

QuickTime player in macOS has long natively supported different playback speeds. But in the latest version of macOS—as of this writing, Monterey—QuickTime made selecting different playback speeds much easier.
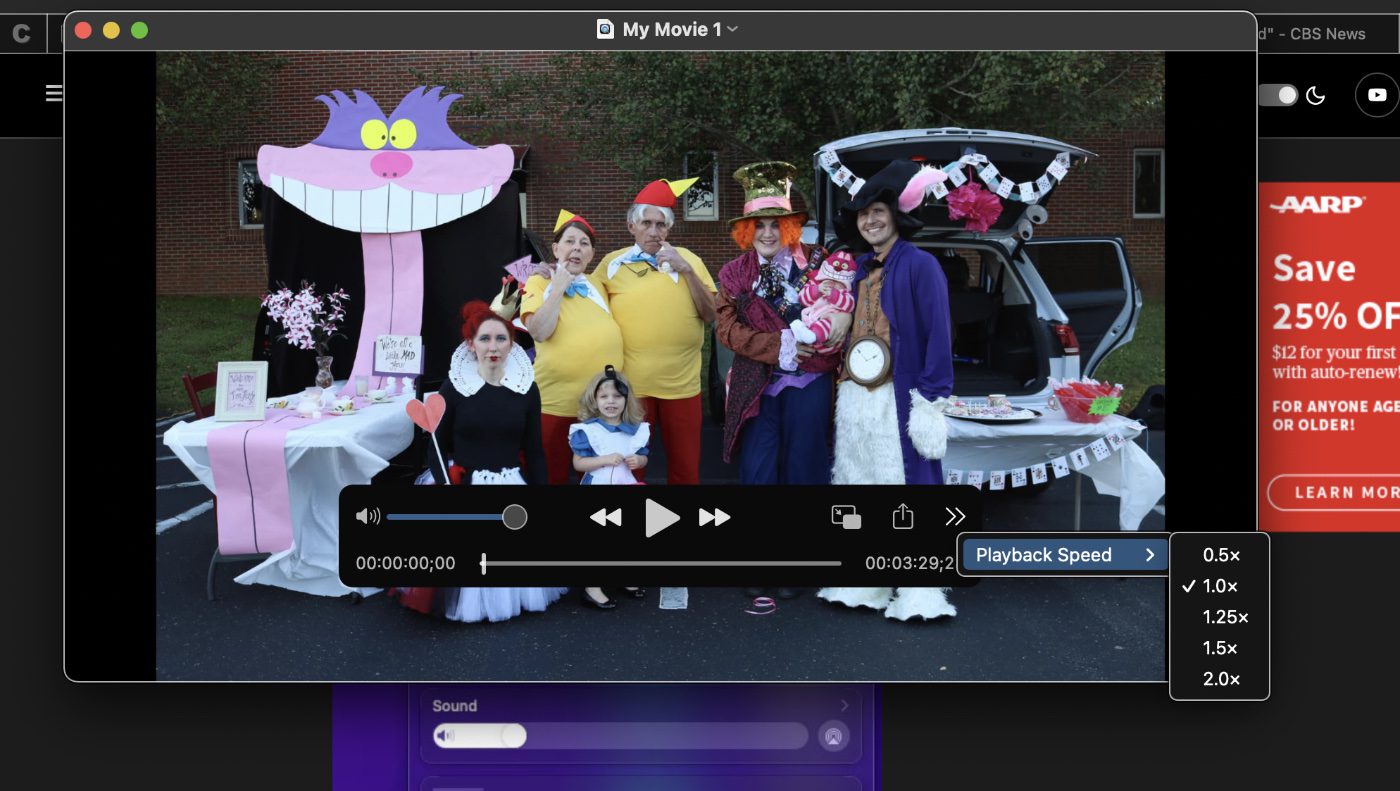
When you open a video in QuickTime, you’ll notice that in the playback chrome there is a button with two symbols on the right side: > >. If you click that button (not the fast-forward button mind you) you’ll be presented with Playback Speed options of 0.5x (half-speed), 1.0x (normal speed), 1.25x, 1.5x, and 2.0x.
If you want more granular control, you can hit the play button and then click the fast-forward button while holding down Option (⌥). Each time you Option-click the fast-forward button the play back screen will increase one-tenth (1.1x, 1.2x, 1.3x, etc.) all the way up to 2.0x. In older versions of macOS, this was the only way to adjust playback speed. It persists in Monterey, but mainly to give you more precise control.
How to record your screen using QuickTime in macOS
Of course, to adjust playback speed, you need a video on which to adjust it. If you’d like to test out this new knowledge, or you were ever curious whether screen recording was possible on macOS, it comes built in! Here’s how to record your screen in QuickTime:
° Open QuickTime.
° Choose File > New Screen Recording to open Screenshot and display the tools.
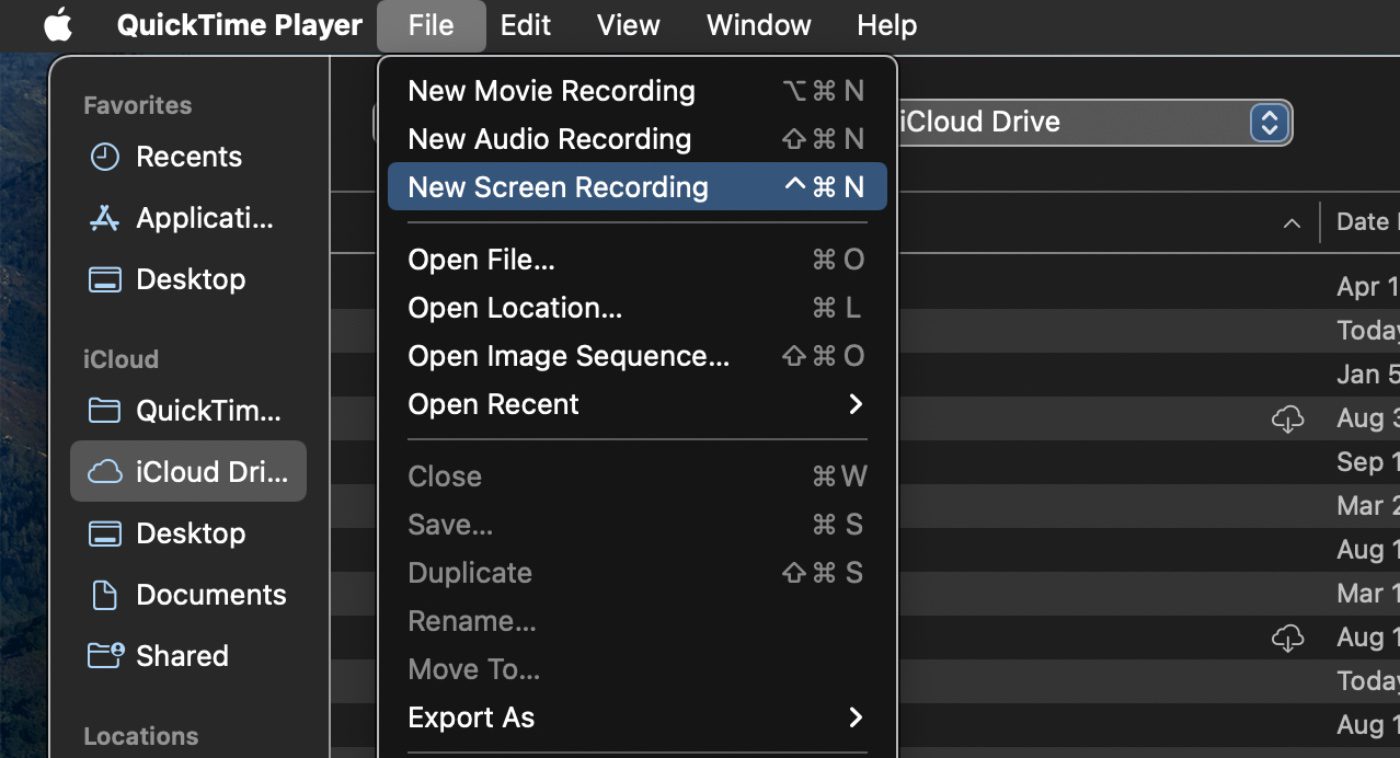
° Click Options to control what you record. For example, you can set the location where you want to save your screen recording, or include the pointer or clicks in the screen recording.
° Click Record.
° To stop recording, click the Stop Recording button.
Another app may open depending on where you save your recording.
How to use QuickTime to record a movie on macOS
You can also record a movie inside QuickTime using the built-in camera on your Mac. The recording controls that appear let you to start recording, control the volume, and choose recording options. Launch QuickTime Player and:
° Choose File > New Movie Recording. When the recording controls appear, you see a green light next to the built-in camera in your Mac.

° Click the Options pop-up menu, then choose any of the following recording options:
Camera: Choose a camera if you have more than one camera available.
Microphone: Choose a microphone if you have more than one microphone available.
Quality: Choose the recording quality. Maximum-quality recordings produce uncompressed files, which can use large amounts of storage space.
° Adjust the volume control to hear the audio you’re recording.
° Click the Record button to start recording.
° To pause recording, Option-click the Record button; click it again to resume recording.
° Click the Stop button to stop recording.
° Choose File > Save to save and name the recording.


Thanks. Also useful would be an article about how to edit movies with QuickTime. I mean, trim or delete parts, etc.