macOS Ventura and iPadOS 16 share (among other new features) Stage Manager. According to Apple, the feature gives users a new way to stay focused on the task in front of them while switching between apps and windows.
What is Stage Manager?
Stage Manager automatically organizes open apps and windows so you can concentrate on their work and still see everything in a single glance. The current window you’re working in is displayed prominently in the center. Other open windows appear on the left-hand side so they can witch between tasks.
You can also group windows together when working on specific tasks or projects that require different apps. Stage Manager works in concert with other macOS windowing tools — including Mission Control and Spaces — and you can get to your desktop with a single click.
How to implement Stage Manager on a Mac
To implement Stage Manager on your Mac, make sure you’re running macOS Ventura, then:
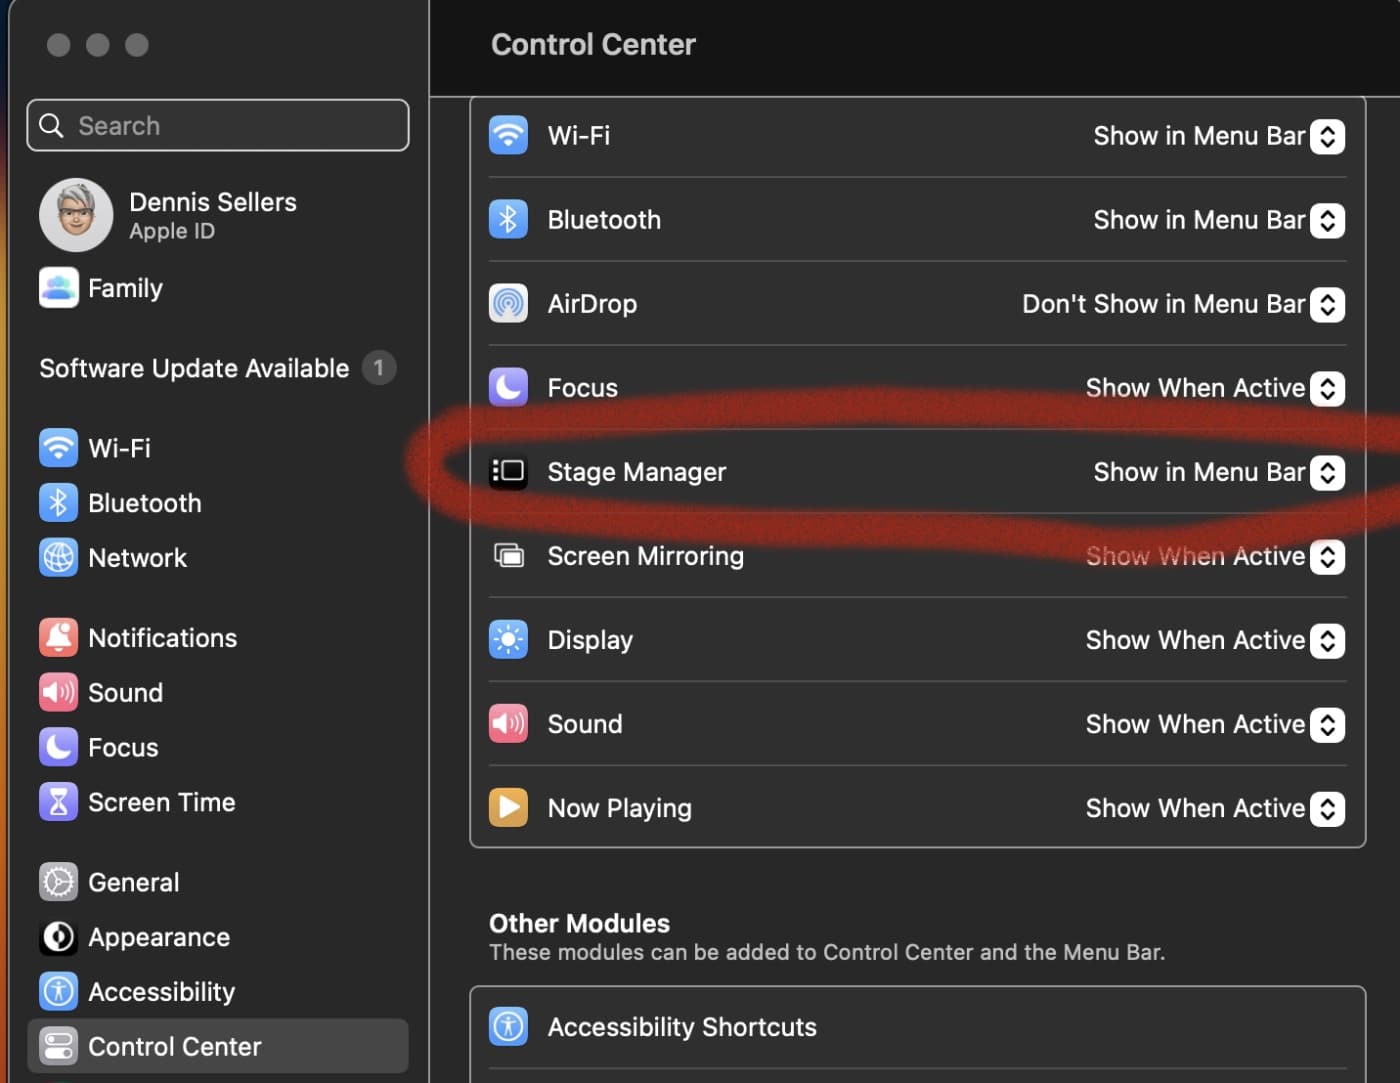
° Open System Settings > Control Center

° Make sure the “Show win Menu Bar” by the Stage Manager option is enabled.
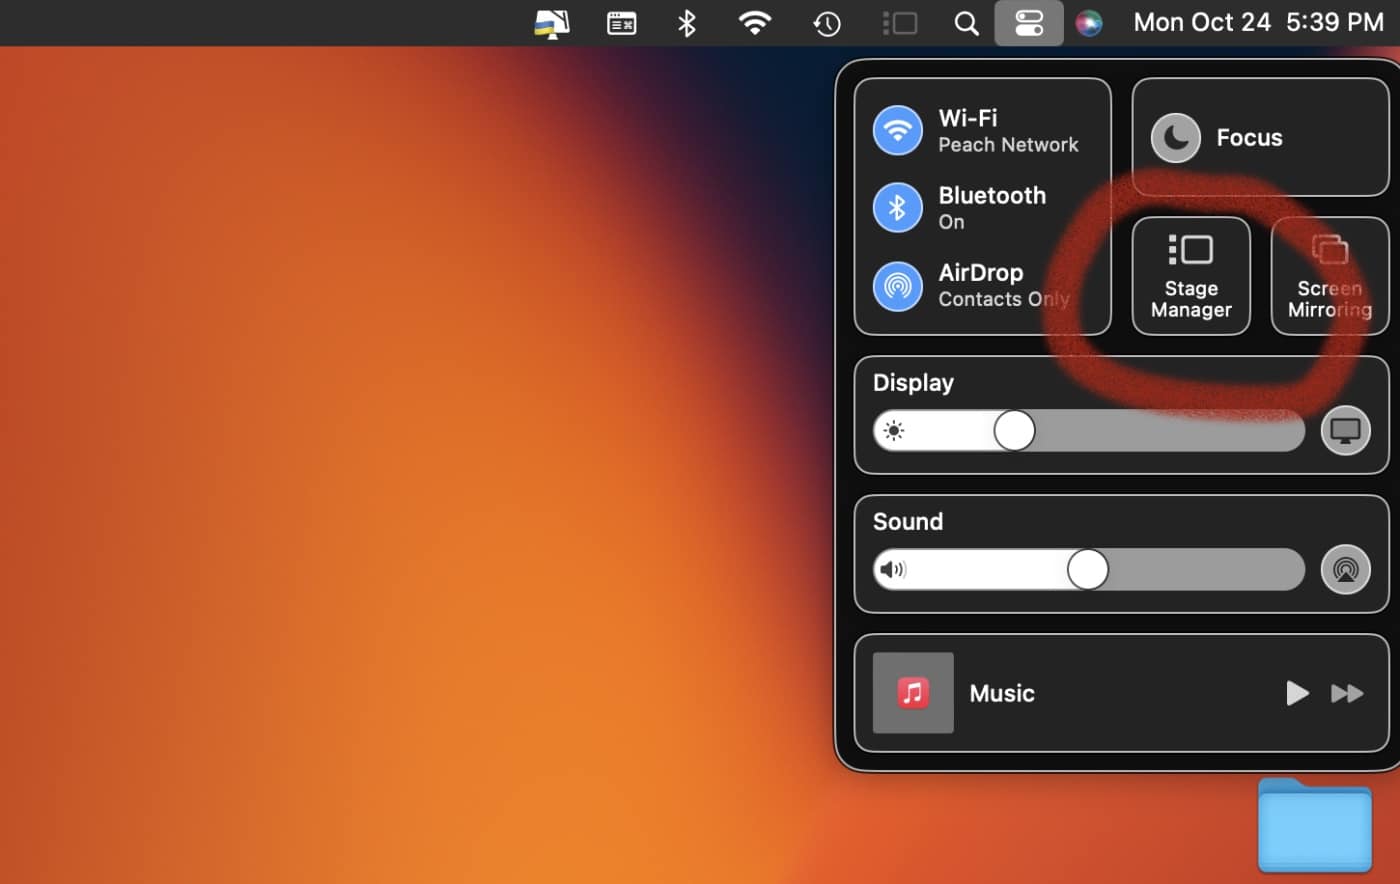
° Open the Control Center by clicking its icon in the Menu Bar.
° You’ll see the Stage Manager pane.

° Click it to enable Stage Manager. Click it again to disable Stage Manager.
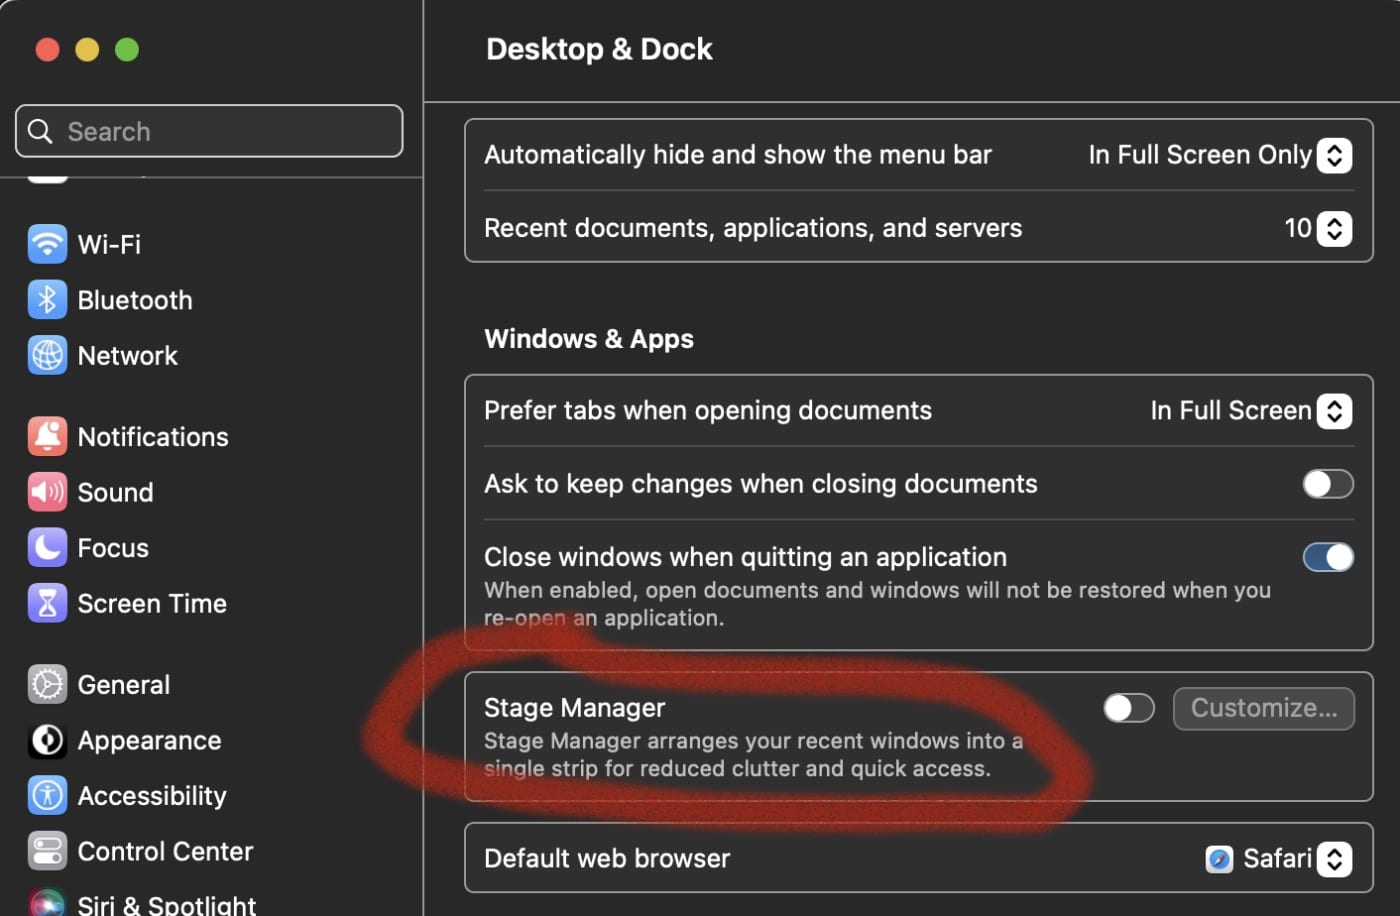
Alternatively, you can open System Settings and choose Desktop & Dock in the left column. Scroll down to the Stage Manager section. Click the switch to turn on/off Stage Manager.

You can also customize Stage Manager by clicking “Customize” to determine how it appears. You have two options:
° Recent apps: Enable if you want all recent apps to appear.
° Desktop Items: Turn this on if you want Desktop items to appear.

But what if Stage Manger doesn’t want to launch?
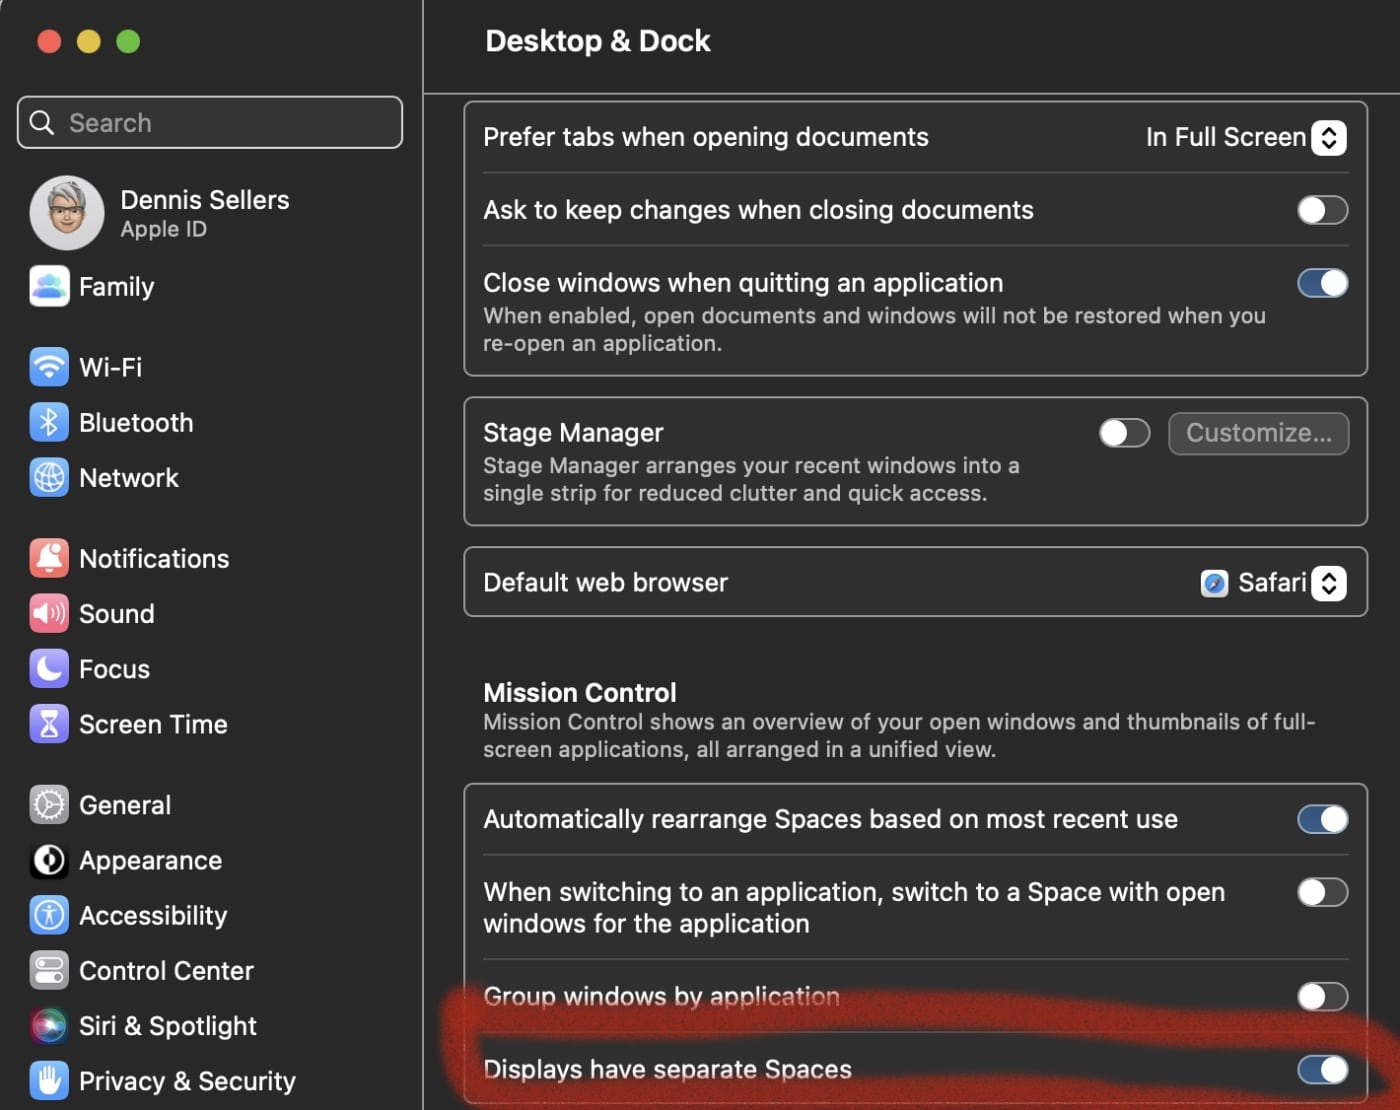
I ran into a problem after updated to macOS Ventura: Stage Manager was greyed out. If you run into this problem, here’s how to fix it:
° Open System Settings and click on Desktop & Dock, in the left sidebar.
° Under Mission Control, turn on “Displays have separate Spaces.”
° Restart your Mac and enable Stage Manager as previously described.
How to use Stage Manager on a Mac
Now launch the apps you want to use. On the left side of the screen, apps will show as thumbnails. When you launch the first app or only have one app open, it’s active (front and center) on the screen. It becomes a thumbnail when you launch another app. Launch more apps and more thumbnails appear.
If you have more than five apps open, the most recently used apps are thumbnails. Quit one of those and an app that previously wasn’t shon as a thumbnail takes its place. one of the not shown apps takes its place on the thumbnail row.
You can also group apps, which is very convenient. To group apps or windows:
° Open at least one app on your Mac.
° Drag an app in Stage Manager over the opened app.
° Repeat these steps to group more than two apps or windows.
The apps are now grouped together as you can see by the visual representation on the left side of the screen. When you click on the group thumbnail, those app windows appear on the screen. Now you can switch between different groups of windows to move from one task to another.
(By the way, if you wish to use Stage Manager AND Spaces together, you can. Check out this AppleInsider article to find out how.)


