If, like me, you occasionally get a PDF mailed to you that needs your John Hancock, you know it’s a pain to print it, sign it, then scan it back into your email for returning. Thankfully, there’s a better way with macOS Ventura.
In fact, PDF markup and signing is one of the most underrated features of macOS. On the other side of the fence, Windows has no built-in PDF editor. The only real option is third-party software that can range anywhere from $50 to hundreds if your employer doesn’t provide you with a copy of Adobe Acrobat.
Preview makes use of the powerful Apple ecosystem to make adding a digital signature to PDFs easy—and best of all, free.
Signing in Mail
If you receive an email with an attached PDF or need to send one yourself, you can actually sign that document without leaving the built-in macOS Mail app. Drag a PDF into the email you’re sending, hover over it, and you’ll see a downward-pointing arrow.
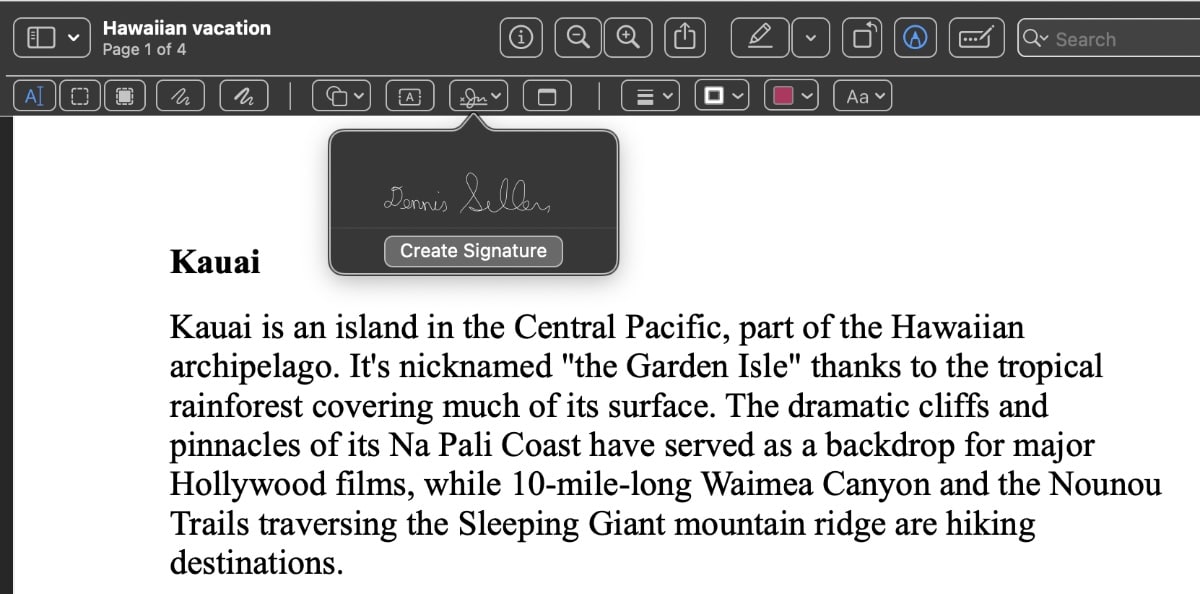
Click the button, and the Markup tool will launch with several options. You can use the tool to add a signature. In the toolbar, you’ll see an icon that looks like a tiny signature with a downward pointing arrow. Click that icon and then click Create Signature.

Create Signature and signing directly in Preview
The following instructions apply when clicking Create Signature either in Mail or within the Preview app itself.
1. Launch the Preview app.
2. Click either the Markup button (a pen tip inside a circle), or the Sign button, (a rectangle with three dots and a pencil).
3. Click the Sign button (an “x” next to a small signature).
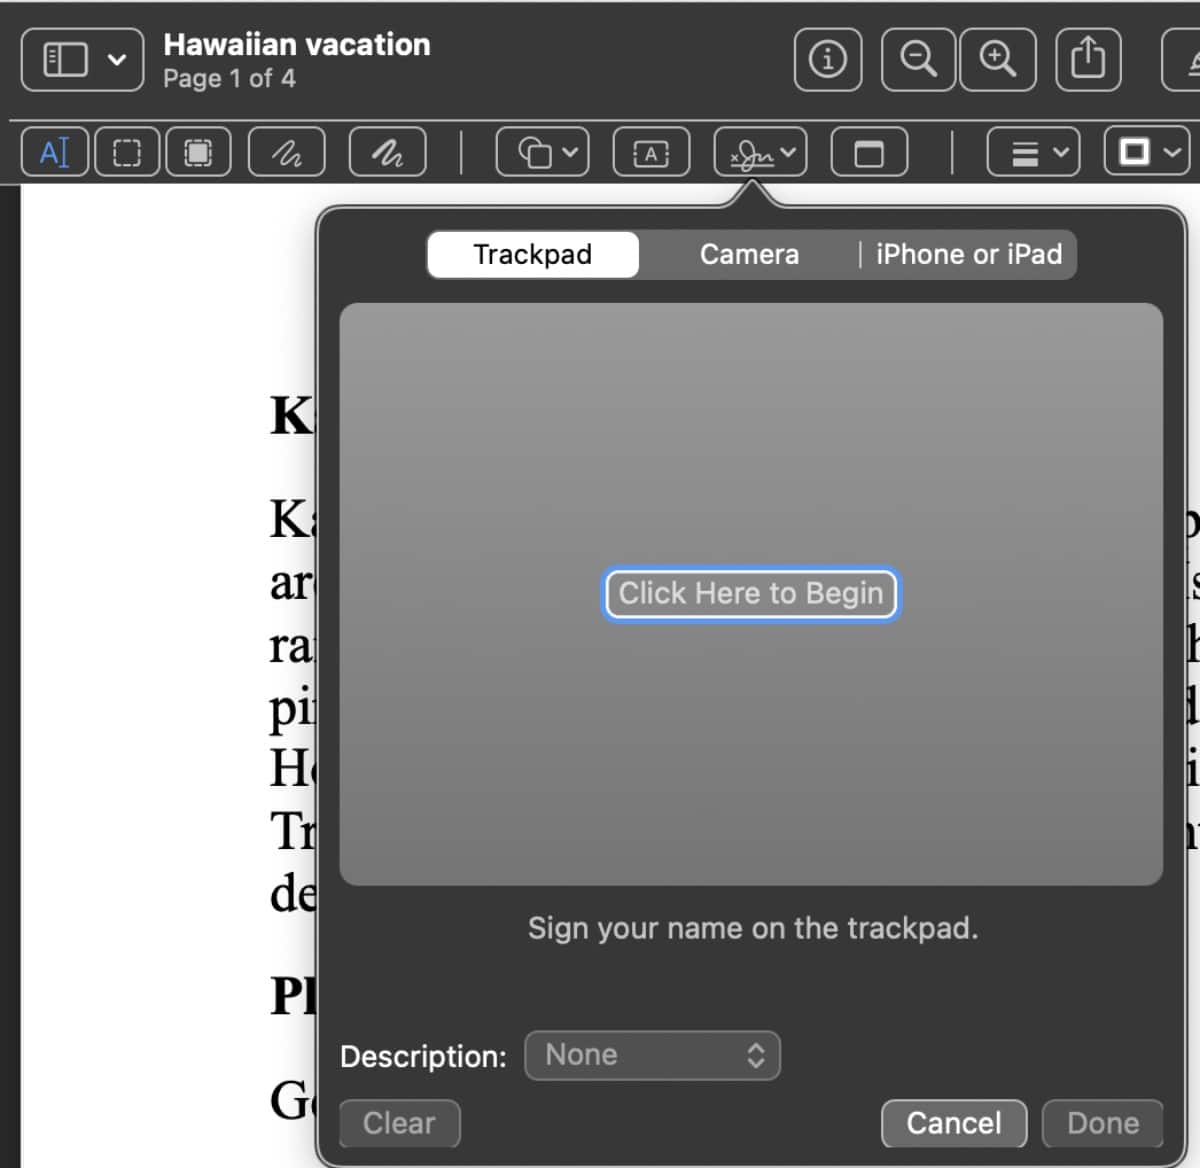
3. Click Create Signature, then follow one of these onscreen instructions.

- Create a signature using your trackpad: Click Trackpad, click the text in the center of the on-screen trackpad as prompted, and then draw your name on the trackpad using your finger. When you’re finished press any key, then click Done. If you don’t like the results, click Clear, then try again. NOTE: If your Mac has a Force Touch trackpad, you can press your finger more firmly on the trackpad to sign with a heavier, darker line.
- Create a signature using your computer’s built-in camera: Click Camera. Write your signature on a piece of white paper and then hold your written signature facing the camera so that your signature is level with the blue line in the window. When your signature appears in the window, click Done. If you don’t like the results, click Clear, then try again.
- Create a signature using your iPhone or iPad: Click Select Device to choose a device (if more than one is available). On your device, use your finger or Apple Pencil (on iPad) to sign your name, then tap Done. If you don’t like the results, tap Clear, then try again.
(If you use VoiceOver, the built-in screen reader on Mac, you can add a description of a signature when you create one. Before you click or tap Done, click the Description pop-up menu, then choose a description, such as Initials, or choose Custom to create your own description.)
Click the Sign button, then click the signature to add it to your PDF. (If you used VoiceOver to add descriptions of your signatures, VoiceOver reads the descriptions as you navigate the list of signatures.)
Choose the signature you want to use, drag it to where you want it, then use the handles to adjust the size.
Finally, you can either add your signature by holding a signed piece of paper up to the webcam on your Mac. Or you can draw on your trackpad.
To delete a signature you’ve saved:
° Launch the Preview app.
° Click the Show Markup Toolbar button.
° Click the Sign button, position the pointer over the signature, then click the X to the right.
The signature is deleted from all apps that use Markup on your Mac. If you have iCloud Drive turned on, the signature is also deleted from your other devices that use iCloud Drive.


I disagree that “the Mac makes signing PDFs ridiculously easy” — in fact I find it just the opposite, infuriating. The reason is that I don’t have a webcam, I don’t have a trackpad — but I do have a Wacom (drawing) tablet because I’m an illustrator/graphic artist. Preview won’t let me sign it with my electronic stylus on my tablet — which would be vastly better and clearer than fat-fingering a trackpad or my iPhone — because it refuses to see the tablet as a trackpad.
Preview also won’t let me import one of my saved, signed signature graphics into the PDF. (I’ve tried repeatedly, with different saved graphic formats.) What Preview may do, on the rare occasions when I can get it to actually work, is use a “pen” tool in Preview to draw a graphic of my signature (this is easier in Skim than in Preview) but even then, it’s not recognized as an official “signature” by online services or websites that look for a signed PDF.
If anyone knows of a way to make this work, please let me know.
Lawrence (sanstudio.com)