If you’re reading this blog, you already know how important it is to have proper, working backups. My personal backup approach is to have one local backup for each drive connected to my Mac, followed by a BackBlaze cloud backup that comprehensively backs data up to an encrypted server.
Mac users have several backup options to choose from. ChronoSync, by Econ, is one of them. ChronoSync started out as a folder synchronization tool, but over the years, it’s grown to include making both regular backups as well as bootable backups.
ChronoSync’s main features include the following:
- It lets you back up data to cloud services (iCloud, Backblaze, Dropbox, etc.)
- It lets you synchronize files between your local machine and your web host via SFTP
- You can schedule syncs or backups that work automatically, behind the scenes
- You can schedule backups to external or network drives
- It supports folder synchronization, with several configuration options
Synchronization involves keeping two sets of files or folders identical. ChronoSync supports both unidirectional and bi-directional syncing. Unidirectional syncing is where the synchronization is one way, like from your Mac’s internal solid stage storage to an external NVMe drive.
Bi-directional syncing is the synchronization of files and folders in both directions. Let’s consider an example:
When I’m at work, I use my 14″ MacBook Pro. Upon returning home, ChronoSync will synchronize my work folder on my laptop to a specified folder residing on my Mac Mini.
If I’m working on those files on my Mac mini, ChronoSync can automatically synchronize my files back to my MacBook Pro. With the bi-directional sync feature, the benefit is huge: I always have access to my latest documents and files, regardless of which machine I’m currently in front of.
Why not just use a cloud service? The big advantage is, all of your data is on your devices. The second advantage is, you don’t have pay for more cloud storage. But, if you want to sync folders and files from your Mac to the cloud, ChronoSync will let you.
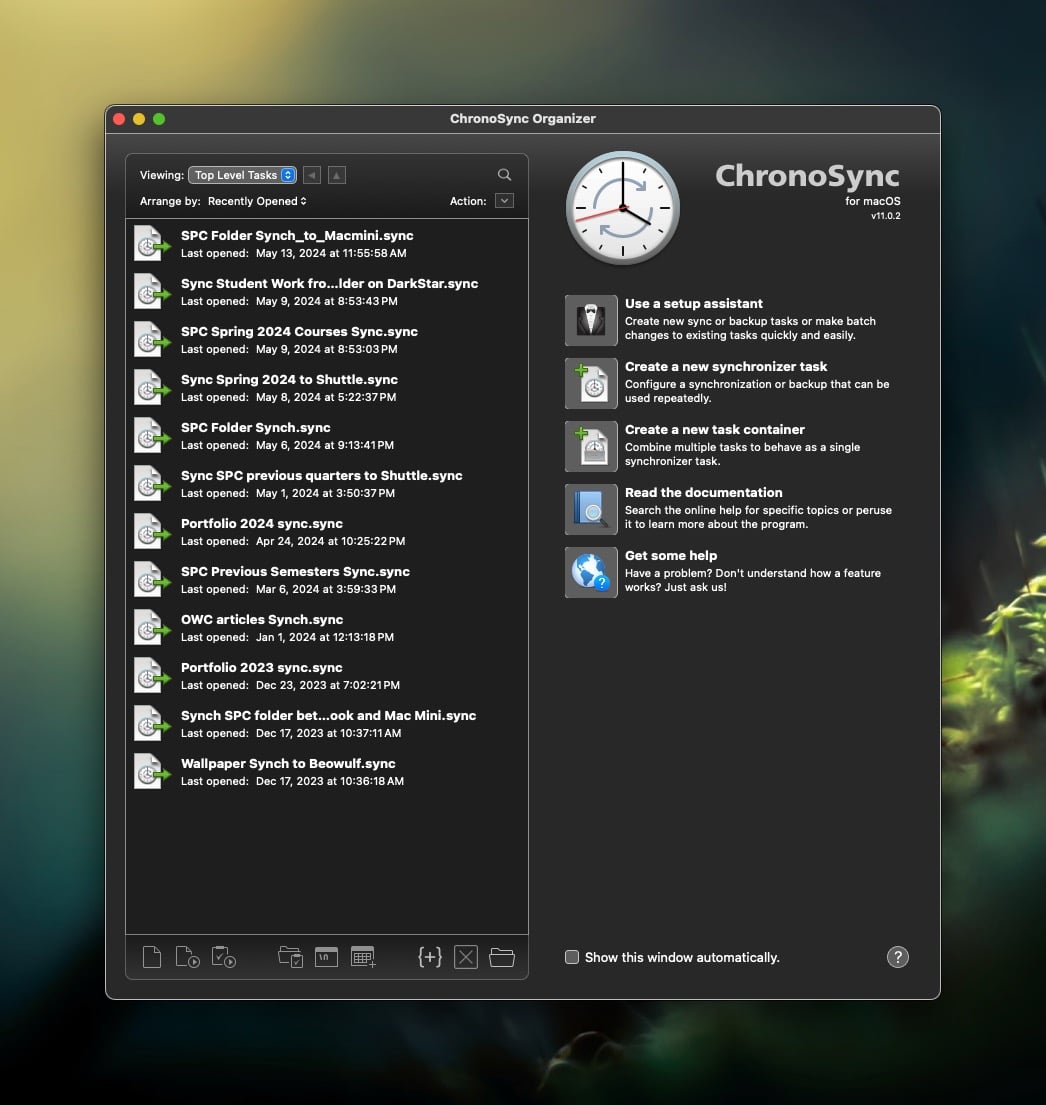
Let’s take a closer look at ChronoSync’s interface. When you first launch the application, you will see a window, divided into two panes. The left pane will contain synchronization tasks. The right pane includes 5 buttons that you’ll most commonly use:
- Use a Setup Assistant: A convenient step-by-step method of setting up a sync Task
- Create a New Synchronizer Task: Configure a sync or backup on a repeating schedule
- Create a New Task Container: Runs multiple Tasks sequentially
- Read the Documentation
- Get Some Help
I use ChronoSync primarily for its folder synchronization features. With it, I can make sure that both Macs I own are always sporting the latest files. I also use ChronoSync to make selective backups for specific folders that I use regularly.
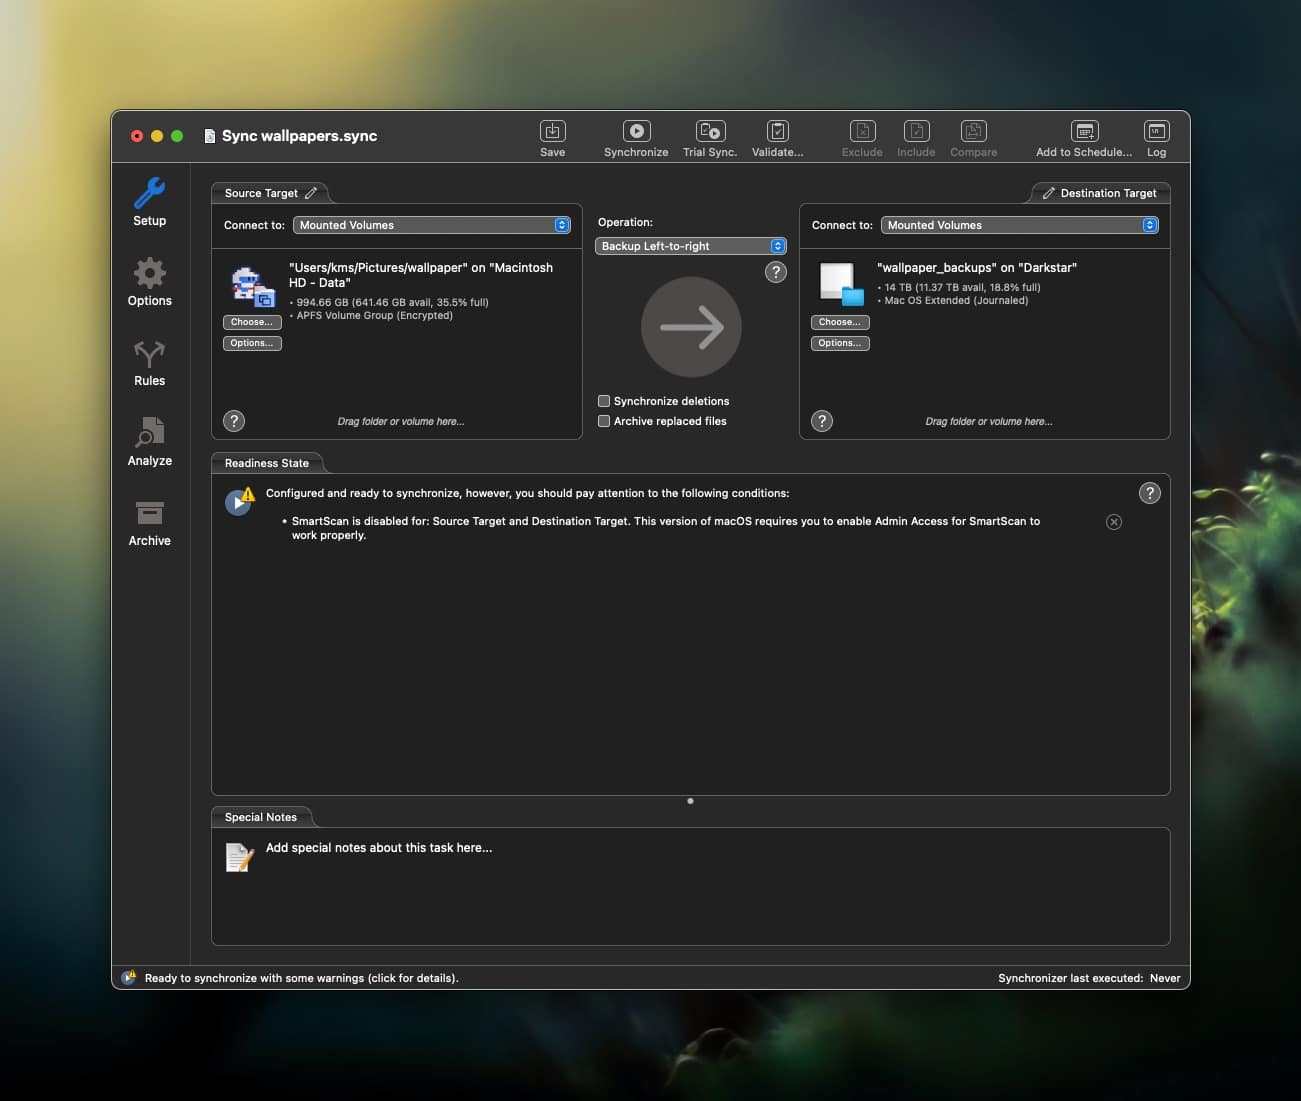
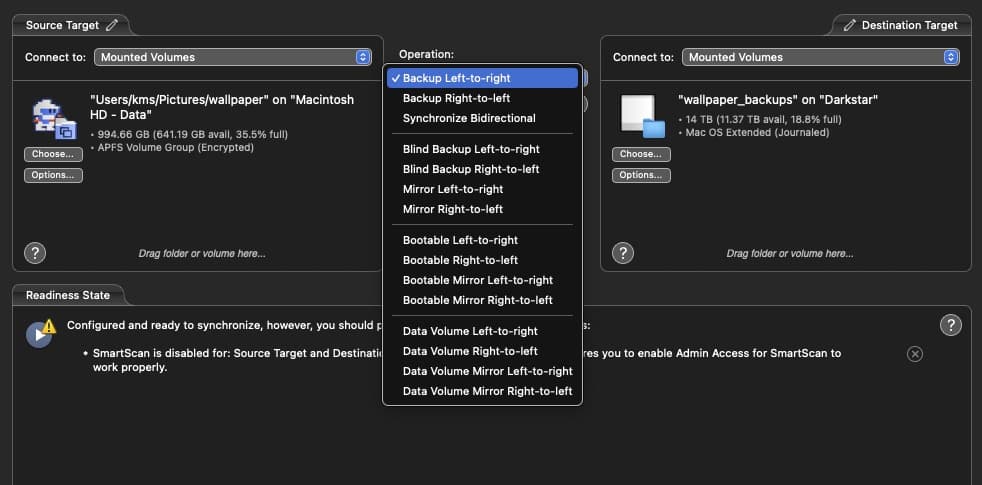
When you select a new Synchronizer task, you are presented with a new dual pane window. On the left is the location you are syncing from; on the right is the location you are synching to. You can also reverse the operation by having the back-up location on the left and the original location on the right. There are several options you can choose from, via the pull-down menu located under operations:
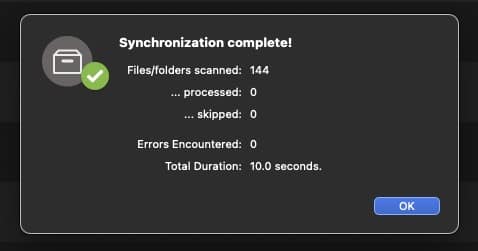
ChronoSync offers the option to test your sync Task before committing to it with an actual sync. This is really useful for new ChronoSync users, because it shows you what ChronoSync will do, without performing the actual task. (Think of it as a sanity check.)
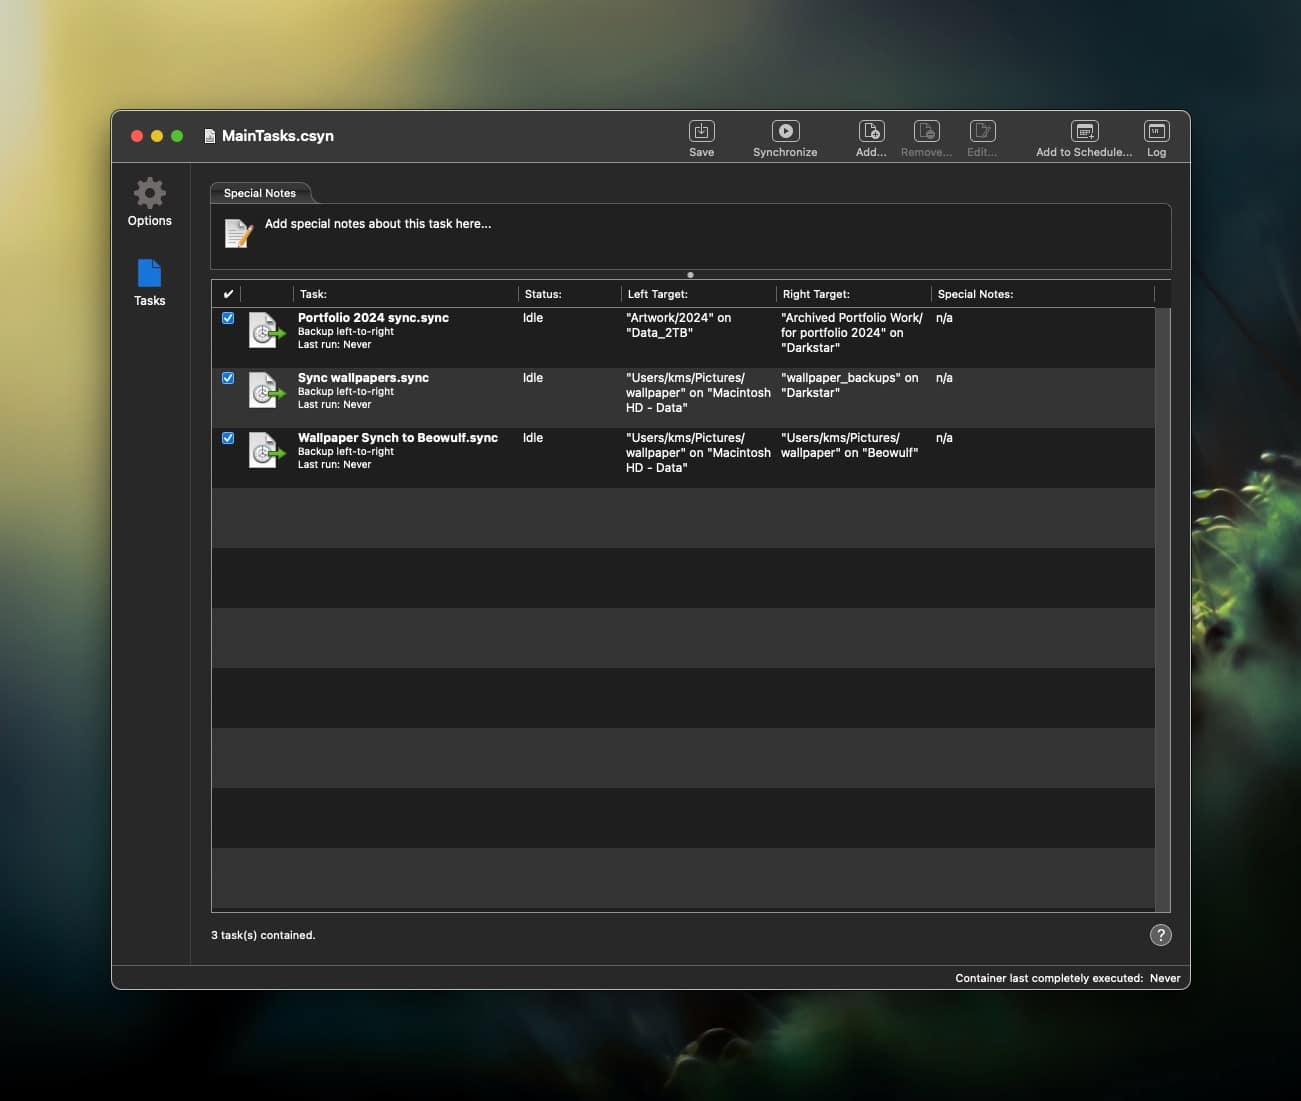
ChronoSync lets you create a Task Container, where you can schedule several Tasks to run, in sequence. In this way, you can have all of your tasks run on a periodic schedule.
ChronoSync will also let you sync files or folders from a Mac to your iPhone or iPad. To do this, you’ll need to install InterConneX from the App Store. I have little need for this feature, as I use iCloud, but it can be quite useful if your workflow involves using the same files on both devices.
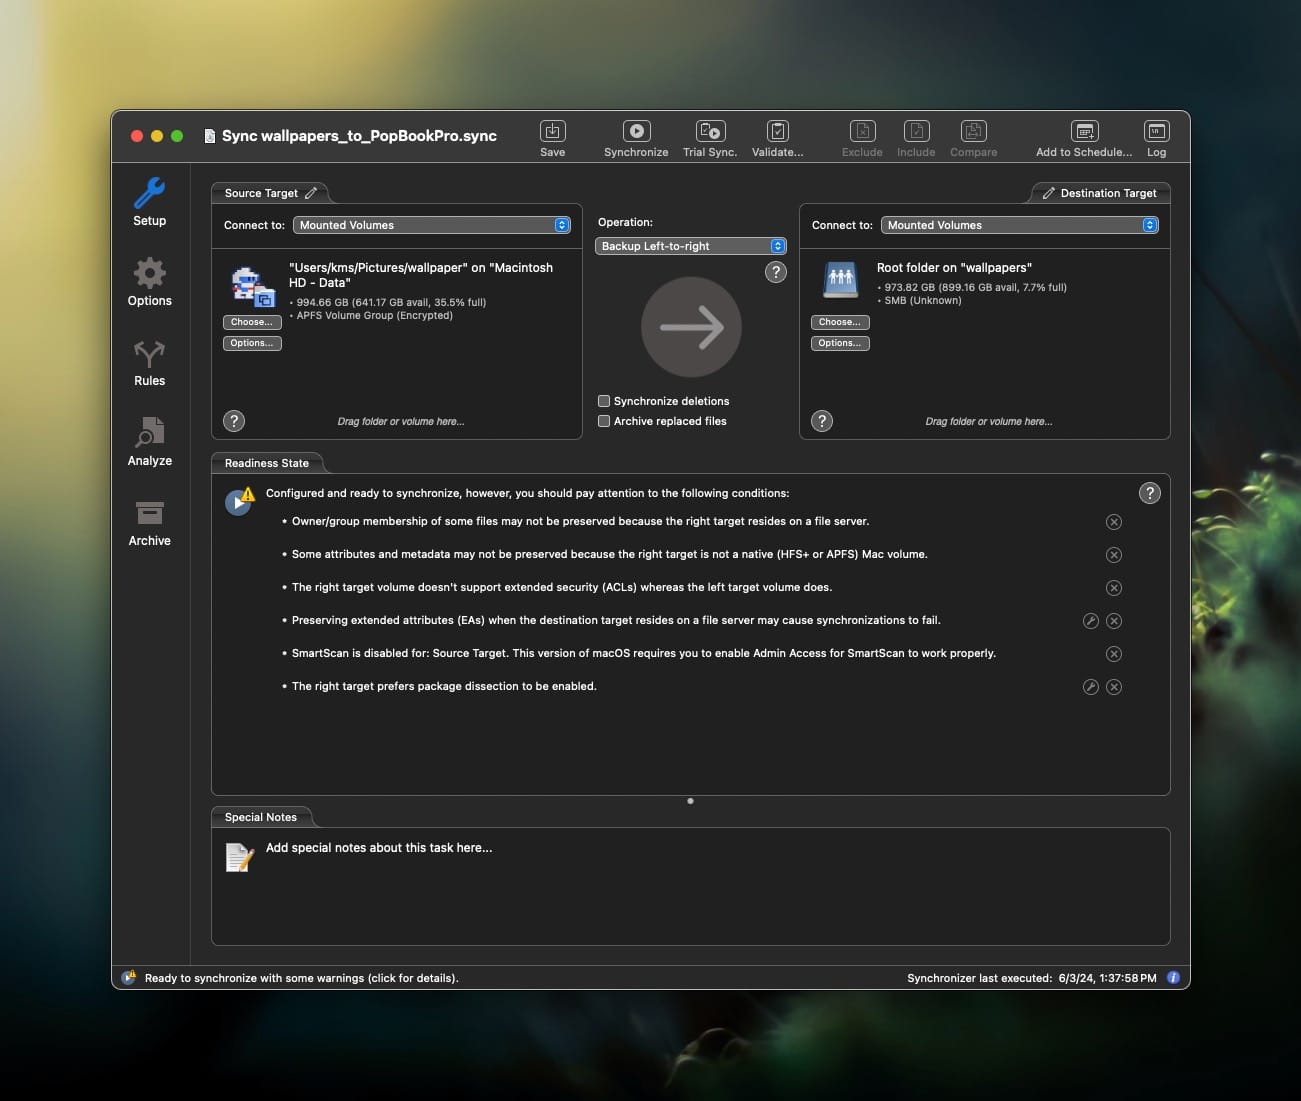
ChronoSync supports syncing to other machines, including Windows PC’s, Network Attached Storage (NAS) devices, or whatever drive you mount as a volume on your Mac. I tested it between my 14″ 2021 MacBook Pro M1 Pro laptop running macOS Sonoma with a 2014 13″ MacBook Pro running popOS (Linux). It worked with nary a hiccup.
The one area I haven’t tested is ChronoSync’s bootable volume backup, as I use a different backup utility (SuperDuper!) for that task. My main use case for ChronoSync is for folder and file synchronization, and in that area, ChronoSync has worked well.
ChronoSync is available from the developer’s website, Econ Technologies. If you’re a long time Apple user, the company’s name may sound familiar to you. The company got its start by making applications and utilities for the Apple IIGS.
ChronoSync comes with a generous 15 day trial, to see if it fits your needs. If you find value in using it, you pay a one-time cost of $49.99US. I have used ChronoSync for years, without any issue, and give it my highest recommendation.
