
Another year, another World Backup Day! Each year around March 31, the Rocket Yard makes you aware of this observance that is designed to point out the importance of backing up your data and what can happen if you neglect doing so on a regular and ongoing basis. This year, the World Backup Day* team has created a short video to make the point:
Backups are just a second copy of all of your data, so if your Apple device malfunctions or is stolen you still have access to that information. Let’s take a quick look at the fastest way to keep your Apple devices safely backed up.
Backing Up Your iOS Devices
The easiest way to back up your iOS devices is to use the built-in iCloud Backup function. This method is simple, fast, and automatic, and it makes quick work of restoring an existing or new iPhone or iPad with all of your apps and data. Here’s how you can set up iCloud Backup:
1) Launch the Settings app.
2) At the top of the Settings you’ll see your name. Tap this to see your settings for Apple ID, iCloud, iTunes and the App Store.
3) Tap the iCloud button (it looks like a blue cloud).
4) Scroll the section titled “Apps using iCloud” until you see iCloud Backup. Tap iCloud Backup and make sure that the iCloud Backup button is green (enabled, see screenshot below):
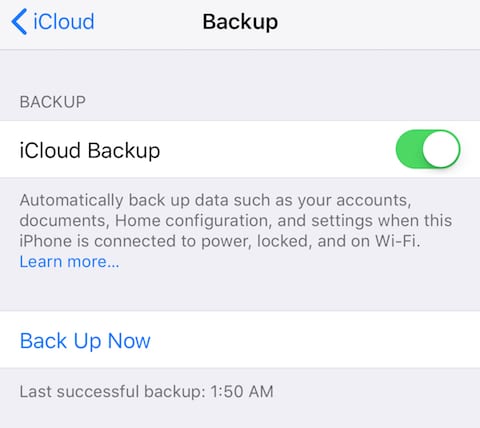
This indicates that when your iPhone or iPad is connected to power, locked and on a Wi-Fi network, it is automatically backed up to iCloud. Tapping “Backup Now” forces a backup if you wish, and the time of the last successful backup is always listed.
Mac Backups
Apple excels in making difficult things easy, and Time Machine is the easiest way for Mac owners to back up their computers. If you’re not doing Time Machine (or other) backups of your Mac, we’re here to show you how to get started. You’ll need an external drive of sort to act as the repository for the copy of your data, and we’ll point out some excellent drives available here at MacSales.com later in this article. Let’s go through the easy process of setting up Time Machine backups.
The first three steps determine how big an external drive you’ll need, and what kind of drive to buy:
1) What’s Your Mac’s Current and Maximum Storage Capacity?
To determine the capacity of a backup drive, it’s important to know how big your Mac’s internal storage is and how much is being used. Click the Apple menu, select About This Mac, then click the Storage Tab at the top of the window:

In this screenshot, the Mac has a 2.12TB Fusion Drive installed with 1.84TB available storage. Will that 1.84TB of empty space be filled up? Probably — the owner of this Mac makes a lot of videos that are quite large.
2) Multiply Your Mac’s Maximum Storage Capacity by Two, and Round Up
A rule of thumb that’s used in determining backup drive capacity is to multiply the Mac’s maximum storage capacity by two, then round up. Assume that you’ll eventually fill up your Mac’s storage with files. Now why do you need twice that amount of storage to back up your files? Time Machine backups grow in size as time passes. Time Machine allows you to “look back in time” for as long as you’ve been making backups, and it takes a lot of capacity to store the “snapshots” that show all of the files that you created and deleted over that time.
In this example, the Mac has a capacity of 2.12TB, meaning that we’d need 2.12 x 2 = 4.24TB of storage. Since drives aren’t made in fractional capacities, we’d round up to 5TB.
MacBooks have less storage capacity than desktop machines. For a 512GB SSD-based MacBook Pro with Touch Bar, a 1TB backup drive is sufficient.
3) Buy An External Drive With The Capacity You Need
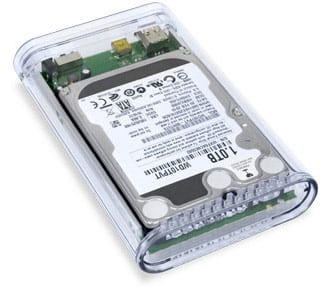
MacSales.com is the place to get the perfect drive for your needs. For a MacBook, OWC Mercury On-The-Go Pro drives have the capacity you need in a form factor that’s small enough to take on the road. Weighing less than 11 ounces, these drives use USB 3.0 connectivity for fast backups and don’t need an external power source. For that 512GB MacBook Pro we mentioned earlier, a 1TB Mercury On-The-Go Pro drive is just $97.50 as of publication, while a speedy solid-state drive (SSD) version is $379.99.
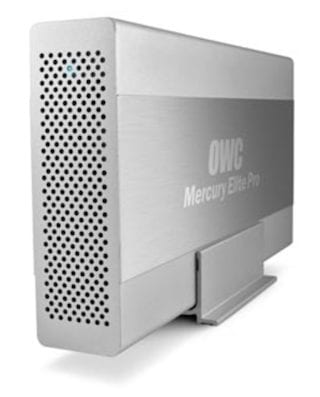
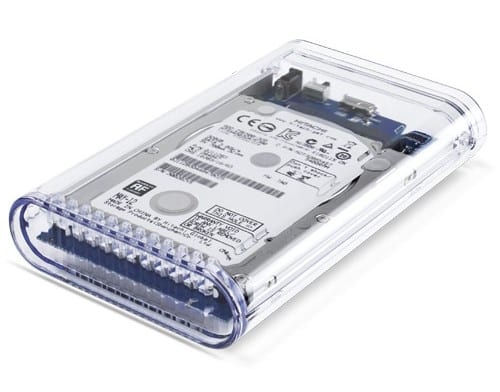
How about a desktop computer, or a MacBook that rarely ventures out of the office? A desktop drive like the OWC Mercury Elite Pro seen below a very suitable choice. It’s available in capacities up to 10TB, providing plenty of space for future backups. That Mac we described earlier needed a 5TB backup drive, and a USB 3.0 version of the Mercury Elite Pro with 5TB of capacity is only $229.88.
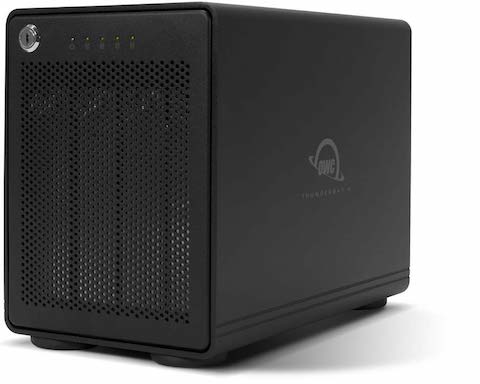
Power users are a different breed, with videographers and photographers requiring fast, big storage to keep their files safe. That’s where RAID (Redundant Array of Independent Disks) is important. RAID arrays place two or more drives into a single enclosure, and can be configured as one big fast drive with redundancy so if one (or more) drives fail, the data is still safe and the bad drives can be replaced.
The OWC ThunderBay 4 RAID drives are quite popular with power users, handling up to 48TB of files and with dual Thunderbolt 3 ports for speedy backup and recovery (see image below).
4) Set Up the External Drive as a Time Machine Backup Drive
Here’s the easy part! Unpack that new external drive and make sure that it is plugged into your Mac with the proper cable and has power running to it. Turn it on, and a dialog like this appears on your Mac desktop:
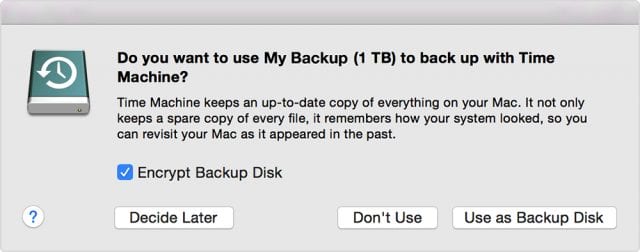
Click the “Use as Backup Disk” button, and Time Machine begins doing an initial, one-time full backup of your data. This can take a while, but once that first backup is complete, your Mac begins backing up new documents and any changes made once each hour. Each day, those changes are condensed into a daily image of your Mac’s content. If you’d like more control over when Time Machine does the backups, we have a tutorial for that.
Now if your Mac hard drive or SSD ever fails, you have a backup that can be used to restore your data once you have a new drive installed. For details on how to restore files or fully recover a Mac’s drive, check out this Rocket Yard article.


I have to balance the cost with safety. I use Apple’s time machine and an online service Backblaze and most of what I backup is (very large) photographic panoramas. I did use a raid 1 but afraid to use it now because I was managing files with Adobe Bridge and it ran amok and deleted all my files and they were not in the trash. Problem with online solutions is it can be slow.
“Multiply Your Mac’s Maximum Storage Capacity by Two”.
Really? Instead that, the currently used capacity is what should be considered and multiplied by 4.
Just imagine a 4 TB disk with just 50 GB used. Would you need 4 x 2 = 8 TB to backup that? Nope! Instead, 50 x 4 = 200 GB would do fine!
Thank you – read as a checklist to make sure I’m doing the right things.
Tom