

Since the arrival of the iPhone 6s a few years ago, iPhone users have had the ability to capture Live Photos. When shooting a Live Photo, the iOS Camera app actually records data before and after the shutter button is pressed so that about 1.5 seconds of movement and sound is stored with each 12 MP still image. When a Live Photo is viewed in Photos, a tap or swipe of the image sets the photo in motion, complete with the sound recorded at the time. Even better, Live Photos can be set as live wallpaper that animates when you tap and hold it. In today’s Quick Tip, I’ll show you how to set a Live Photo or a GIF animation as live wallpaper for your iPhone…and give you some other Live Photo and GIF tips for good measure.
Taking a Live Photo
To begin, let’s review how to take Live Photos. I’d recommend shutting off Live Photos most of the time on the iPhone because they almost double the amount of storage required by a regular still photo. For those occasions where you see the potential for a really fun 3-second Live Photo, turn on the feature. That’s done by tapping on the “target” button that’s on the top of the Camera app in portrait mode and on the left side of the Camera app in landscape mode. That button is highlighted in the screenshot below:
Once that button has been tapped to activate Live Photos, it turns yellow, animates with a rippling effect, and displays the word LIVE below the button for a moment. At this point, every photo you take with the Camera app becomes a Live Photo.
While most of the time professional photographers recommend taking photos in landscape (wide) mode, Live Photos are best captured in portrait (tall) mode. This is especially true if you wish to use the Live Photo as wallpaper on your iPhone.When making the shot, don’t be fooled into believing that you’re shooting video — the Live Photo actually begins 1.5 seconds before you press the shutter button and ends 1.5 seconds after it is pressed. You’re tapping the shutter button at the midpoint of the Live Photo, so that should help you time the best moment to take the image.
As soon as you’ve taken your Live Photo, it’s a good idea to tap the Live Photo button pictured above to turn off the feature. It will turn white, then display a LIVE OFF label.
Viewing Live Photos on Recent iPhones
Like all other photos and video shot on an iPhone, the Live Photos end up in the Photos app. Launch the Photos app, find the Live Photo you want to view, and then 3D Touch (a “Force Press”) and hold the image. You can tell if a photo you’ve taken is a Live Photo by the “LIVE” icon in the upper left of the image (see screenshot below):
Setting a Live Photo as Wallpaper
Once you have the perfect Live Photo of your kids, golf swing, favorite baseball player going for the fences, or your friends smiling, it’s time to set it as the Wallpaper. Note that only those iPhones and iPads that have 3D Touch or Force Press can use a Live Photo as wallpaper, as the other models don’t allow activation of the image on the Lock screen.
1) Launch the Photos app on your iPhone
2) Select the Live Photo you want to use as wallpaper on your device
3) Tap the Share button
4) In the lower row of buttons on the share sheet, select “Use as Wallpaper”
5) The Live Photo button should already be selected, but if it isn’t, tap on it from the list of “Still”, “Perspective” and “Live Photo” that appears. Then tap the Set button at the bottom of the screen (see screenshot below).
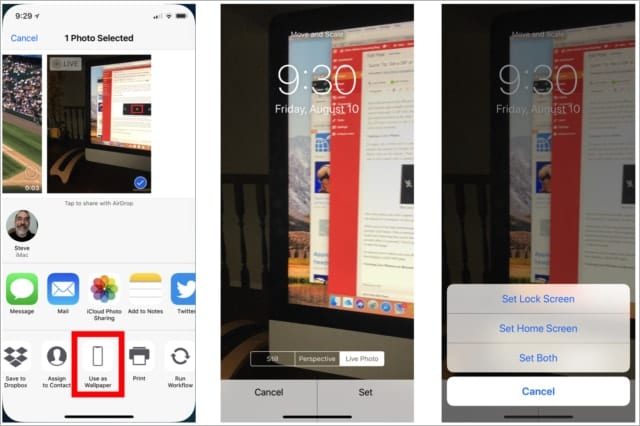
6) You can choose to Set Lock Screen, Set Home Screen or Set Both (see screenshot above). Note that the Lock screen is the only screen that can display the Live Photo animation — doing the Force Press has no effect on the Home screen. On the Home screen, only the still image associated with the Live Photo is displayed.
Converting a Live Photo to GIF Format
Live Photos are great for sharing with others with iOS devices, but sadly they can’t be shared on social media without first being converted into a GIF file. iOS 11 made it very simple to do this; prior to its release, conversion had to be done with a third-party GIF creator app. Here’s how the conversion is done now:
1) Launch the Photos app
2) Tap on the Live Photo you wish to convert to a GIF
3) Swipe up on the center of the screen to view animation effects. For GIFs, it’s best to use the Loop effect, which plays the Live Photo over and over again. There’s also a Bounce effect, which works like Instagram’s Boomerang. The other effect, Long Exposure, merely turns all of the individual frames of the Live Photo and puts them into one image, so it’s not appropriate for GIF creation.
4) Once you’ve changed the image into a Loop, the word “Loop” appears in the upper part of the Photos app screen and you’ll see the image looping over and over.
5) Tapping that Loop button actually did the trick! To find your GIF, tap on Albums in the Photo app, then find the Animated album. Your file is looping away in there, and with a tap on the Share button you can send it via Messages, Mail or your favorite social network. Note that if you use AirDrop to share the file, it is actually sent as a .MOV movie file. Here’s a rather boring GIF that is proof that this works quite well!
Setting a GIF as Wallpaper
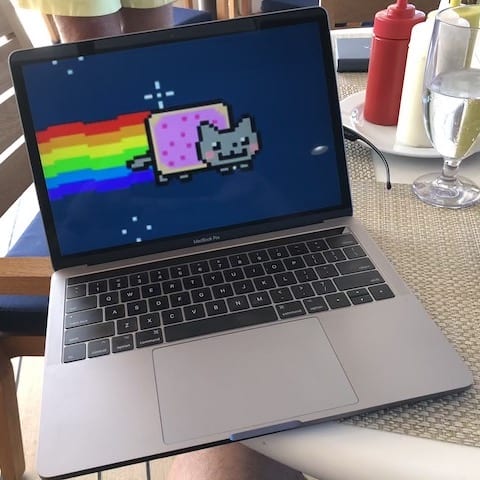
Sure, you can use those little captured moments of your life as live wallpaper on your iPhone, but wouldn’t it be nice to have some of your favorite GIFs from movies and TV shows instead? For example, the “Picard Facepalm” meme is one that would make my day as live wallpaper. To accomplish this, you’ll need to have the Giphy app (free) installed on your iPhone.
Here’s how I’ll get Captain Picard to command my Lock screen:
1) Launch the Giphy app
2) Using the search bar or by just browsing, select the perfect GIF
3) Tap the … share button to see more sharing options (see screenshots below). One that appears is our familiar Live Photo button (second row of buttons). Tap it.
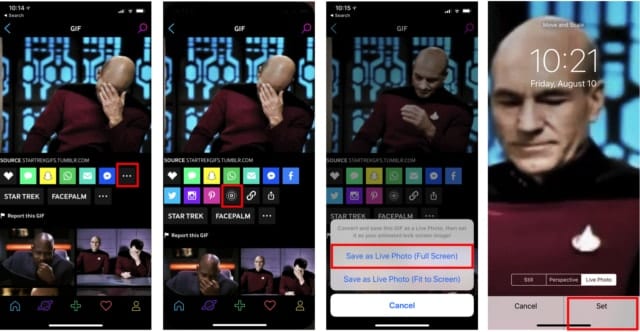
4) A dialog appears requesting whether you wish to save the Live Photo as Full Screen or Fit to Screen (screenshot above). Select one or the other — I usually use Full Screen.
5) Follow the instructions earlier in this article on setting a Live Photo as wallpaper.
Here’s a big “thumbs-up” to using your Live Photos and GIFs as live wallpaper on your iPhone. Have fun!


Hi, this was very helpful but I was wondering if there is anyway to make screenshots into a Live Photo without any apps except for photos and camera