 Welcome back to our series on the iOS 12 Shortcuts app! In our first article, we introduced you to the Shortcuts app with a description of the purpose of the app, a guide to the user interface, and the general settings that are available for each shortcut created. The second installment was primarily focused on actions, the building blocks of more complex shortcuts. Today we’ll put this introductory information to good use by creating a simple shortcut to show you how the process works.
The Rocket Yard Archive Shortcut
The Rocket Yard blog can provide you with a lot of knowledge, and sometimes you may remember that we wrote about a topic but you can’t find the article. In our first example, we’ll create a shortcut that will save a Rocket Yard article (or any other web page for that matter) to a PDF, then ask you where you wish to store it on your iCloud Drive.
Are you ready? Here we go:
1) Launch the Shortcuts app on your iOS device. If you haven’t already installed Shortcuts, click this link to download it from the App Store.
2) You’ll be greeted with the Library screen, a list of shortcuts that have already been created for you. Look for the blank white and blue “Create Shortcut” button (see image below, you may need to scroll down on the Library screen) and tap it.

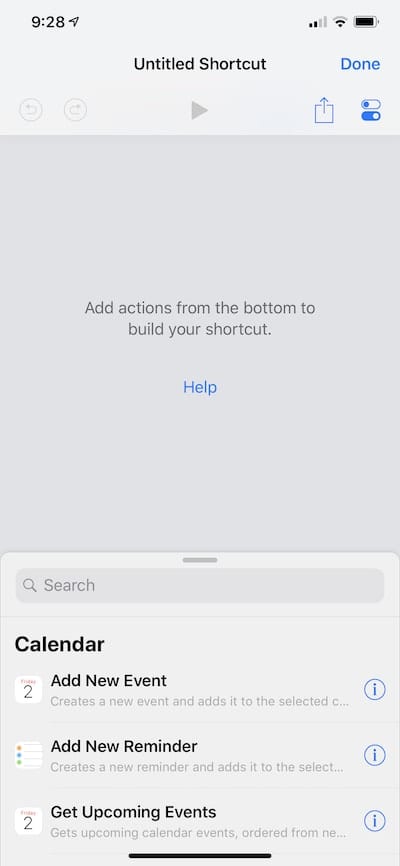
3) Once the button has been tapped, you’ll see a generic “Untitled Shortcut” screen with a list of actions at the bottom of it (see screenshot below). The text in the middle of this screen tells you how to build a shortcut — “Add actions from the bottom to build your shortcut”.
4) Let’s start to fill that blank canvas. What we’ve decided we want to do is to make a PDF of a web page that we’re looking at, then save it into a folder on iCloud Drive. Our first step is to make a PDF, so let’s look for a pre-packaged action that will let us do that. Tap on the Search field on the blank page, and type in “PDF”. All actions that have something to do with PDF files appear in a list at the bottom (see screenshot below):
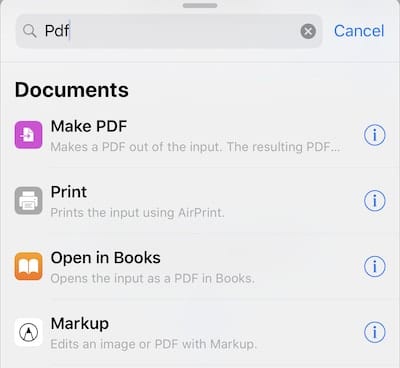
5) The first item in the list is exactly what we want to do in the first step of our shortcut — turn it into a PDF file. Tap on Make PDF to add the action to our shortcut.
6) The second step in our shortcut is to save the PDF file into iCloud Drive (this can also be customized to save to Dropbox, by the way). To do this, tap the Search field again and type iCloud. There are many more results this time, but in the list under “Documents” there’s one action — Save File — that does what we want to do. The description says “Save files to iCloud Drive or Dropbox”, and tapping on the information button (the small ” i ” button) notes that we can turn off “Ask Where to Save” in order to specify a destination path. What that means is that if we are only using this shortcut to save Rocket Yard articles and want to save into a specific folder, we can do that. If we want to change the destination where the file is saved depending on the web page we’re saving, we’ll keep “Ask Where to Save” turned on. Tap “Save File” to add it to our shortcut, and now the shortcut should appear something like this (see screenshot below):
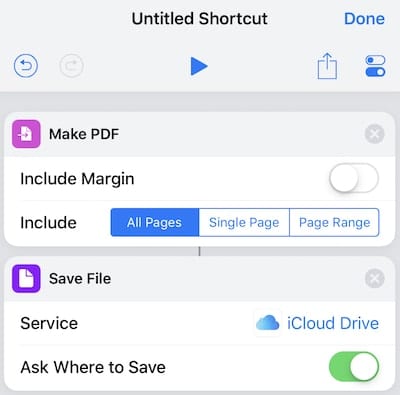
If I wanted to save the file into one specific folder each time, I could turn off the Ask Where to Save toggle by tapping on it, which adds two more lines to the Save File action — Destination Path (which must be located inside a folder named /Shortcuts/ for some odd reason) and Overwrite If File Exists.
7) OK, our shortcut has been put together and we could check it by tapping the “play” triangle at the top…but since we’re not on a web page or haven’t selected text in a document, it’s not going to do much. Let’s finish the shortcut by giving it a name and adding it to the iOS share sheet so we can use it when we find a Rocket Yard article we want to archive.
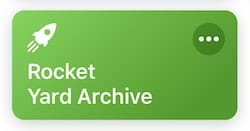
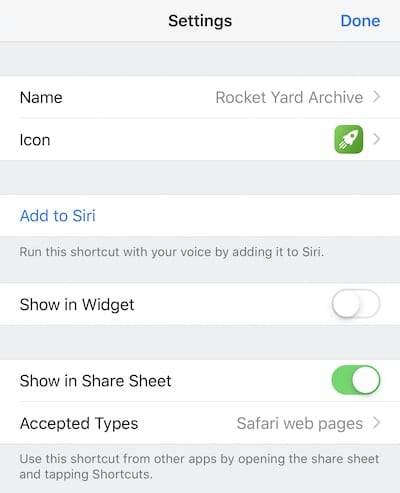
Tap on the “settings” button that is located below the word “Done” on the upper left side of the shortcut window. This displays a window with a number of available settings. To start with, tap the Name line in the settings and change “Untitled Shortcut” to something like “Rocket Yard Archive”, then tap the Done button to save the new name. Next, tap on the Icon line. You can select a number of colors and glyphs to identify the shortcut — I chose to make the icon green and make it a rocket.
Dropping further down on the settings page, I turned off “Show in Widget” as I don’t want to run this shortcut from the Lock Screen widget. I turned on the “Show in Share Sheet” toggle, since I do wish to use this shortcut in the share sheet. You’ll notice that the line below “Show in Share Sheet” says “Accepted Types” — this allows us to specify the type of document that we can archive. In this example, I just want to archive pages from the Safari web browser, so I tap on Accepted Types, tap Deselect All, then tap Safari web pages. If I also wanted to be able to save text from emails, text messages, and so on, I could select those items as well.
The final settings look like this:
8) Tap Done at the top of the settings page to save the settings, and the shortcut is saved in the Shortcuts Library as a button that looks like the one seen at the top of this article.
How to Use the Rocket Yard Archive Shortcut
Let’s put the shortcut to work.
1) Launch Safari on your iPhone or iPad, then visit this website. Tap on any article you’d like to save to iCloud Drive to see the complete article.
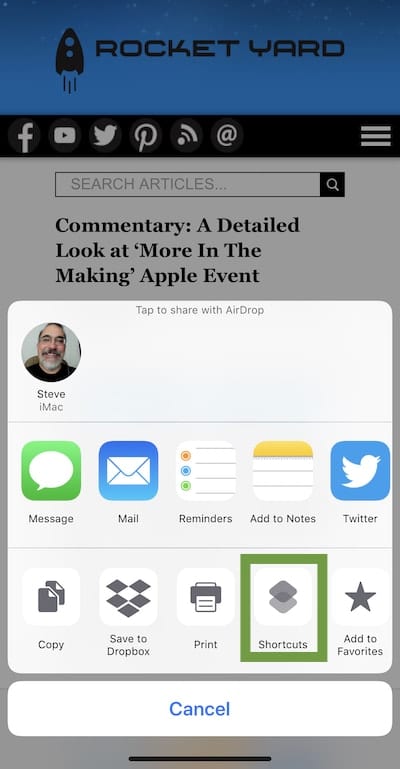
2) Tap the Share Sheet button — it’s the button that looks like a square with an arrow pointing up from it. When the share sheet appears, tap on Shortcuts (outlined in green in the screenshot below).
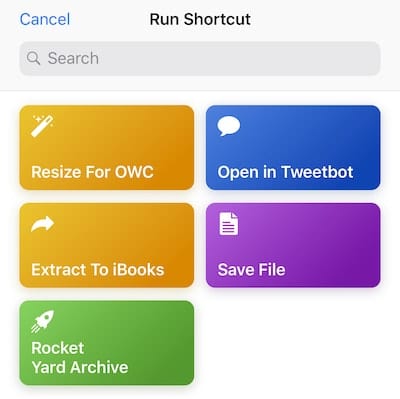
3) The next screen (see screenshot below) shows the shortcuts that are available to run. Sure enough, there’s our Rocket Yard Archive button. Tap it to run the shortcut.
4) The shortcut runs, then asks where you wish to save the document (see screenshot below). I’m putting it into a folder I created on iCloud Drive called Archives, but if this was a recipe website I could save the web pages into my Recipe folder on the drive. Once you’ve selected the folder into which the file will be saved, tap Add. If there’s already a file with the same name, you’ll be asked if you wish to replace it.
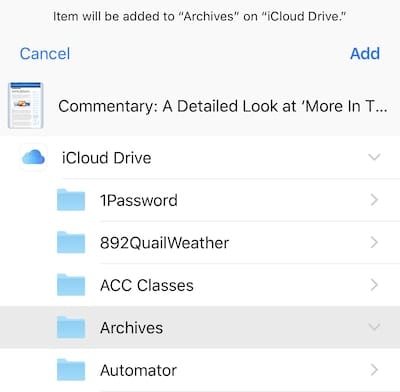
At this point, you have the complete web page in PDF format with all images intact stored in iCloud Drive for future reference.
This is a rather simple example of a shortcut, but in the next and last article of this series, we’ll create one that’s much more complex to show how scripting tools work. In the meantime, feel free to experiment with the Shortcut app and let us know what you create.
- Read Part 1 here: The iOS Shortcuts App Part 1: An Introduction…
- Read Part 2 here: The iOS Shortcuts App Part 2: Apple and Third-Party Actions
