In this installment of Pro Audio, I’m going to share the exact plugins (and settings) that I use when editing and mixing episodes of a podcast series, Talking Too Loud, from the video hosting company Wistia. I’ll also provide a path for those of you who want to use the stock plugins included with your DAW software, like Pro Tools—this should also translate easily to other software like Logic, Reaper, Studio One, and others.
How Wistia Records Three People in Three Locations
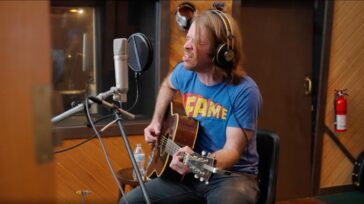
All episodes of Talking Too Loud have three participants—the host (Chris Savage), the producer (Sylvie Lubow), and an interview guest. Since there are three people in three locations, Wistia uses Zoom to facilitate the interaction between all of the guests. Chris and Sylvie are each using a Shure SM7B going into a Zoom recorder, while the guest audio varies from episode to episode. All Zoom participants also record the streamed audio as a backup. (There are settings within Zoom so that each participant’s audio is recorded to individual files.)
Note: Zoom is mentioned twice above; there are in fact two products that use the name Zoom. Zoom can be used to refer to the popular video-conferencing platform and can also refer to the brand that offers portable recording devices.
• Zoom Videoconferencing
• Zoom Recorders
The Plugins
To start, here is the list of plugins I use when I edit and mix episodes of Talking Too Loud. I generally use Izotope plugins to handle the cleanup of the raw audio, and Waves Renaissance-series plugins for the EQ and compression processing. I like the Renaissance series for this workflow because the plugins have simple interfaces, sound pretty transparent, and let me dial in settings quickly.
- Izotope RX De-plosive
- Izotope RX De-click
- Izotope RX Mouth De-click
- Waves X-Noise
- Waves Renaissance Channel Strip
- Waves Renaissance DeEsser
- Waves Renaissance Compressor
- Waves F6 Floating-Band Dynamic EQ
- Waves Vocal Rider
- Waves L3 Ultramaximizer
The Workflow
Off-Line Cleanup
Before I make a single edit, apply EQ, or use compression, I process all raw audio tracks off-line with one or more of the Izotope plugins listed above. I generally use very gentle settings and then do some spot checks to make sure that the raw audio has not been adversely affected.
Background Noise Suppression
After the raw audio is processed to remove egregious plosives and clicks, Waves X-Noise is used to suppress background noise. Since everyone is recording from home, sources of unwanted noise can include air conditioners, refrigerators, computer fans, or an elevated noise-floor from mic pres. To use X-Noise, simply find a portion of the audio track that contains no speaking and loop play that selection. Next, click the “Learn” button—this will create a noise profile for that track. Once X-Noise has been “trained”, simply dial in threshold and reduction settings so that the background noise is suppressed while preserving the fidelity of the original audio. Repeat this process for each track that has unwanted noise and you should have much cleaner audio to edit and mix.
The EQ and Dynamics Chain
Now that the background noise has been suppressed, the rest of our processing chain deals with equalization and dynamics. The chain for each voice track is a straightforward combination:
- Renaissance Channel Strip ->
- Renaissance DeEsser ->
- Renaissance Compressor ->
- F6 Dynamic EQ ->
- Vocal Rider
Renaissance Channel Strip
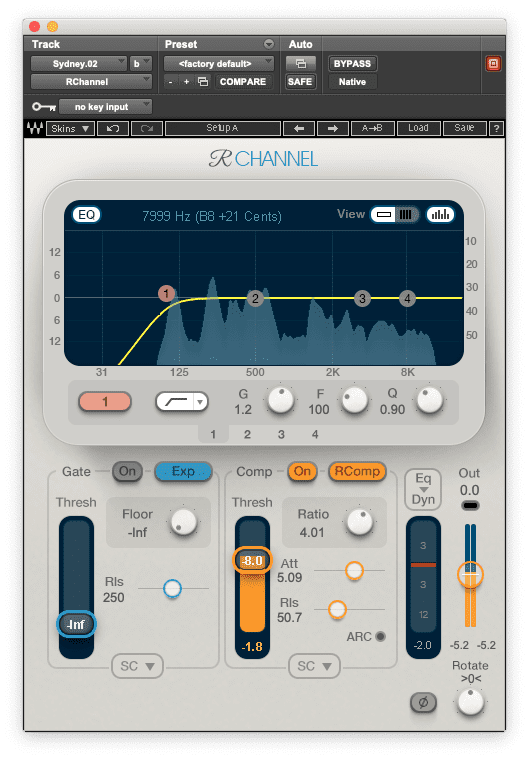
The Renaissance Channel Strip offers EQ, gate/expansion, and compression in a compact interface that’s easy to use. For the purposes of podcast audio, I generally use the EQ to simply apply a high-pass filter, usually somewhere between 80 and 100 Hz. This helps reduce rumbles or other low-frequency noise that might negatively affect intelligibility.
Second, I make sure to disable the gate section of the channel strip—I do not use gates as I prefer to manually edit the silence for each side of the conversation.
Next, a mild amount of compression is applied. The goal here is to achieve some control for the track, but not flatten the dynamic range altogether. I generally look for 2 or 3db of gain reduction at this stage. Keep in mind, that we will be applying more compression with the DeEsser, Renaissance Compressor, and the L3 later—we are stacking compressors in a way so that none of the individual compressors are working too hard. This will ensure that we maintain a natural sound even as we bring the dynamic range under control.
Check out the settings below for a good starting point. You’ll likely need to adjust the high-pass filter and compressor threshold settings to suit your source material. Sometimes I will make an additional EQ move in the mid-range if something is bothering me, though I usually find myself waiting until the audio hits the F6 Dynamic Equalizer (later in the chain) to do this.
Renaissance DeEsser
Depending on the speaker and the microphone, you may find that the source track has unwanted emphasis, particularly for “chh”, “shh”, and “ess” sounds. A DeEsser is a great way to tame these distracting sounds. Here are a couple of different settings I tend to use on a spoken tracks, depending on the speaker’s tendencies.
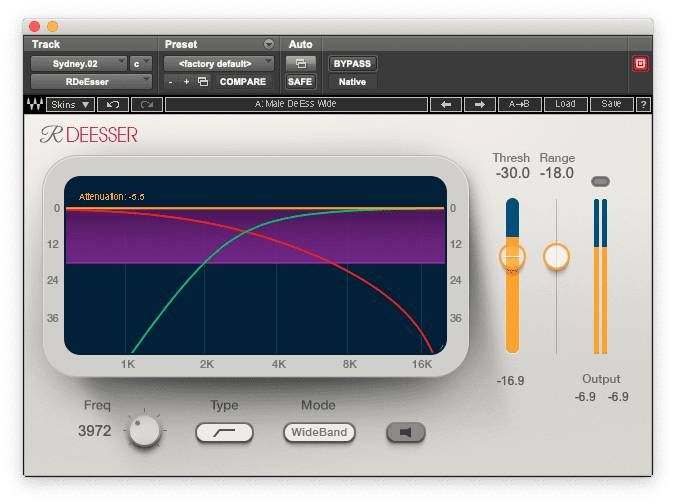

The goal here is to achieve some control over any sharp “ess” or “chh” sounds without giving the speaker an artificial lisp. If you take the time to find the right balance, the rest of your podcast mix will come together with relative ease.
Renaissance Compressor
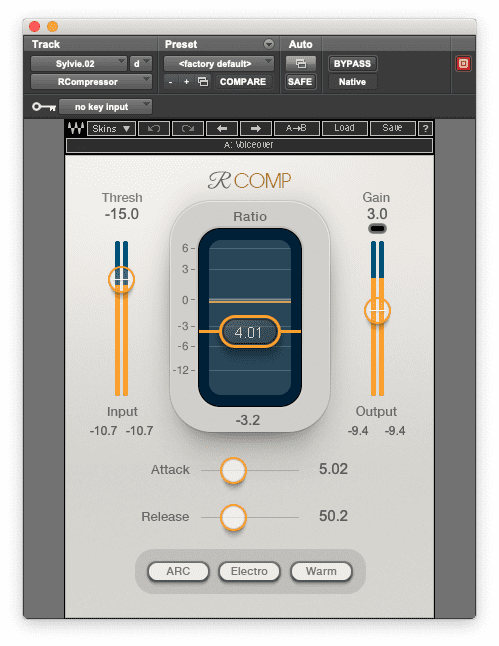
To quickly recap, by the time our podcast audio hits our next plugin, the Renaissance Compressor, we’ve already applied a high-pass filter, mild compression, and treated harsh sibilance with a DeEsser. The use of the Renaissance Compressor will provide additional control over the dynamic range, and since we’re stacking multiple compressors, we can continue to use settings that aren’t too aggressive—which will help us maintain a more natural tone. Like the compressor in the channel strip that’s used earlier, we target a reduction of approximately 3 dB.
Here’s what those settings look like, and remember that you might need to adjust your threshold setting.
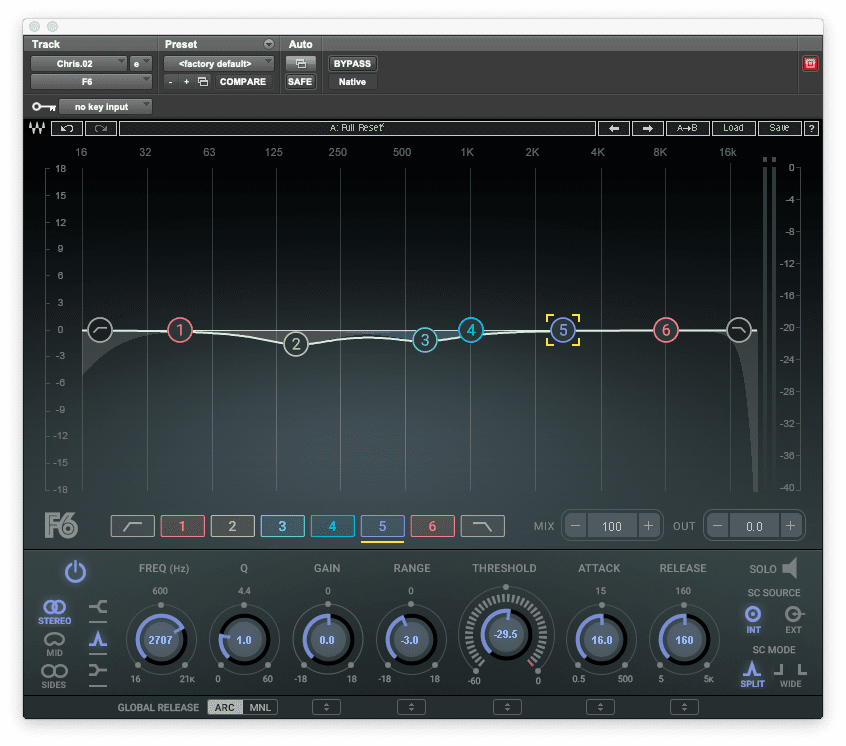
Waves F6 Dynamic EQ
The Waves F6 can be used to make just about any EQ adjustments you might need at this stage in the process. It’s an incredibly flexible and powerful plugin, with six fully-adjustable bands along with dedicated low and high-pass filters. I’ll generally use the F6 to treat the mid-range as needed, and find it particularly useful if I want to gently smooth out some harshness that might be present in the speaker’s voice.
The F6 can be used as a conventional EQ to manipulate frequency bands of your choice, or more powerfully, as a dynamic EQ by which you set a threshold and range in order to control frequency bands only when they break that threshold. If you’re unfamiliar with the concept of a dynamic EQ, consider it similar to a compressor that is only affecting certain frequencies of your choice. Below is a shot of a setting I use for one of the podcast hosts. In this instance, I have carved out just a touch of low and low-mid information using standard equalization, and have a dynamic eq configured (band 5 in purple) to tame some harshness right around 2.7k. It’s really only working some of the time, when something in his voice gets a little peaky—and even then, only a max of 3 dB in reduction.
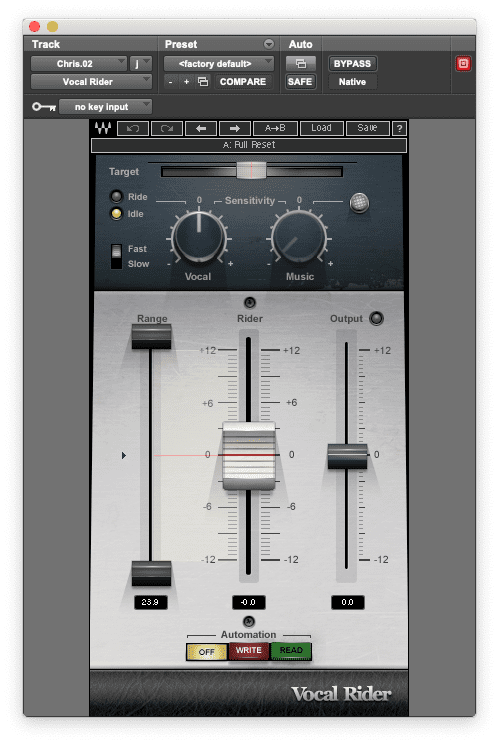
Waves Vocal Rider
The last plugin in my signal chain on podcast tracks is Vocal Rider, which automatically keeps dialog levels steady and does so without the “coloration” of compression. Although it’s capable of more, it works great in 99% of podcast mix scenarios when you just throw it on a voice track and set a wide range. You can adjust the sensitivity and target to your taste, though I usually leave them at their default settings. In rare instances where it’s not quite working the way I want, I’ll actually print the automated fader moves to an automation track and make adjustments to the fader moves as necessary. I tend to prefer the “slow” setting to avoid and sudden, large fader moves, but I’ve had success with “fast” mode as well.
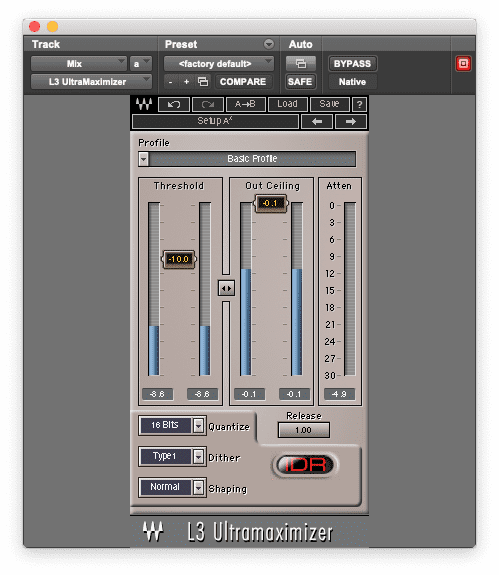
Waves L3 Ultramaximizer
The L3 is the very last plugin used in any podcast I edit and mix. It is instantiated on the stereo mixbus and achieves two goals: more overall level and a gentle amount of limiting. This is one more place where you can transparently bring even more control to the dynamic range of your podcast mix. It’s a simple plugin that just kind of works—use your ears and you’ll know if you’ve set your threshold too low. I like to set the ceiling at -0.1 to guarantee that no online streaming services will reject the audio for clipping.
Conclusion and Stock Plugin Alternatives
Now that I’ve shared my voice processing chain for podcasts, you can experiment by replicating a lot of this functionality with whatever plugins you already own. The key to maintaining a smooth, neutral, and balanced tone is to avoid aggressive compressor settings that color the sound. By stacking multiple compressors, you can achieve control over voice recordings yet still allow for their natural dynamic range to come through in the final mix.
While I’m not aware of any stock noise reduction plugins that come with Pro Tools for free, here are some very useable options for EQ, compression, and de-essing:
- Waves Renaissance Channel Strip -> Avid Channel Strip
- Waves Renaissance DeEsser -> Avid Dyn3 De-Esser
- Waves Renaissance Compressor -> Avid Dyn3 Compressor/Limiter
- Waves F6 Dynamic EQ -> Avid EQ3 7-Band Equalizer (not a dynamic EQ)
One last tip—the most important aspect of putting out a podcast with professional audio will always come to down to the quality of the original recording. If you take the time to make sure your recording environment is quiet and invest in a quality microphone, you will have already set yourself up for success. Wistia, for example, makes my mix process easier than it could be otherwise, in part because they have invested in great podcast microphones (Shure SM7B) and individual recorders (Zoom H5) that capture clean, transparent audio.