The default font for body text in Apple’s Pages word processing app is 11-point Helvetica Neue. It’s easy to change in a document, but a bit trickier to change permanently.
You can set a default font and font size for the templates in the Basic category. Each time you begin a new document using these templates, the font and font size you selected are used.
The font and font size you choose apply to the Body paragraph style. Other paragraph styles use the same font, and their sizes adjust according to the font size relationships of the original template.
To choose a font and font size:
- Choose Pages > Preferences (from the Pages menu at the top of your screen)
- Click General
- Select the checkbox next to “Set font and size for new Basic documents”
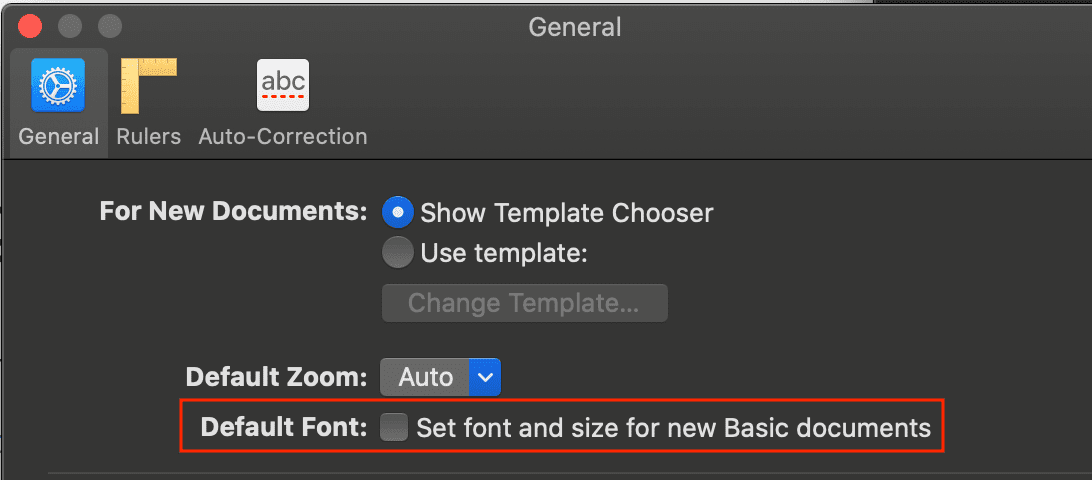
- Click the Font pop-up menu and choose a font.
- Click the arrows next to Font Size to choose a font size, or type a value in the text field.
Note that your setting applies to new documents you create after you set the preference; nothing changes in existing documents. Later, if you want to revert the templates to their original fonts, deselect the “Set font and size for new documents” checkbox.
To create a custom template with fonts and font sizes you prefer:
- In Pages, choose File > Open
- Click New Document. The template chooser opens
- Double-click a template
- Select some text and click the paragraph style at the top of the sidebar
- In the Font section of the sidebar, choose a font and font size for the paragraph style you selected
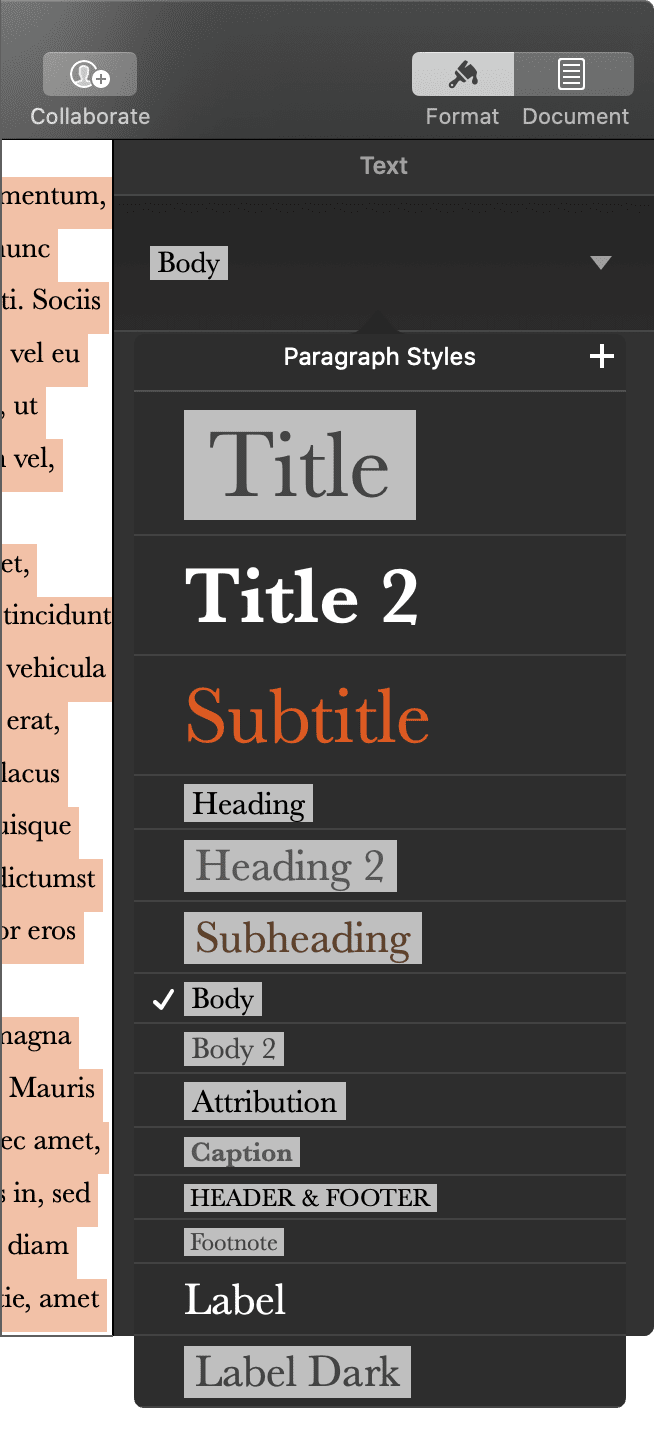
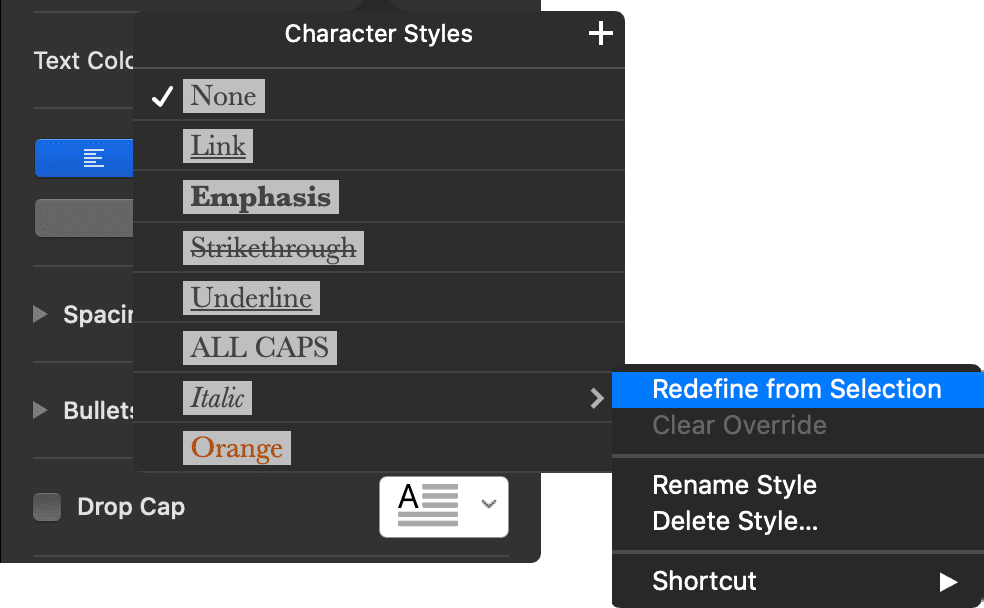
To change character styles:
You can also use other controls in the Font section to choose character styles like bold and italic, and change the text color.
Update the paragraph style with your changes. If there’s an Update button: Click Update. If there’s only an asterisk next to the paragraph style: Click the style name, then move the pointer over the style name in the Paragraph Styles pop-up menu. Click the arrow that appears, then choose Redefine from Selection.
If you typed in the template, delete any text that you don’t want to appear every time you open the template. When you’re finished, choose File > Save As Template (from the File menu at the top of the screen). The original Blank template is still available from the template chooser.
Click Add to Template Chooser, then type a name for your new template. The template is added to the My Templates category of the template chooser.
Also, you can rename the style and delete styles you don’t want to keep.
Click a paragraph that uses the style you want to rename.
In the Format sidebar, click the paragraph style name near the top, move the pointer over the style name you want to change, then click the arrow that appears.
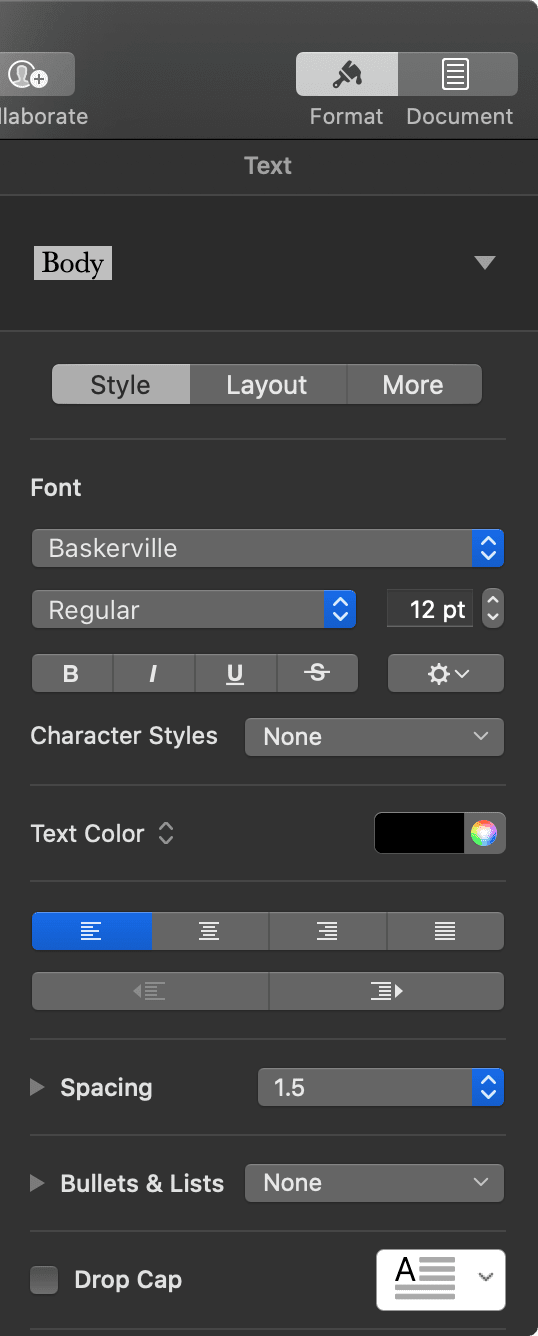
If the text is in a text box, table, or shape, first click the Text tab at the top of the sidebar to see paragraph styles.
You can delete a style from the paragraph styles list. Click anywhere in your document text.
In the Format sidebar, click the paragraph style name near the top.
If the text is in a text box, table, or shape, first click the Text tab at the top of the sidebar to see paragraph styles. In the Paragraph Styles menu, move the pointer over the name of the style you want to delete, then click the arrow that appears and choose Delete Style.



Thank you for this information. I thought it would solve a problem I’m having, but it doesn’t seem to.
I’m trying to make a change to the basic view when I create a new document: I want to have blank documents open no side panes open and with the text size set to Page Width. Even when I create a template and save it, when I use it to create a new document I still get the Format pane on the left and the view set to 125%. I wonder if this is even possible.
Anyway, thank you for this info.