With Family Sharing on the Mac, you can create Apple IDs for kiddos under 13. This means they can participate in Family Sharing and use other Apple services such as iCloud, iMessage, and FaceTime.
To participate in Family Sharing, all family members have to have their own Apple ID. For obvious reasons, those under 13 can’t create an Apple ID on their own. However, as a parent or legal guardian, the family organizer can provide verified parental consent for a child to have their own Apple ID, then create it for the youth.
If your child already has an Apple ID, you can update their email address, date of birth, security questions, and more. When you create an Apple ID for a child, it’s added to your family group automatically.
Here’s how to create a child’s Apple ID with macOS:
- Go to Apple menu > System Preferences > Family Sharing
- Make sure Family Sharing is enabled.
- Click the “+” sign.
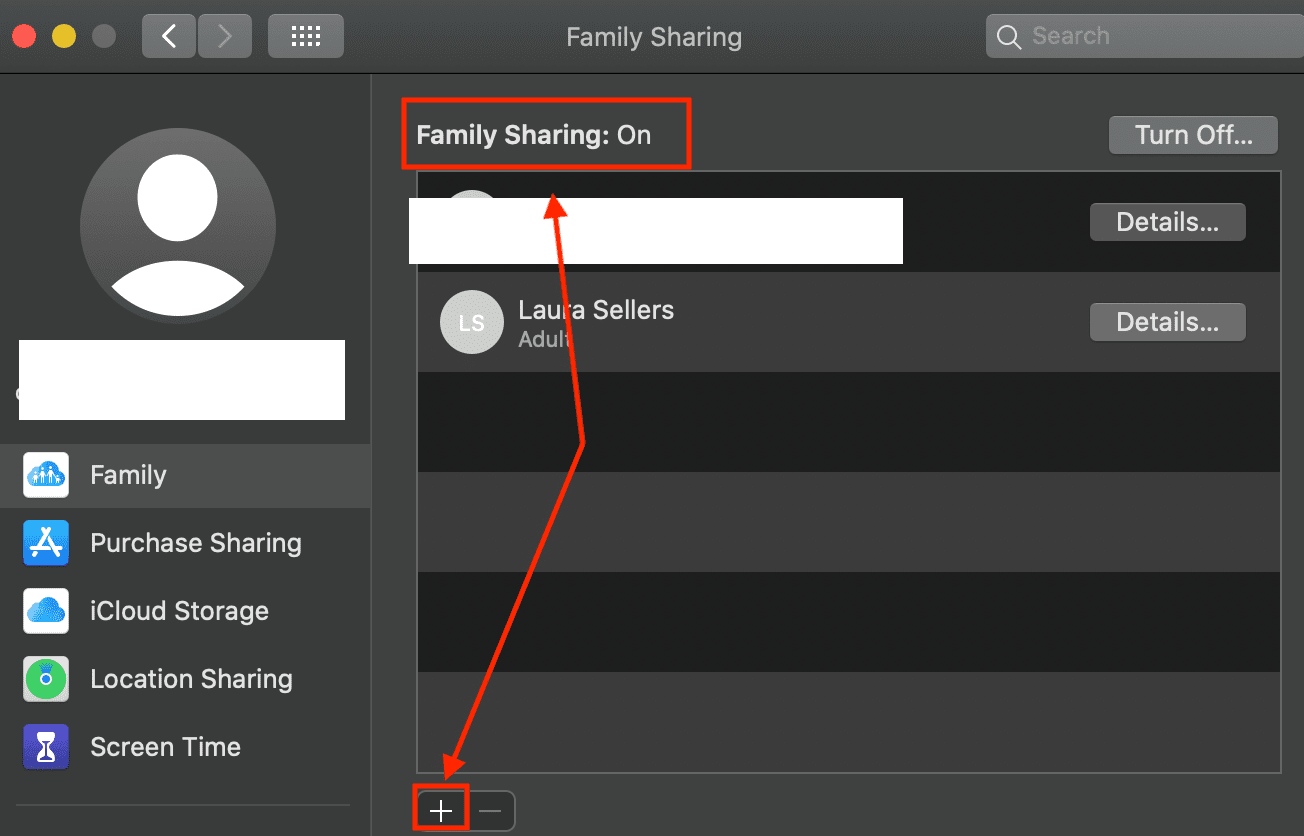
- Select Create an Apple ID for a child who doesn’t have an account
- Click Continue
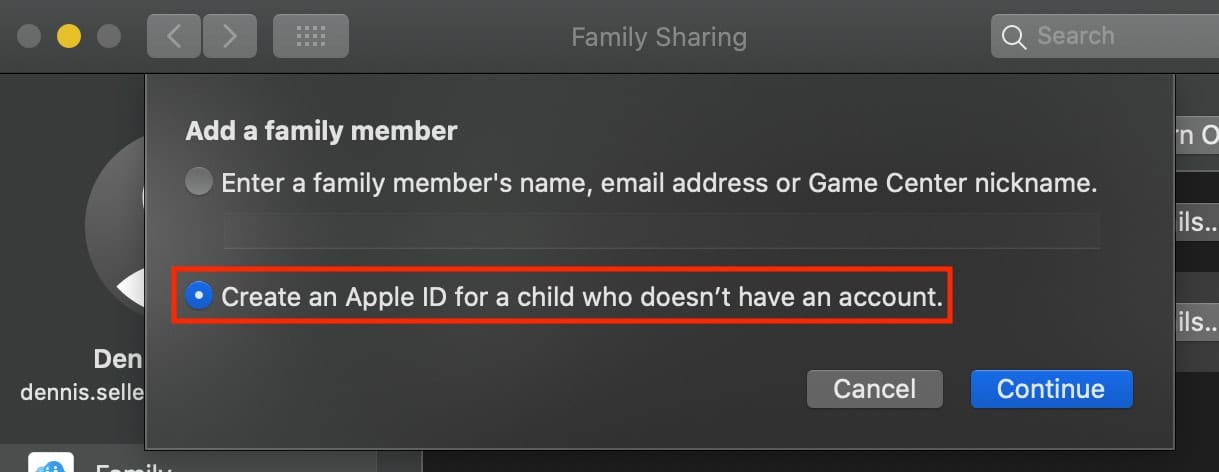
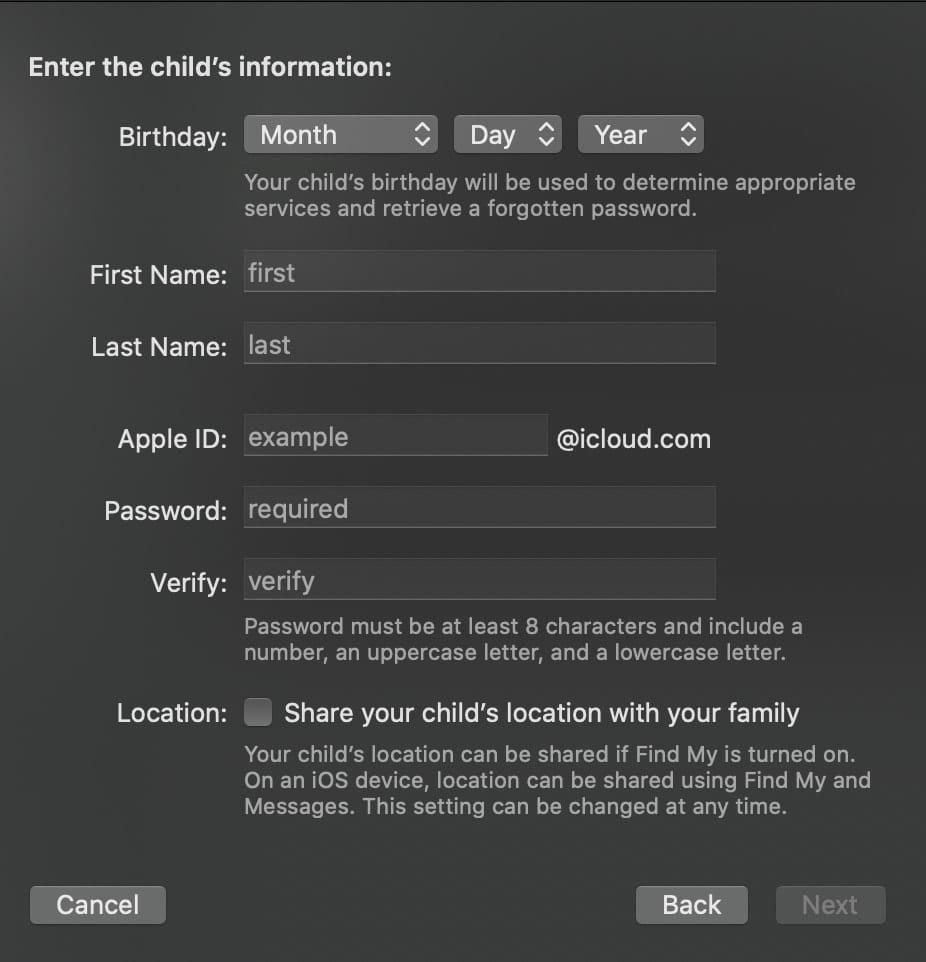
- Enter your child’s birthday. Be sure to enter the correct date
- Enter your child’s Apple ID (username@icloud.com), first and last name, and password
- Click Continue
- Enter the requested information for your payment method
- Click Agree (If you don’t have a payment method on file, you need to add one)
Follow the on-screen instructions to set a password, choose security questions, and set up your child’s account. Choose passwords and security questions that you can both remember. You’ll get an email confirmation after you create the Apple ID.
Children enjoy the same Family Sharing features as other family members and, by default, can access the same music, movies, TV shows, books, and apps. You can limit what content your child can access on the devices they use. However, you can set Restrictions or Parental Controls.




How do you do it if you don’t have and don’t want an icloud email address?