

There are certain actions that anyone can take to make their Apple products more secure, but none is probably as effective as enabling two-factor authentication for your Apple ID. Let’s face it, your Apple ID is used to purchase products (apps, music, movies, even hardware if you’re purchasing it from the online Apple Store) and sign you into iCloud where a lot of personal information is stored. So shouldn’t you go out of your way to make sure that you are the only person who can access that account — even if someone else knows your password?
Let’s start by talking about the definition of two-factor authentication. Wikipedia describes it as “a method of confirming a user’s claimed identity by utilizing a combination of two different components. These components may be something that the user knows, something that the user possesses or something that is inseparable from the user.” As an example, when you want to withdraw money from an ATM, you use two-factor authentication. You need to have a combination of your bank card and a PIN for the transaction to proceed. In other words, you use something you know (your PIN) and something you have (your bank card) to prove you are who you say you are.
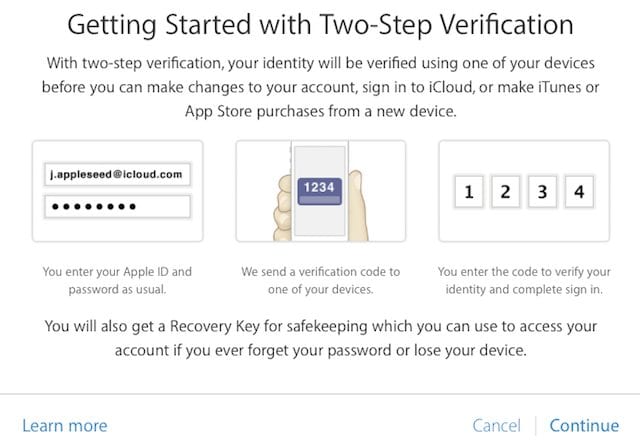
 ATMs aren’t the best example of two-factor authentication, of course, since criminal elements have discovered ways of modifying ATMs to skim card numbers and copy PINs. Two-factor authentication for Apple ID makes it possible to only access your account on trusted devices like an iPhone, iPad or Mac. What happens is that when you try to sign into a new device for the first time, you’re asked to provide two pieces of information — your Apple ID password and a six-digit verification code that’s displayed automatically on other trusted devices. That verification code is a temporary code that’s sent to your trusted device or a trusted phone number (more about that later…) whenever you sign into a new device or browser with your Apple ID.
Let’s look at an example. You already own an iPhone and you like it so much that you’ve given up that old PC for a shiny new MacBook. If two-factor authentication is enabled, the first time you sign into Apple services like iCloud using your Apple ID on that MacBook, a prompt appears asking you to enter your Apple ID password and a verification code. That verification code appears automatically on your iPhone. Take the six-digit code and type it into the MacBook along with your password, and you’ve just used two-factor authentication. Since you have now had to use more than just a password to access your account, security is improved for that Apple ID and all information associated with it.
You won’t have to enter a verification code on that MacBook again unless you sign completely out of the device, erase it, or have to change your Apple ID password. If you sign into iCloud from a web browser on your Mac or PC, you can choose to trust your browser so that you won’t be asked to enter a verification code whenever you sign in from that particular computer.
What are some of the trusted devices that can be used to receive a two-factor authentication verification code? Any iPhone, iPad, iPod touch or Mac using iOS 9 or OS X El Capitan that has already been signed into using two-factor authentication. Apple knows that those devices are yours and they can be used to verify your identity with a verification code if you try to sign in on a different device or a different browser.
What happens if you don’t have a trusted device? For example, you may have just purchased your first iPhone and you’re new to the Apple ecosystem. Well, you’ll be asked to provide a trusted phone number that can be used to receive verification codes by text message or a “robo-call”. To enroll in two-factor authentication, you must verify at least one trusted phone number. This can be a home phone or a phone number used by another family member or close friends. This is useful if you can’t access your own devices for some reason.
There’s one other way to get a verification code. If you’re using that device and can’t received a verification code on other devices, you can get one from Settings — even if your device is offline. In iOS 9, launch Settings and then select iCloud. Tap your Apple ID username, and you’ll be asked to enter your Apple ID password. If your device is offline, tap Get Verification Code. If it’s online, tap Password & Security > Get Verification Code.
For a Mac running OS X El Capitan, launch System Preferences (from the Dock or Apple Menu), click iCloud, then click Account Details. If your Mac is offline, click the Get Verification Code button. If it’s online, click Password & Security and then Get Verification Code.
Turning On Two-Factor Authentication
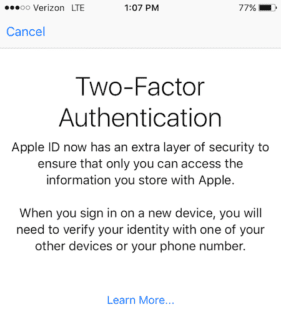
Now that you know all of the details on what two-factor authentication offers and how it is used with your Apple ID, it’s time to learn how to turn it on. It’s available for all iCloud users who have at least one device using either iOS 9 or OS X El Capitan (or of course, iOS 10 and macOS Sierra).
On the iPhone, iPad or iPod touch using iOS 9 or later:
- Launch Settings, then go to iCloud and tap your Apple ID
- Tap Password & Security
- Tap Turn on Two-Factor Authentication
On the Mac using OS X El Capitan or later:
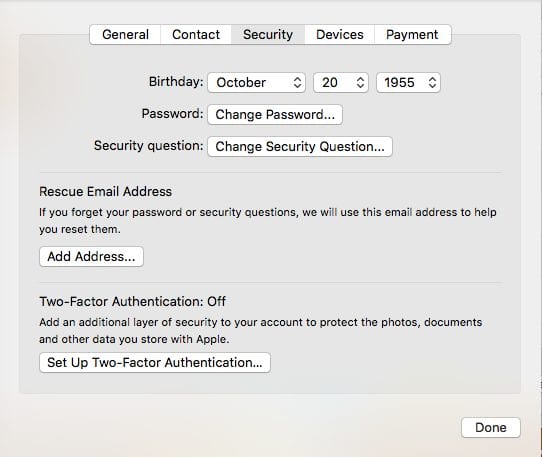
- Launch System Preferences from the Dock or Apple Menu, then select iCloud > Account Details
- Click Security
- Click Turn on Two-Factor Authentication

Now when two-factor authentication is enabled, your Apple ID is given a significantly improved measure of security. Remember that you’ll need to enter your password and have access to your trusted device(s) or trusted phone numbers whenever you sign into your account. Be sure that in the future, you remember your Apple ID password, use a device passcode and/or Touch ID on your devices, keep your trusted phone number(s) up to date, and that you keep your trusted devices physically secure.
What do we mean by “physically secure”? Well, don’t leave a trusted MacBook, iPad, iPhone or other device just sitting out somewhere where it can be picked up by someone. Should someone steal two or more of your devices, they’d have access to the verification code and all bets are off.
How to See What Devices are Trusted
How can you find out what devices are currently trusted once you’ve enabled two-factor authentication? On iOS devices:
- Launch Settings
- Tap iCloud and your Apple ID
- Tap Devices (see image below)

On OS X/macOS devices:
- Launch System Preferences
- Click iCloud, then click Account Details
- Click the Devices tab (see image below)
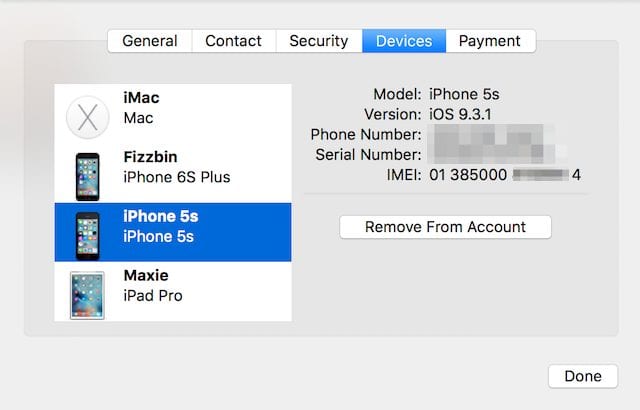
If you’re selling or giving a device to someone else, be sure to sign out of iCloud on that device. It’s then a good idea to look at the trusted device list from another Apple device and then remove your former device from the account.
Disabling Two-Factor Authentication
It’s not recommended to disable two-factor authentication, since it helps provide another layer of security into your Apple ID account. However, if for some reason you decide that you must turn it off, here’s how to do it.
- Sign into your Apple ID account page
- Click Edit in the Security section, then click Turn Off Two-Factor Authentication
You’ll be asked to create new security questions and verify your date of birth. Once that is done, two-factor authentication is turned off.
Occasionally, someone might turn on two-factor authentication for your Apple ID without your permission. You will have received an enrollment confirmation email that was sent to your Apple ID or “rescue” email address. There will be a button marked “Turn Off Two-Factor Authentication” at the bottom of the email, and your Apple ID is restored to its previous security settings. That button is live for two weeks after two-factor authentication has first been enabled.
For more tricks and guides from the Rocket Yard, visit our Tech Tips section and view more Rocket Yard Guides here.


Can someone tell me why I am not getting the verification codes being sent by apple. I am trying to change my password and I cannot do this until I get a verification code. I have 2 trusted devices listed but neither one get the code.
When I try to set up 2 Factor authentication, it says a code is being sent to “trusted devices” but I never get that message.
You know what else sucks? When you decide to upgrade both your Mac Air and your iMac desktop to Sierra at the same time, and you innocently choose to turn on 2-step verification for your Apple ID on the first device, and the second device can’t help you because it’s in the middle of the update … and your phone is logged in under another Apple ID and it won’t get text messages to verify the two OS devices.
It would really improve two-step verification if it could be selectively implemented for certain devices (i.e., laptops, phones, and tablets) while the desktop is allowed to skip that rigmarole.
Arguably, mobile devices are the ones most likely to be stolen — I can’t see anybody trying to walk away with a 21″ iMac from a home office — so why do desktop computers have to undergo this? Apple obviously knows which devices I have logged in under which Apple IDs.
Is there anything you can do if you are now in recovery mode and have been waiting for two weeks to get an email. Locked out of Mac and Iphone. Why does it take so long to get this fixed?
Hi – since we can’t supply support for Apple’s operating systems, it’s probably best for you to contact Apple directly. Visit their support site at https://support.apple.com to search for answers or — even better — talk to one of the support reps about this specific issue.
Steve
The article made no mention of app specific password change required for 2 FA. When I turned on 2 FA my iPhone worked but my iMac suddenly stopped receiving Messages. I turned off 2 FA and so far i’m still not receiving Messages.
You know what two-factor authentication really sucks for? When a customer drops off their Apple device at your shop (especially the customers who are having password problems), and every problem you try to fix not only requires you to play “mother may I” with Apple, but to call the customer to ask what is the magic number that just appeared on their iPhone.
Sadly, you’re right! Or trying to do support for an elderly parent who has no idea what you’re talking about when you ask them for the authentication code… I had to do that with my 87-year-old Dad who has memory issues, finally just gave up and drove over to do it myself. :-)
Steve
El Capitan 10.11.5 — I find no “Two-Step Authentication” option when I follow your suggested steps to activate it. System Pref>iCloud>Account Details>Security> . . . .but no “Two-Step Authentication option.
Hi, Kevin —
It’s definitely there in El Capitan’s System Preferences. Once System Preferences has been launched on a Mac that is logged into iCloud, click on the iCloud icon to launch the system prefs for iCloud. Just below your photo and iCloud login name on the left sidebar of the iCloud system preferences you’ll see the button marked “Account Details”. Click that, and you’re asked to verify your iCloud credentials. Once you’re in, click that Account Details button one more time, then click the center tab marked “Security” and that’s where you’ll find the “Set Up Two_Factor Authentication” button.
Hope this helps!
Steve