

My friend Steve Sande recently wrote a great post, “AirDrop Files From Your iPhone or iPad to Your Mac.” I had to chuckle when he submitted it for publication, telling him that I was actually in the middle of putting screenshots together for a post on how to AirDrop files between two Macs. There are many similarities but enough differences to make it worth not bailing on the creative endeavor. Plus, a screenshot is worth 1,000 words, as the saying goes (or something like that).
In this post, I’ll be using Big Sur on one Mac and Catalina on the other. Why? Because the 2018 MacBook Pro I use for work runs Catalina, but I have upgraded my 2013 MacBook Pro to Big Sur. Rocket yard posts many blog articles about macOS 11, so I use my personal laptop to verify other author’s submissions and take tons of screenshots for posts I scribe on topics related to Big Sur. These files need to ultimately make their way to my Catalina Mac for a little Photoshop love and final inclusion into the posts you read – including this one.
How do I do this? Well, AirDrop, of course!
How to Share a File Between Mac’s Using AirDrop
We have quite a few posts on how to take screenshots, so I won’t get into the finer details of such. What I want to show is how to take a file and “share” it. This process will work for any type of file, small or large (there are no file size restrictions I am aware of). The only thing to keep in mind is that the time it will take for the file to transfer will depend upon its size and whether or not your AirDrop connection is using WiFi or Bluetooth.
Note: Do you need to worry about telling your Mac to use either WiFi or Bluetooth? Nope. Just make sure they are both enabled, and Apple will do its magic mojo to ensure optimal performance.
Select the File(s) on Your “Sending” Mac
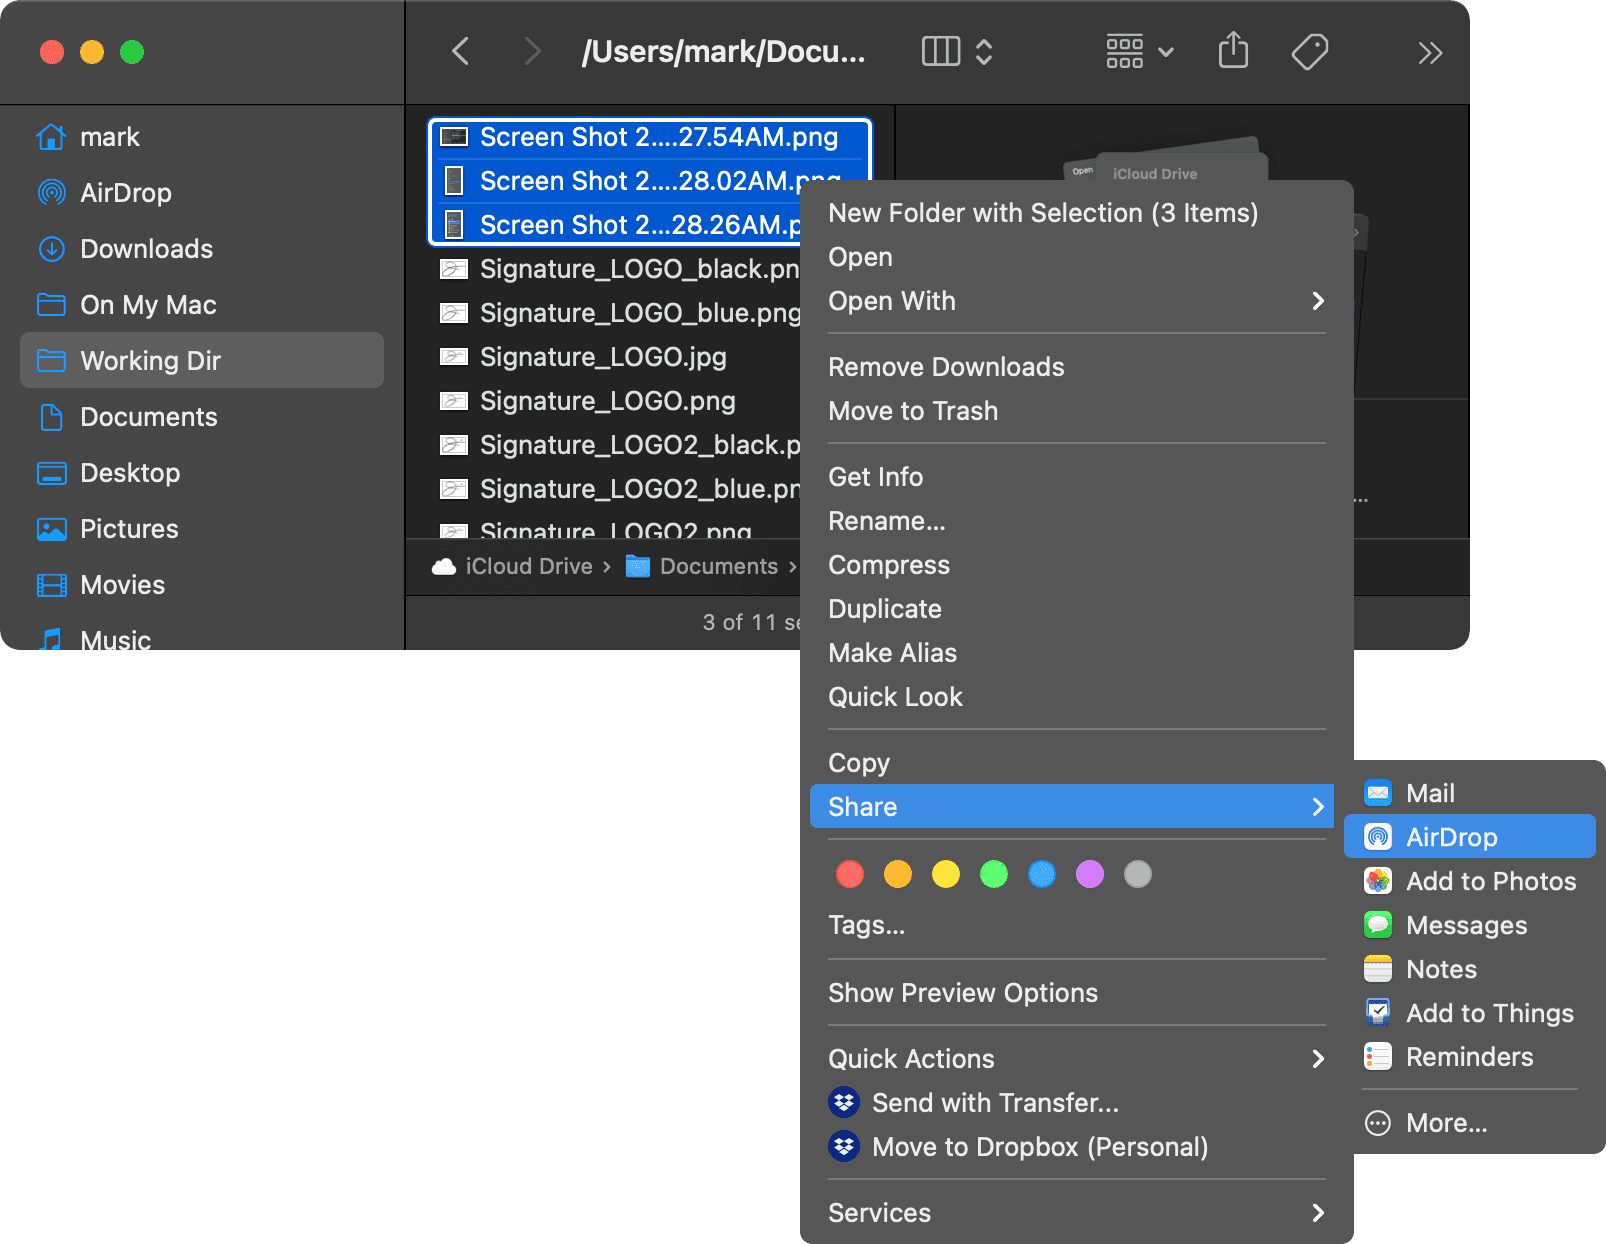
Navigate to the file (or files) you would like to transfer, select it (or them), and bring up the contextual menu. You can do this in one of three ways:
- Select the file(s) and click your right mouse button
- Hold the control key and left-click
- Rest two fingers on your trackpad and click with your thumb (my preferred digit) or another finger
From the pop-up menu, select “Share > AirDrop.” Below is an example, though your menu items may differ.
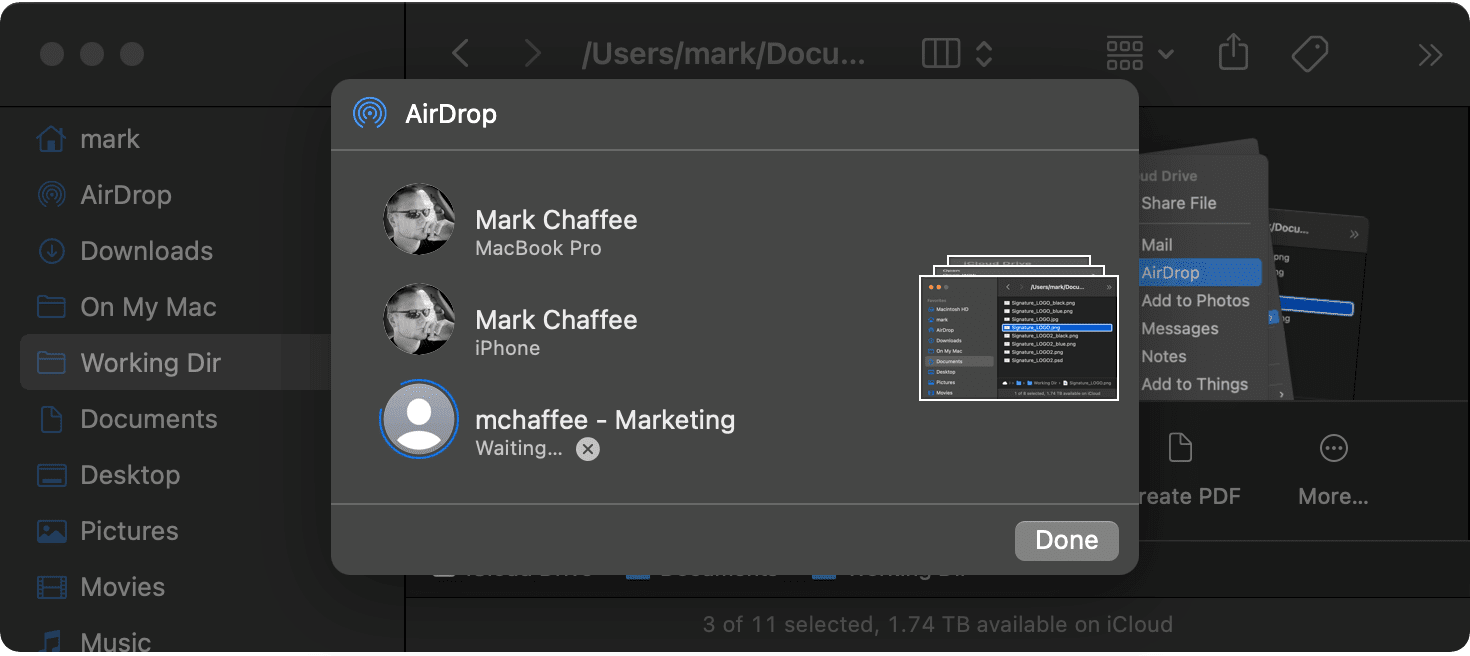
Your Mac will find all the devices it can on the WiFi network or via Bluetooth that have AirDrop enabled. Select which device you’d like to send the files to, and you’ll see its icon begin to spin with a message noting that it has connected and is “Waiting…” for a response.
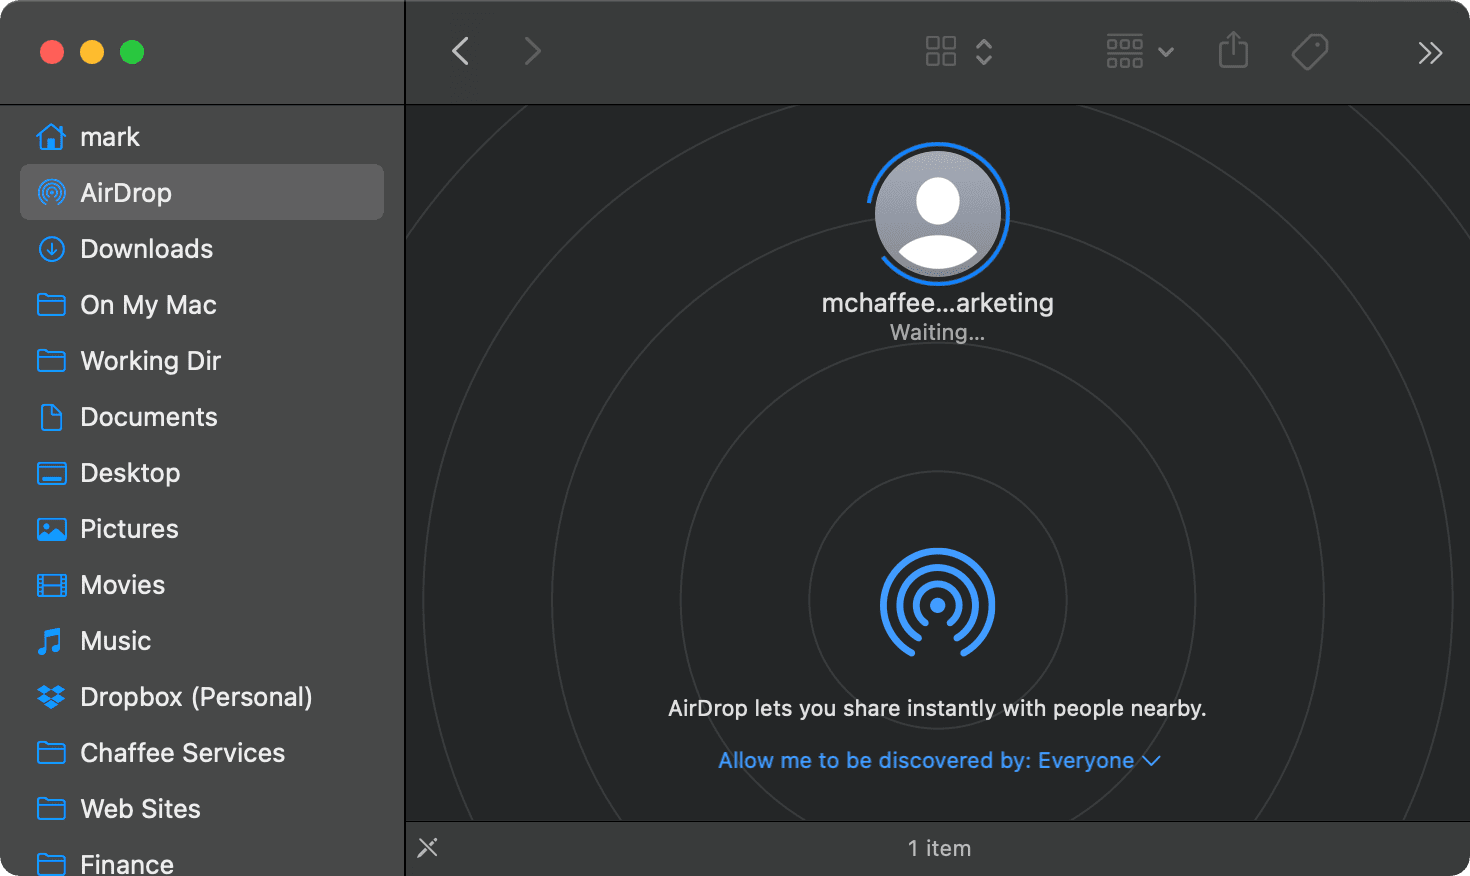
You can also drag the file(s) to the AirDrop icon ![]() in your Favorites list in the Sidebar and drop them on the desired computer:
in your Favorites list in the Sidebar and drop them on the desired computer:
Note: If you don’t see AirDrop in the Sidebar, go to “Finder > Preferences..” and select “Sidebar.” There you will find a list of items that you can enable or disable – including AirDrop.
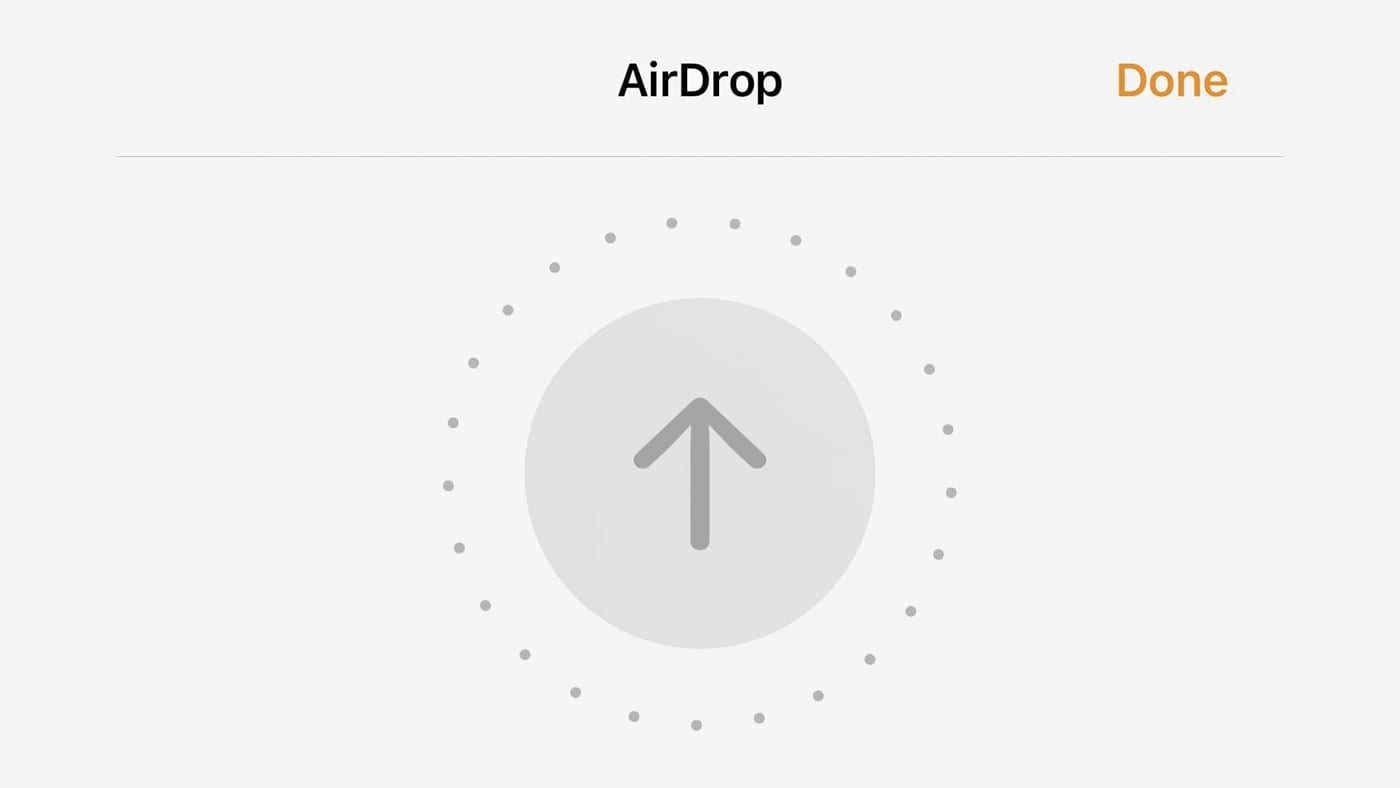
Accept the Files on Your “Receiving” Mac

Once you initiate sending the files, you will receive a message from the other computer, asking if you want to Accept or Decline. You can save them to your Photos app or your Downloads folder.
Though it would help my workflow, I haven’t figured out a way to automatically accept files or drop them somewhere else on my Mac. But I know that could present a security risk. If you have your system set to “Allow me to be discovered by: Everyone” (see above), you will open yourself up to a whole lot of problems you don’t want to have to deal with!


Did you mean left click? Two finger tap is my favorite left click for contextual menus.
Perhaps it is the way the mouse is configured. I believe the default for bringing up the contextual menu for a file in the finder is a right-click when it is already selected – a left click, when selected, would invoke the “rename” feature. I did forget about the two-finger tap, though. Probably because I disabled this for all the errant tapping mistakes I would make. :-)