

Over the years, we’ve recommended using DiskMaker X as a quick and easy way to create a bootable install disk for various versions of macOS. Guillaume Gète, the developer of DiskMaker X, has decided to call it quits with the venerable utility. In explanation, Gète said:
I had a few hopes that thing would look a bit easier for macOS Big Sur, but they sure don’t look better at all. Though using the
createinstallmediacommand works fine from the Terminal, managing to embed it in a meaningful and easy-to-use way seems impossible for me now.Besides, I’ve been working on a lot of other projects in the last years, my own company needs me a lot more, and I feel I went from a fun project for something that seemed to be a life-changer (ok, maybe not that big, but still quite big) tool for many of you, and I’m really, really happy for this.
Mac users wishing to create a bootable install disk for Big Sur now need to use the createinstallmedia command in Terminal, and here’s how to do it. These instructions work to create a bootable install disk for all versions of macOS from macOS 11 Big Sur back to OS X El Capitan 10.11.
What’s needed to create a bootable install disk
- A USB flash drive or other secondary volume formatted as Mac OS Extended, with at least 14GB of available storage
- A downloaded installer for macOS Big Sur, Catalina, Mojave, High Sierra, or El Capitan
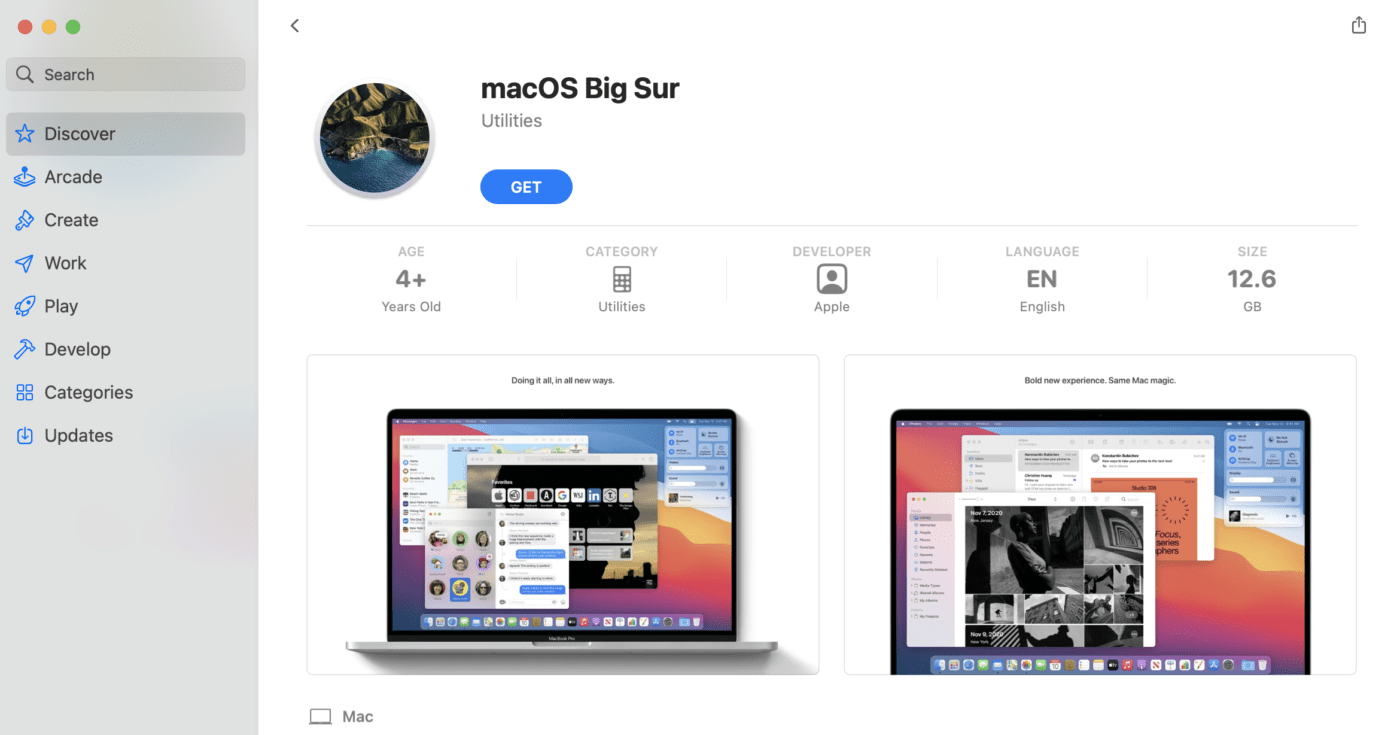
Download macOS from Apple
To ensure that you’re getting a valid, un-hacked, and legal version of macOS, you need to download it directly from Apple. For macOS Big Sur, macOS Catalina, macOS Mojave or macOS High Sierra, the links download an installer directly into your app folder. The installer has the name “Install macOS [version name]”.
For Mac OS X El Capitan, the link downloads a disk image file named InstallMacOSX.dmg. When the file is downloaded, double-click it to install an app named “Install OS X El Capitan” into your Applications folder.
Using “createinstallmedia” in Terminal
Let’s get down to business.
- Plug in the USB flash drive or formatted volume you’re using for the bootable install disk. For this article, I used a 2TB USB hard disk drive erased and formatted as Mac OS Extended and given the name Installer.
- Find the Terminal app in the Utilities folder of your Applications folder. Launch the app.
- At the Terminal prompt, type or copy and paste (easier and more accurate) one of the following commands. These commands are dependent on the installer being in your Applications folder. In each command, replace the name MyVolume with the name of your volume. For my example, I replaced it with Installer.
Big Sur:*
sudo /Applications/Install\ macOS\ Big\ Sur.app/Contents/Resources/createinstallmedia --volume /Volumes/MyVolumeCatalina:*
sudo /Applications/Install\ macOS\ Catalina.app/Contents/Resources/createinstallmedia --volume /Volumes/MyVolumeMojave:*
sudo /Applications/Install\ macOS\ Mojave.app/Contents/Resources/createinstallmedia --volume /Volumes/MyVolumeHigh Sierra:*
sudo /Applications/Install\ macOS\ High\ Sierra.app/Contents/Resources/createinstallmedia --volume /Volumes/MyVolumeEl Capitan:
sudo /Applications/Install\ OS\ X\ El\ Capitan.app/Contents/Resources/createinstallmedia --volume /Volumes/MyVolume --applicationpath /Applications/Install\ OS\ X\ El\ Capitan.appNOTE (*): If your Mac is using macOS Sierra or earlier, include the “–applicationpath” argument and installer path, as shown in the command for El Capitan.
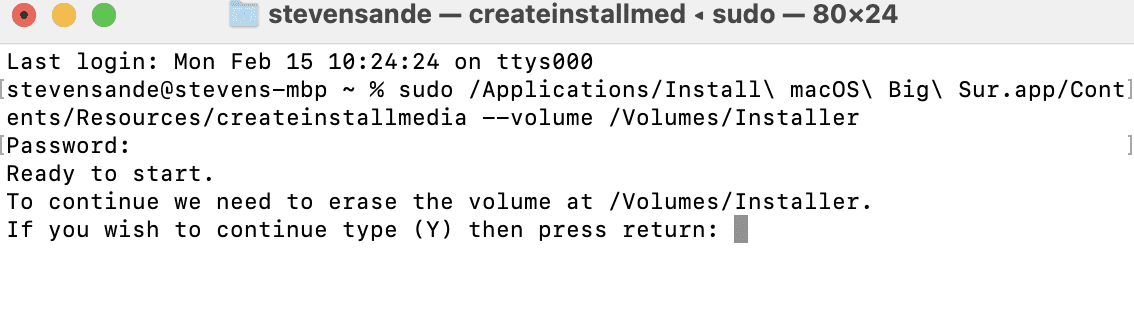
- Once the command has been entered, press Return.
- You’ll be prompted to type your administrator password and press Return again. Note that for security, Terminal doesn’t display characters as you type your password.
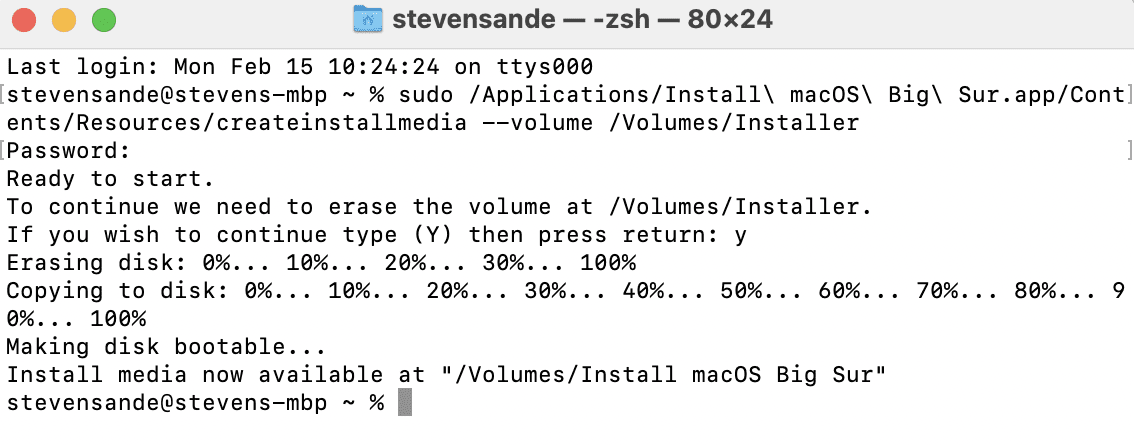
- When you’re asked, type Y to confirm that you want to erase your bootable installer volume, then press Return. Terminal displays the progress of the erasure.
- Once the volume is erased, an alert may appear stating that Terminal would like to access files on a removable volume. If you see this, click OK to allow the copy to move ahead.
- Once Terminal shows that the process is complete, the volume has the same name as the installer you downloaded, such as Install macOS Big Sur. You can now quit Terminal. Eject the volume by dragging it to the Trash or right-clicking and selecting “Eject” from the menu.
Using the Bootable Install Disk
Do you have a Mac with Apple silicon? If so, there’s a slightly different process. To see if your Mac uses Apple silicon, select About This Mac from the Apple () menu. If it shows Apple M1 or another Apple chip, then follow the Apple silicon instructions. Otherwise, use the instructions for an Intel processor.
For Apple Silicon Macs
- Plug your bootable installer into a Mac that has an Internet connection and that is compatible with the version of macOS you’re about to install.
- Turn on the Mac and continue to hold down the power button until you see the startup options window. It displays all bootable volumes (which should be your installer and the internal drive on your Mac), and a gear icon labeled “Options”.
- Select the volume with the bootable installer, then click Continue.
- The macOS installer opens. Follow the onscreen instructions.
For Intel Processor Macs
- Plug your bootable installer into a Mac that has an Internet connection and that is compatible with the version of macOS you’re about to install.
- Restart or turn on your Mac, then immediately press and hold the Option (Alt or ⌥) key.
- Release the Option key when a dark screen appears displaying your bootable volumes.
- Select the volume with the bootable installer, then click the Up arrow or press Return. If you’re unable to start up from the bootable installer, then you’ll need to use these instructions from Apple to allow booting from external media.
- If prompted, select your language.
- Select Install macOS (or Install OS X) from the Utilities window. Click Continue, then follow the onscreen instructions.
It’s a great idea to have a bootable install disk available for those rare emergencies when you might need to re-install your Mac operating system and Recovery Mode isn’t working. With OWC external drives available for as little as $79.75, it’s inexpensive insurance.


Is there a way to make a USB stick with the latest Big Sur installer on it? I don’t need a bootable drive as I have a computer with Big Sur already on it and just want to do the latest update. Basic problem is that the computer is located in a very remote area with only DSL internet which is totally unsuited to handling such a big download. I’d like to make the stick at home and then bring it up and just plug it in and install. As this is not a “full” new install will my plan work?
Thanks
I have followed these steps several time and all seems to go well. I end up with a USB drive with the installer as the only file on the disc. But the disc never appears as a bootable disc when I plug it into another Mac.
Richard, you’re wanting to end up with files inside the installer bundle getting copied to the drive. There has to be a System folder with appropriate contents that would be discovered as bootable.
Have you tried using Diskmaker or Install Disk Creator?
Problem solved… simply too aggressive settings in Little Snitch (app-level firewall). Been using these settings for a LONG time, not sure yet exactly why this problem showed up here, but… just Murphy’s Law at work.
I have been trying for some time to find a legit copy of the High Sierra installer, and was hoping your download links given above would work for me. Unfortunately, they do not. I have tried repeatedly with every combination of browser, logged in/out App Store status, App Store running or not when invoked, etc. that I can think of. All return a “Cannot Connect” dialog, retires allowed but useless. What a I missing? Thanks for any help.
Instead of the actual installer, from the link for High Sierra I’m getting a ‘stub’ that apparently then downloads the real installer during the installation process.
Anyway, when I try to make the USB stick standalone, I get
“/Applications/Install macOS High Sierra.app does not appear to be a valid OS installer application.”
This is INCREDIBLY frustrating, I’m trying to build an installer for a friend who does not have reliable internet and can’t download a 5gb installer to his own machine.
What about Install Disk Creator. https://macdaddy.io/install-disk-creator/
How exactly do those installers download? When I click on one of those links my System Preferences/Software Update window opens as if I’m replacing my existing OS with what I’ve clicked. Am I missing something or am I not understanding the mechanics here?
Not missing anything. The Software Update pane has been handling the download process of macOS installers since Mojave. System Preferences doesn’t itself run major macOS upgrades. It only downloads the standalone installer bundles that run separately.
Thanks. Could it be done using this simply 1-2-3 procedure?
Format target drive as GUID Partition Map and either HFS+ or APFS.
Download the macOS full installer from Apple App Store.
Open the installer and install into the formatted target drive.
No command-line interface. No extra application required. Easy and intuitive. The Mac way!
You are not trying to install the OS on the USB drive. This is to setup the USB drive to boot up and install the OS on the internal HD from the USB key.
Say, not on this topic exactly – but perhaps doing a story on the new Big Sur 11.3 upgrade potentially causing some real problems might be worth a story…