

After capturing a meme-worthy piece of video, you might want to convert it into the popular GIF format. GIFs are smaller in size and compatible with more devices than most video formats. There are many apps in the App Store that perform the video to GIF conversion, but here’s a way to do the deed using nothing but your iPhone or iPad.
Take a Shortcut
The answer lies in the powerful, but woefully underused Shortcuts app that is currently available for iOS and iPadOS. Shortcuts debuts on macOS Monterey this fall. Here are the steps to turn any iPhone video into a GIF you can share on Instagram, WhatsApp, and any other social media outlet.
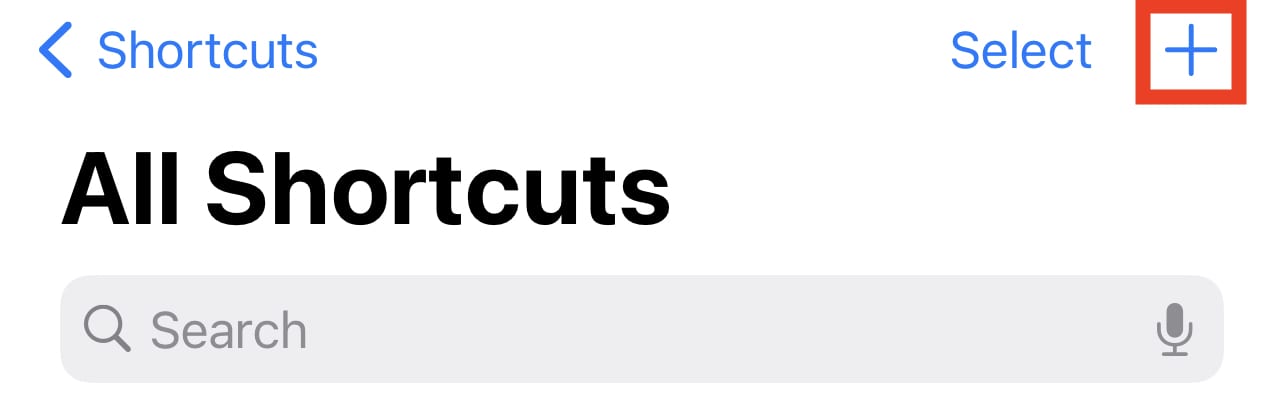
- Launch the Shortcuts app on your iPhone, iPad, or iPod touch.
- Tap the “+” button (highlighted in red below) to add a new Shortcut.
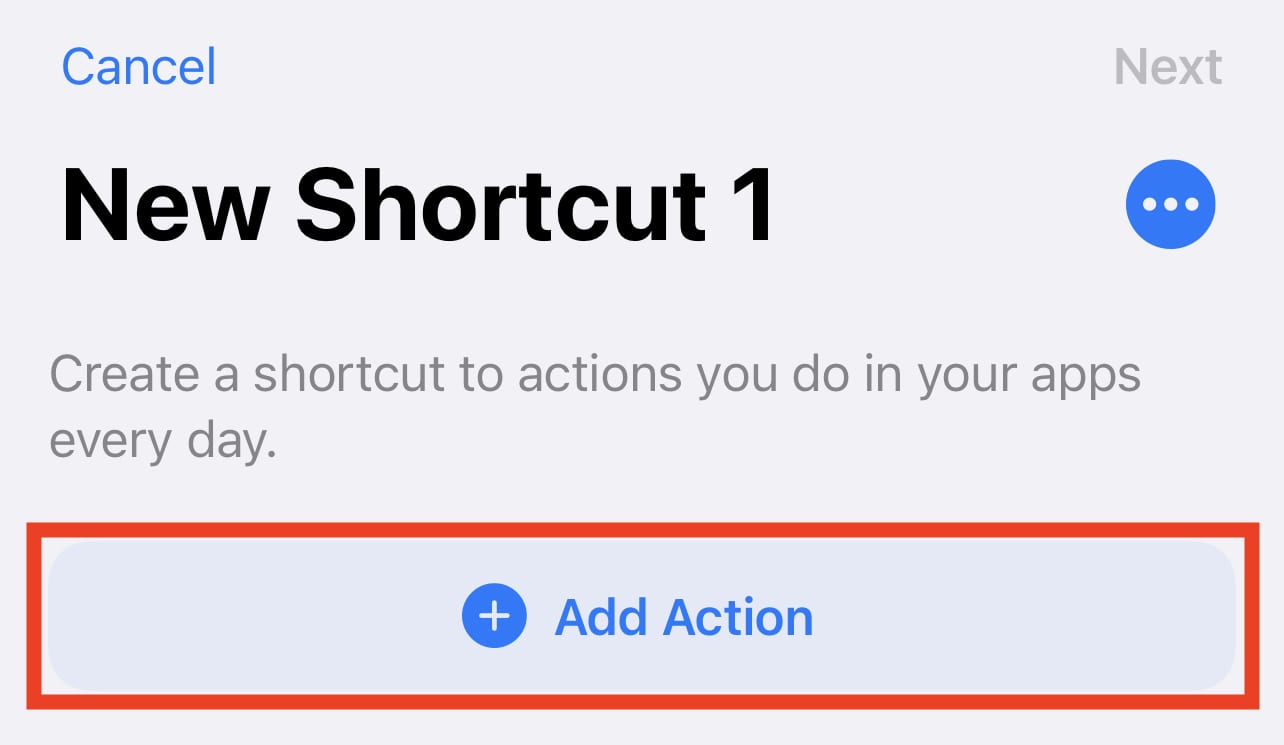
- Tap the Add Action button (highlighted in red below).
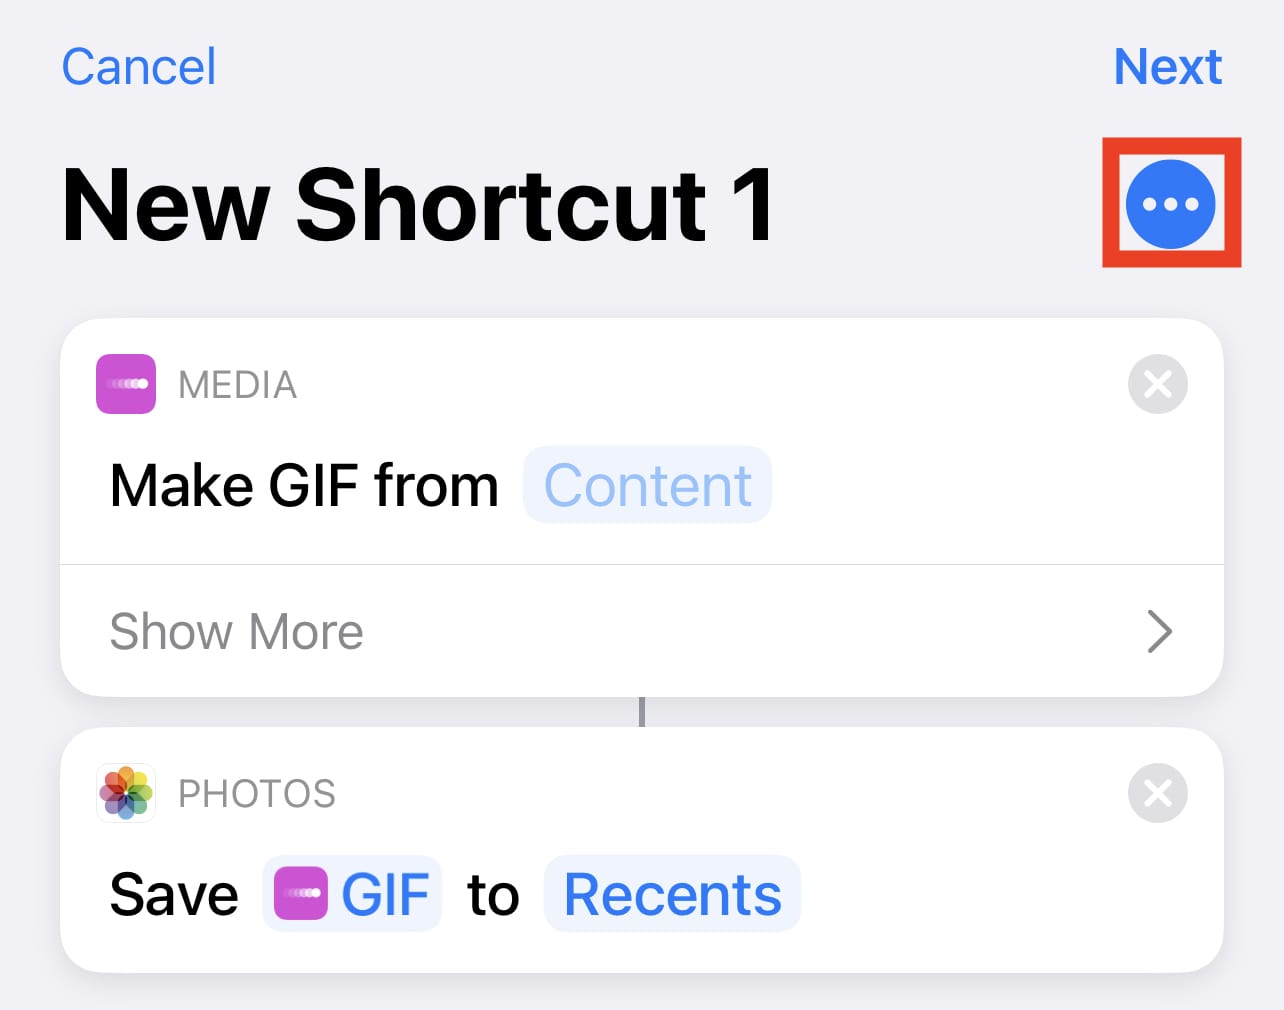
- In the search field at the top of the Actions page, type “gif” to search for GIF-related actions
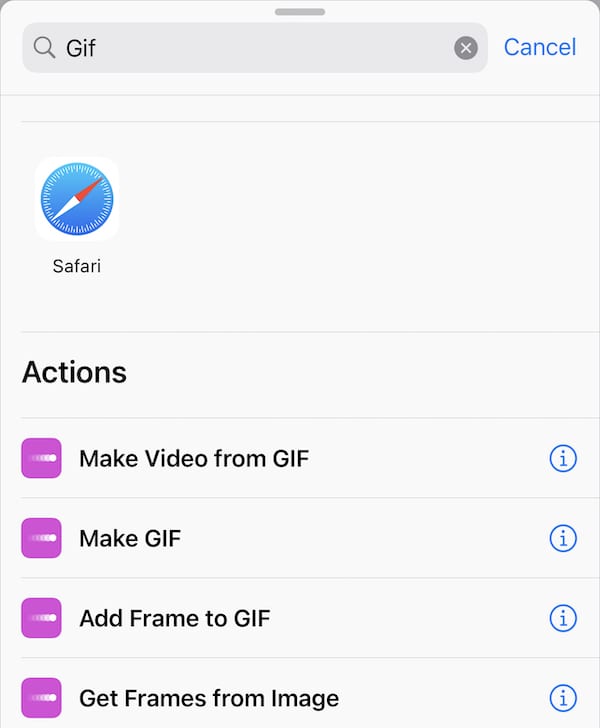
- Do you see what I see? Make GIF is one of the actions built into Shortcuts. Tap on Make GIF. The following shortcut appears:

Adding a Save Action
- Tap the Plus (+) button. Our goal now is to save the GIF that is created by the shortcut. Type Save into the search field at the top of the page that appears. You’ll see a list of actions:
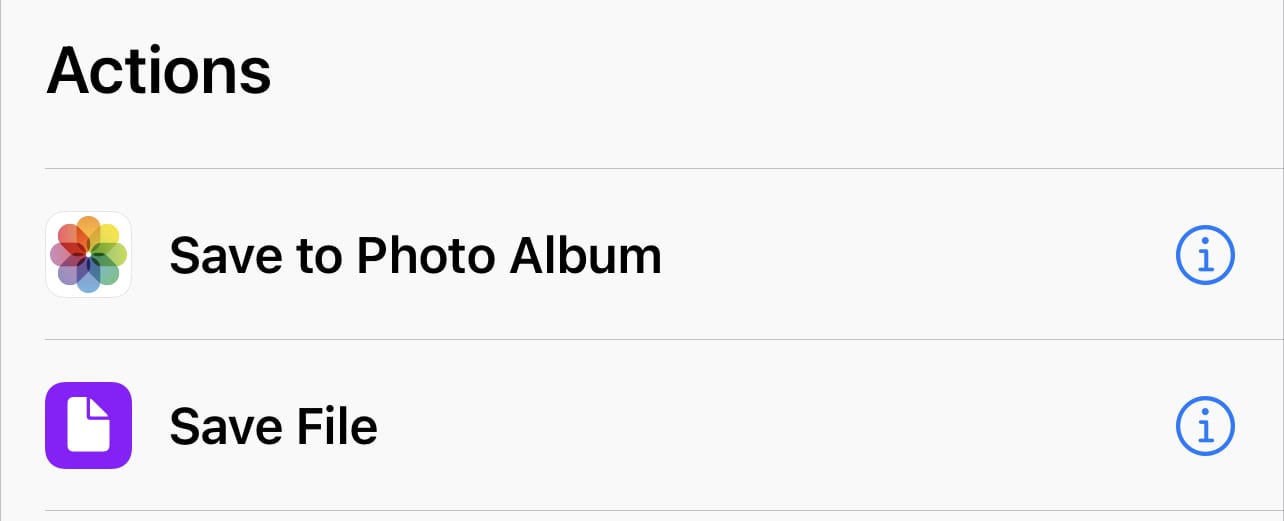
- Tap “Save to Photo Album”. On the screen that appears (see below), tap the … button (highlighted in red):
- On the next screen, do two things: name the shortcut and tap the Show in Share Sheet button.
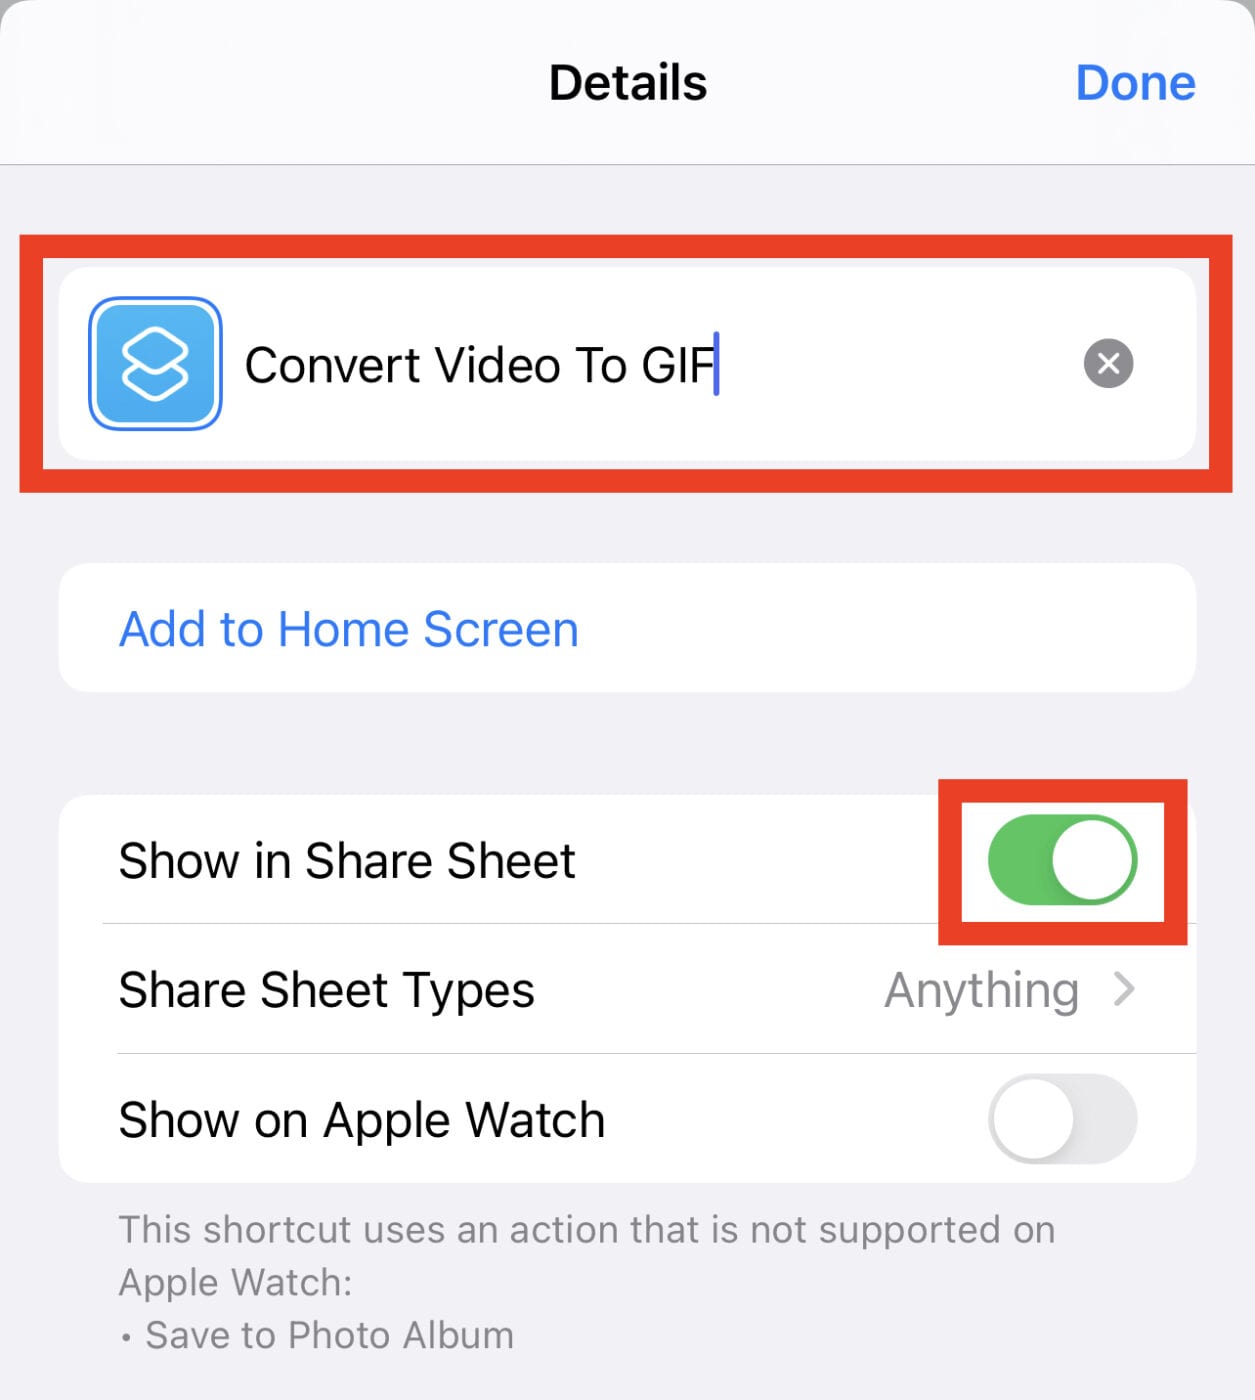
- Tap Done. We’re not actually finished creating our Shortcut, but this saves our work to this point. Now tap on “Content” in the “Make GIF from Content” step of the Shortcut.
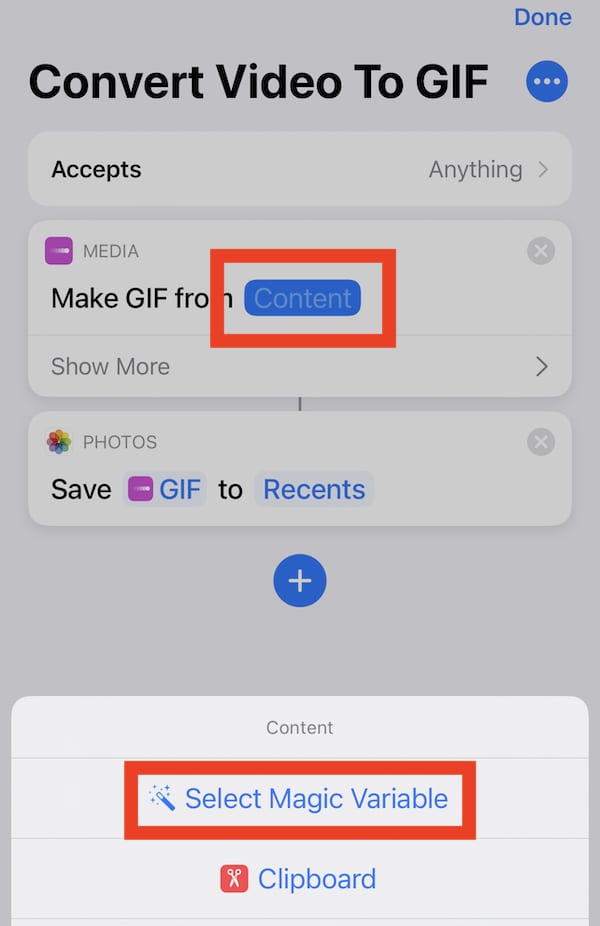
- On the next screen to appear, tap “Shortcut Input”. What this does is pass whatever video we’ve selected to the Shortcut function that converts a video to GIF format.
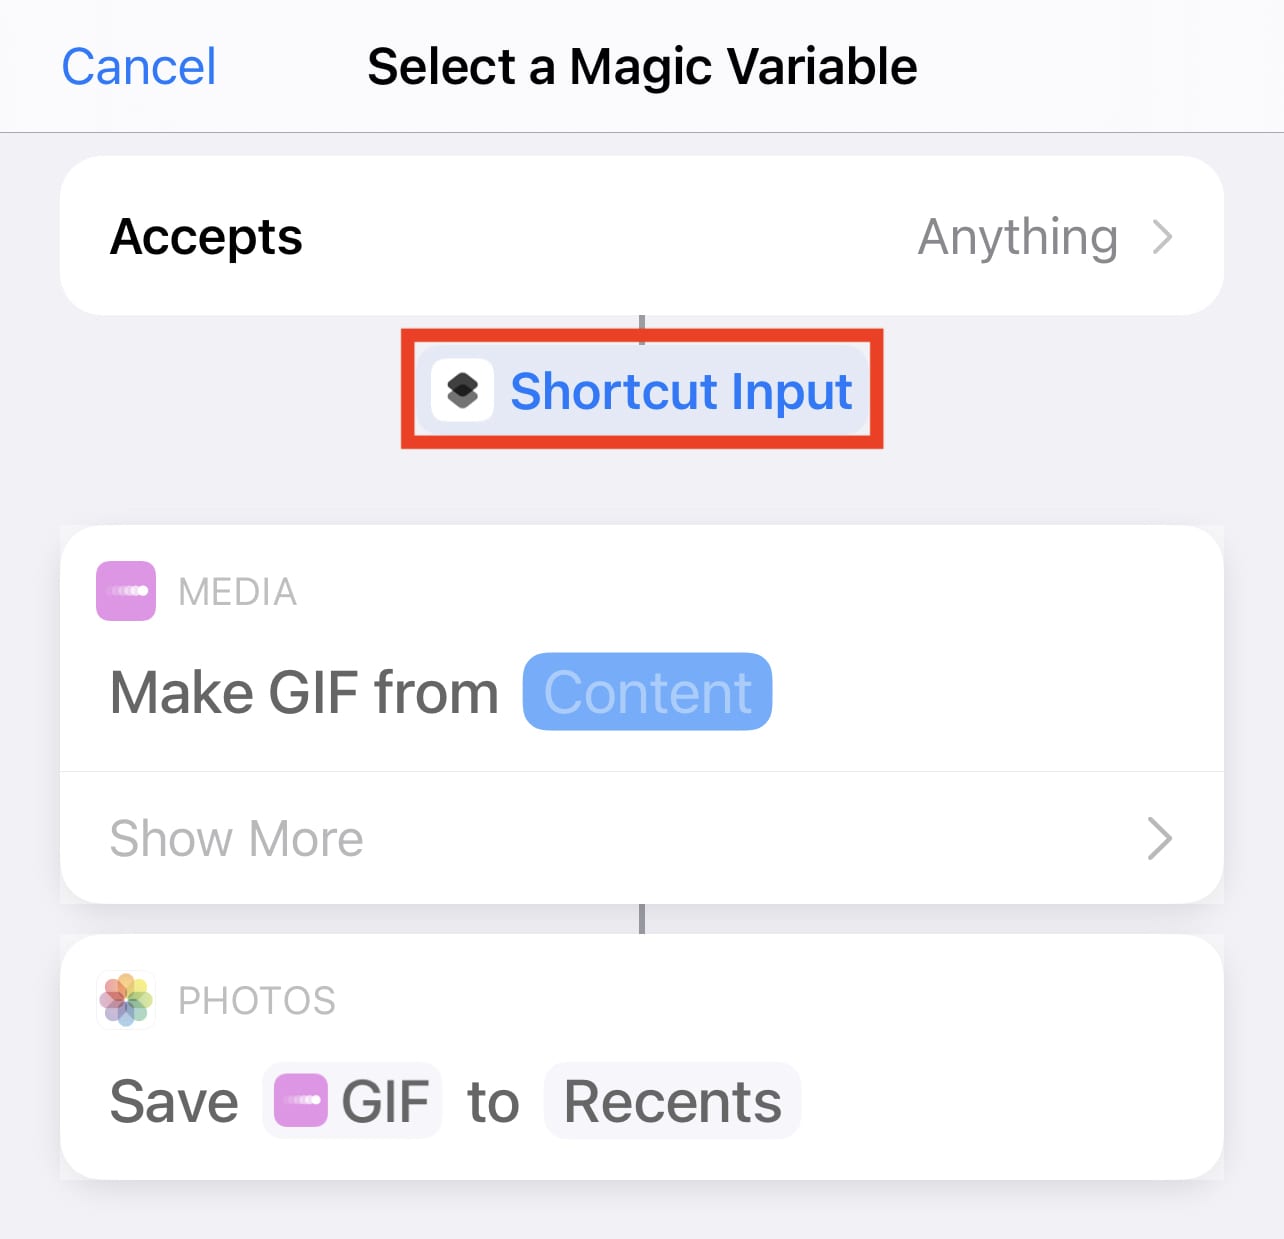
- Tap “Done”. This saves the shortcut on the standard iOS / iPadOS Share Sheet.
Using the Shortcut
You now have a shortcut that converts any video on your iPhone, iPad or iPod touch into a GIF. Let’s give it a try.
- Select a video in the Photos Library. GIFs are usually 15 seconds or less in length, so keep that in mind. To select the video, tap Select (highlighted in red below) and then tap the video you want to convert.
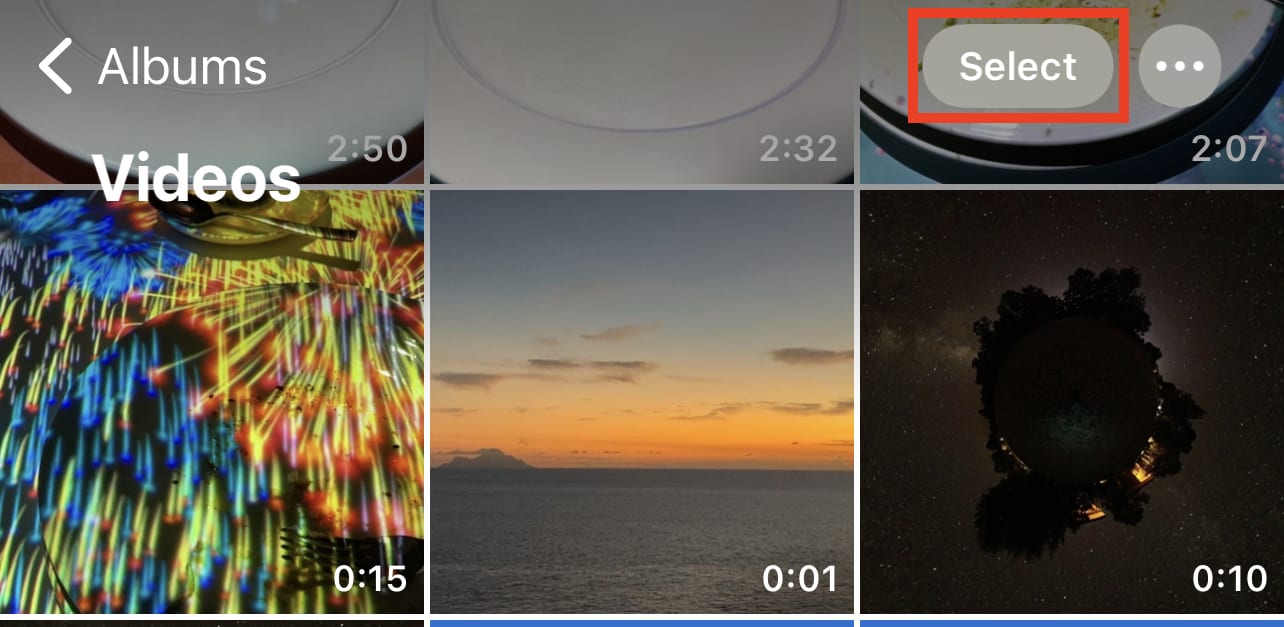
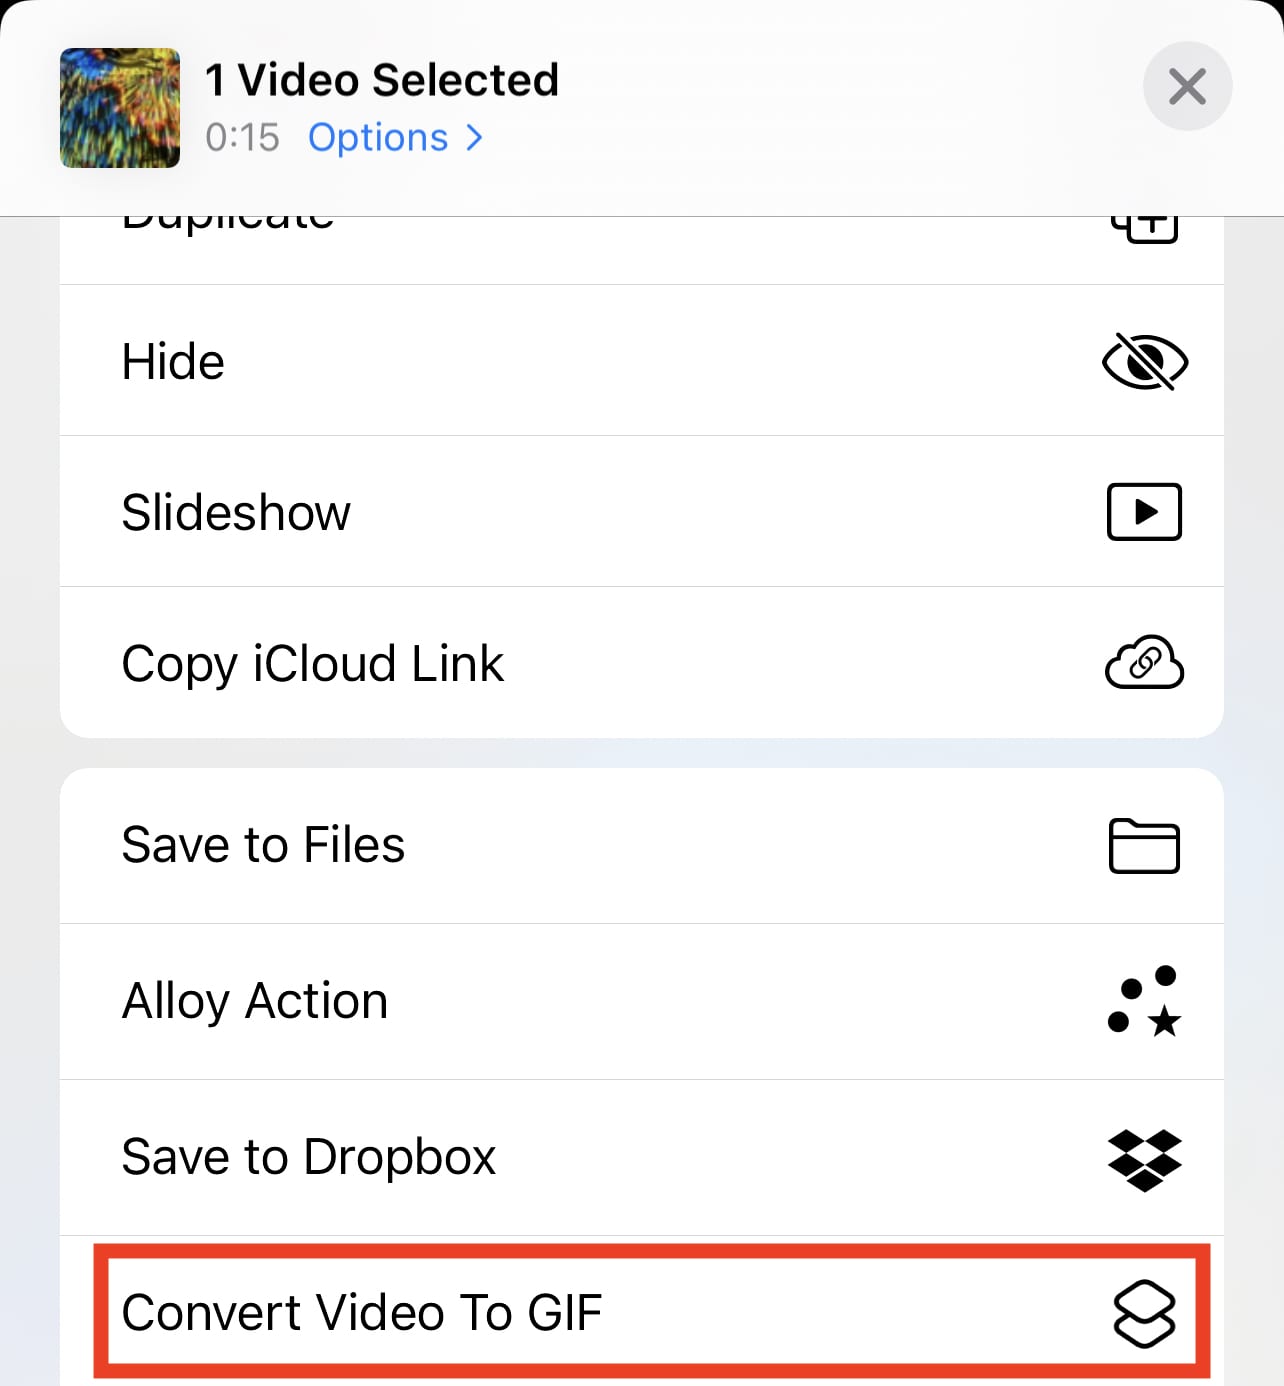
- At the bottom of the screen, you’ll see “1 Video Selected”, the Share button (in red below), and the trash button. Tap the share button.

- Scroll down in the list of share options until you see “Convert Video to GIF” (or whatever you named the shortcut). Tap it.
Your video is converted to a GIF file and saved to the Recents album in your Photos Library. Keep in mind that the GIF is likely to be less smooth than your original video, but it’s also smaller. A long (15-second) .MOV video, 17.8 MB in size, became a 6.8 MB GIF.
The Power of Shortcuts
What this example shows is just how powerful Shortcuts can be. Actions are available for most Apple and many third-party apps, letting Apple users string those apps together in creative ways. I have no doubt that Shortcuts in macOS Monterey is going to unleash a lot of creative shortcuts on the Mac.


I followed all of your steps but when I select the video and click the share Icon, the “Convert Video to Gif” option isn’t there. All I get is:
Copy iCloud Link
Add to Shared Album
Add to Album
Duplicate
Hide
Slideshow
Save to Files
Edit Actions… (link)
Thanks Steve, your clear instructions enabled me to set up my iPhone 7 with IOS 14.7.1 to convert video clips to GIFs. All previous attempts using guidance elsewhere on the internet had failed dismally!
I’m afraid that these instructions don’t work. I am using an 11” iPad Pro running the latest iPadOS.
From almost the outset, the interface is different than the one described in the instructions. By the Make GIF step there is something missing and I cannot progress.
Far too often these step-by-step instructions on you site suffer from a fatal flaw that some step/detail is missing or the image shown is not on my machines – believe me I’ve tried all sorts of things OWC has published on my devices. Some verification about operability should be done prior to publishing.
Hi, Sanjay –
I’m the author of this article, and the same shortcut works on my new M1 iPad Pro and iPhone with no difficulties. I have no doubt that it will work on a Mac running macOS Monterey in a few months. Just to make sure that I wasn’t missing a step somewhere (note that I check my instructions repeatedly when I write how-to articles), I just erased the shortcut from the Shortcuts app, then followed the directions while on my iPad Pro. There is a difference in step 3, as there is no Add Action button since on the iPad and iPad Pro, the actions are listed on the right side of the screen and there’s no need for that extra step. Go to step 4, type gif into the search field on the right top of the window, and tap on the Make GIF action to add it to the shortcut.
There’s also not a + button on the screen, once again because it’s not necessary on the iPad. Type Save into that search field on the right top of the window and tap the Save to Photo Album item to add it to the shortcut. The rest of the steps are the same, except for there is no Done button. Just tap the link to go back to My Shortcuts and you’ll see the Convert Video to GIF shortcut you just created.
I’ll consider adding clarification for the iPad to the article. Thanks for your input!
Steve
This is a far better explanation of how to create and use “Shortcuts” than there is in the iOS manual. Thanks!