

Quick Actions have been in macOS for a while. Right-click (or control-click) on a file in the Finder and Quick Actions appear in the contextual menu. Those Quick Actions are special functions that are useful for the file type you’ve selected. Today we’ll look at a new Quick Action in macOS Monterey called “Convert Image”.
What does the Convert Image Quick Action do?
This Quick Action is quite helpful for anyone who needs to convert a image file from one format (JPG, PNG, or HEIC) to another. It also changes file size to one of four settings — small, medium, large and actual size — while displaying the file size. Finally, you have the choice of whether or not to keep the file’s metadata.
How the Convert Image Quick Action works
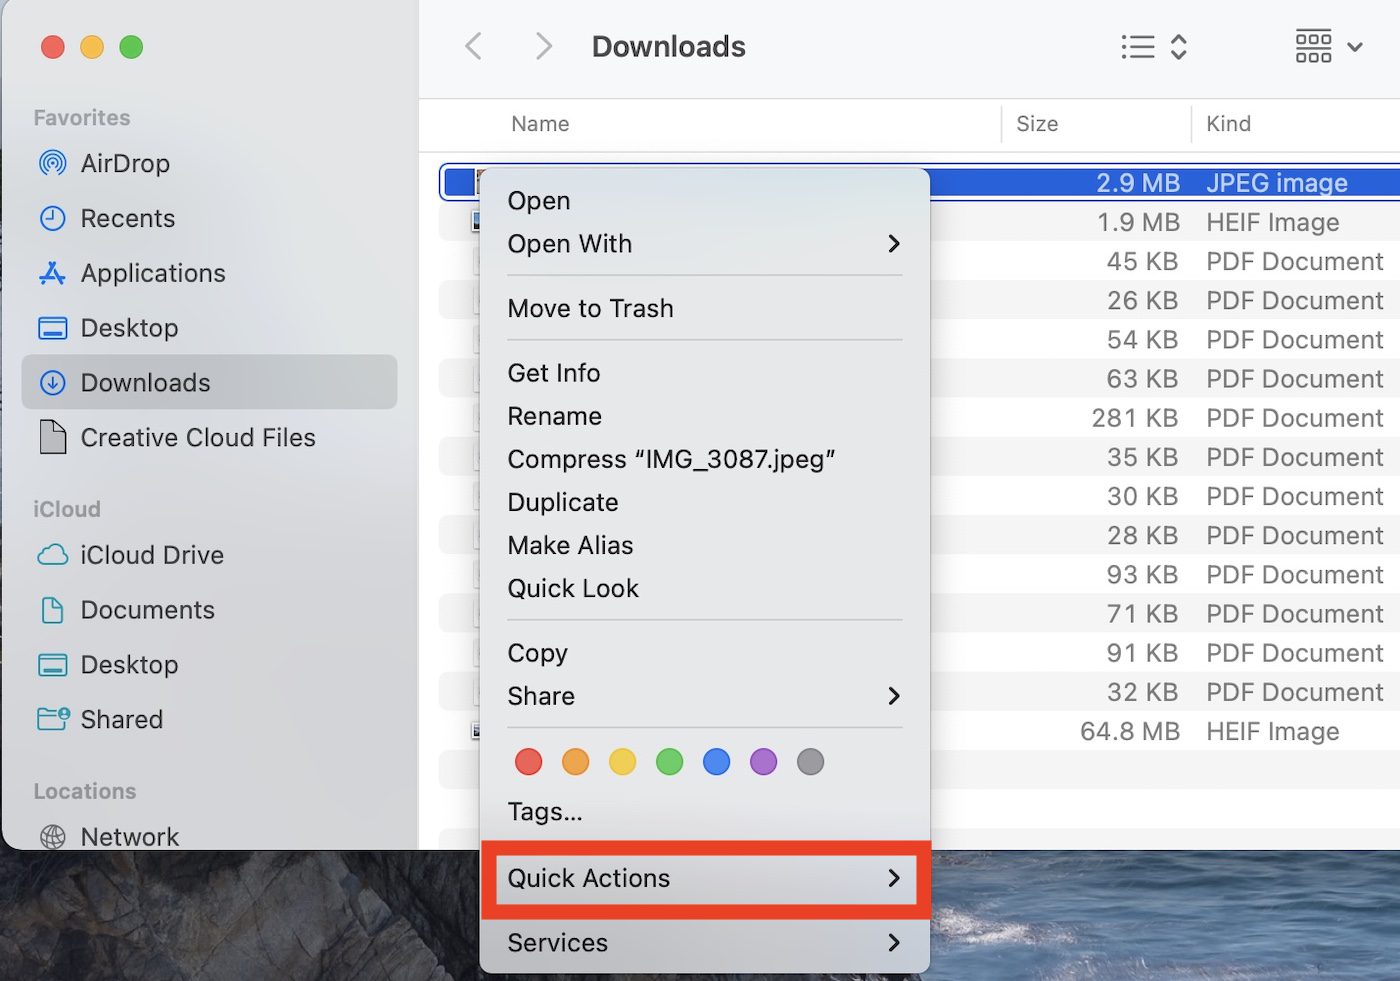
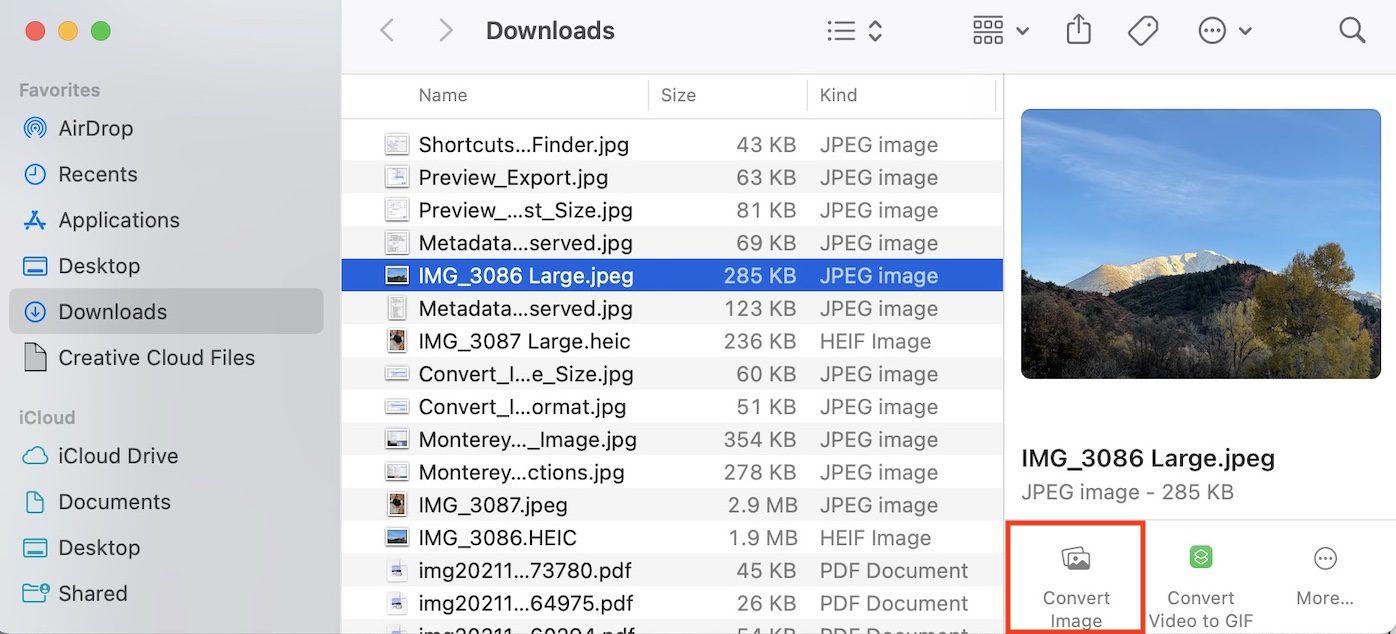
To use the Convert Image Quick Action, right-click on an image file. Quick Actions appears in the contextual menu (highlighted in red below).
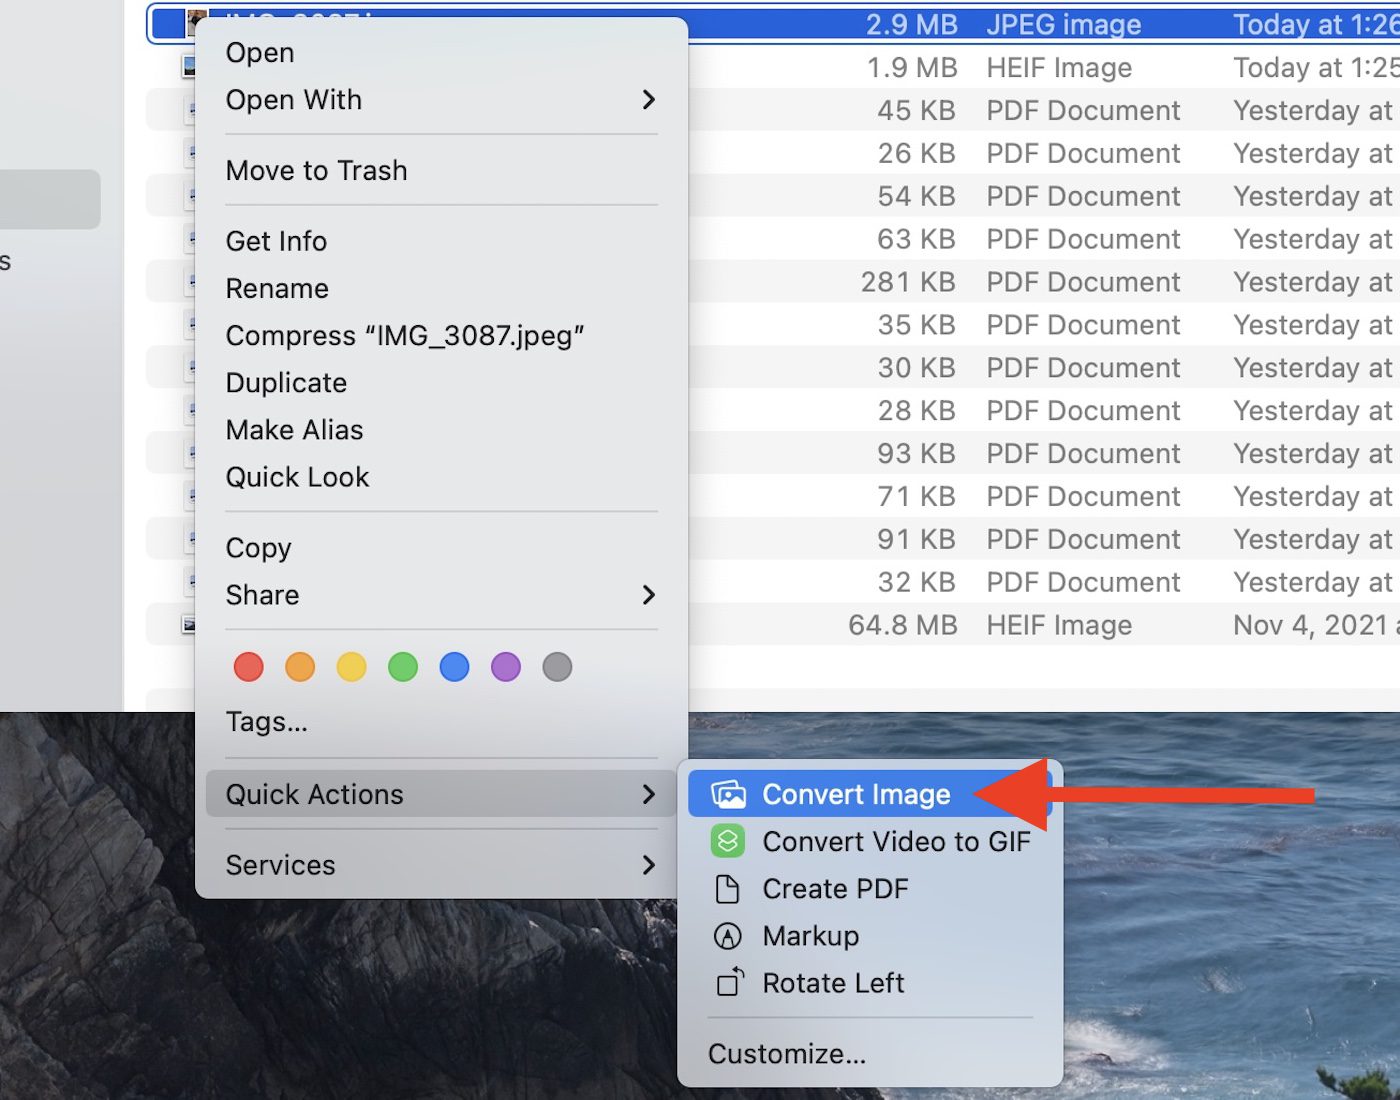
Select Quick Actions, and a sub-menu appears. Choose Convert Image from the sub-menu (highlighted with arrow in the screenshot below).
There are several other Quick Actions available. Convert a video file to the GIF format with a click, create a PDF from almost any file, or rotate an image 90º counterclockwise.
The Convert Image Quick Action dialog is pretty simple. You can change the file type:

Or you can change the file dimensions:
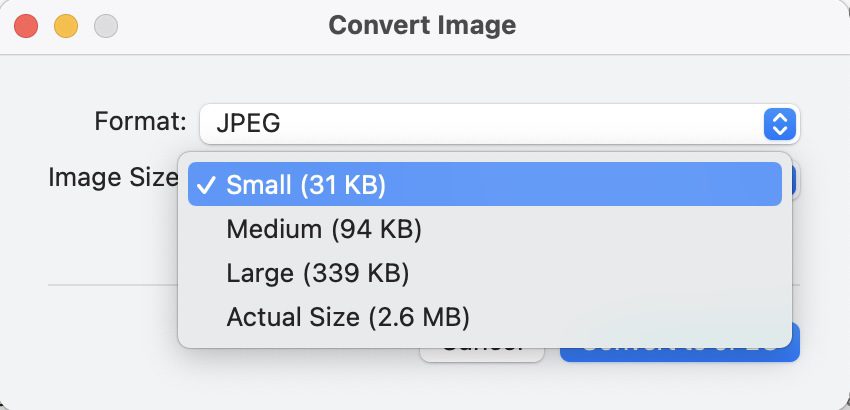
The latter selection is useful when preparing an image file or files that are rather large in size. Select another image sizes and in this example the file goes from 2.6 MB down to 31 KB in size.
I’ll start off by doing some conversion of a picture of my cat. The original image is a 3024 x 4032 JPEG file that is 2.9 MB in size. If I know I’m going to be sharing the image with someone who is also an Apple user, I can use the High Efficiency Image Format. I select HEIC and a Large image size, and the resulting file is 960 x 1280 pixels and 238 KB in size.
By just changing the file format to HEIC and keeping the “Actual Size” image, the file size goes down to 1.7 MB. Likewise, if I have a 4032 x 3024 pixel, 1.9 MB HEIC file that I want to send to someone outside of the Apple ecosystem, I can convert the file to JPEG and small size to reduce the file down to a tiny 22 KB.
Convert Image Quick Action in the Preview Pane
Do you use the Finder’s Preview Pane? To see it, select a file in the Finder and choose View > Show Preview in the menubar. Quick Actions appear in the Preview Pane, and Convert Image is there for image files (highlighted in red below):
Other File Formats
At this point it probably looks like the Convert Image Quick Action can only handle JPG, HEIC and PNG file types. Wrong! Let’s say you want to convert an Adobe Photoshop PSD file to JPG. Image quality may suffer, but the file size is smaller. You don’t need to open or even own Photoshop to make the conversion.
An old image file format called “Tag Image File Format” (TIFF) is a lossless format that usually creates large file sizes. It’s also convertible using the Quick Action.
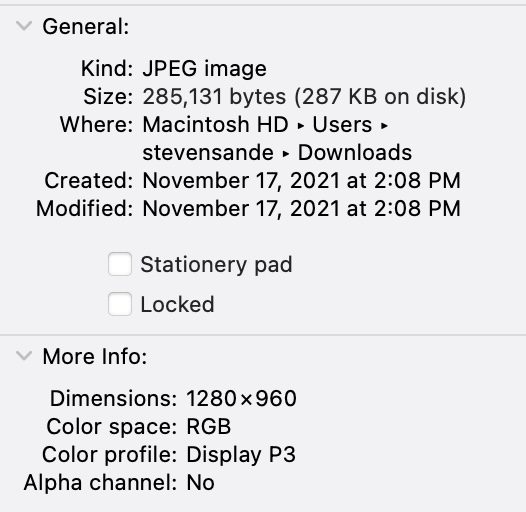
Preserve Metadata…or not
I found the ability to convert a file and take the metadata off of it quite useful. . A lot of information including latitude and longitude appears in this unconvered file info:

Converting the file to a JPG format and unchecking Preserve Metadata not only makes the file size smaller, but gets rid of the extra information:
It’s the same image, but smaller in size and without the location and camera information included.
Need more flexibility?
The Convert Image Quick Action is useful, but limited in what it can accomplish. If you need an image to have specific dimensions or to be in a different file format, open it in the Preview app.
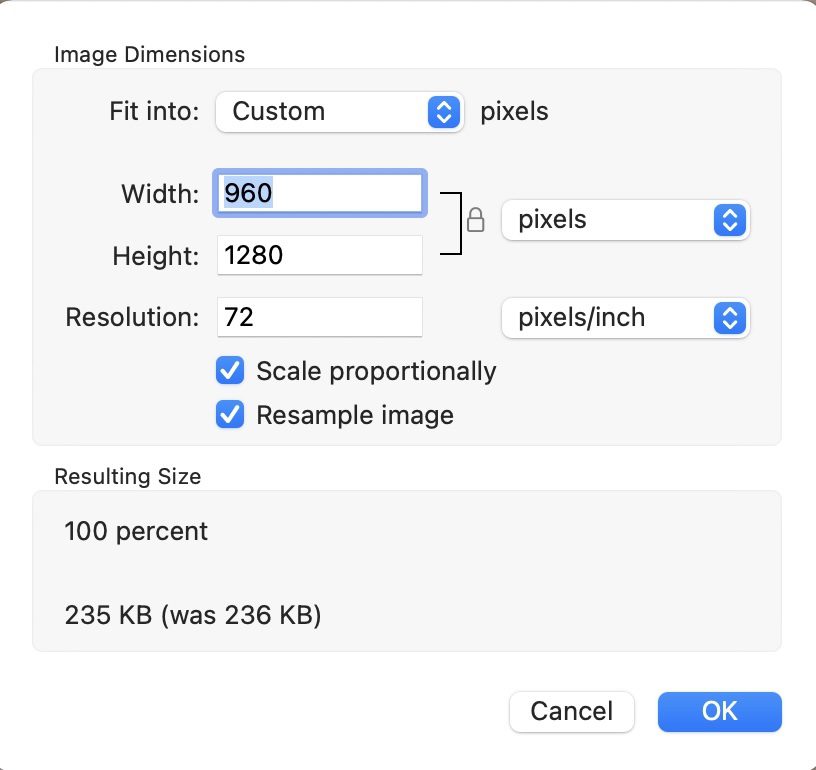
Tools > Adjust Size lets you set the dimensions in pixels, inches, centimeters, millimeters or points, and even adjust the resolution. Retina display screenshots have a resolution of 144 dpi (dots per inch); a file is smaller when downscaled to the web standard 72 dpi.
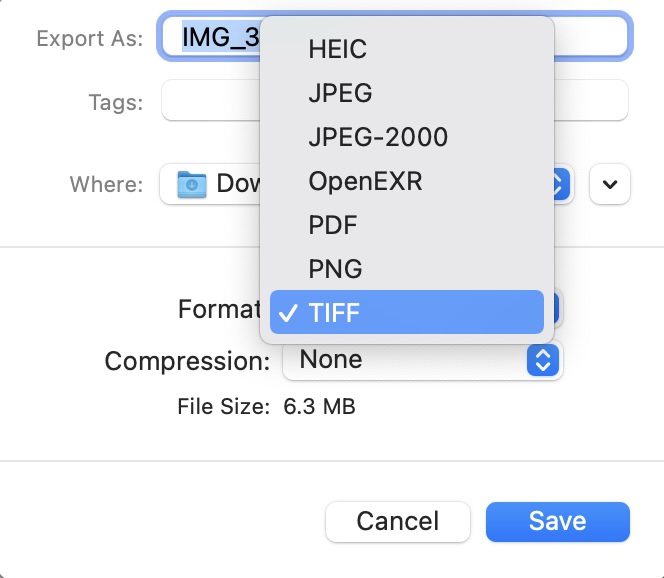
File > Export provides a number of file formats, including HEIC, JPEG, JPEG-2000, OpenEXR, PDF, PNG, and TIFF.
Customizing
Need a specific set of dimensions and file type? Consider creating your own Quick Action in the macOS Monterey Shortcuts app. I won’t go into the details of how to create a Shortcut here. Just know that one of the settings you can choose is Quick Action. Once a Shortcut is set as a Quick Action, it appears in the Quick Actions menu.


It certainly would make more sense if one could do this in photos where you look for an image instead of a file. Let’s hope Apple arrives at the same obvious use case.