

In the latest version of Adobe Premiere Pro, adding subtitles is easier than ever. In the past, Adobe Premiere Pro subtitles have always been a bit fiddly. Creating them has been a complicated, time-consuming process, and a rather frustrating hindrance—particularly at the end of an edit when you’re just about done with the project. Nowadays, you’ll be pleased to know that it’s actually quite a stress-free, streamlined process.
Premiere Pro has undergone relatively minor yet significant changes that have really changed the game. With a few clicks, you can now have your whole video transcribed (in multiple different languages) and captioned! In this video, we show you exactly how to add subtitles in Premiere Pro.
Creating a transcript
The first step is to create a transcript.
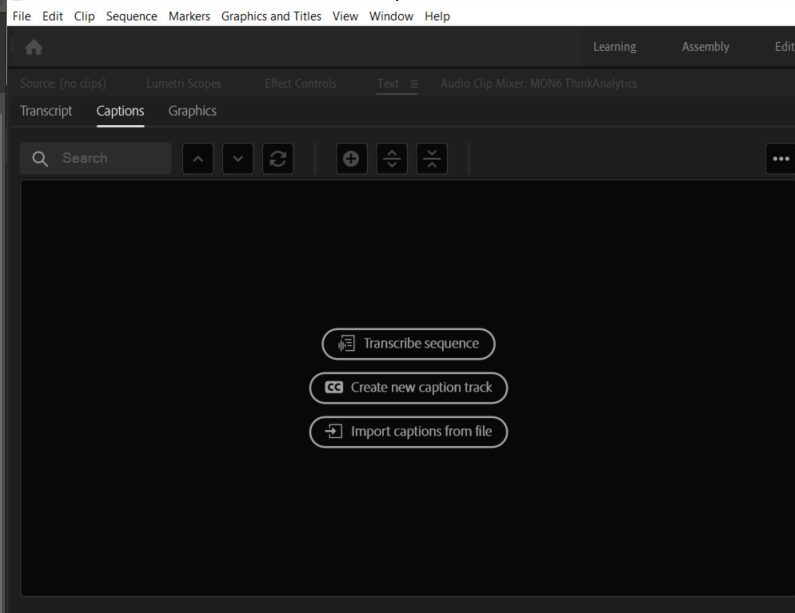
1. With your footage on the timeline. navigate to the Captions and Graphics tab at the top.
2. In the Text window that appears, click Transcribe Sequence. The Create transcript dialog opens.
3. Here, you can select which language you want to transcribe to, which audio tracks you’re analyzing, and whether you want to identify different speakers.
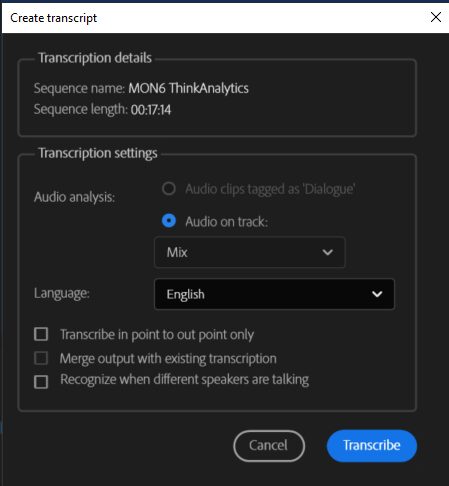
4. Once you’re happy with your chosen settings, go ahead and click Transcribe. Depending on the length of footage and how fast your internet is, Premiere Pro will take a few moments to transcribe.
Creating captions
To create your captions:
1. In the Transcript window that opens in the Source Monitor, you’ll see your transcript. From this, you can go ahead and click Create captions.
2. In the Create captions dialog, make sure you’ve selected Create from sequence transcript and refine your settings. I tend to go single line, max characters 42, minimum duration 1.2 seconds. All of these preferences are totally up to you.
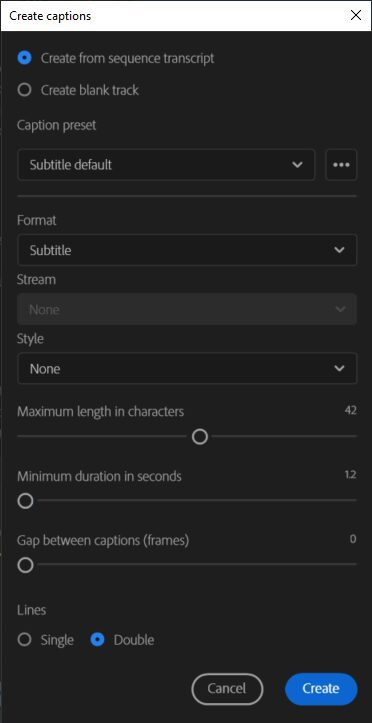
3. When you’re happy with the settings, click Create and your captions will appear in a matter of seconds.
Editing the captions
Using the playhead, you can scrub through your captions on the timeline. In the Text window on the left, you’ll see how each caption is highlighted as the playhead passes over it. Use this to make any necessary changes to your subtitles.
- Select the Captions track.
- To the right of the Program Monitor, you’ll see the Essential Graphics panel. Click the Edit tab. Here, you can change the size of the text, give the subtitles a background, change the size and opacity of that background, and much more.
- Under Track Style, select Create Style from the drop-down menu. You can save the style you’ve created, and this will then be applied to all the captions on your timeline for this sequence.
Uses of subtitles
Adding Adobe Premiere Pro subtitles is a great way to improve the quality of your film. While perfect for translating interviews and for navigating patchy audio in various documentary situations, captions are also proving more and more useful for short-form online content.
Many people now watch social media videos while scrolling through feeds with their sound muted. Being able to see and read the subtitles helps to draw them in and keep them watching the video.


