


The iPhone, iPad, and iPod touch are all perfect devices for gathering information anywhere. Rather than tapping that information into a tiny cell in a spreadsheet, create a form in the Numbers app for smoother data entry. In this post, I’ll show you how to use a feature in Numbers for iOS and iPadOS to make and use forms for data entry.
How Numbers forms work
Once you’ve created a Numbers form, entering data into it automatically adds the data to a spreadsheet table linked to the form. This is useful for adding data to simple tables that use similar information. Examples of these tables include inventories, class rosters and attendance tables, surveys, and address lists.
Forms using Apple’s Scribble capability allow data entry into forms directly from an Apple Pencil. Numbers convert the handwriting to text, then add the data to the linked table. Have a group of people collecting survey information with iPads or iPhones? Forms work with shared spreadsheets so the entered data is accumulated in a shared table.
Want to know what’s new in Numbers for iOS and iPadOS? Check out this Apple article.
Creating a form
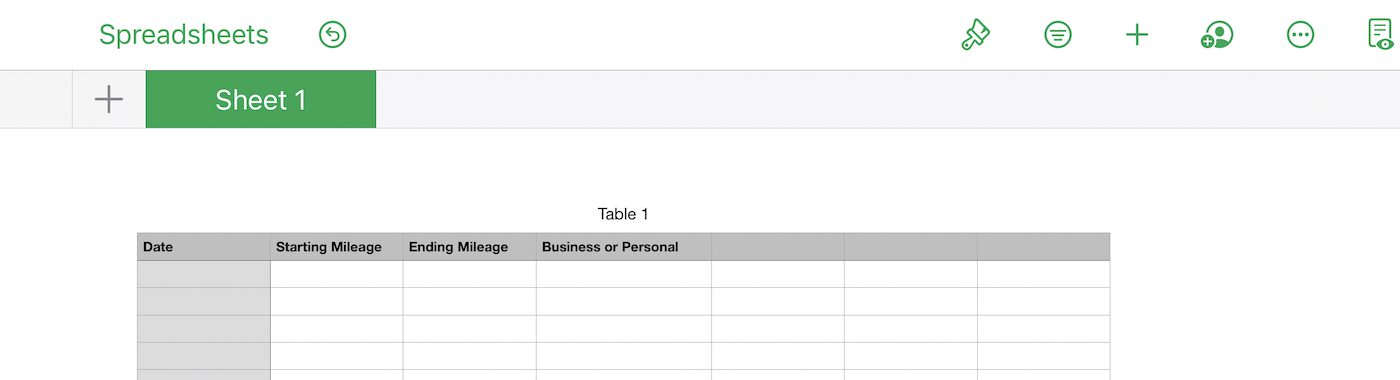
For this article, we’ll create a logbook for tracking mileage. This is useful for small business tax records. Each record (row) includes date/time stamp, starting mileage, ending mileage, total miles driven, and if the drive was for business or personal use.
If you already have a spreadsheet table in Numbers, it’s simple to create a form from the row headers. For example, here’s a spreadsheet to capture date and time, starting and ending mileage, and business/personal use. Adding a simple calculation to determine miles driven can be done later:
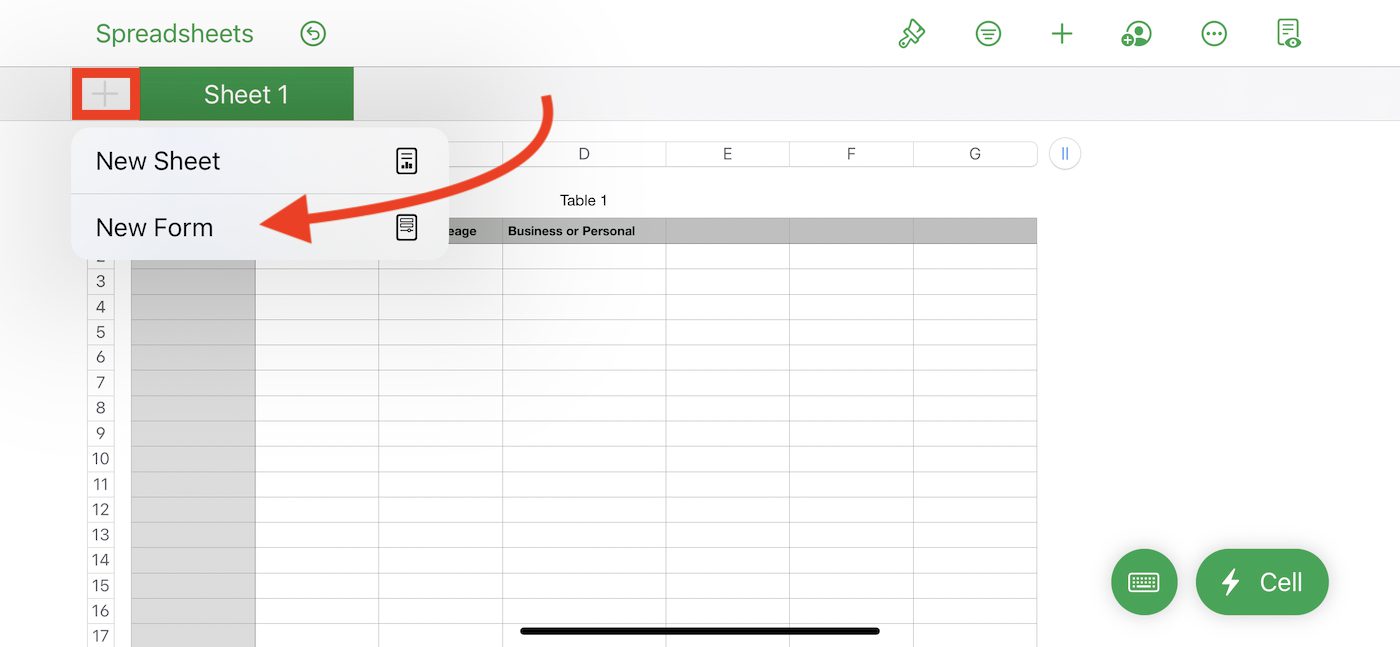
To create a new form, click the plus sign button ( + ) just under the Spreadsheets button (see image below). A popup appears with two choices — New Sheet or New Form. Select New Form.
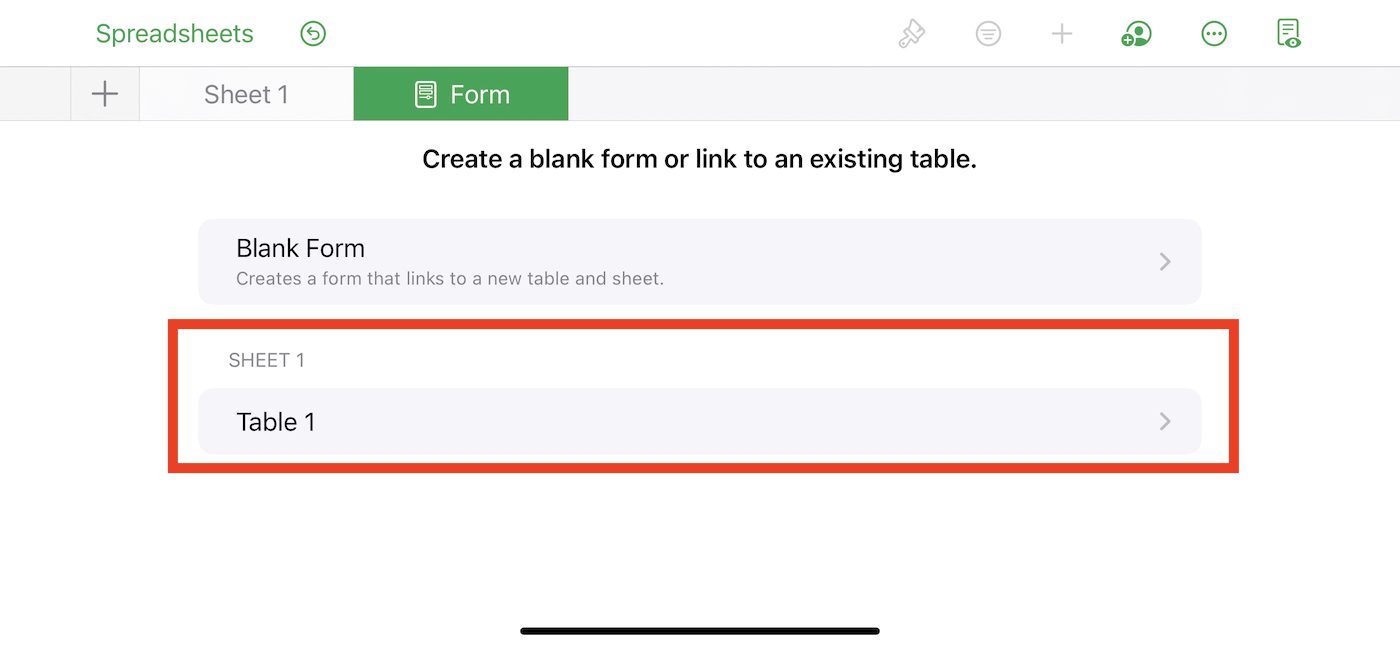
You’re now asked to create a new sheet and a new form that is linked, which is what you’d do if you hadn’t already created a spreadsheet. In our case, we take the second option, which is to create a form from an existing sheet and table:
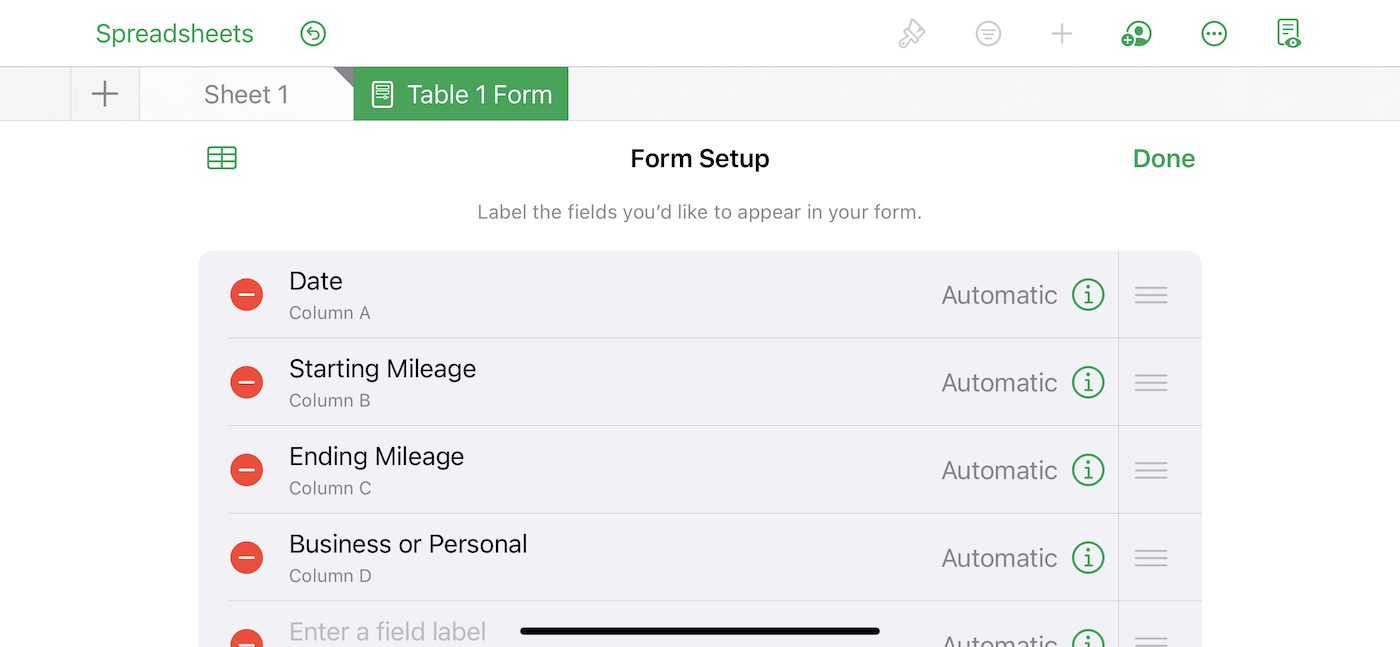
Click “Table 1” under Sheet 1, and a Form Setup window is displayed (see image below). Don’t like the existing labels on the form? It’s possible to change them by selecting the labels and typing in the preferred label text.
Defining field format
This is also a good time to set the format for each field. For date, we want to set “Date & Time” as the format so it’s impossible to accidentally enter text or a single number. To do so, tap the green “info” circle at the right side of each field and a list of possible field formats appears (at left below). Then select Date/Time.
Want a specific format for date and time? Tap the info circle next to Date/Time and a list of possible date and time formats appears (at right below).

For the Starting Mileage and Ending Mileage fields, we selected Number as the format, then chose to have one digit after the decimal point (allowing tenth of mile increments).
To make data entry simple for the “Business or Personal” field, we selected Pop-Up Menu as the format. There are two choices: Business and Personal. After defining field formats, I tapped the “Sheet 1” tab to open my spreadsheet and table. To automatically calculate the total mileage driven, I created a calculation subtracting the starting mileage from the ending mileage, then copied and pasted that calculation into the cells below the first calculation.
Numbers automatically adds the calculated mileage to the bottom of the form, showing the number in gray (instead of black) to indicate that it was calculated and not entered.
Entering data
Ready to take a road trip? Let’s enter some data into the form by opening the spreadsheet and tapping our form (I’ve renamed it from the default “Table 1 Form” to “Entry Form”):

Tap the Date field on the form, and a data entry window appears:
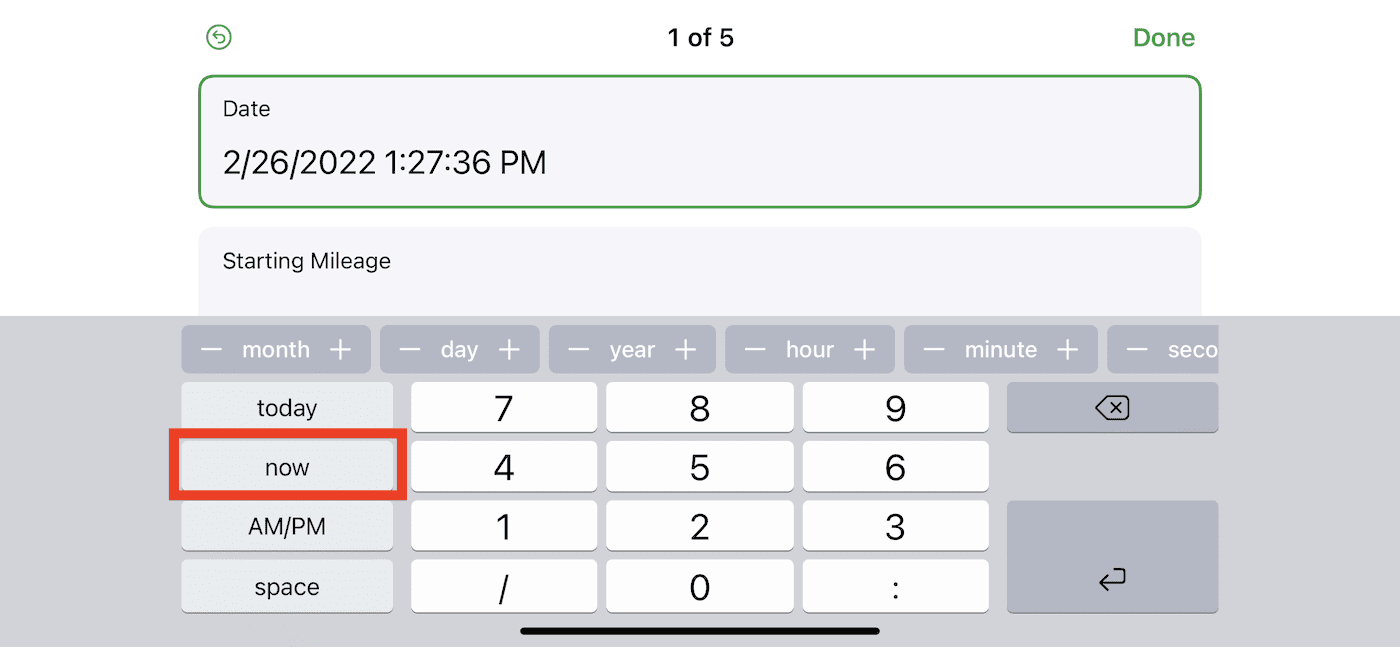
We can tap the “now” button to automatically enter the date and time to the second—no typing required! For the starting and ending mileage, tapping the form fields displays a much simpler data entry keyboard:
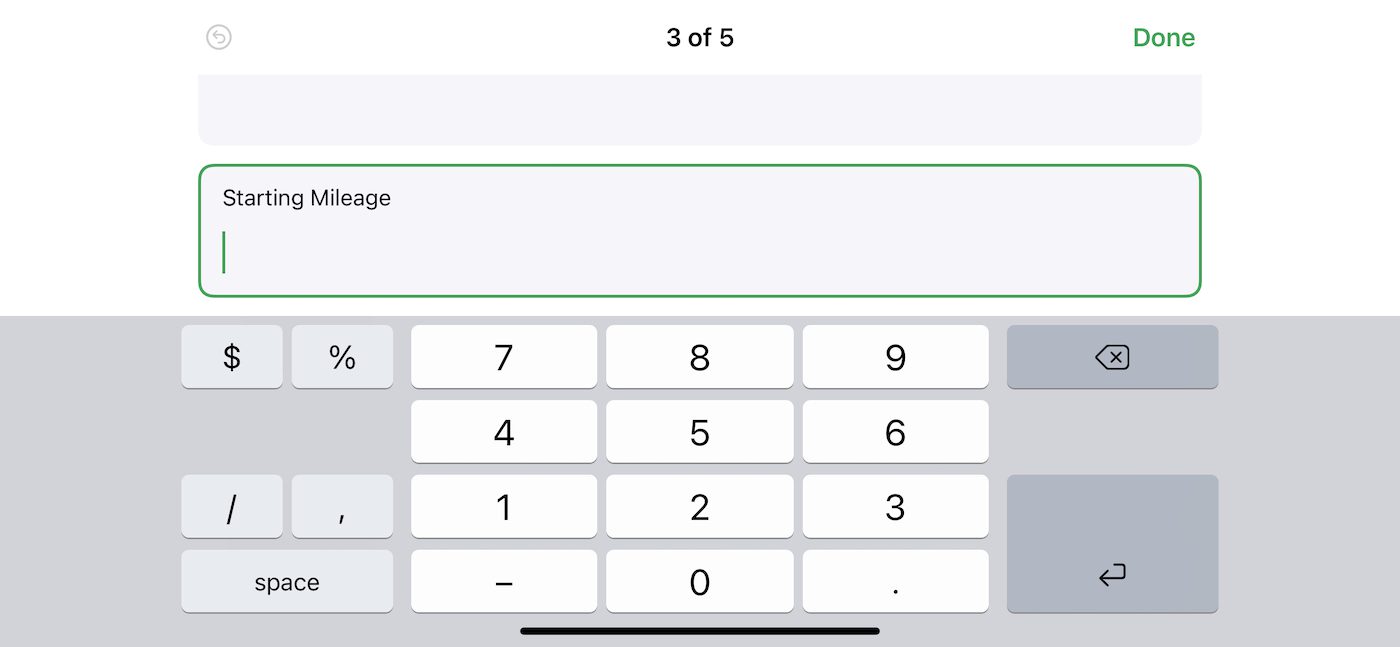
Here, simply tap in the starting (or ending) mileage, then tap the Return key at the bottom right to enter the number and move to the next field.
The Business/Personal popup menu works by displaying the two choices at the bottom of the display. Tap one or the other to select it:
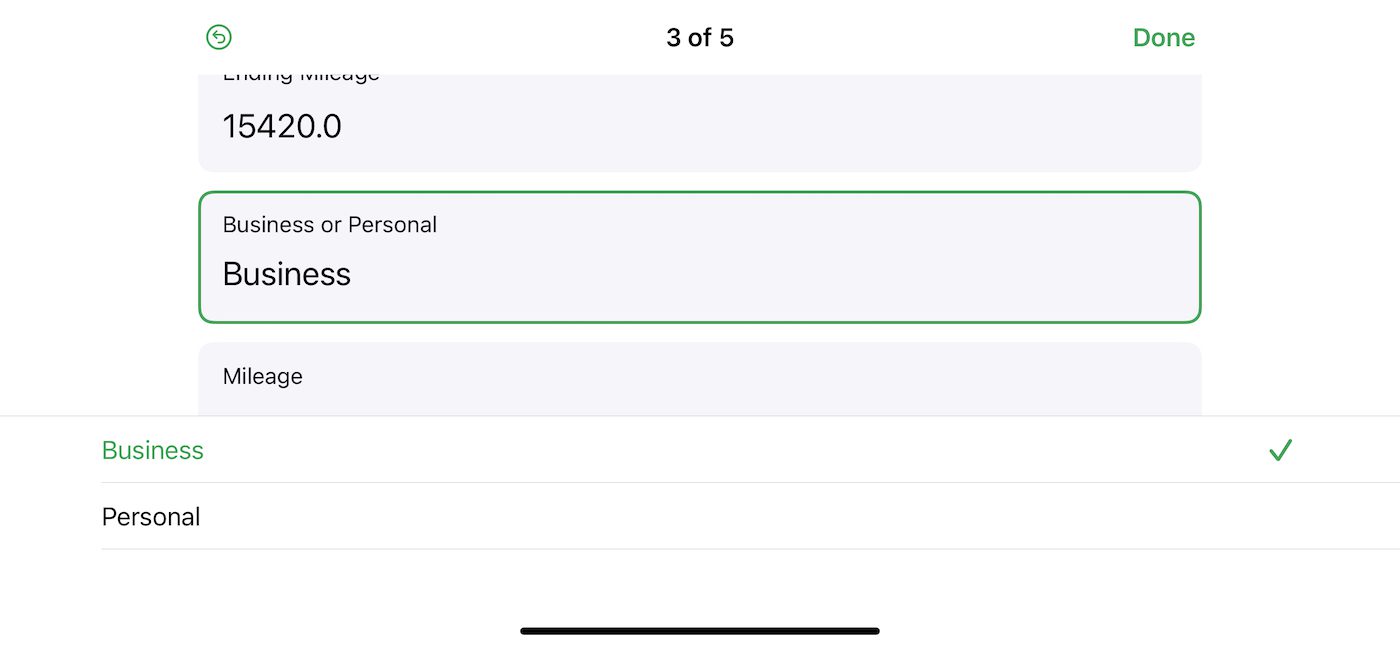
It’s easy to see how useful a popup like this could be when you have more than two choices!
Viewing the data
Once you’ve collected data using the form, simply tap on the associated spreadsheet and table to view the entries:
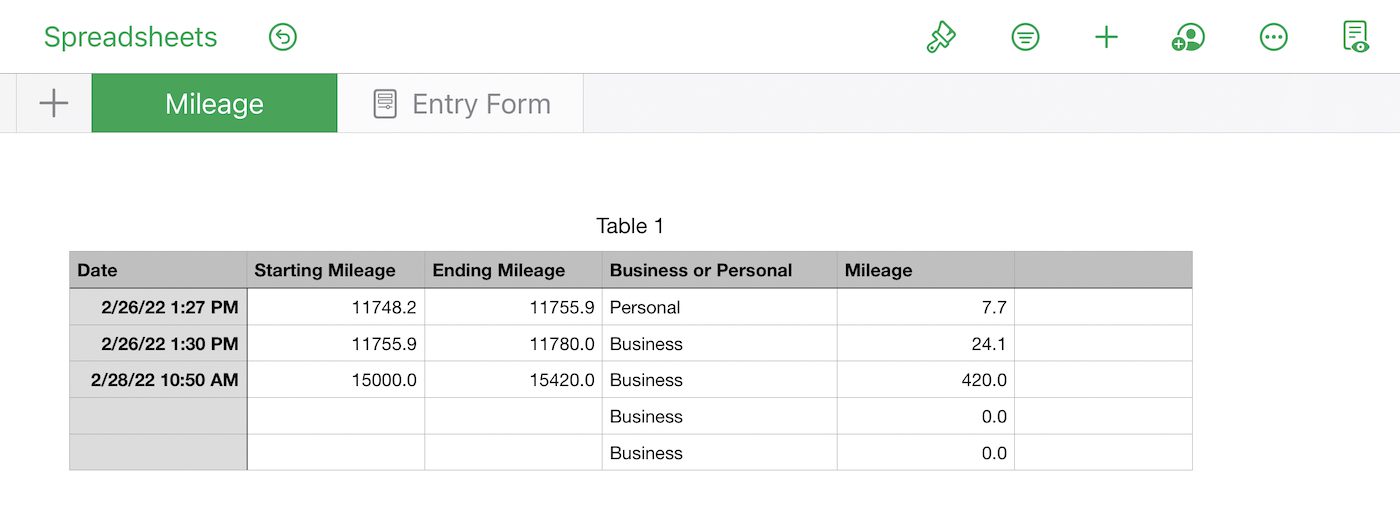
As with all Numbers spreadsheets, this data can be manipulated further by adding calculations or sorting the records (rows) by business or personal usage. Sharing a sheet with another user is as simple as tapping the … button, and collaborating with a team (perhaps a fleet of vehicle users in this example) is done by tapping the Share File button (to the right of the plus + button).
Using Numbers forms to ease data entry is a fantastic way to use your iPhone, iPad, or iPod touch to capture information and eliminate paper. Try the form function for your next data gathering needs!


this third party number row keyboard with number row looks like almost native one
https://apps.apple.com/us/app/number-row-keyboard/id1264816696
Sorry Steve, on my 2020 M1 Mac mini, Numbers version 11.2 (7032.0.145) does not have a Form option available when clicking the plus sign.
Perhaps checking this out first????
….. Just saying
I could not get it to work on iPhone 11 and Numbers 11.2 but there was no Minimum Requirements shown in your article, I guess it just assumed that everyone had the latest version of device and application.
Okay, so I’ve got the latest version, 11.2, of Numbers.
I’ve clicked on the + sign, the spreadsheet and never have gotten anything called Forms.
Then I went tot he comments, below, and you say “Sadly, Apple hasn’t built that functionality into the macOS version of Numbers yet. I hope Forms are added this year!”
How can I do that, then, in Numbers as the tutorial suggests?
Can Forms be created in macOS? I don’t see the option nor does search turn anything up.
Hi, Greg –
Sadly, Apple hasn’t built that functionality into the macOS version of Numbers yet. I hope Forms are added this year!
Steve