


iCloud+ combines most of the things we like about iCloud with new premium features, including HomeKit Secure Video support. And it’s easy to set up with macOS!
About HomeKit Secure Video
Apple HomeKit Secure Video enables you to securely store activity detected by Eve Outdoor Cam in iCloud. Using on-device intelligence, Apple TV or HomePod can determine when a person, animal, vehicle, or package is present before securely storing the recording in iCloud for you.

A 10-day recording history is available to view in the Apple Home app on your iPhone, iPad, or Mac. HomeKit Secure Video requires iCloud+ (not included). iCloud+ with 50 GB storage supports one camera, iCloud+ with 200 GB storage supports up to five cameras, and iCloud+ with 2 TB storage supports an unlimited number of cameras. Camera recordings don’t count against your iCloud+ storage limit. See how to upgrade to iCloud+ or change your storage options by clicking here.
You can access your HomeKit Secure Video on your iPhone, iPad, iPod touch, Mac, or Apple TV if you or someone in your Family Sharing group has an iCloud+ subscription.
How to set up HomeKit Secure Video on your Mac
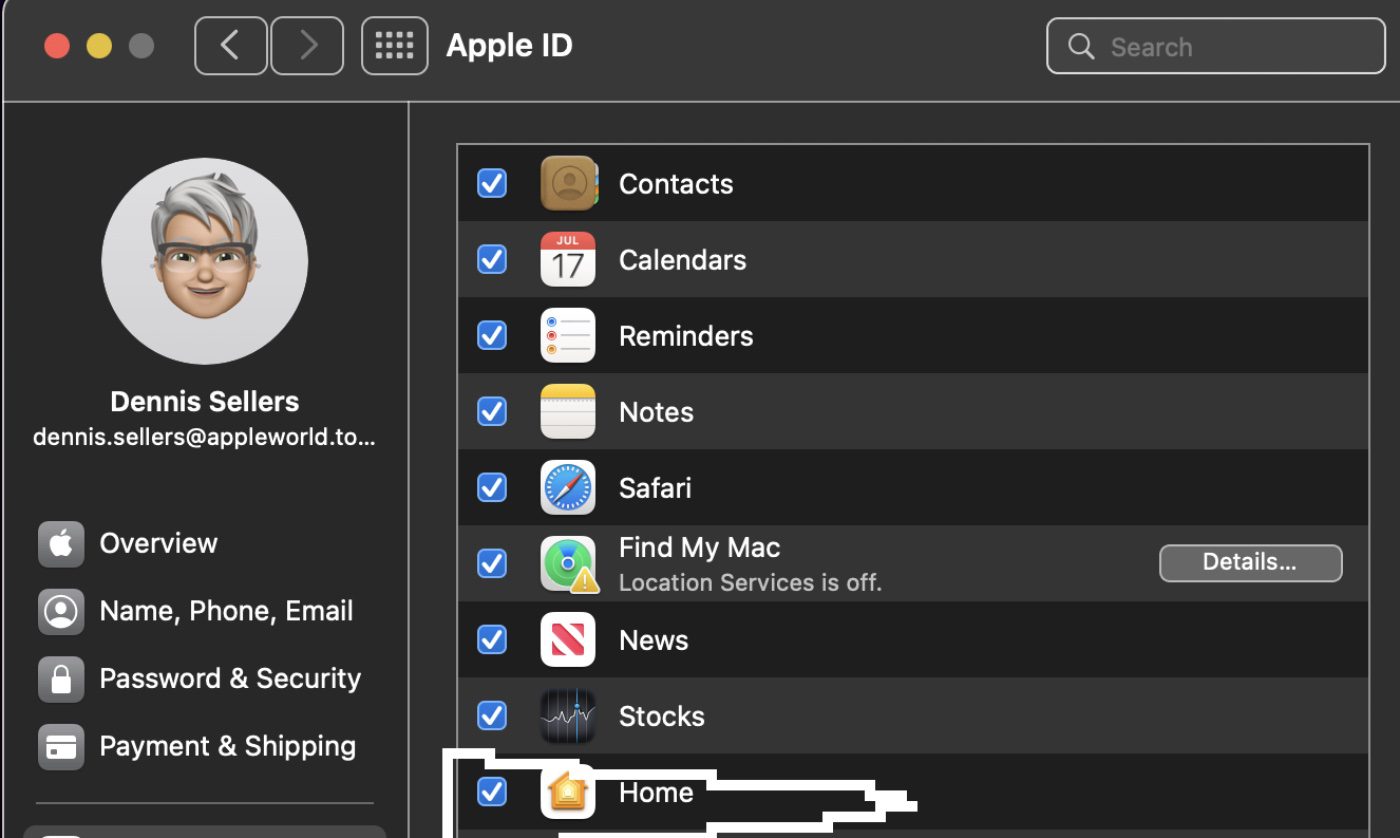
- On your Mac, choose Apple menu > System Preferences, click Apple ID, then click iCloud.
- Select Home.
You can view and share HomeKit Secure Video footage stored in iCloud using the Home app on your Mac. However, you have to use an iPhone, iPad, or iPod touch to add a security camera to Home. Check out these Apple articles to see how to do this:
For more information on how to view and share HomeKit Secure Video on your iPhone, iPad, or iPod touch, read Apple’s “Use HomeKit. Secure Video” guide, which also offers a list of supported cameras.
Changing security cameras options on a Mac
You may need an iOS or iPadOS device to set up HomeKit Secure Video cameras. However, you can change their settings on your Mac.
Launch the Home app, click the camera tile, then select Options.
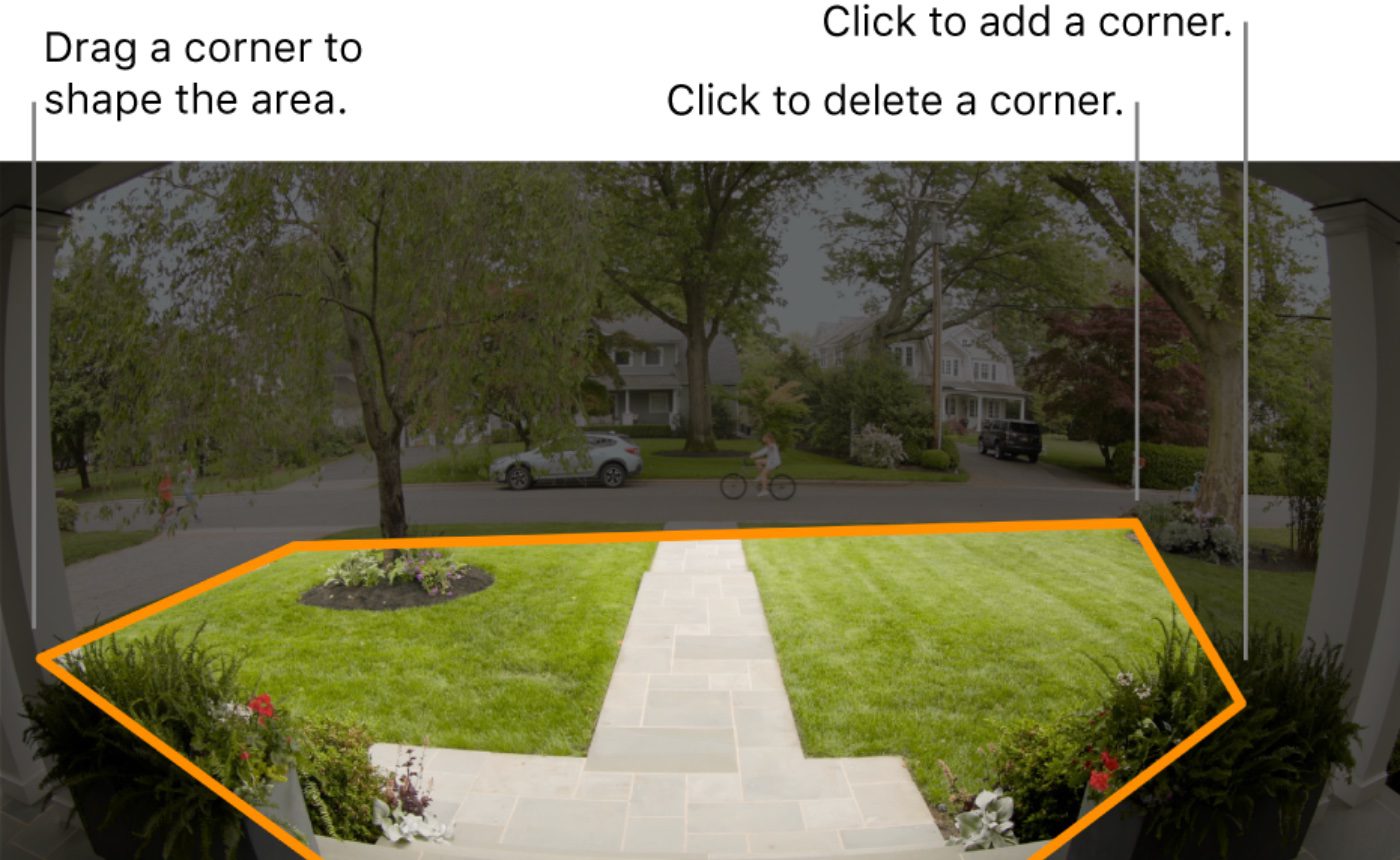
Now you can select to change these settings: Room, Notifications, Streaming & Recording, Recording Options, and Select Activity Zones.
To view video on your Mac
- Launch the Home app, and click the camera tile. Live video plays automatically.
- Click on a video clip to play it. Or you can scrub through the timeline at the bottom of the screen to browse recorded clips.
- To switch back to live video, click Live.


