There’s a reason that Apple has branded their external trackpad as a Magic Trackpad.
Sure, it can click and right-click. But it’s everything else it does that makes it magic. Lots of this stems from MacOS. From being able to give you thesaurus results to helping you with the multiple apps you have open, Apple’s trackpad is…well, magic.
And since magic can be tricky (pun intended), we’ve put together a complete guide to mastering your trackpad. By the end, you should feel as powerful as Jedi Master Yoda—able to manipulate your environment with a flick of a few fingers…as long as you’re on a Mac, that is.
Basic Trackpad Preferences
To get it out of the way, while I’m using the Magic Trackpad, it matches the feature set on the trackpad on MacBooks and MacBook Pros.
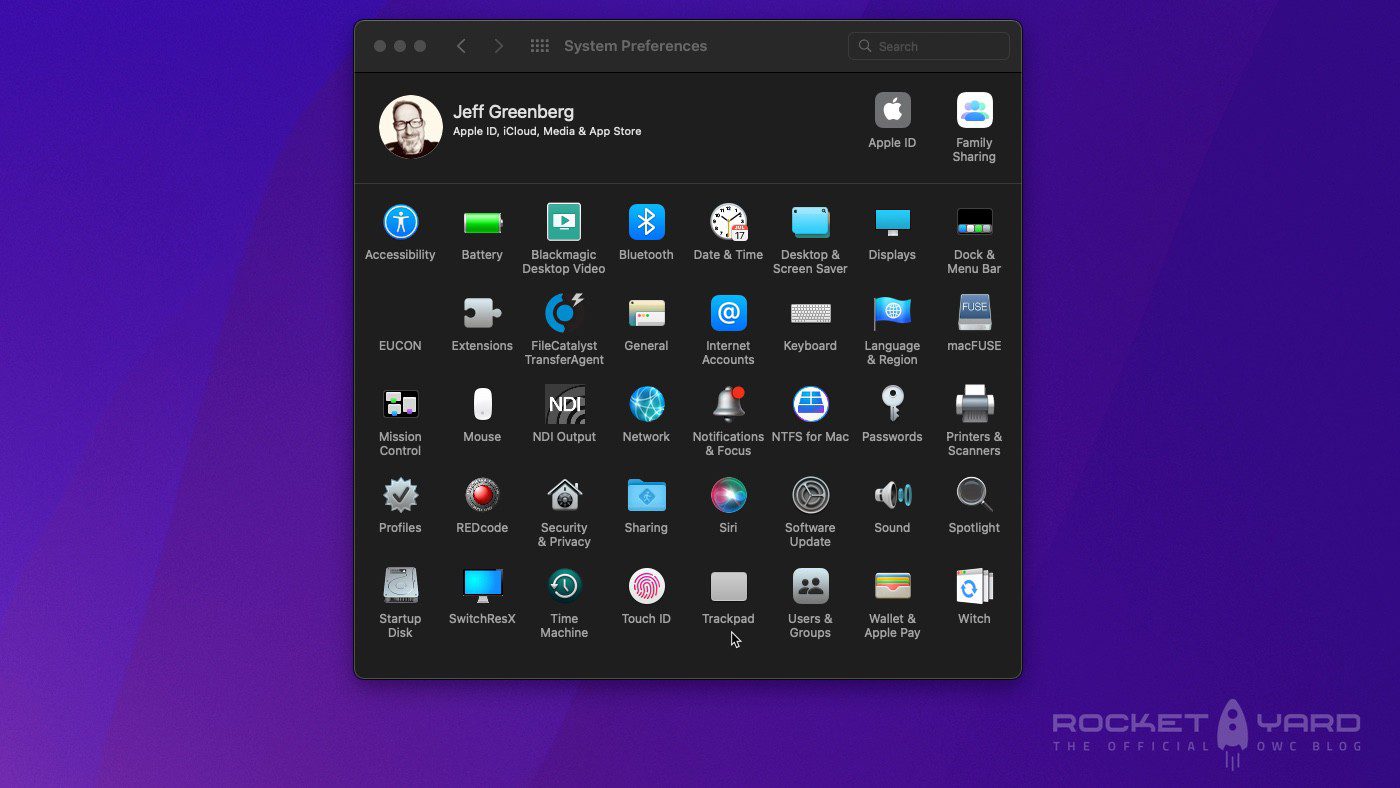
The way to get started is to open System Preferences and then click “Trackpad” to open the Trackpad preference pane.
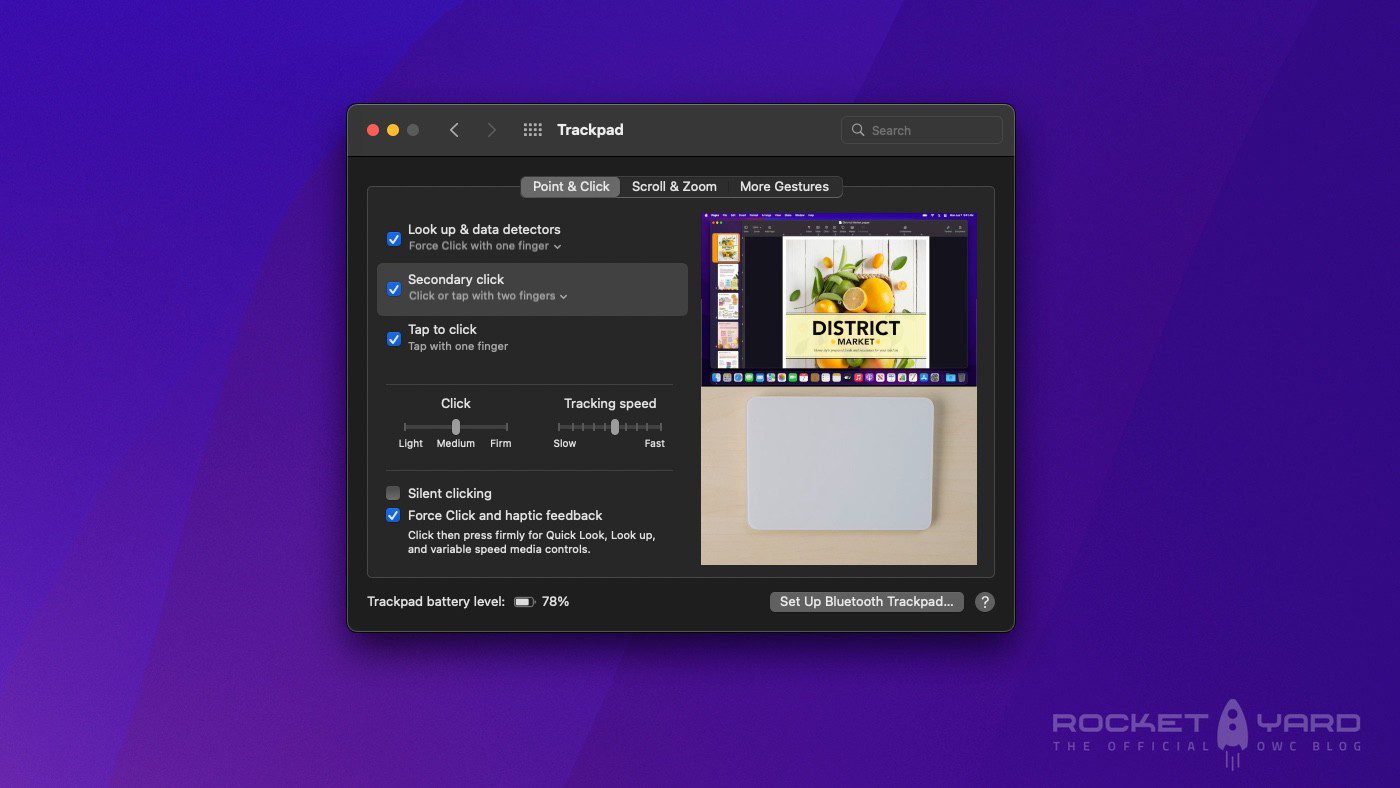
The Point & Click section has some gems that most people miss. Ever wanted the clicking to be silent? If you’re using a newer Mac, like those powered by Apple’s M1 chips, turn on Silent clicking to optionally turn off clicking sound the trackpad makes. You’ll notice that you still feel a click, but the click sound is gone.
Apple’s latest trackpads have this capability because the pad itself doesn’t physically move. For instance, turn off your Magic Trackpad—or, if you’re on a MacBook, shutdown your laptop—and try to click the trackpad. You can’t! That’s because small haptics inside the trackpad are bumping against your press in order to simulate the click feeling we’ve all come to expect. Magic!
Data Detector
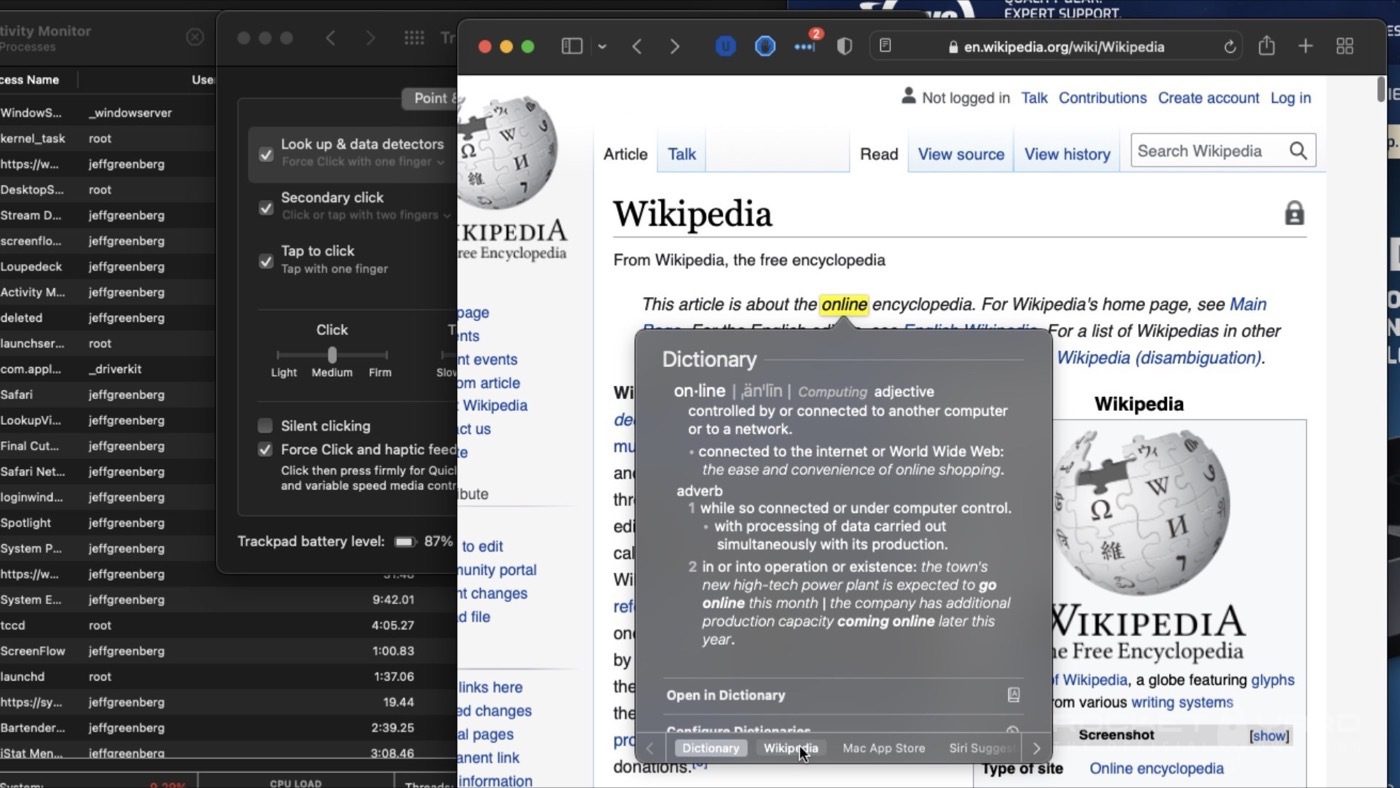
Let’s look deeper at the data detector feature. If you’re using a browser like Safari, you can click a word on a webpage and use the force click feature, by performing a single, but deeper, press on the trackpad. (Basically a click and brief hold). These data detectors bring up extra information based on what’s selected. Choices like a dictionary, Wikipedia, and items that Siri Suggests are all along the bottom of the window. It’s information that you’re likely to want to look up in some way.
Right Click, Zoom, and Rotate
Back to the Trackpad preferences pane.
There are some excellent variations on right click (secondary click) behavior in there. It can be changed from a “two-finger” click to clicking on one of the pad’s corners.
At this point, if you haven’t noticed, in a very easy-to-understand “Apple” way, any function you’re looking at shows a video of its process in action.
On the second page of the Trackpad pane, the Scroll and Zoom page, there’s a unique feature called Smart Zoom. It’s the same concept that you’re used to in your iPhone. Inside of Photos, if I double-tap with two fingers it zooms in to a nearly perfect amount. That’s a smart zoom. For further common needs: if I open my fingers and close my fingers, that’s a zoom in / zoom out. This gives quite a touch/feel environment, especially with photos.
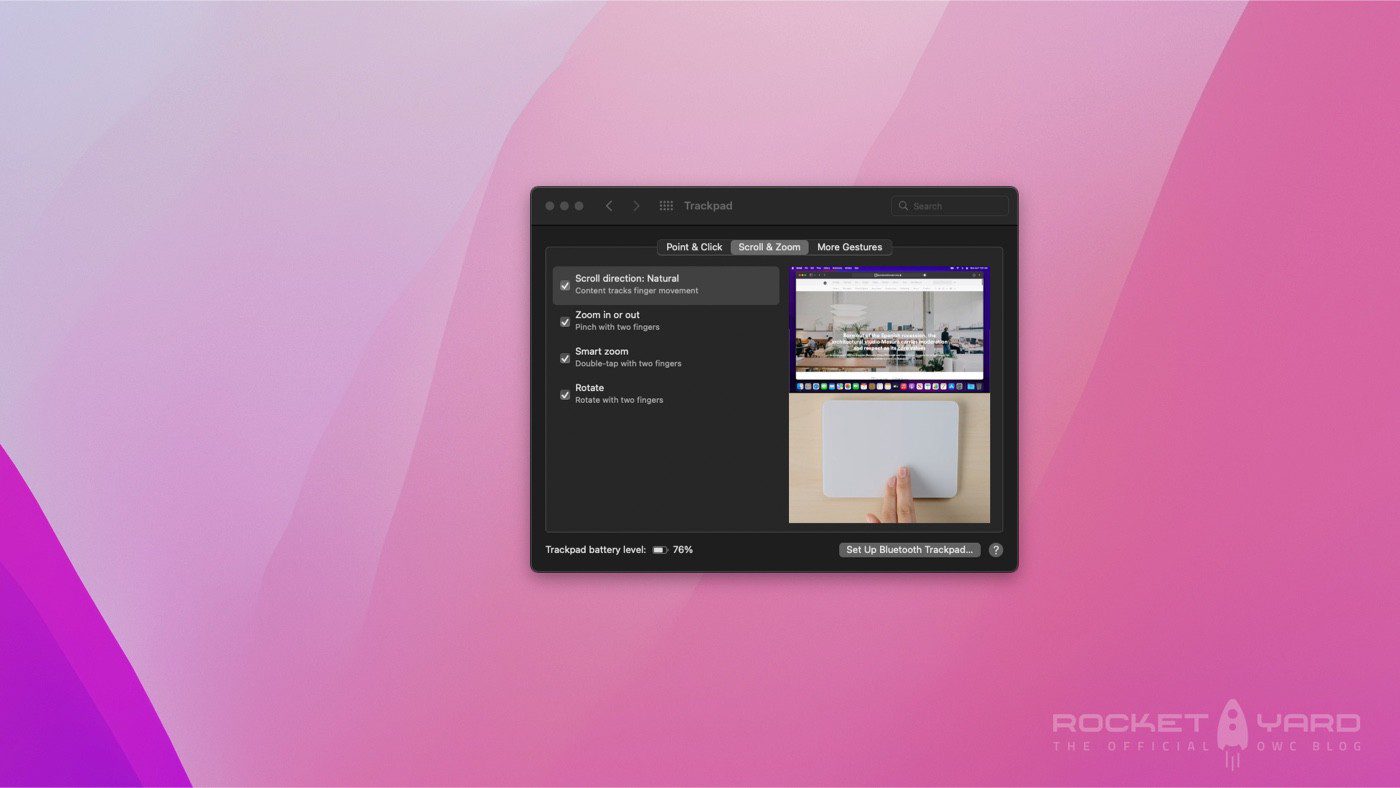
Some other minor features here: you can turn on the Rotate feature, which allows you to rotate photos and other file types by twisting your fingers along the trackpad’s surface. You can also set your preferred scroll direction (how you move your fingers to scroll up and down webpages.) With phones and tablets a staple in most people’s lives, Apple has called one scroll direction “Natural.” On the trackpad this means that you can scroll content and webpages just as you do on an iPhone or iPad. But if you’re using a mouse, this direction is actually a reversal to the way people have typically scrolled a mouse over the years. If it feels weird, you can turn it off by unchecking the box.
Swipe Between Pages, Apps, and More
But where things get interesting is under the tab More Gestures. Particularly, switch and swipe between pages. This is what most people miss! A two-finger swipe can go back/forward pages in Safari pages. And three fingers can do the same with Apps that are full screen.
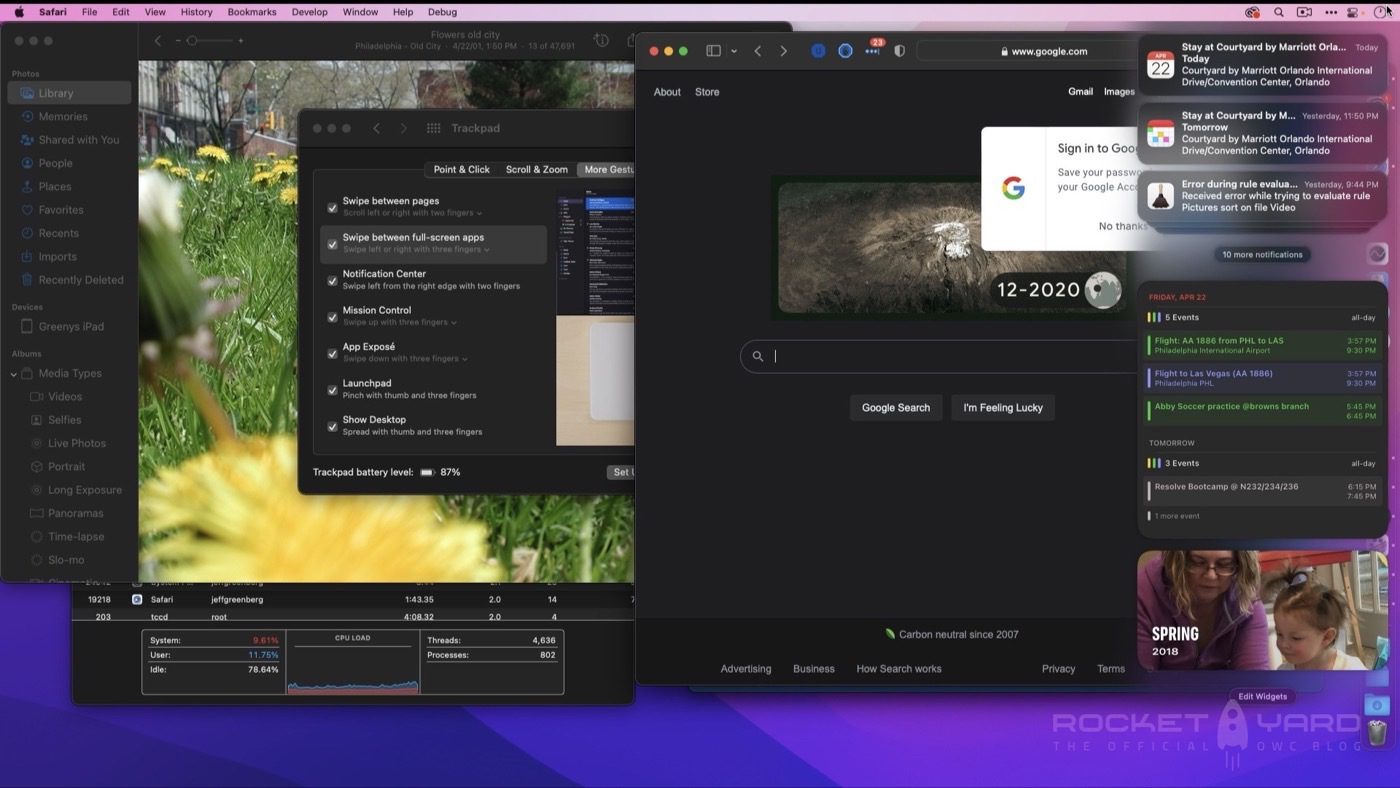
It can open and close Notification Center—something I’ve been finding more and more valuable. You have to start with two fingers on the right edge of the trackpad. Swipe inwards to open the Notification Center.
I’m not a fan of Launchpad, but you take three fingers and just kind of pinch them together to bring up the Launchpad interface. (I stopped using Launchpad years ago as I have found there are faster ways to launch the apps I need.)
Mission Control and Show Desktop

These last three are my favorites. You can invoke Mission Control by swiping up with three fingers. This MacOS feature shows you every single window open on your system. And at the top of the screen? There is availability to see/get to other desktops on the system and full-screen apps.
The opposite of a three-finger swipe up is a three-finger swipe down. This is similar to Mission Control, but instead of seeing every window open, it just highlights the windows for the specific frontmost application. It’s only advantageous if you have more than one window open—say when browsing in Safari or Chrome.
Finally, a spread with four fingers—thumb plus three—allows you to drill down and show your desktop. It’s great when you have something you need on the desktop. It gets the clutter of windows out of your way, to quickly get to the desktop.
I hope you found some gems here. Items you didn’t know, features you wanted to customize—or even turn off. If you have any questions, feel free to leave them in the comments. And as always, I hope you found this helpful.