

There’s a free program that comes with your Mac that’s amazing. It’s called Keynote. Beyond its intended use as a presentation tool, this powerful app also has the ability to create fantastic animations you can use for FREE with any editorial tool—and all without setting a single keyframe. Check out the video or read on below.
Let’s look at how it works. The secret is the Animation Inspector in Keynote.

Typically, Keynote’s animation tools are used for transitions between slides in a presentation deck. For any object on a slide, they can be animated with a:
- Build in – How it moves in on screen
- Build out – How it moves off screen
- Action – any animation while on screen
Let’s look at an example of a Build In.

Here, I’ve selected the large text block. On the Animation inspector, Build In is selected.
Aside from picking which animation you want, the essential items to adjust are duration and how the animation should occur. Should it be on the whole block? Word by word? Different animations give different sub choices. Don’t forget to choose the PREVIEW button to get an idea of how it will feel.

Just like we can have something Build in/Build out. We can add animation for any object. That’s found on the Action tab. It’s a smaller set of choices – but you still don’t have to set a single keyframe.

Cool transitions—with a twist
A unique and crucial feature of Keynote’ is that the app can properly build alpha/transparency information. You can use any transition and have it move from a slide with the transition back to the video in your editorial tool.
The critical information: the background here has to be set to no fill. When you export correctly, this has an automatic alpha channel for any editor.
Make sure you explore
I’d 100% play with everything in Keynote as you’re learning. At the very least, you can quickly take the boring corporate slides and do something with them.
Don’t miss that infographics/charts that are built with Keynote can be animated! There’s no reason that the pie chart or line graph has to just fade up!
Get it out of Keynote
Getting this to your editor or choice means exporting a movie.

The dialog box gives you options about how long the “next slide” and “next build” should be.
I set all these timings to be one second. Any further adjustments/timing I’ll make in my editor.
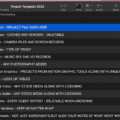
Pick custom and adjust the export size to match your sequence – in this case, I’ve picked 1920×1080.
To get the transparency/alpha channels to be available, it’s necessary to pick a codec that supports it from the list. There’s only one, ProRes 4444. It’s going to build a larger file than any other choice, but now anything that has the background set to No Fill, will get the proper transparency.
And that’s how Keynote can be the secret animation weapon in your arsenal of tools. There’s more for you to explore (bonus points for digging into Magic Move) now that you understand how the basics work.


Nice!,
Cool idea on “no fill” to enable an alpha channel.