You may have been using Apple Products for a while now, or have recently made the splurge. Either way, you’ve spent way too extravagantly to go about your day unable to bring into play its best features. You’ve been under-utilizing your iPhone or Mac, and we’re not going to sit here and watch you do it anymore.
So, if you want to use your iPhone and Mac to their maximum capabilities, then keep reading. we’re going to be sharing with you some iPhone and Mac tricks that can help save some time and make your life a whole lot easier.
Sign documents in a modern way

Gone are the days, when you’d have to print a document, sign it and re-scan it to send it back to where it came from. You’re probably thinking, who even does that anymore? You’d be shocked to learn; many people! So below are the steps to not only digitally sign your documents but save a particular signature and use it to sign other documents much faster.
Pro Tip: Change the color to blue for added authenticity
How to sign a document in the Mail App on iPhone or iPad
It’s pretty simple.
- Open Mail and find the particular file you’d like to sign.
- Tap on the document/Pdf so that you are now looking at the full preview.
- Click on the ‘mark-up’ tool in the top-right corner (it looks like a little marker in a circle)
- You can customize the color, marker tip, or thickness.
- Using your finger, or an Apple Pencil if you’re using an iPad, sign your name and tap ‘done’ at the top left.
- You can now click on ‘reply all’, which will send the email to everyone on the list. Otherwise, you can click on ‘new message’ and make a custom mail.
Use a pre-saved Signature on your iPhone or iPad
Now you know how to sign your documents, but you want to be able to do it faster.
- Find the document/pdf you’d like to sign.
- Open up the mark-up tool in the top right corner.
- Along with all the pens, you’ll notice a ‘+’ sign in the bottom left corner. Click on it.
- Now in the list of options opened up, tap ‘signature’.
- Using your finger or an Apple Pencil, sign your name. Then, click ‘done’ at the top.
- You can adjust the signature’s size and move it around the document. Make adjustments and click ‘done’ again.
- You can now reply to everyone by clicking ‘reply all’ or make a custom mail by tapping ‘new message’.
Next time you use the mark-up tool, all you have to do is click ‘+’, and your previous signature would be there to use. You can also add multiple signatures and pick from them every time you sign a document.
This signature is saved on your iPhone and can be applied in Gmail, photos, and scanned documents as well.
- For Gmail, you’d have to click on the document, then ‘share’ in the top right corner, and then find the ‘mark-up’. The rest of the steps are the same as mentioned above.
- If you need to sign a Photo, you click on ‘Edit’ on the top right, then on the three dots, and finally ‘mark-up’. The rest of the steps are the same as mentioned above.
Add a Signature to your Mac with your iPhone

Suppose that you’re going through some documents on your Mac, rather than your iPhone; which is perhaps what most people do. In this case, you can open the PDF or pages document on your Mac and click on the “create signature” icon on the top. Then you will get the options of your ‘mouse trackpad’, ‘camera’, or ‘iPhone’. Click on iPhone and now you can use your finger to sign your name on the iPhone or choose one of your pre-saved signatures on the iPhone.
Make sure you are signed into both devices using the same Apple ID and connected to the same Wi-Fi to enable this feature.
Type faster, with both hands, or just one!
This is a small one, but definitely, one that fast texters and note-takers will appreciate. Do you know when you’re really in the flow of writing whatever it is that you’re so passionate about jotting down? And then you feel like going back and making changes. So you have to take the little cursor to that exact little spot. You can use your fingers to tap and place the cursor exactly where you’d like it, but you don’t want to lift your fingers. Besides, your big finger can never click on the exact spot. Instead, just hold down the spacebar and move it held down to maneuver your cursor without even lifting your finger!
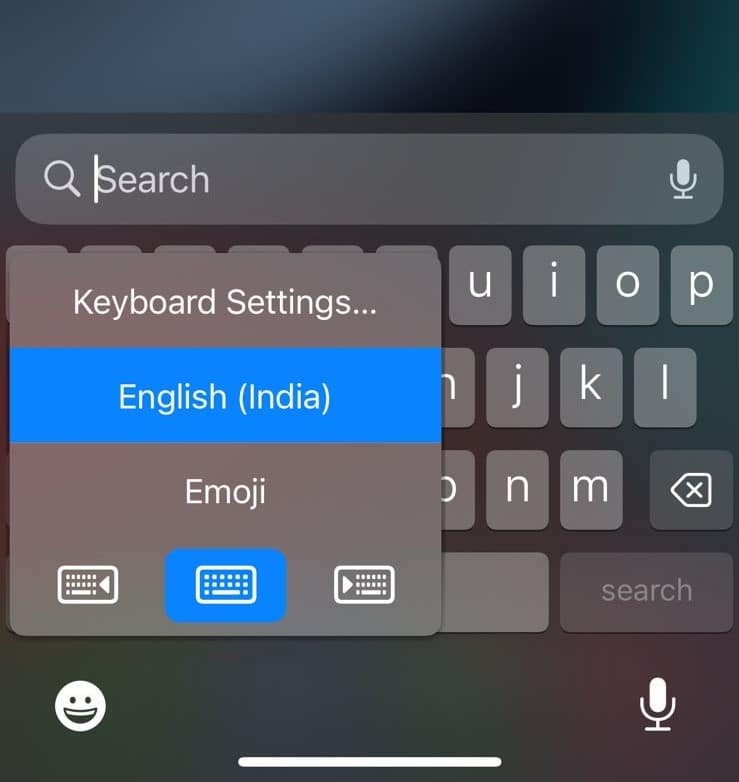
Now suppose, you’re typing with just one hand. You’ll have to extend your thumb rather far, especially if you have a Pro Max. Instead, hold down the globe or emoji icon which is there on the bottom left corner of your keypad. You’ll see three mini keypads, the farthest right one will move your keyboard slightly to the right. The farthest left mini-keyboard will move the keyboard to the right. Depending on which hand you’re using, choose one. Now you’ll have an easier time typing with one hand.
Are there phrases you repeatedly watch yourself typing? Such as “Busy, will call you back”, or “Will get back to you when I’m in a better mindset to address this?” You can add shortcuts to your iPhone in the settings. Open up ‘settings’, and then ‘General’, ‘keyboard’, then ‘Text Replacement’. Now click the ‘+’ icon at the top and enter your commonly used line of text. Lastly, add a shortcut for the same. Now every time you type that shortcut (e.g Ilysm), the full phrase (I love you so much) will appear in your text preview. Utilize this feature to its extent, because you can include emojis in it too!
Move between your Mac and your iPhone swiftly with Continuity
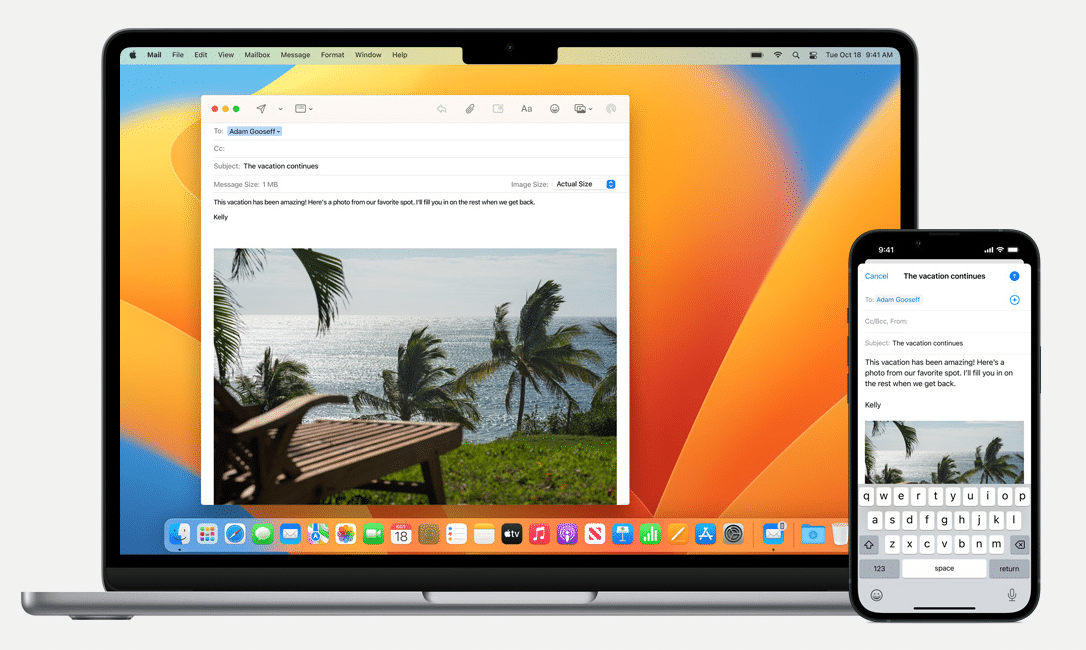
If you have an iPhone and a Mac or any two apple devices for that matter, you’ll save a bunch of time by utilizing Apple’s ecosystem or more popularly known as “continuity” features. You may already be using this, but for those who aren’t, let’s look at all you can do with it.
Handoff
As the name already depicts, all the work or activity you’re doing on one of your apple devices can very literally be handed off to the other apple device. All you need to ensure is that all devices are connected to the same Wi-Fi and logged in with the same Apple ID.
The very first example of this would start typing something in the ‘notes’ application on your iPhone. Then, open the ‘notes’ application on your Mac, and you’ll find whatever you typed on your iPhone to be there.
This works with pretty much all applications.
Open a tab on Safari on your iPhone, and you’ll find a pop-up on the Safari application on your Mac as well. If you don’t, you can go to your Mac’s Safari homepage. There you will see tab suggestions that are currently opened on your iPhone. This works the other way around as well. When you use the app switcher on your phone, you’ll notice suggestions for a Safari tab opened on your Mac.
One of the best ways that the Apple Ecosystem can be utilized is through pages. Pages are the applications that Mac users use to compose formal documents. Suppose that you’d like to insert a photo in your document that is taken by your iPhone. All you have to do is right-click on the document, and click on ‘take a photo’. You’ll see that your iPhone’s camera would automatically open up. You can click a picture and then click ‘use photo’ and now it would appear on the document on your Mac. You can crop it and place it where you’d like.
If you were to right-click and click ‘scan document’, your iPhone’s scanner would open up. And if you were to right-click and select ‘add sketch’, then you can sketch something using your fingers on your iPhone and it would appear on the document as well!
If you can do so much on just the pages app, imagine how much you can utilize the handoff feature on more creative outlets such as Adobe Photoshop.
Use your iPhone as your webcam (Continuity Camera)
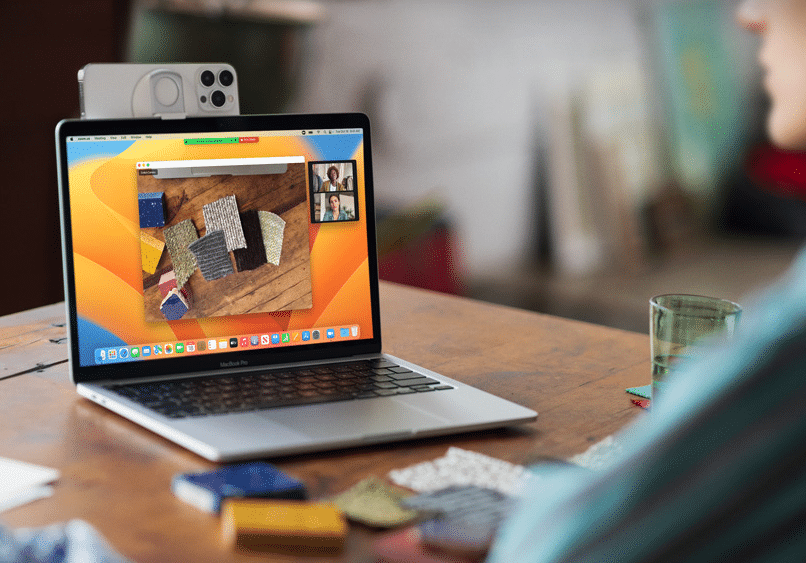
Continuity Camera is an awesome macOS feature that allows you to wirelessly use your iPhone as a webcam. This comes in handy in a big way for Mac Mini users, but is also a huge upgrade on the built-in cameras on every MacBook and iMac.
In macOS Ventura, all you need to do is bring your iPhone close to your Mac and in apps like FaceTime, Zoom, Teams, or Google Meet, your iPhone will automatically appear as an available camera.
Share your iPhone’s data connection with your Mac automatically
Another time-saving continuity feature is Instant Hotspot which allows you to automatically use your iPhone as a data hotspot for your Mac. To use the feature, all you need to do is enable Personal Hotspot in your iPhone’s settings app and whenever you open your Mac’s Wi-Fi menu, your iPhone will appear as an available network. The feature even automatically disconnects your iPhone from your Mac once you’re done.
Universal clipboard
The seamless benefits of owning two devices from Apple don’t just stop there. There is also a universal clipboard that allows you to copy text or images from one device, and then just paste it onto the other device. Fantastic, right? There’s no extra step needed in the middle. Just hit copy on one device and hit paste on the other.
Locate your iPhone using your Mac or vice versa
Another handy benefit of the Apple ecosystem is that one device can easily help you find the other. So, suppose you can’t find your iPhone in the house (this happens at least once a day to some of us). You can easily ask Siri on your Mac, “Where’s my iPhone” and your iPhone would start pinging making it easier to locate. You can ask the same from Siri on your iPhone if you can’t locate your laptop.
Share Wi-Fi passwords in just a click
We all make our Wi-Fi passwords full of different case letters, numbers, and symbols just to make them as secure as possible. It’s all well and good until you have to share that password with someone. Well, if your friend also has an iPhone, this process can take just a few seconds.
- Make sure both your phone’s Bluetooth is turned on and the devices are quite close to each other.
- Unlock the device that wants to share the password, and make sure it’s connected to Wi-Fi.
- On your friend’s device which you would like to connect, tap the same Wi-Fi network.
- There will be a pop-up on your device that will ask you to ‘share the password’. Click on that, and then ‘done’
- Your friend’s device should now be connected to the same Wi-Fi as yours.
Create custom vibration patterns
This might be the coolest one on the list. So we all know how to assign different contacts distinct ringtones and alerts. But did you know that you can assign your favorite contacts an individual vibration pattern altogether?
All you have to do is open the contact that you’d like to do this for. Click on ‘Edit’ and then ‘Ringtone’. You’ll see an option for ‘vibration’, click that. You’ll see a bunch of vibration patterns like Accent, Alert, Symphony, and so on. On the very bottom, it’ll say ‘create new vibration’, click that. Now you can create your vibration with the taps of your finger. You can play it to see if you like it and re-do it if you don’t.
Now you’ll know who’s calling because your frequent callers will quite literally give you good vibrations.
Share your photo but not its data
Most people don’t know this, but sending your photo is equivalent to sending somebody your location. This is because all your photos carry with them all the information which usually contains the coordinates of where exactly they had been taken. But thankfully you can remove all the GeoIP metadata before sharing a picture. All you have to do is open up the picture and click on the ‘share’ icon. Then click on ‘options’ at the top and ensure that you have the toggle for sharing ‘all app data’ switched off. That’s it, now you can share your pictures, and protect your privacy while you do so.
That’s it, Folks!
We’ve shared with you some of our favorite iPhone and Mac tips and tricks. While you may be aware of them, we hope you were able to identify newer ways to make use of them. If not productive, they can certainly help make your experience more personal and fun.
Are we missing anything? Let us know your favorite pro tips in the comments!





A signature as a drawing is not accepted as legal signature. For that, a digital signature with certificate must be used, as allowed by Adobe Acrobat Reader (free) and Adobe Acrobat Pro DC (commercial).