macOS has a Dark Mode that allows you to, in Apple’s words, “stay focused on your work, because your content stands out while darkened controls and windows recede into the background.” Implementing it is just slightly different in macOS Ventura.
Dark Mode uses a dark color scheme that works system wide, including with the apps that come with your Mac. Third-party apps can adopt it, too.
To turn on Dark Mode:
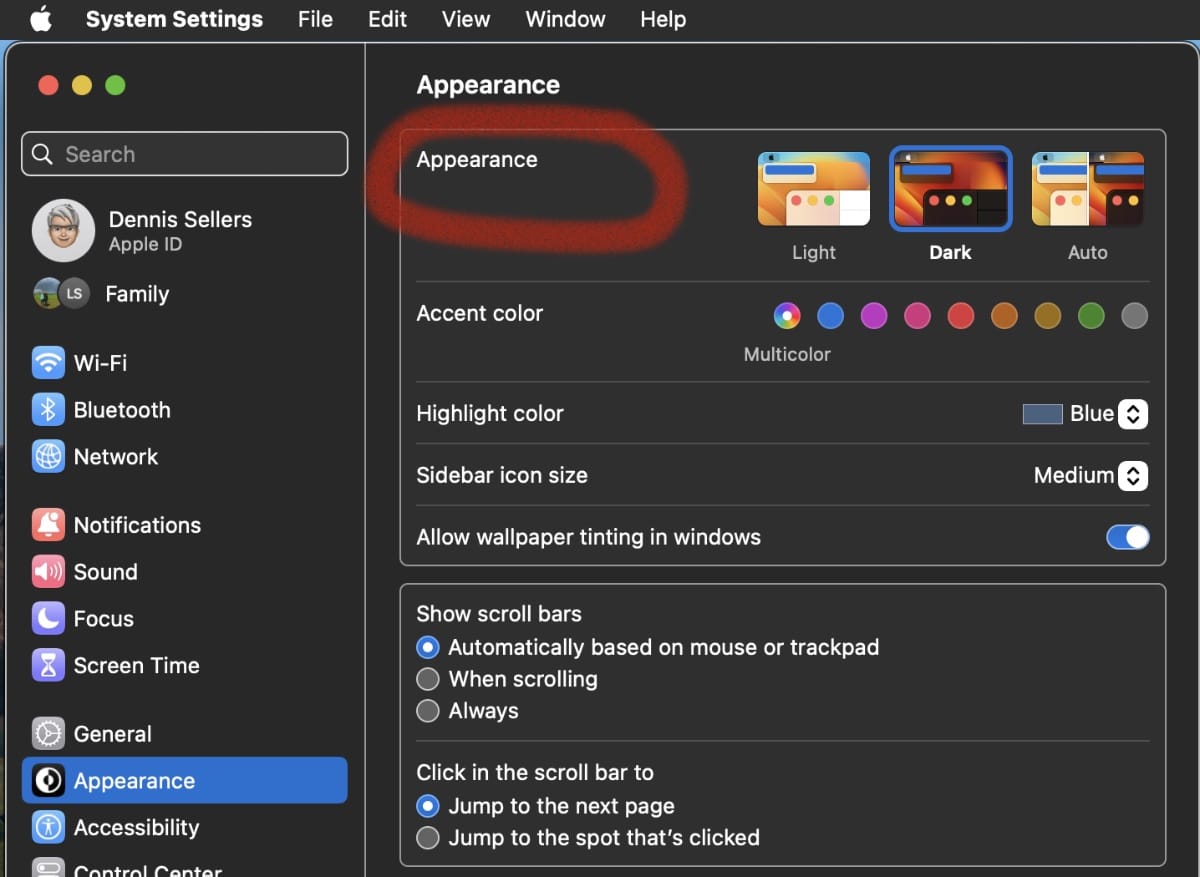
° Choose Apple menu > System Settings.
° Click Appearance in the sidebar.

° Then choose one of the Appearance options at the top of the window:
- Light: Use the light appearance.
- Dark: Use the dark appearance.
- Auto: Automatically use the light appearance during the day, and the dark appearance at night.
How Dark Mode works with some apps and features
Some apps and features have special Dark Mode settings or behaviors.
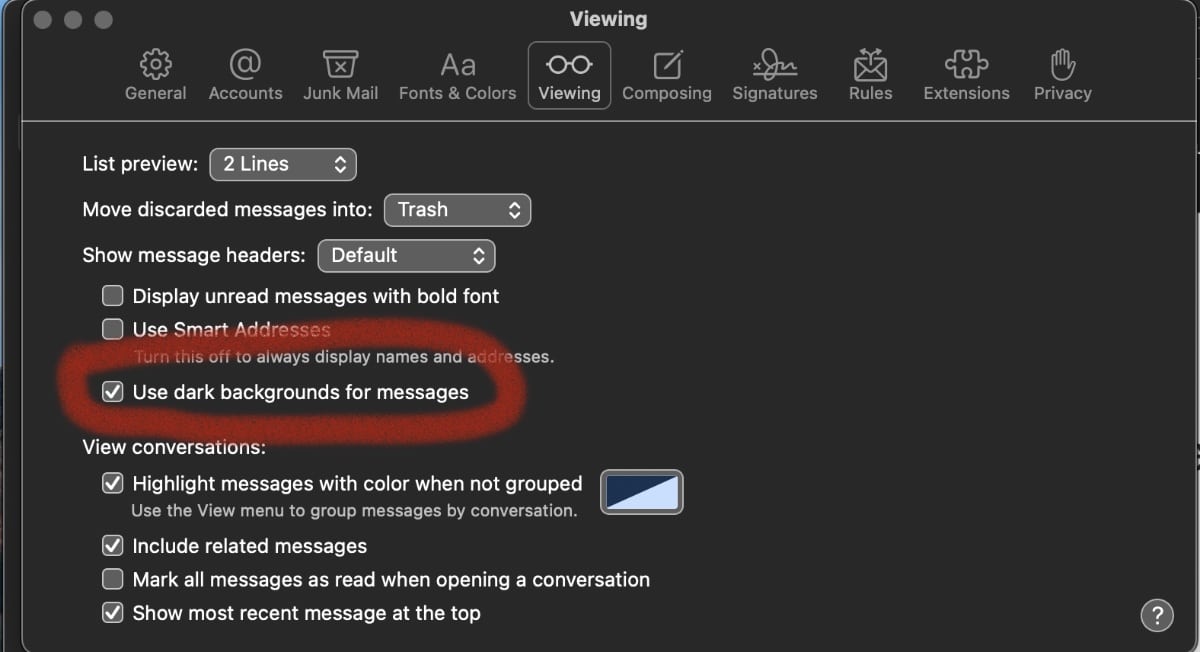
To use a light background for email messages while Dark Mode is turned on, open Mail and choose Mail > Settings, then click the Viewing tab and deselect “Use dark backgrounds for messages.”

Maps
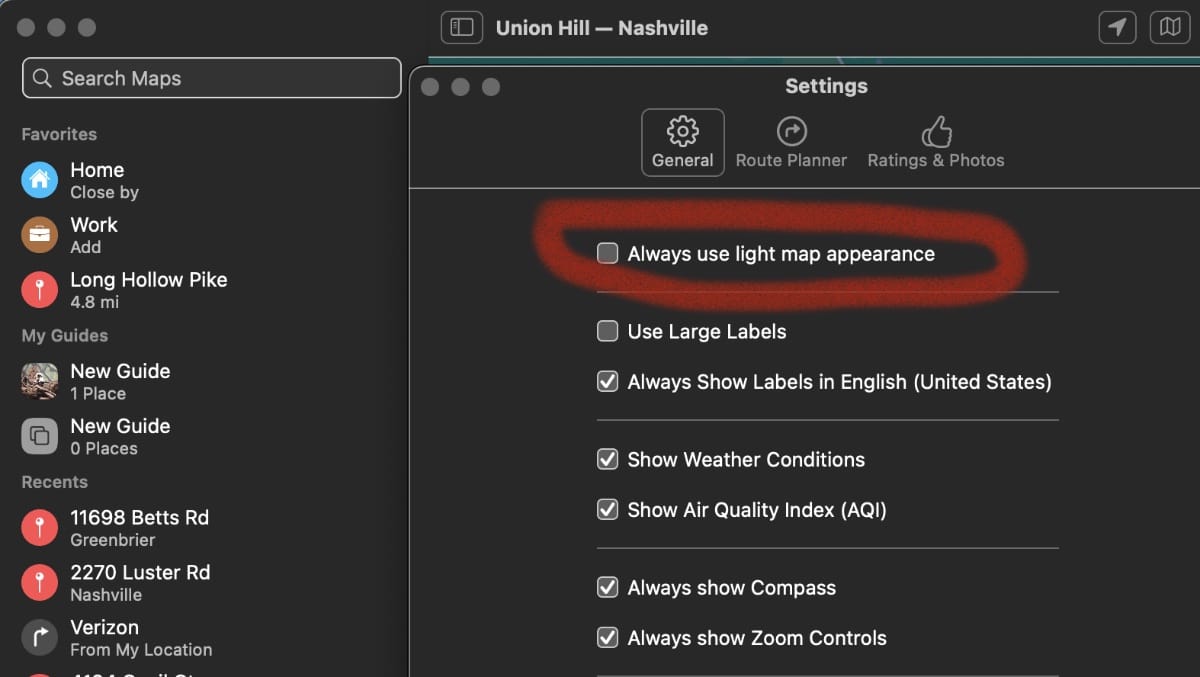
To use a light background for maps while Dark Mode is turned on, open Maps and choose Maps > Settings, then select ”Always use light map appearance.”

Notes
To use a light background for notes while Dark Mode is turned on, open Notes and choose Notes >Settings, then deselect “Use dark backgrounds for note content.”
Safari
When you use Dark Mode, Safari automatically shows a website in Dark Mode if the website has been designed to support it. If the website doesn’t support Dark Mode, you can use Safari Reader to read articles in Dark Mode.
TextEdit
To use a light background for documents while Dark Mode is turned on, click View in the menu bar, then deselect Use Dark Background for Windows.
Dynamic Desktop
If you turn on Dark Mode while using Dynamic Desktop, the desktop may change to the dark still image. You can change this by going to System Settings > Desktop & Screen Saver preferences.


