To invoke Siri on your Mac, the most obvious method is to simply click on its icon in the menu bar. Has Siri disappeared from your menu bar? If you don’t see the Siri icon there, head to System Settings > Control Center, scroll down to the Menu Bar Only section and select Show in Menu Bar to enable the Siri icon. It will pop up just to the left of the date and time in the menu bar.
But if you don’t want Siri in your menu bar or you want to save time by invoking Siri with your voice just like you do on your iPhone, you can set up your Mac to launch the personal digital assistant by just saying, “Hey Siri,” or, as introduced with macOS Sonoma, just “Siri.”
Let’s look at how to do this in macOS Ventura and macOS Sonoma
How to Enable “Hey Siri” in macOS Ventura and the new “Siri” command in macOS Sonoma
Note that you must be running one of these Mac models to use “Hey Siri” in macOS Ventura: a 2018 (or later) MacBook Pro; a 2018 or later MacBook Air; an iMac Pro; or a 2020 (or later) iMac.
° Go to the Apple menu and choose System Settings.
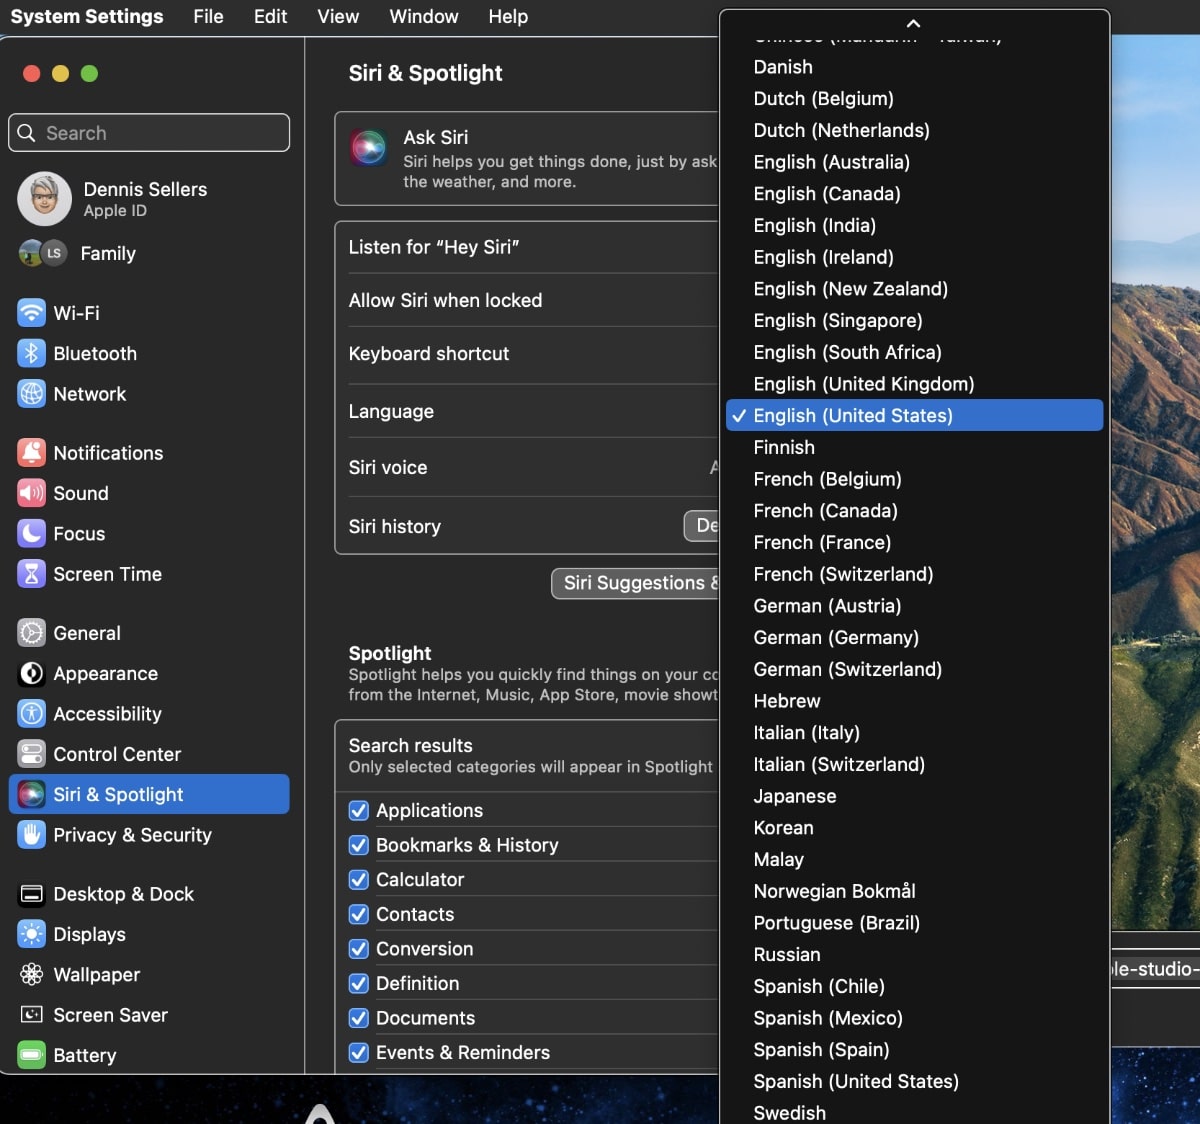
° Click Siri & Spotlight in the sidebar.
° Turn on Ask Siri.
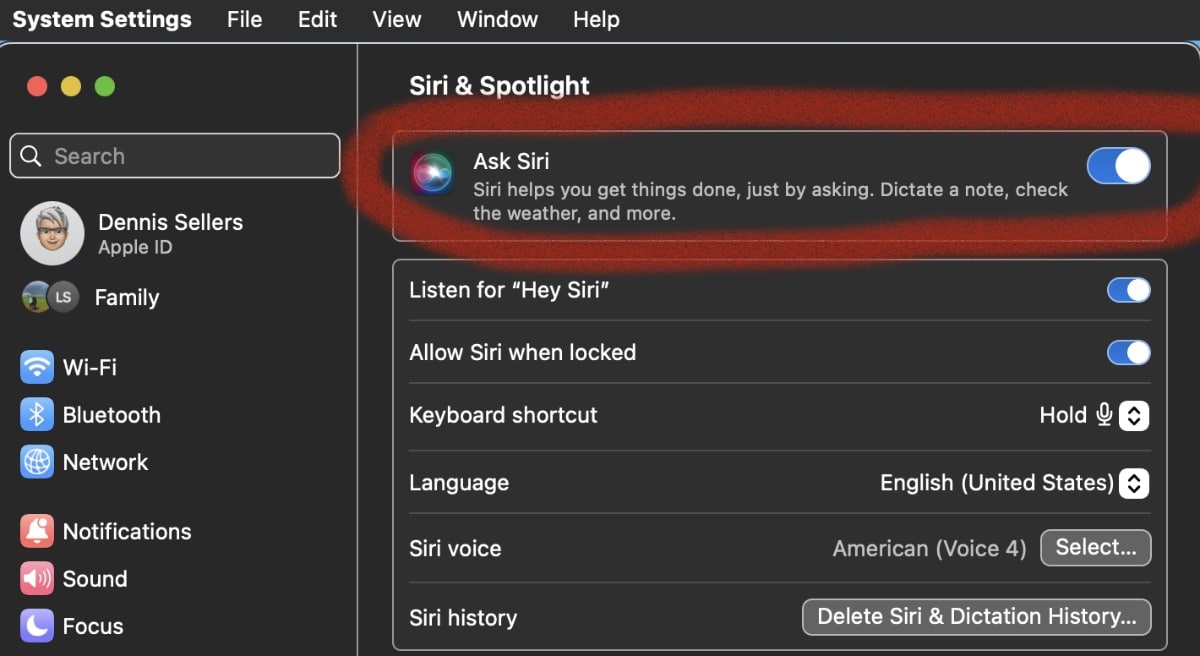
° Enable the Listen for Hey Siri option.
If you’re running macOS Sonoma, you can also invoke Siri by just saying “Siri.” Because of the new option, the Siri & Spotlight menu in macOS Sonoma looks slightly different from macOS Ventura.
° Click the dropdown box to the right of “Listen for” and select “Siri” or “Hey Siri”

° No matter if you’re running Ventura or Sonoma, if you want to use Siri even when your Mac is asleep or locking, enable the Allow Siri when Locked option.
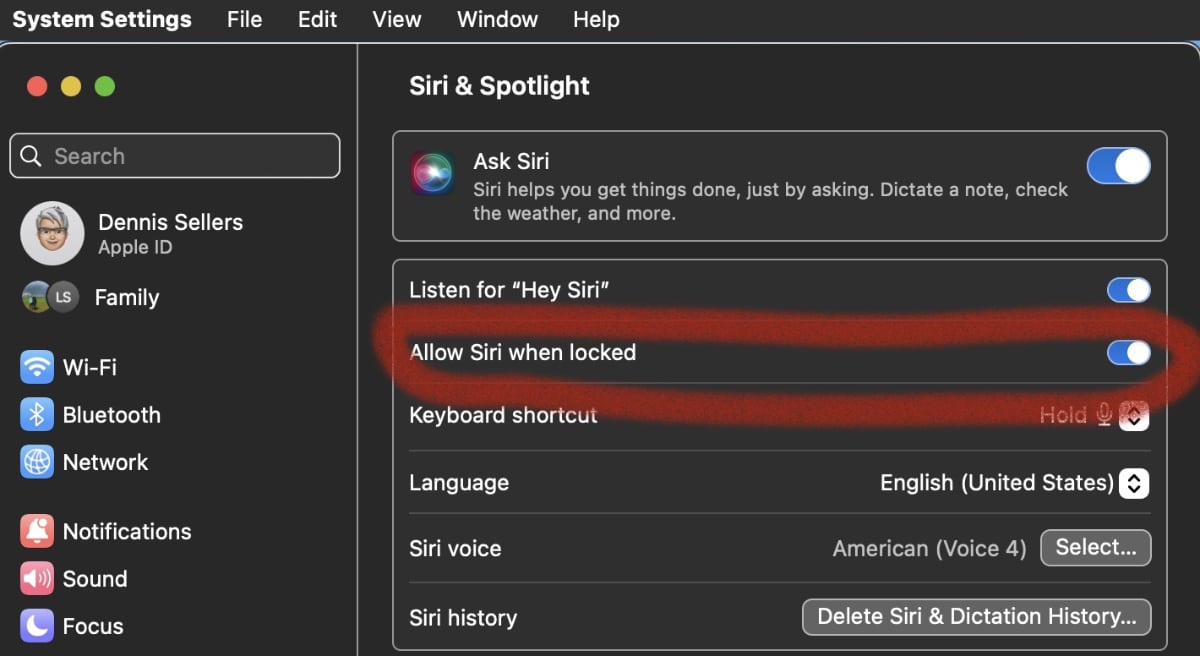
Now you can just say “Hey Siri” to start using the personal digital assistant. When this option is on and you turn on “Allow Siri when locked,” you can also use Siri even if your Mac is locked or in sleep.
You can also connect your Apple Studio Display to a Mac to use “Hey Siri.” See our article here.
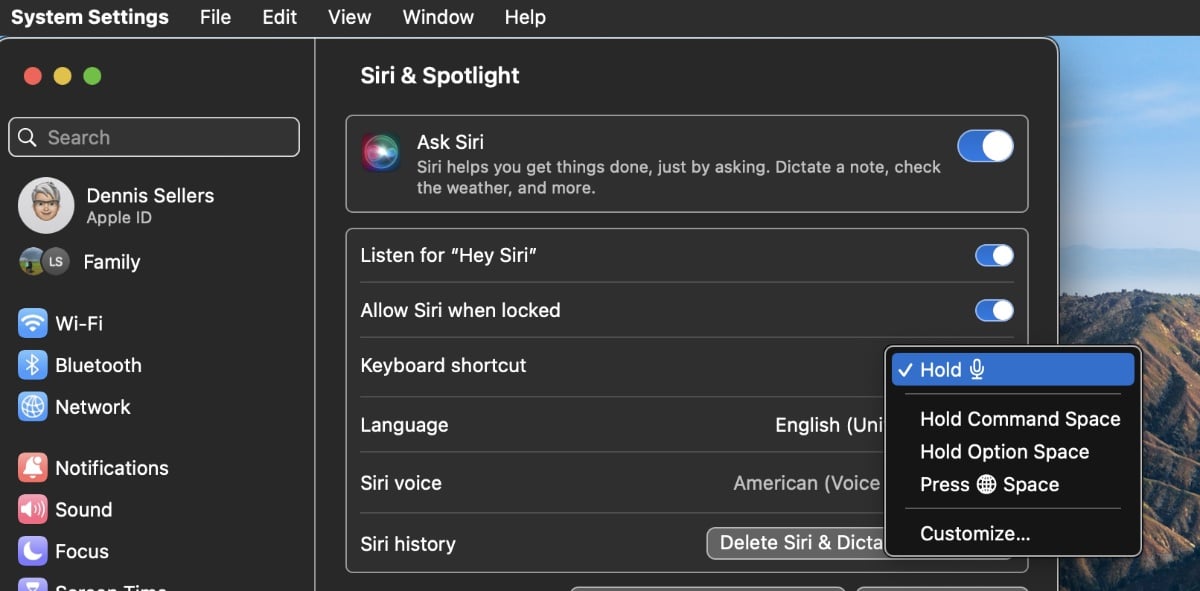
In addition to the “Hey, Siri” command, you can set up a keyboard shortcut to activate it. This is a good way to ensure your other Apple devices don’t respond to the verbal “Hey Siri” or Siri commands. Click the “Keyboard shortcut” pop-up menu, then choose a shortcut to activate Siri or create your own.
With Siri enabled, you can also choose how it speaks. Click the Language pop-up menu, then choose a language. Click Select next to “Siri voice” to hear a preview, then choose the voice that you want Siri to use from the Voice Variety options and the Siri Voice options.
Here are some other tidbits you will find handy when using the personal digital assistant:
° You can mute Siri by clicking Siri Responses, then turning off “Voice feedback.” Now the response from Siri is shown in the Siri window but not spoken.
° You can show what Siri says on screen by clicking Siri Responses, then turning on “Always show Siri captions.”
° You can show what you say on screen by clicking Siri Responses, then turning on “Always show speech.”
° To off Siri, choose Apple menu > System Settings, then click Siri & Spotlight. On the right, turn off “Ask Siri.”



Bon je suis très content et puis j’aime ça