When Mac OS X El Capitan debuted in 2015, it allowed you to hide the menu bar. This was the first time you could do this on our Mac. I like having the menu bar easily visible, but if you don’t, we’ll look at how to hide it in macOS Ventura.
What is the menu bar?
But first, let’s look at what the menu bar is. It runs runs along the top of the screen on your Mac. You can use the menus and icons in the menu bar to choose commands, perform tasks, and check status, as show in this graphic from Apple’s support page:

How to hide the menu bar in macOS Ventura
Okay, now let’s look at how to hide it in macOS Ventura.

- Click the Apple icon and select System Settings.
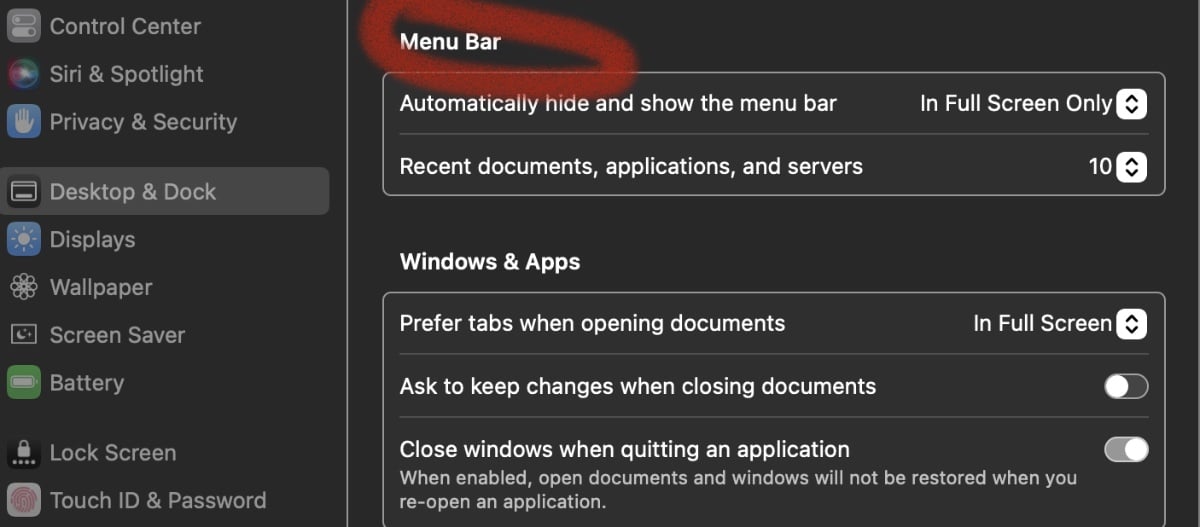
- Select Desktop & Dock.
- Scroll down to the Menu Bar heading.
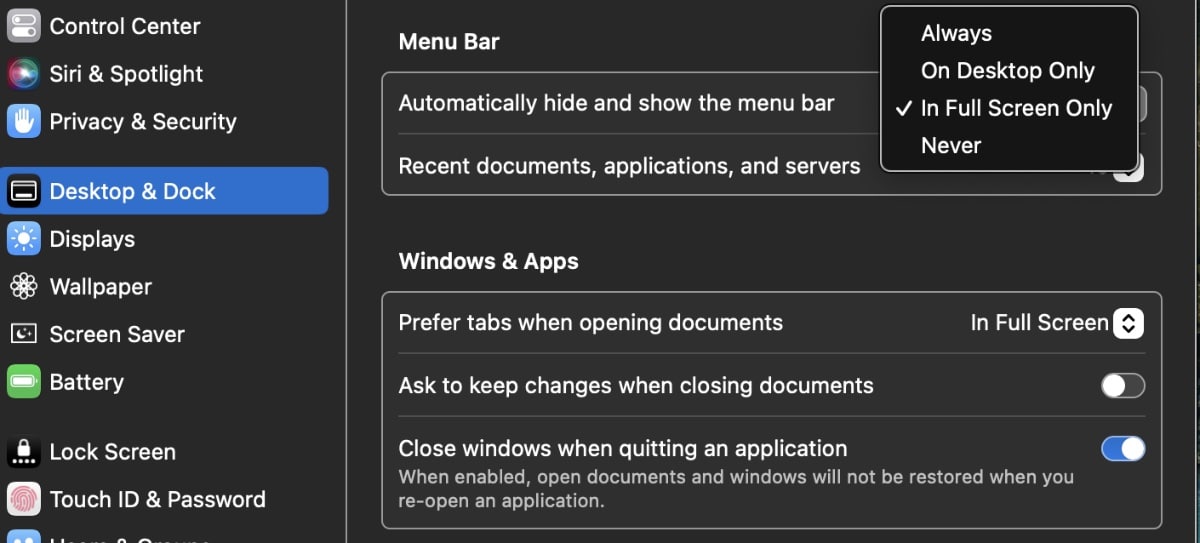
- Click the drop-down next to Automatically hide and show the menu bar.
- You can choose from Always, On Desktop Only, In Full Screen Only, or Never

- Select Always if you want to automatically hide the top menu bar all the time and show it only when you take the mouse pointer to the top of your Mac’s screen.
How to hide the menu bar in macOS Sonoma
The steps for hiding the menu bar in macOS Sonoma are slightly different in macOS Sonoma, as Apple has moved the menu bar options from the Desktop & Dock section of Settings to the Control Center section.
- Click the Apple icon and select System Settings.
- Select Control Center.
- Scroll down to the Menu Bar heading.
- Click the drop-down next to Automatically hide and show the menu bar.
- You can choose from Always, On Desktop Only, In Full Screen Only, or Never
- Select Always if you want to automatically hide the top menu bar all the time and show it only when you take the mouse pointer to the top of your Mac’s screen.


