

Let’s be honest: Aside from incremental updates and a new splash of paint from time to time, the macOS Finder has more or less remained the same since the debut of Mac OS X. (Some might argue that the Finder has regressed since that point, but I digress.)
On the one hand, familiarity makes for convenience. That the Finder has behaved largely the same since the inception of the Mac is a testament to its usability. But as familiar as the Finder is, it can be somewhat limiting for more demanding users.
Over the years, there have been many third party applications that attempt to improve (or outright replace) the Finder’s functionality, with varying degrees of success. I have tried most of them, including PathFinder, TotalFinder, and the like. These applications offer several useful features, but at their core, remain similar to what we already have in the Finder. They weren’t really my cup o’ whisky.
Bloom is a relatively new entry in this arena. Like the aforementioned apps, Bloom promises a “refined Finder experience, reimagined for productivity”. That’s a bold claim, and one that I decided to test out for myself.
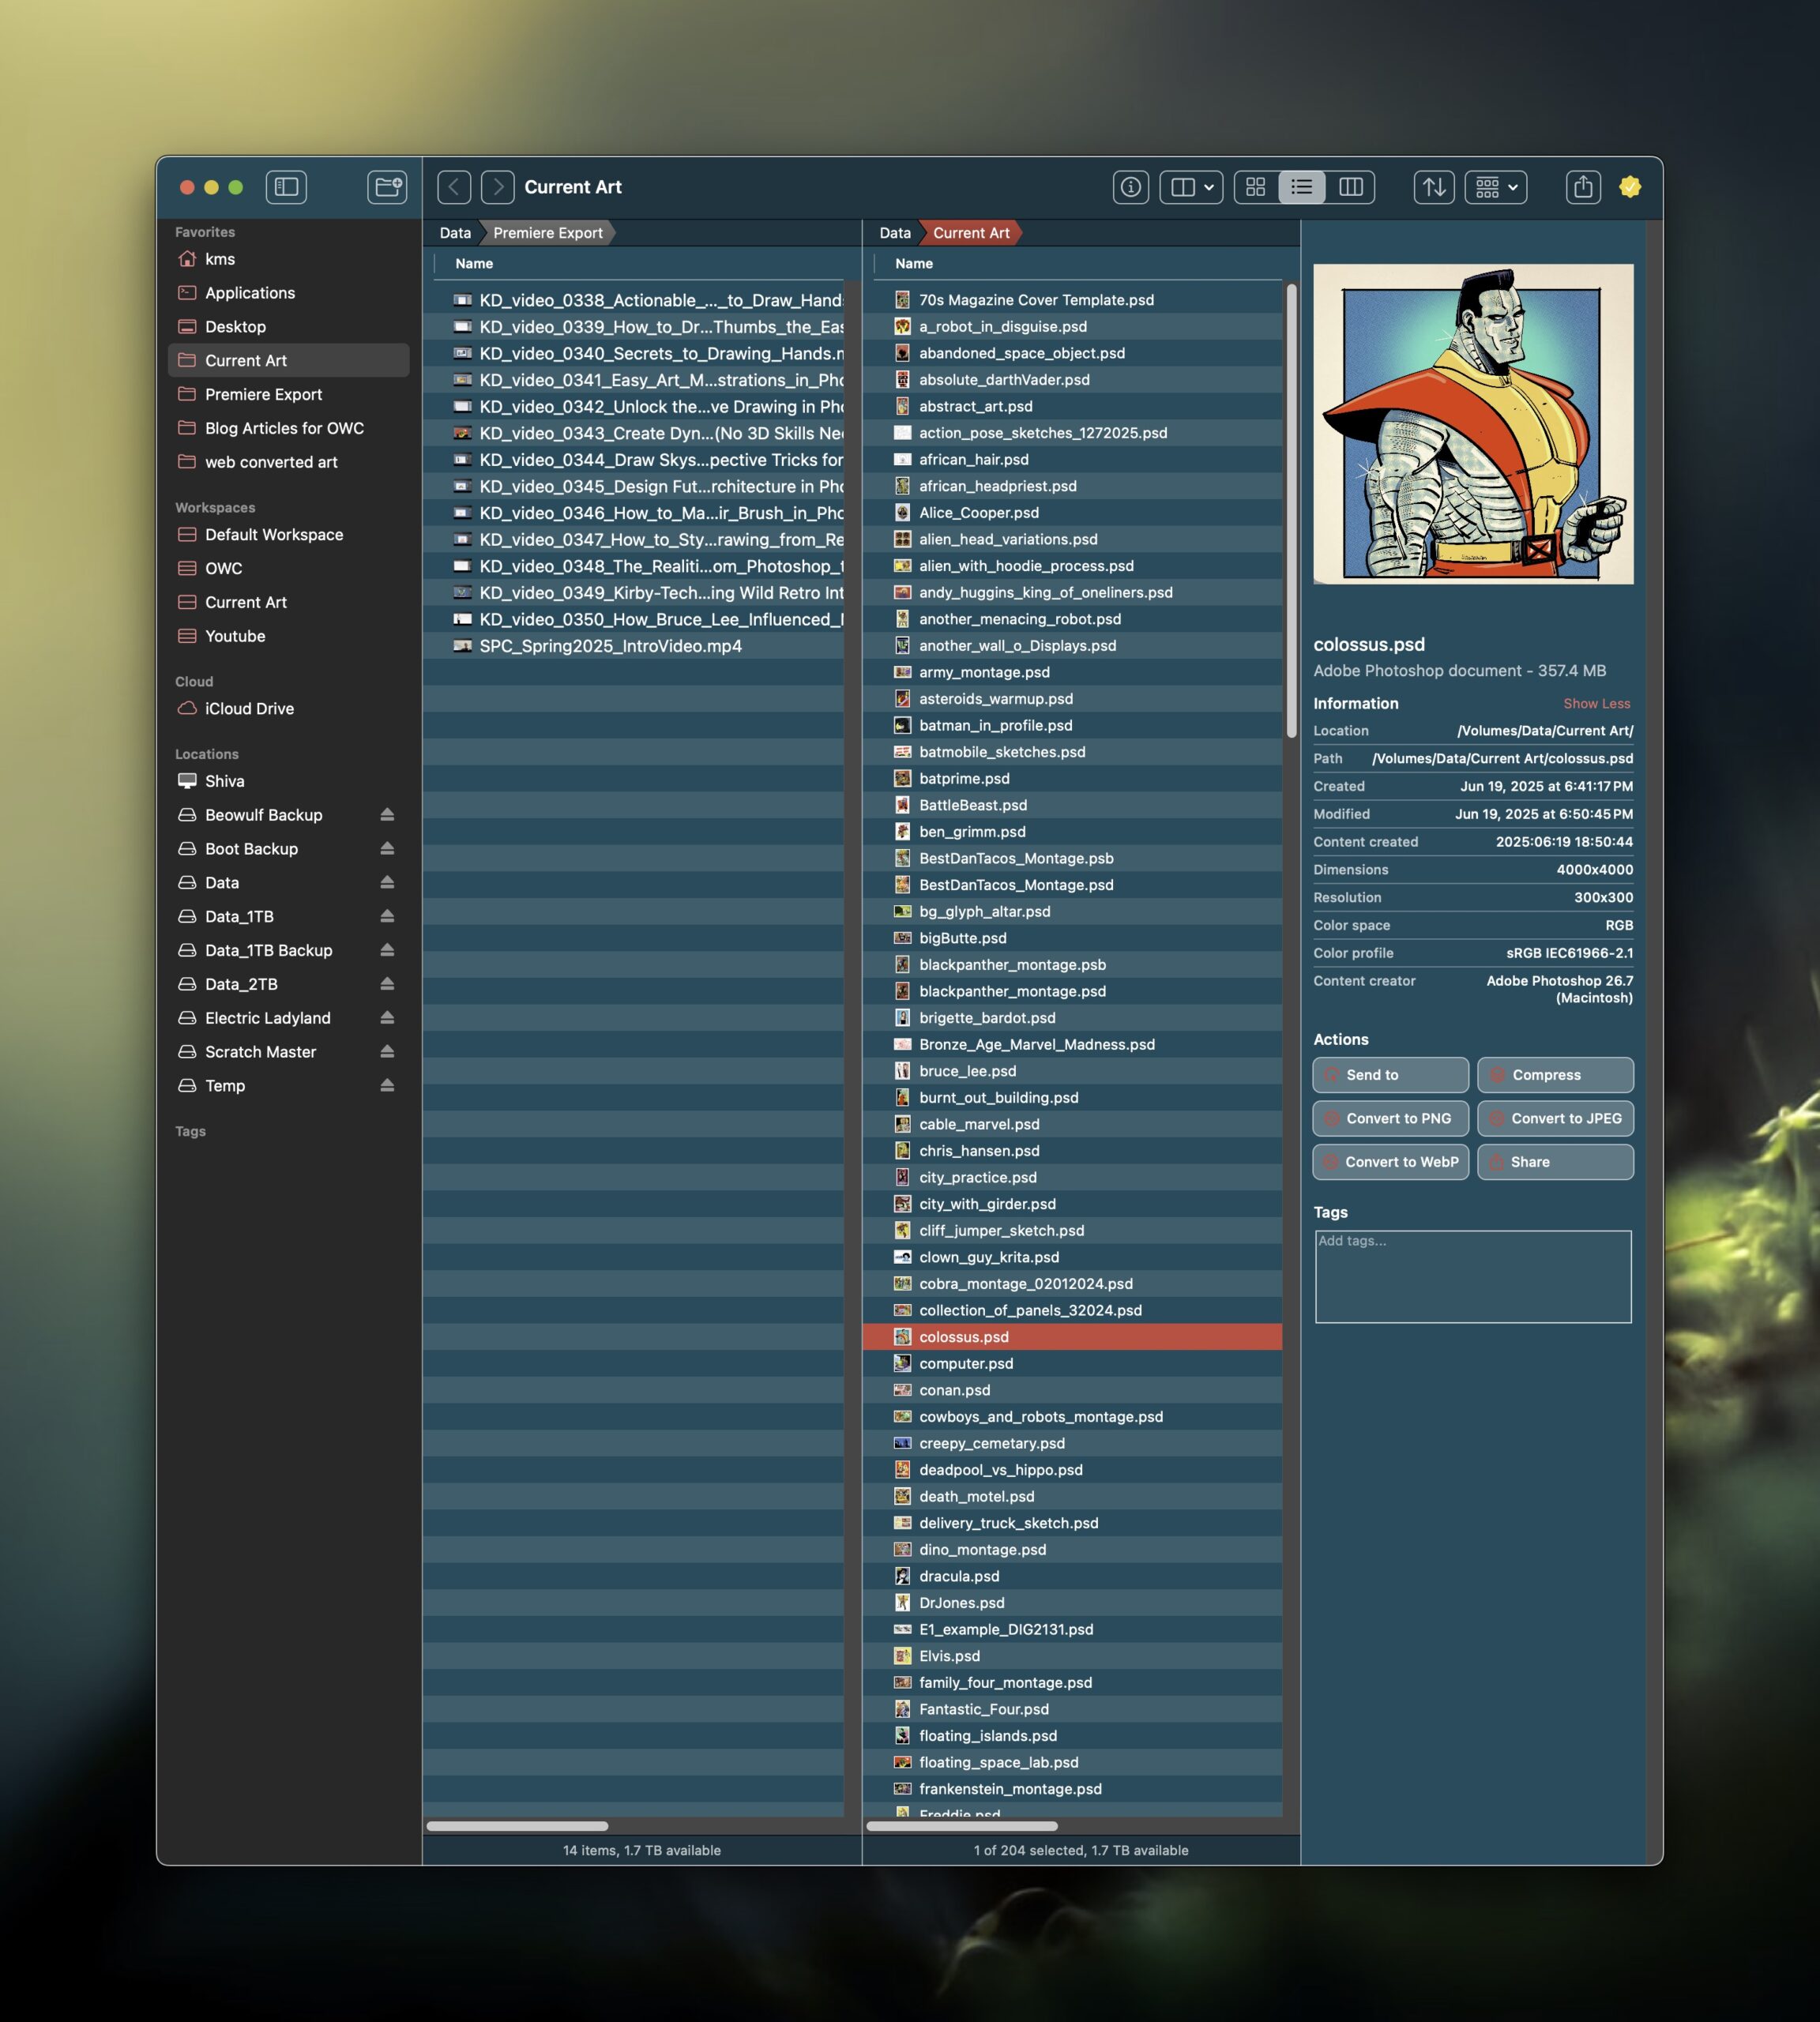
Bloom’s layout includes a familiar sidebar on the left, window pane(s) in the middle, and a Preview sidebar on the right.
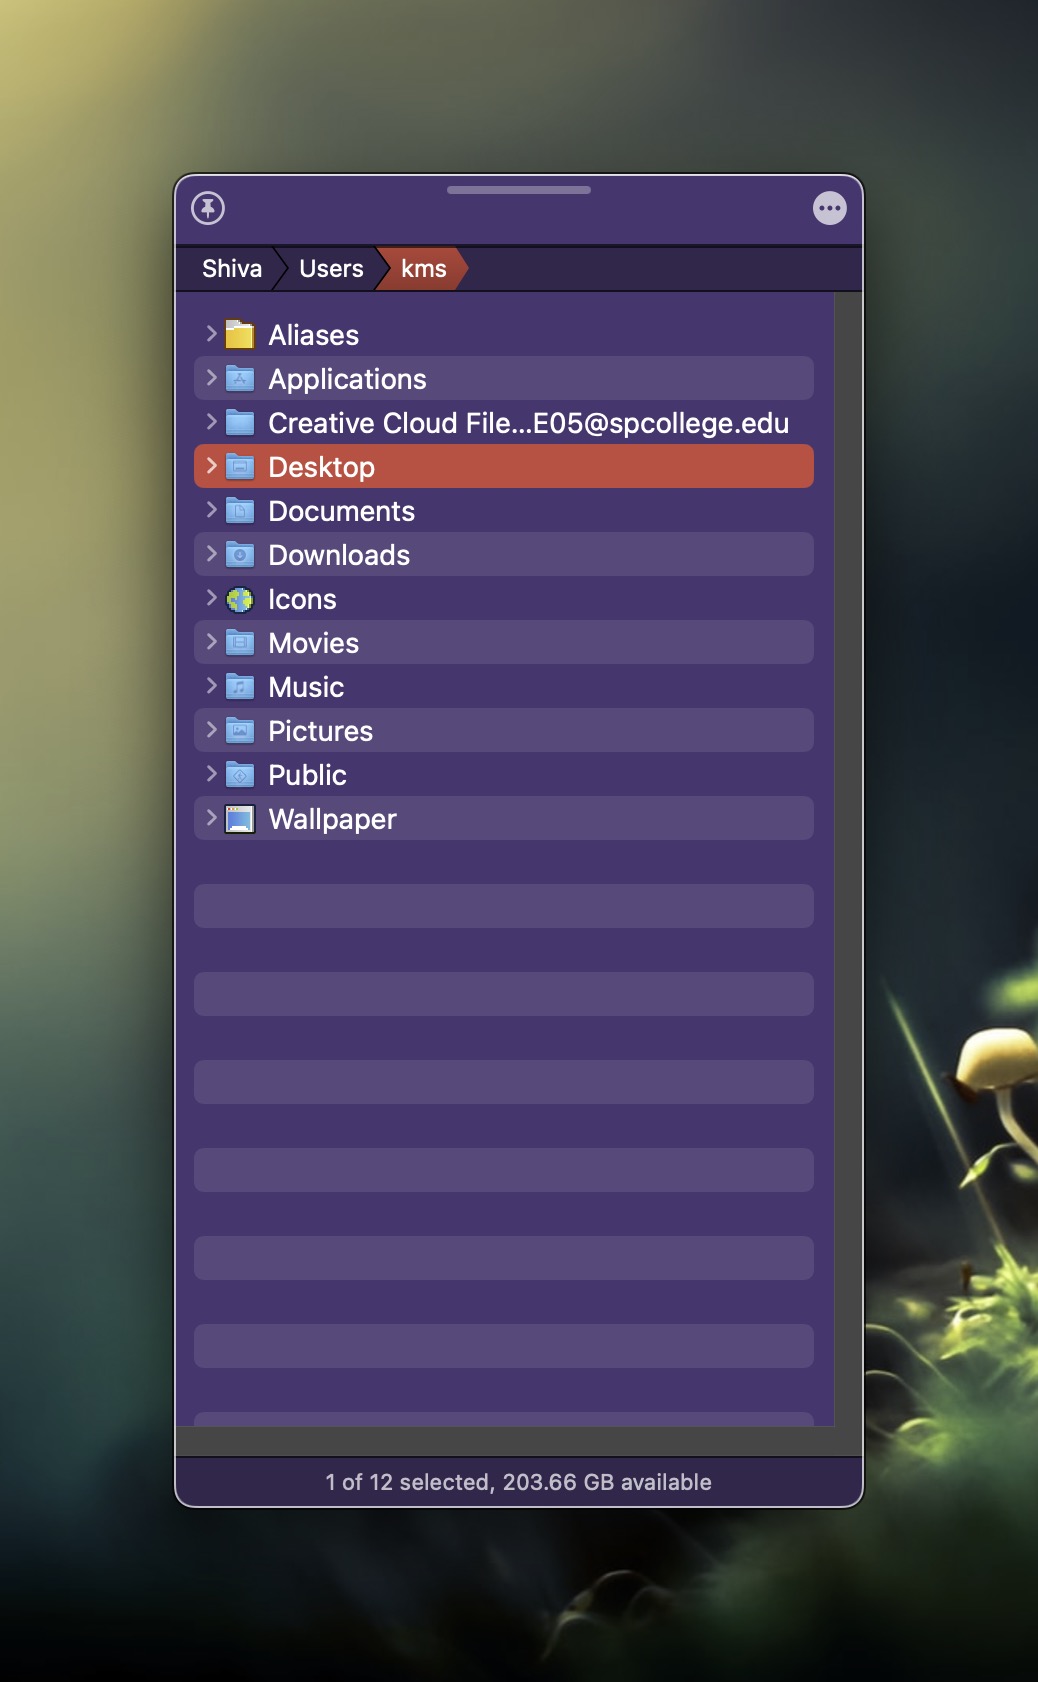
In its most basic single pane configuration, Bloom resembles the Finder.

But, unlike the Finder, Bloom allows for multi-pane layouts within one window. For example: one Bloom window can contain two horizontal panes, three stacked vertical panes etc. Bloom includes 10 different multi-pane layouts, so you can pick the one you prefer the most.
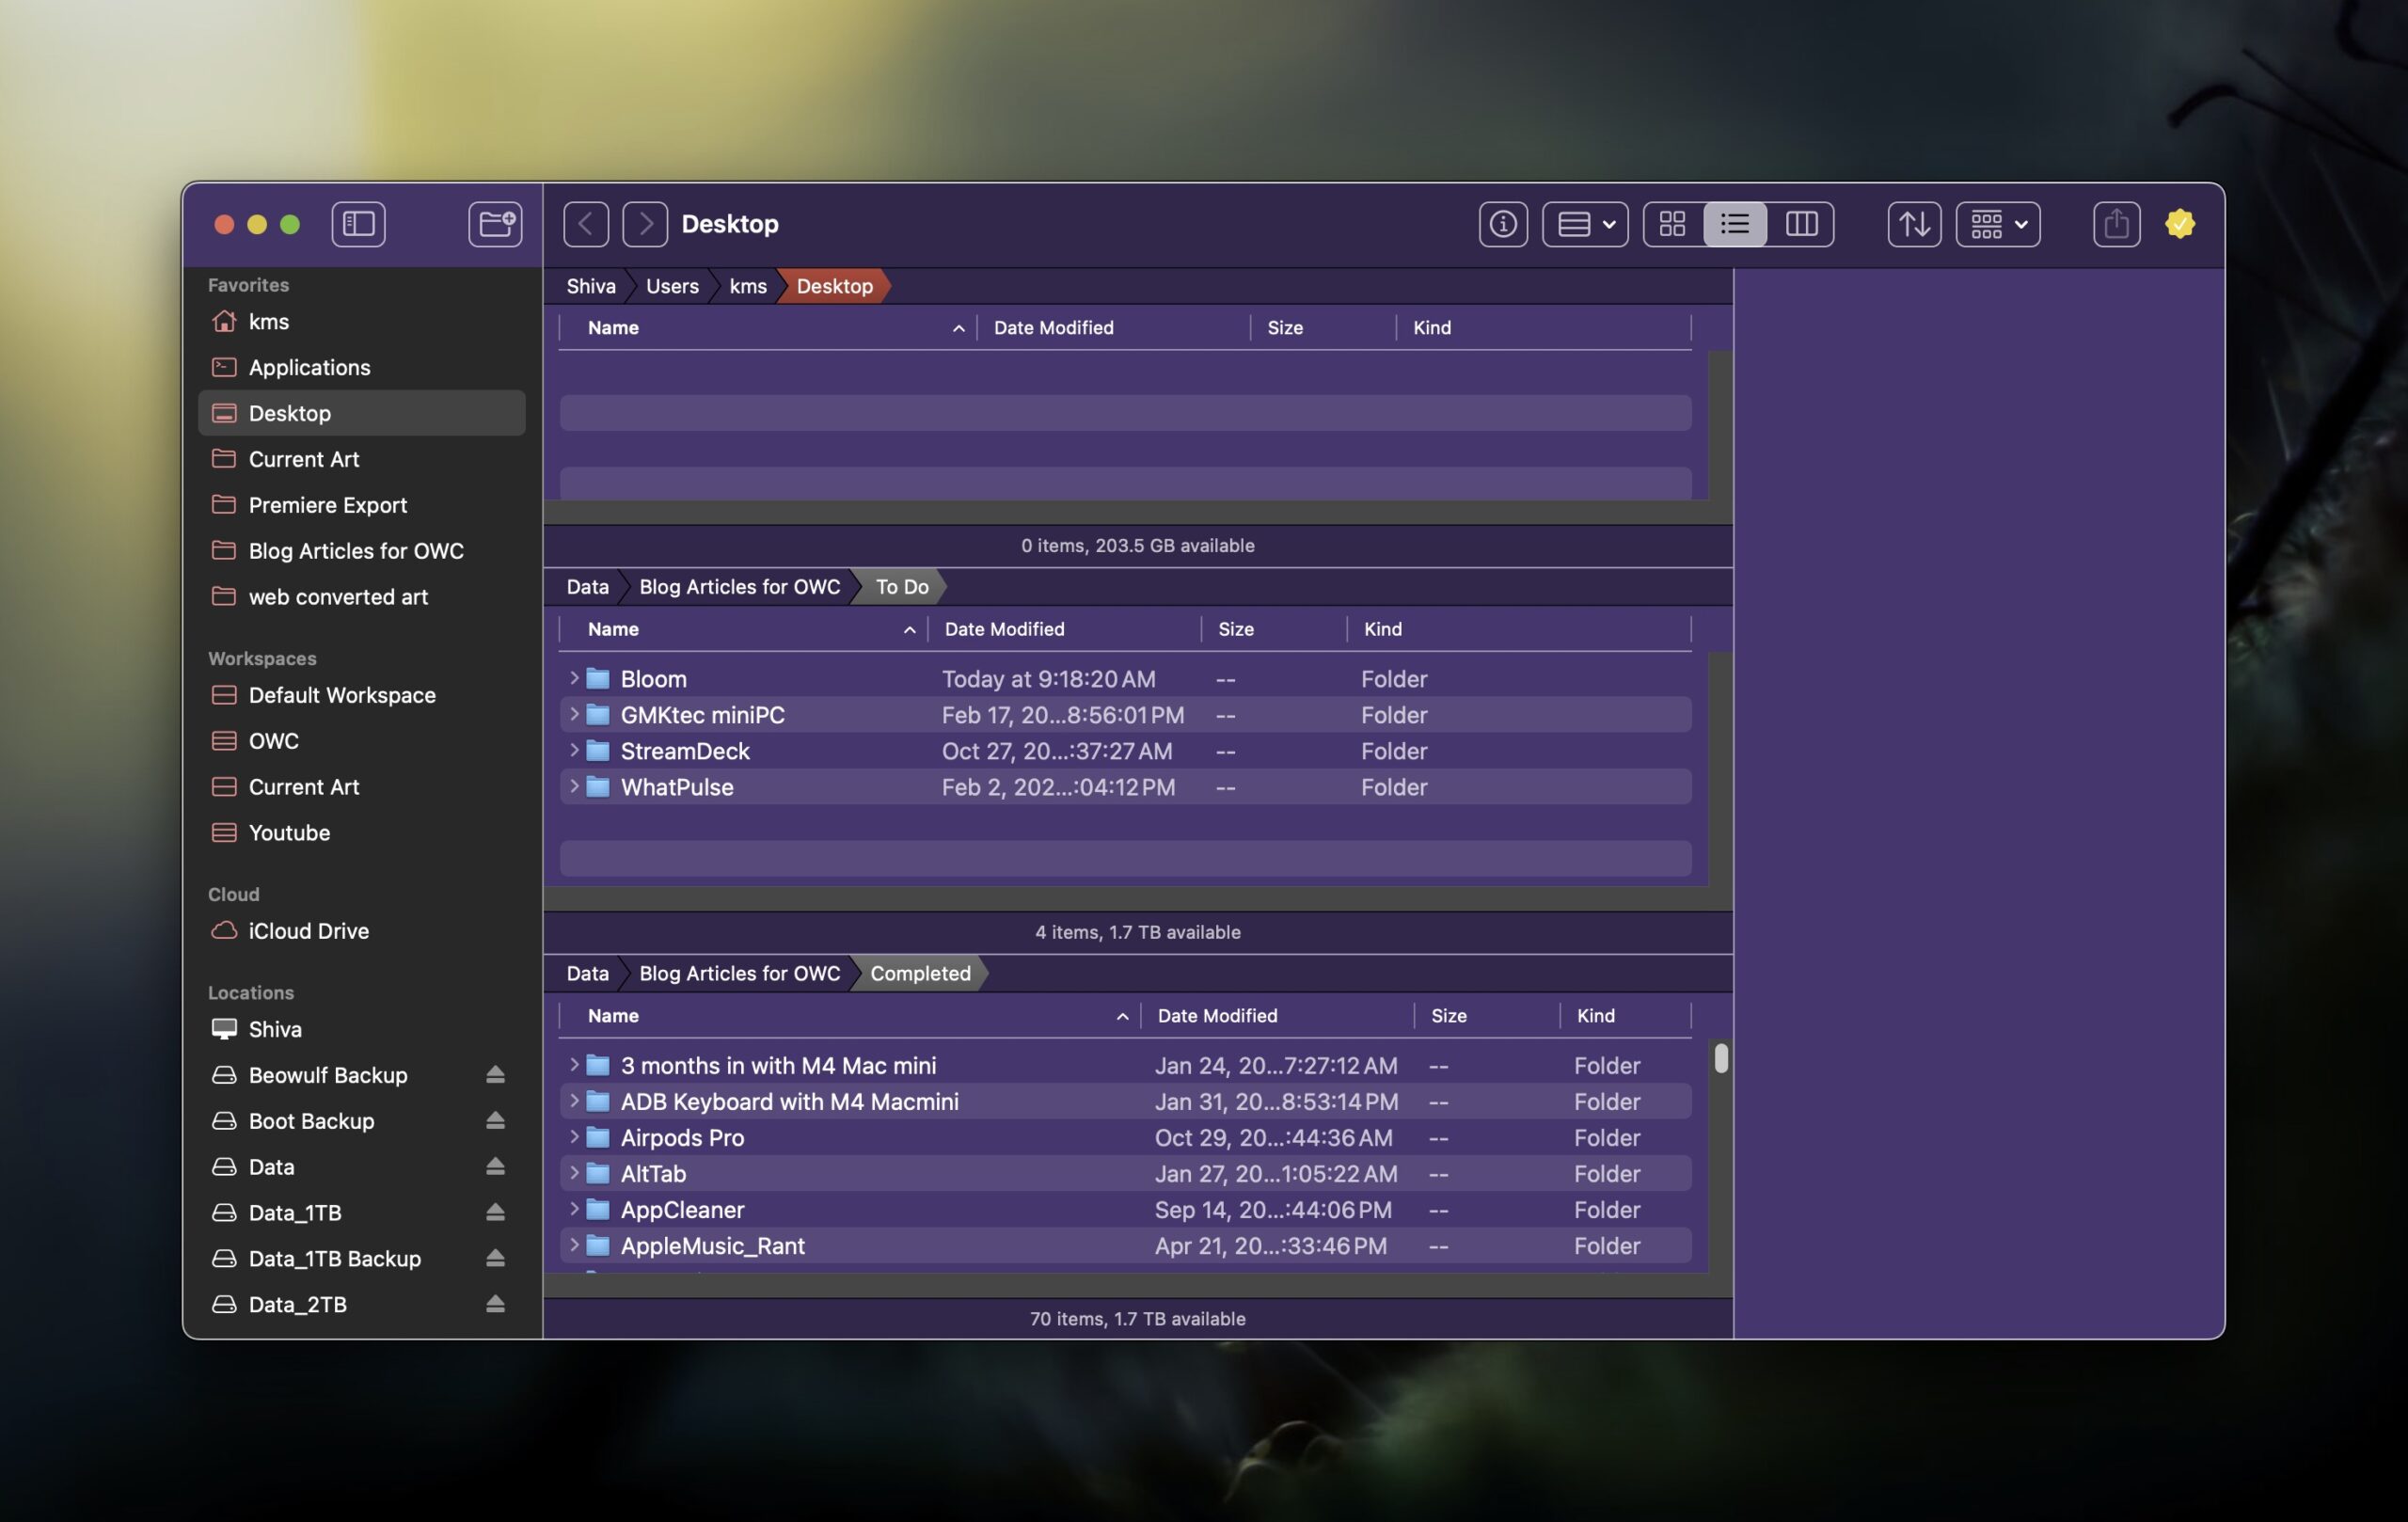
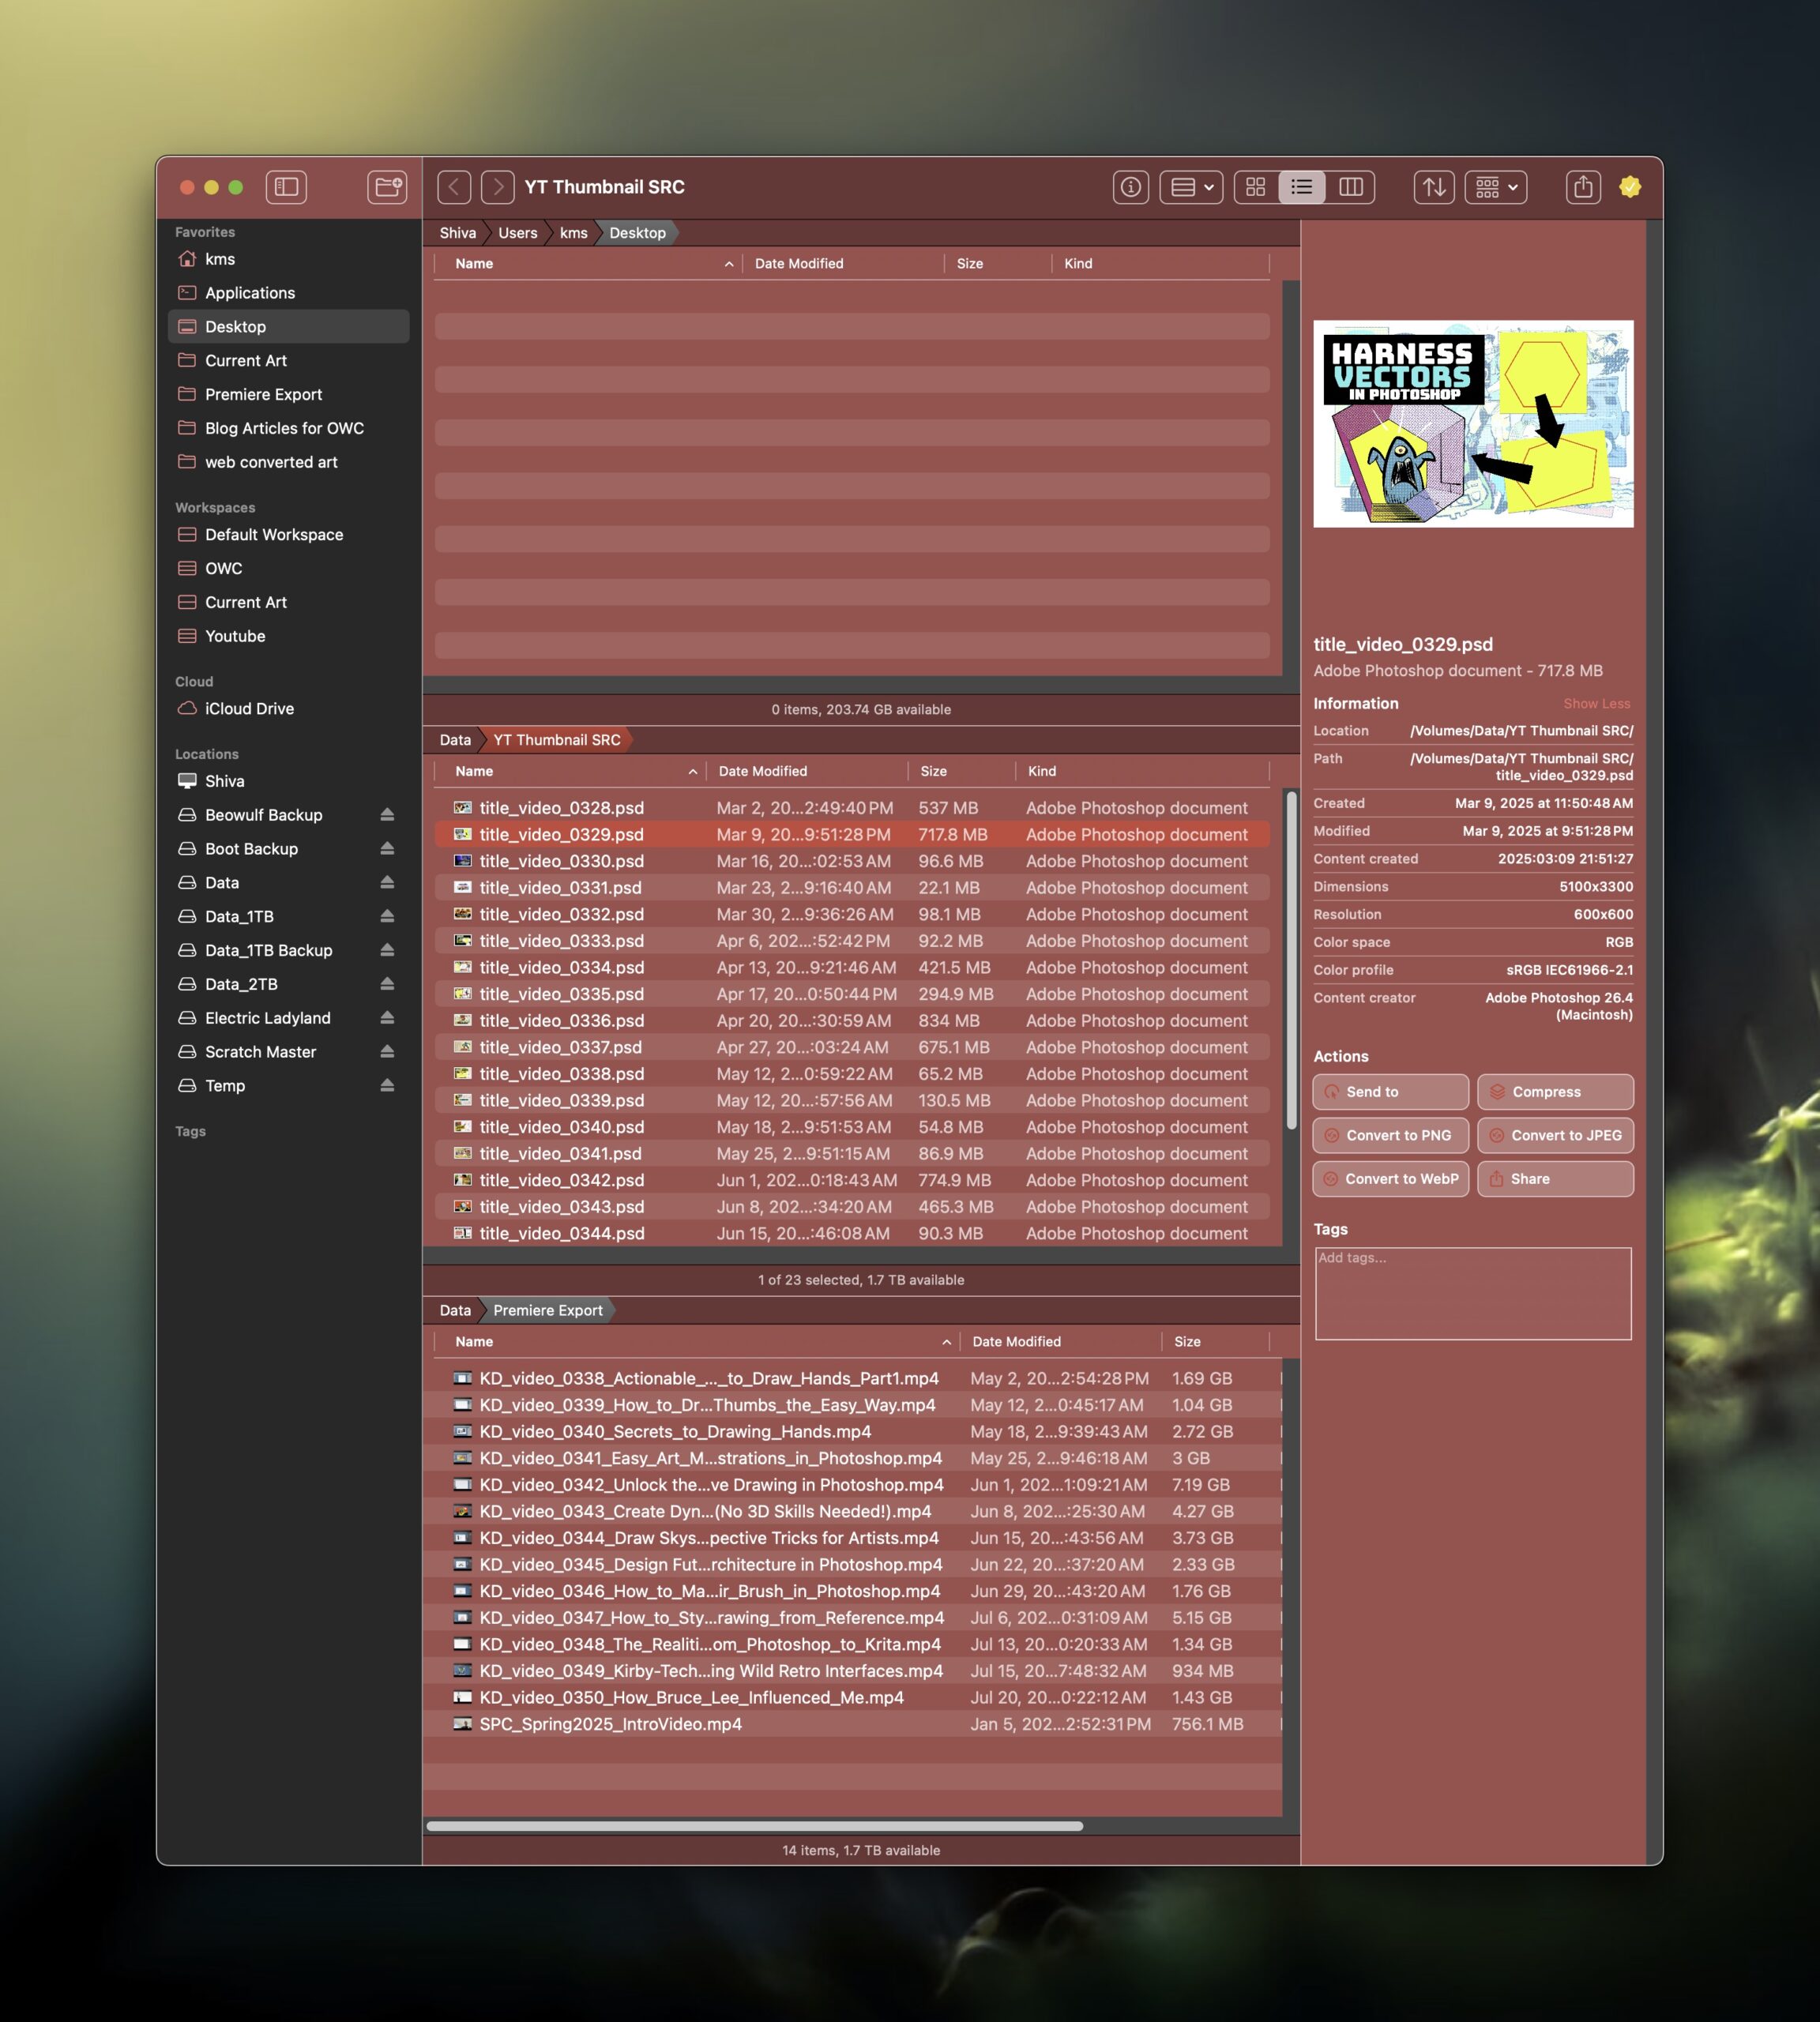
Having one window with three vertically stacked panes is incredibly convenient for moving or copying files between different locations. Instead of opening two or three separate Finder windows, you can simply open up one Bloom window and see all three panes, each with their own specific path.

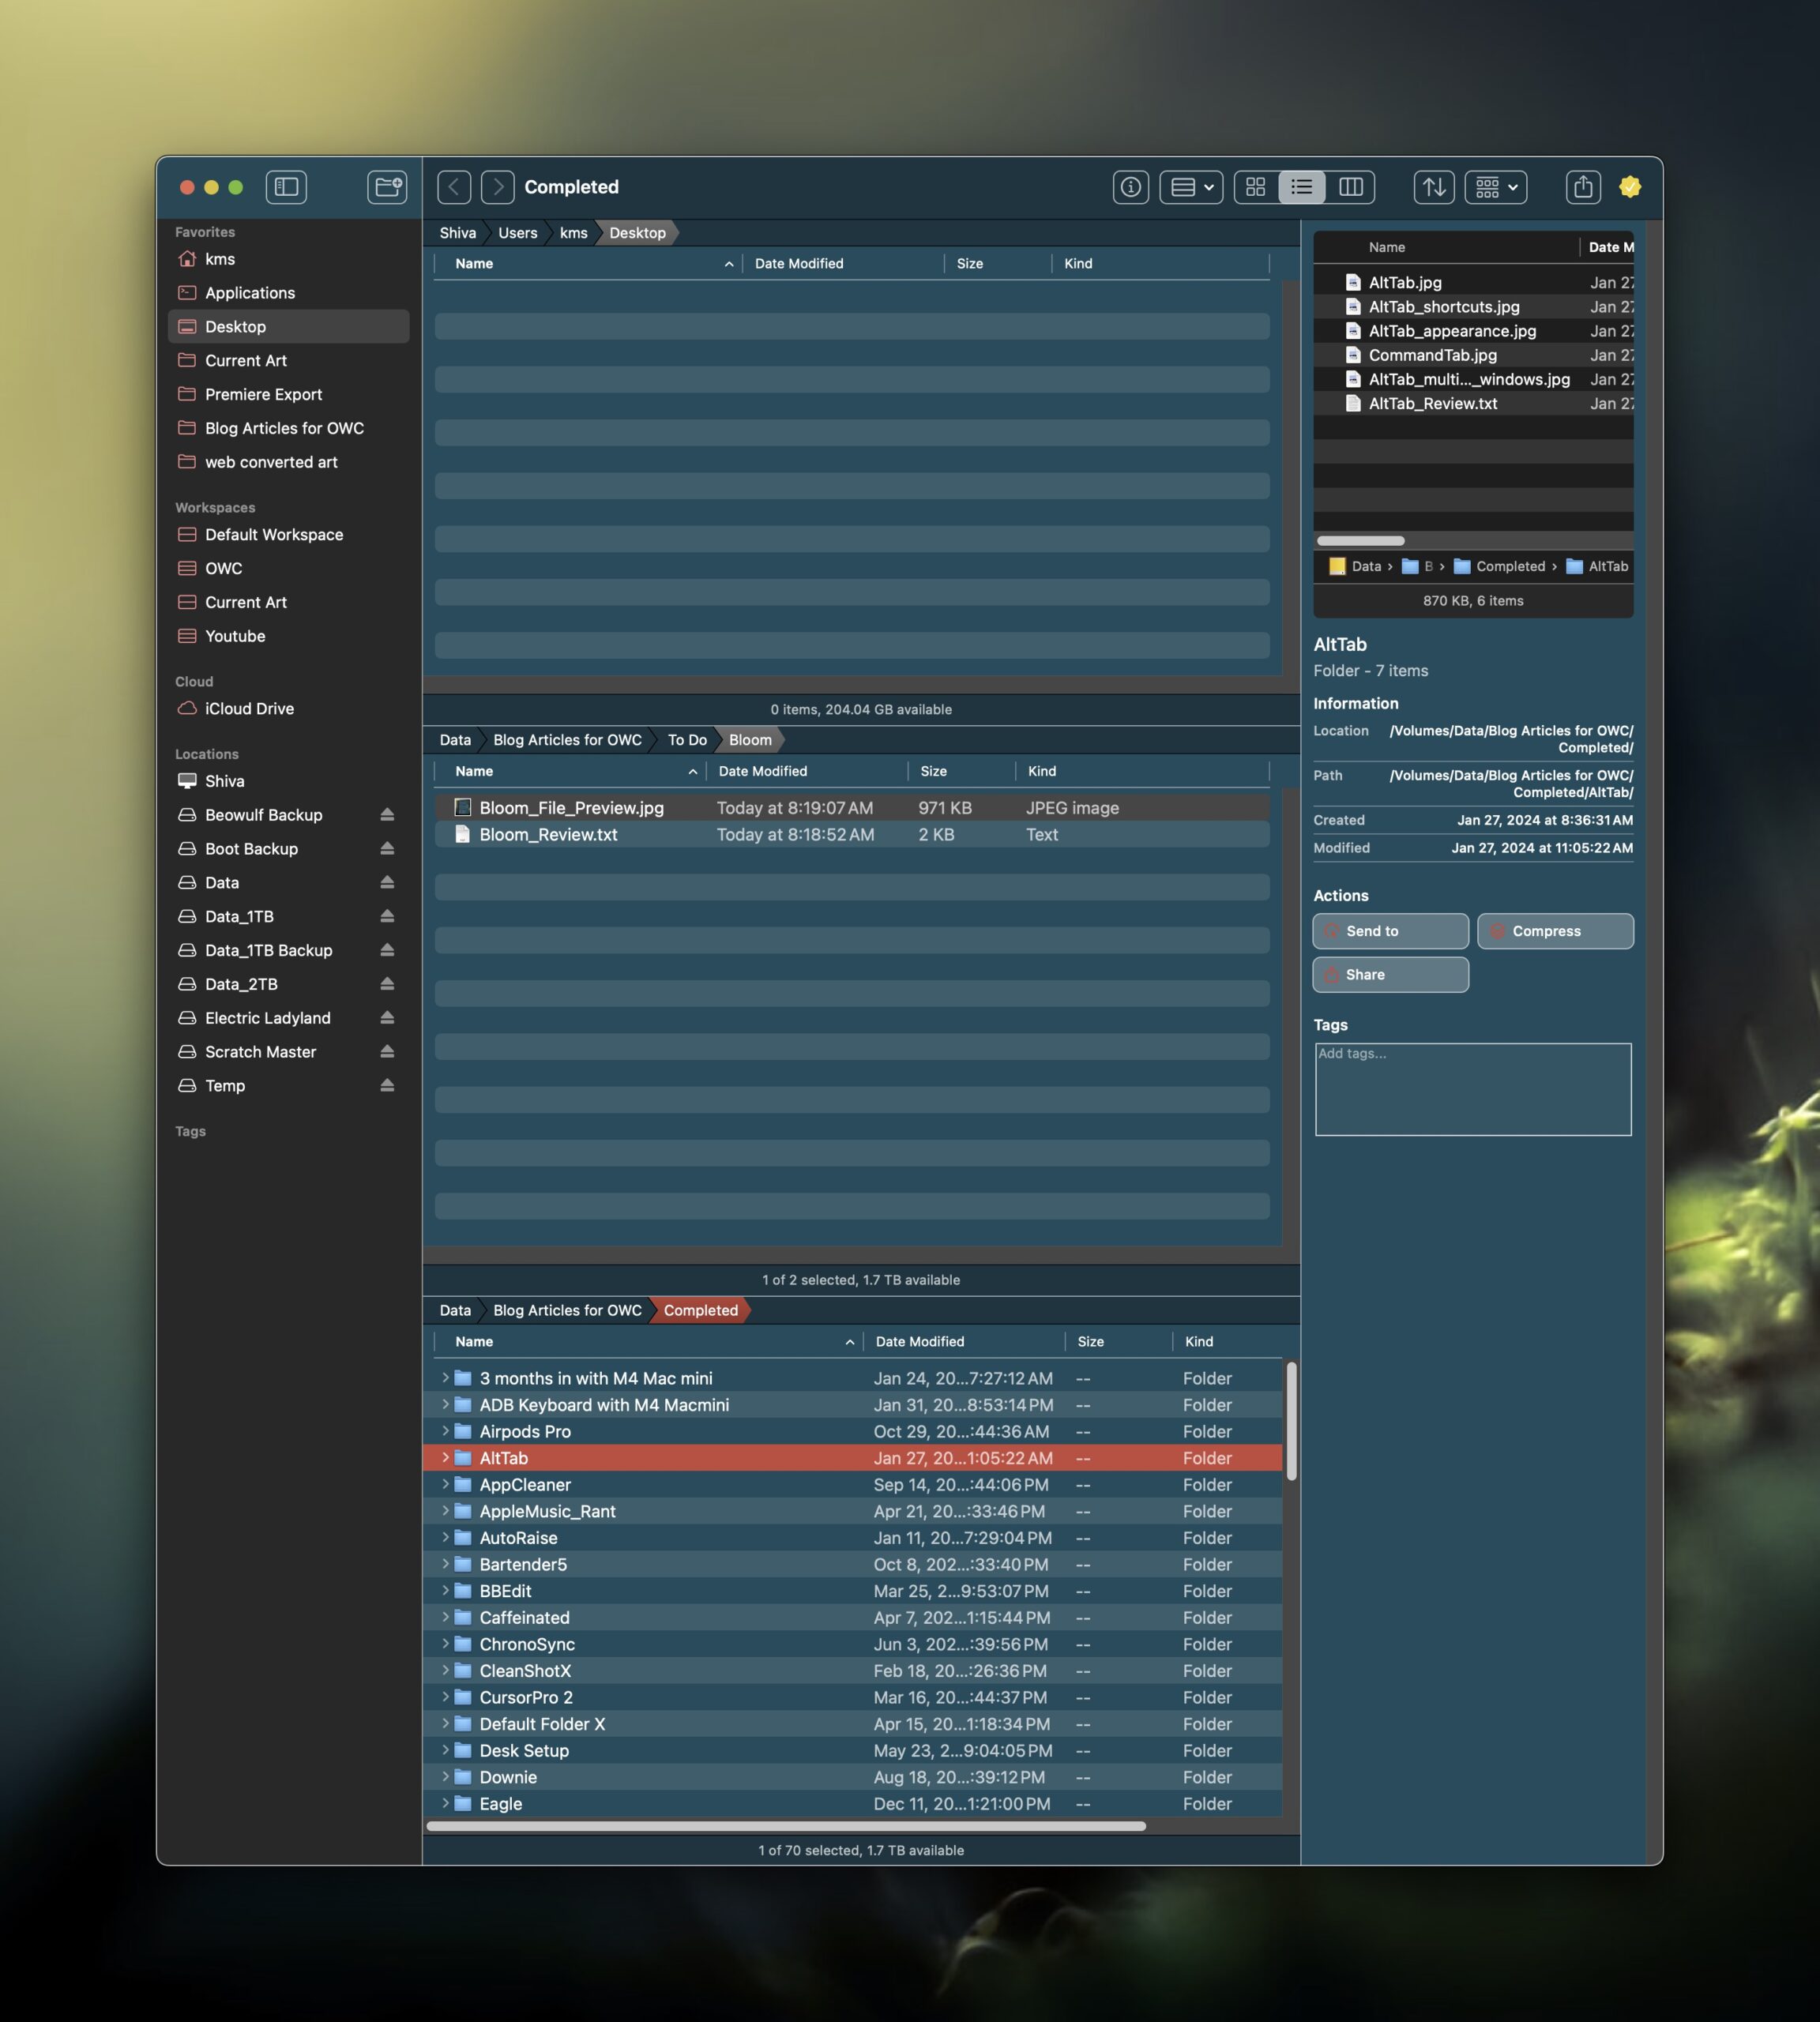

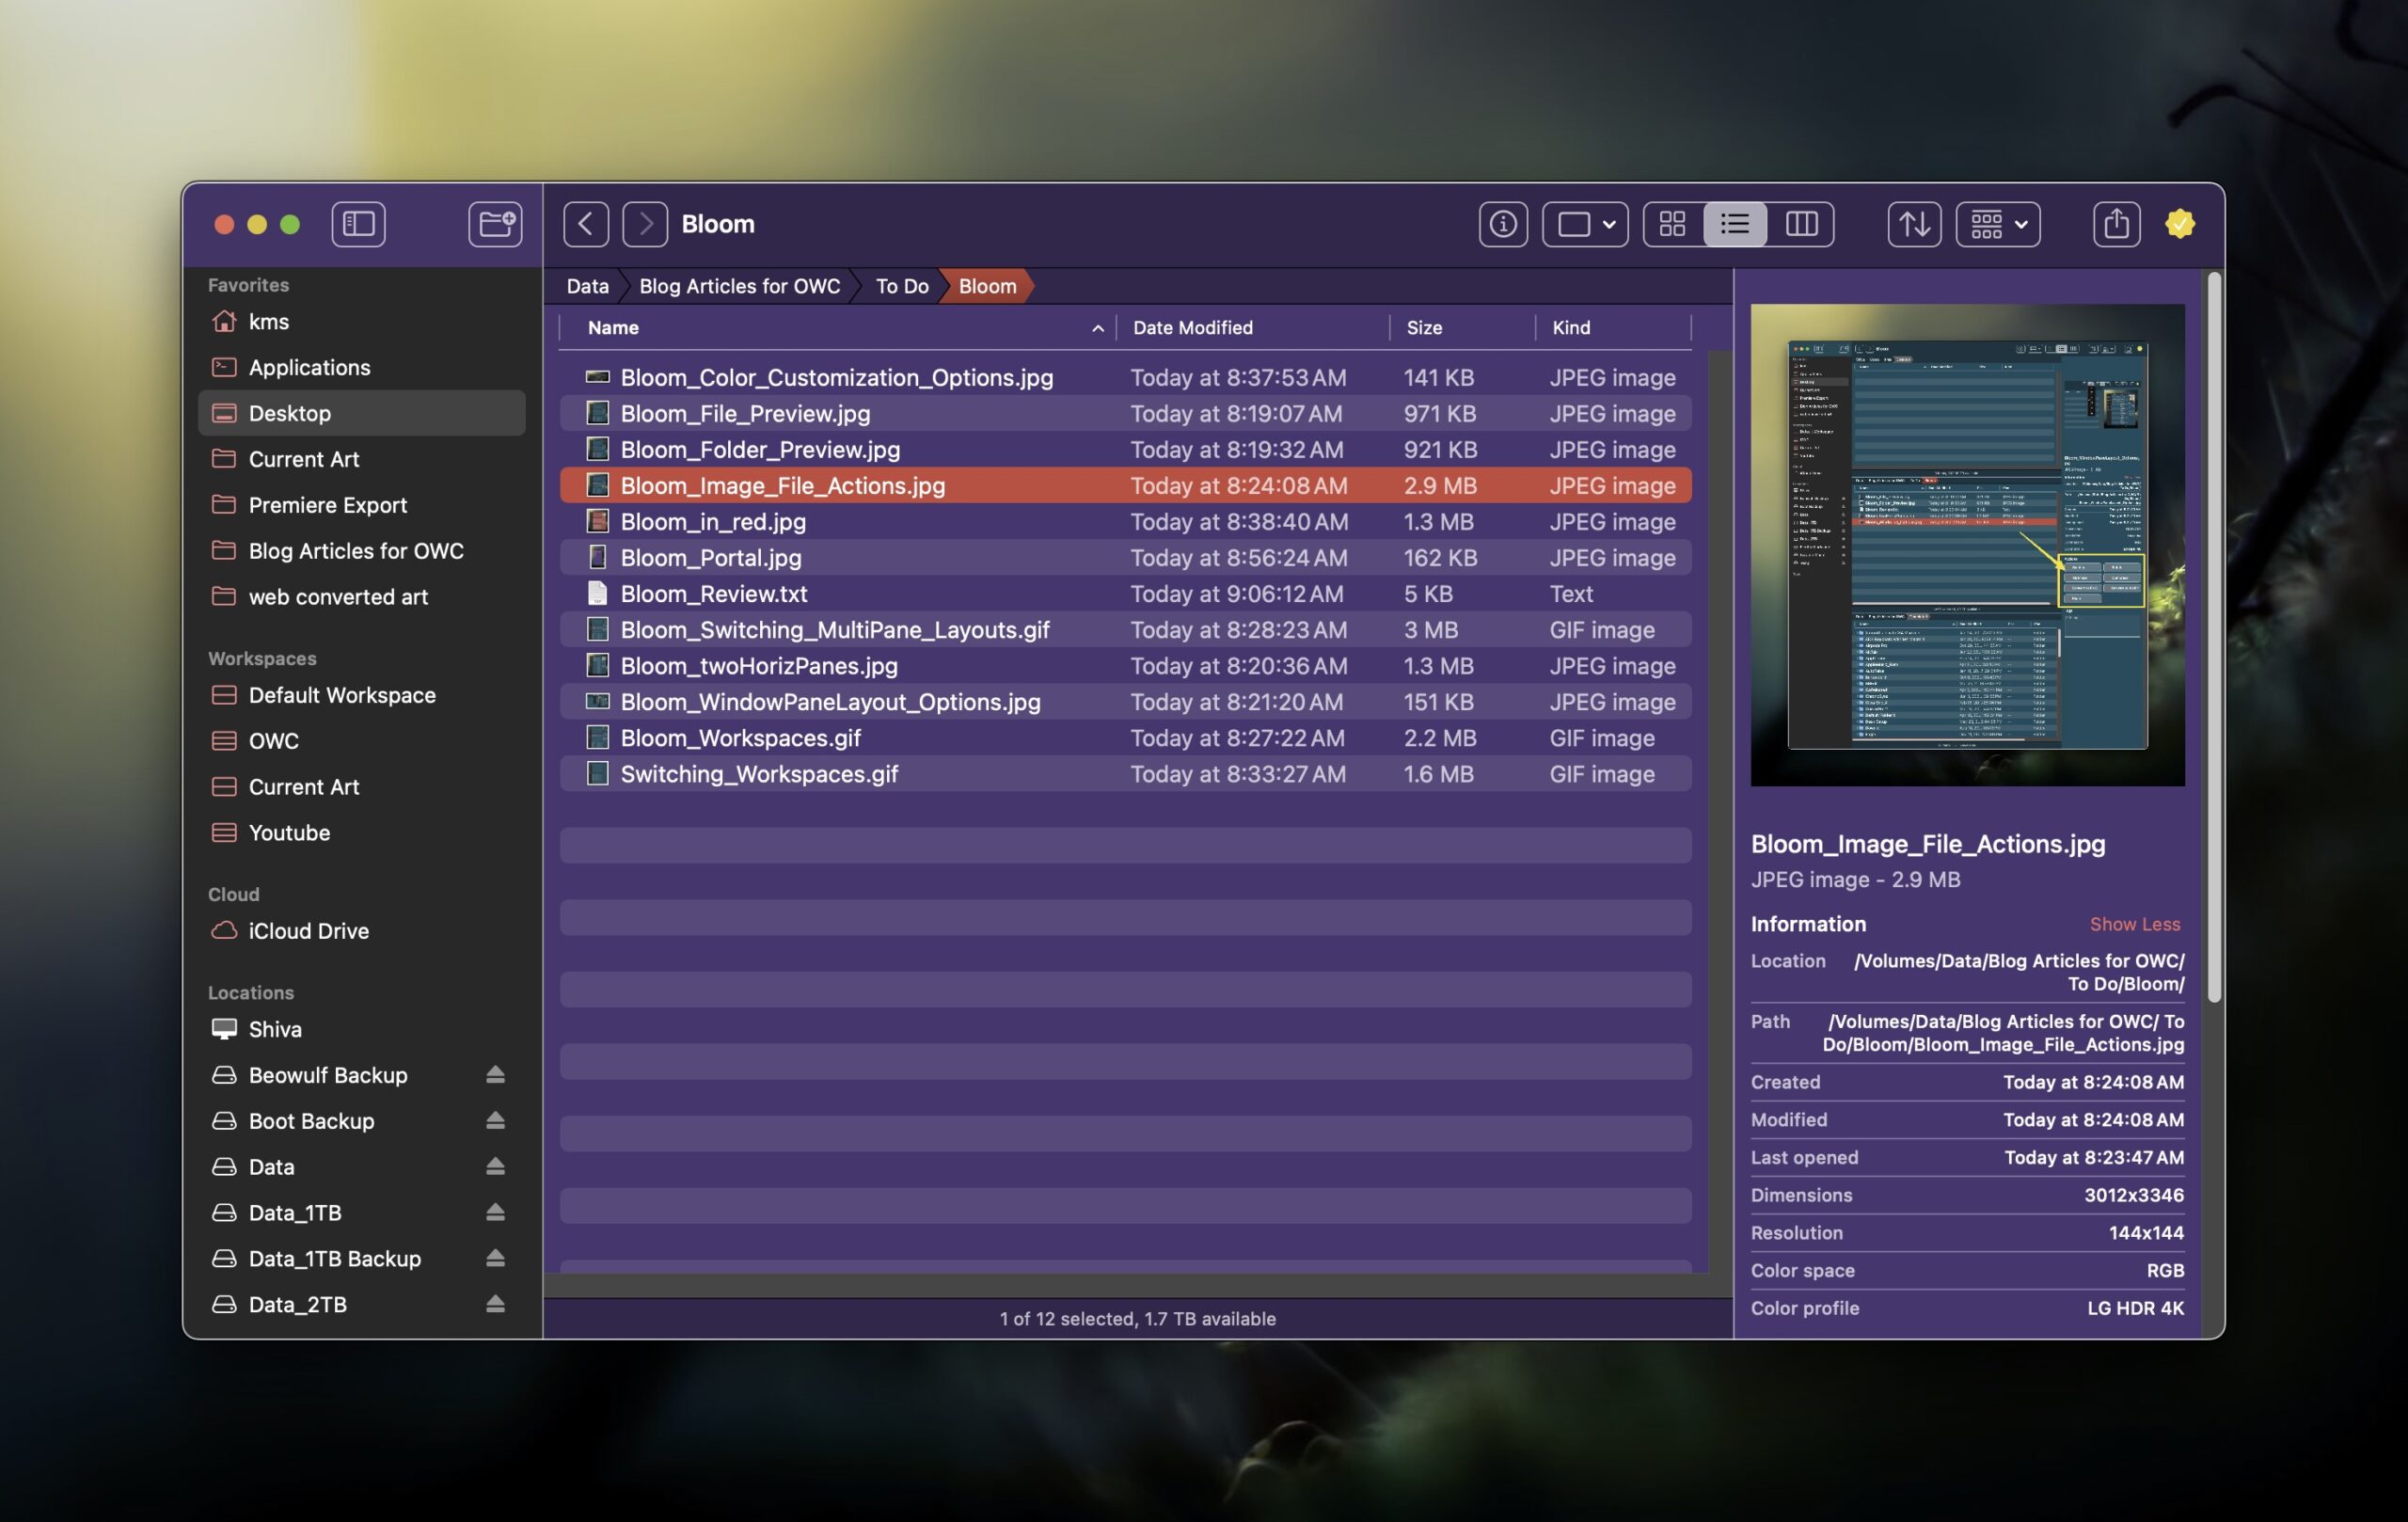
When a folder is selected in the active window pane, the Preview sidebar shows a list of the folder’s contents, the path, and a set of Actions (Send to, Compress, and Share). When selecting a file, Bloom will show you a preview of the content, its path and a set of Actions associated with the file. For example, when a JPG image is selected, you can choose additional Actions to convert the file to PNG, WebP or rotate the file.
If you prefer a more compact view, Bloom offers Portal: a Bloom window without the sideBar or preview. It can be pinned to the top, so that you have quick access to your working directory.

My favorite Bloom feature is its ability to save Workspaces. For example, when I’m writing reviews for RocketYard, I prefer a 3-pane vertical stack, with the top pane showing my Desktop, the middle pane showing my To Do folder, and the bottom pane showing my Completed Reviews folder. When I’m preparing Youtube videos, I have another saved Workspace that includes a 3 pane vertical stack with the associated folders I frequently use.

If I need to switch tasks, I simply select the appropriate saved Workspace from Bloom’s Sidebar, and I’m ready to work. Bloom’s Saved Workspaces is an incredible time-saver!

Bloom also includes color customization options. Pick from one of the assorted colors (or choose your own using Bloom’s color picker), and your Window pane changes its color accordingly. Try doing that in the macOS Finder!
If that weren’t enough, Bloom includes useful search tools. Hit Command-Shift-Return to navigate to another location on your Mac, or simply hit the Tab key in Bloom to bring up the same search window. Pressing Command-F will let you search for a specific file in your current folder location.
I find Bloom (currently at version 1.34) to be incredibly useful. What’s included works really, really well. There’s a high degree of polish, and I have yet to run into any rough edges or quirks.
For future versions, I would like Bloom to include an option to see my local network in the Sidebar. I also think it would be great if each Saved Workspaces could include a specific Window pane color. For example, a purple Bloom window could indicate that I’m in my Writing workspace, while a green window could indicate that I’m in my Video Editing workspace.
For all this added functionality and power, Bloom is blazingly fast and light on memory usage.
Bloom is compatible with macOS 14 and up. The developer offers a 7-day trial to see if it’s right for you. Bloom costs $15 as a one-time purchase, and can be installed on up to 3 Macs.
Does Bloom live up to its billing a refined Finder experience? Yes, it most certainly does. I’ll go on record and state that Bloom is several orders of magnitude more powerful than the Finder. Apple, take notes.


Thanks. Had for half a day.
The auto column width alone will probably make it a keeper for me. And I installed it first on my Tahoe MBP. Mini will stay on Sonoma until full release.
And I can think of one or two Workspaces I’ll use
How do I add Services and Quick Actions?