 1-800-275-4576
OWC Drive Setup for Windows, Chrome, and Android Platforms
Support Article
Details
Mac-Formatted OWC SoftRAID Device
- OWC software RAID drive solutions that ship from an OWC facility are set up as either an OWC SoftRAID RAID 0 | RAID 5 for Mac. The following options will allow the Mac-formatted OWC device to work as a Windows formatted device.
- Please consult the support article "Mac to Windows – SoftRAID Volume Conversation" for instructions to convert the Mac-formatted OWC SoftRAID RAID 0 | RAID 5 to a Windows formatted device through OWC SoftRAID.
- The Mac-formatted OWC SoftRAID RAID 0 | RAID 5 devices can be used in Windows through the purchase and installation of OWC MacDrive. OWC MacDrive allows access to Mac-formatted drives in Windows without performing a conversion process. Please visit OWC MacDrive Product Details or OWC MacDrive Support for more information.
Mac-Formatted APFS | HFS+ Device
As of November 1st, 2023 newly assembled OWC drive solutions that ship from an OWC facility to a user will be set up as either HFS+ for HDDs and APFS for SSDs. This will allow for a seamless plug-and-play experience between Mac and iPad systems. Windows, ChromeOS, and Android users will need to reformat the Mac-formatted OWC device over their respective operating system to begin use.
NOTE: Select OWC drives were already configured before this change and will not arrive formatted as HFS+ / APFS. Mac users will need to format the drive using the pre-loaded formatting utility called OWC Drive Guide. Open "OWC SETUP", double-click the OWC Drive Guide utility, and follow the instructions to complete the formatting process.
Operating System Formatting Instructions
Windows Operating System
This section describes the process of formatting a Mac-formatted OWC device to work with Windows.
Users can access OWC Mac HFS+ / APFS formatted devices by either reformatting the drive using OWC Drive Guide for Windows or by purchasing MacDrive. Drive Guide is a free utility to format/reformat OWC drives in a Windows drive format (NTFS & ExFAT). MacDrive is a paid software that allows for Mac-formatted (HFS+ & APFS) drive support on Windows. Please visit Use Your OWC Drive on Windows for additional details
OWC Drive Guide for Windows
- Reformat the Mac-formatted device using OWC Drive Guide for Windows. This application is only available for devices assembled and shipped from OWC.
- Download OWC Drive Guide for Windows to begin the process of reformatting the OWC device with Windows.
- Please consult the OWC Drive Guide Support Manual for instructions.
OWC MacDrive
- The Mac formatted device can be used in Windows through the purchase and installation of OWC MacDrive. OWC MacDrive allows access to Mac-formatted drives in Windows without reformatting.
- Please visit OWC MacDrive Product Details or OWC MacDrive Support for additional details.
ChromeOS Operating System
This section describes the process of formatting a Mac formatted OWC drive to work with ChromeOS.
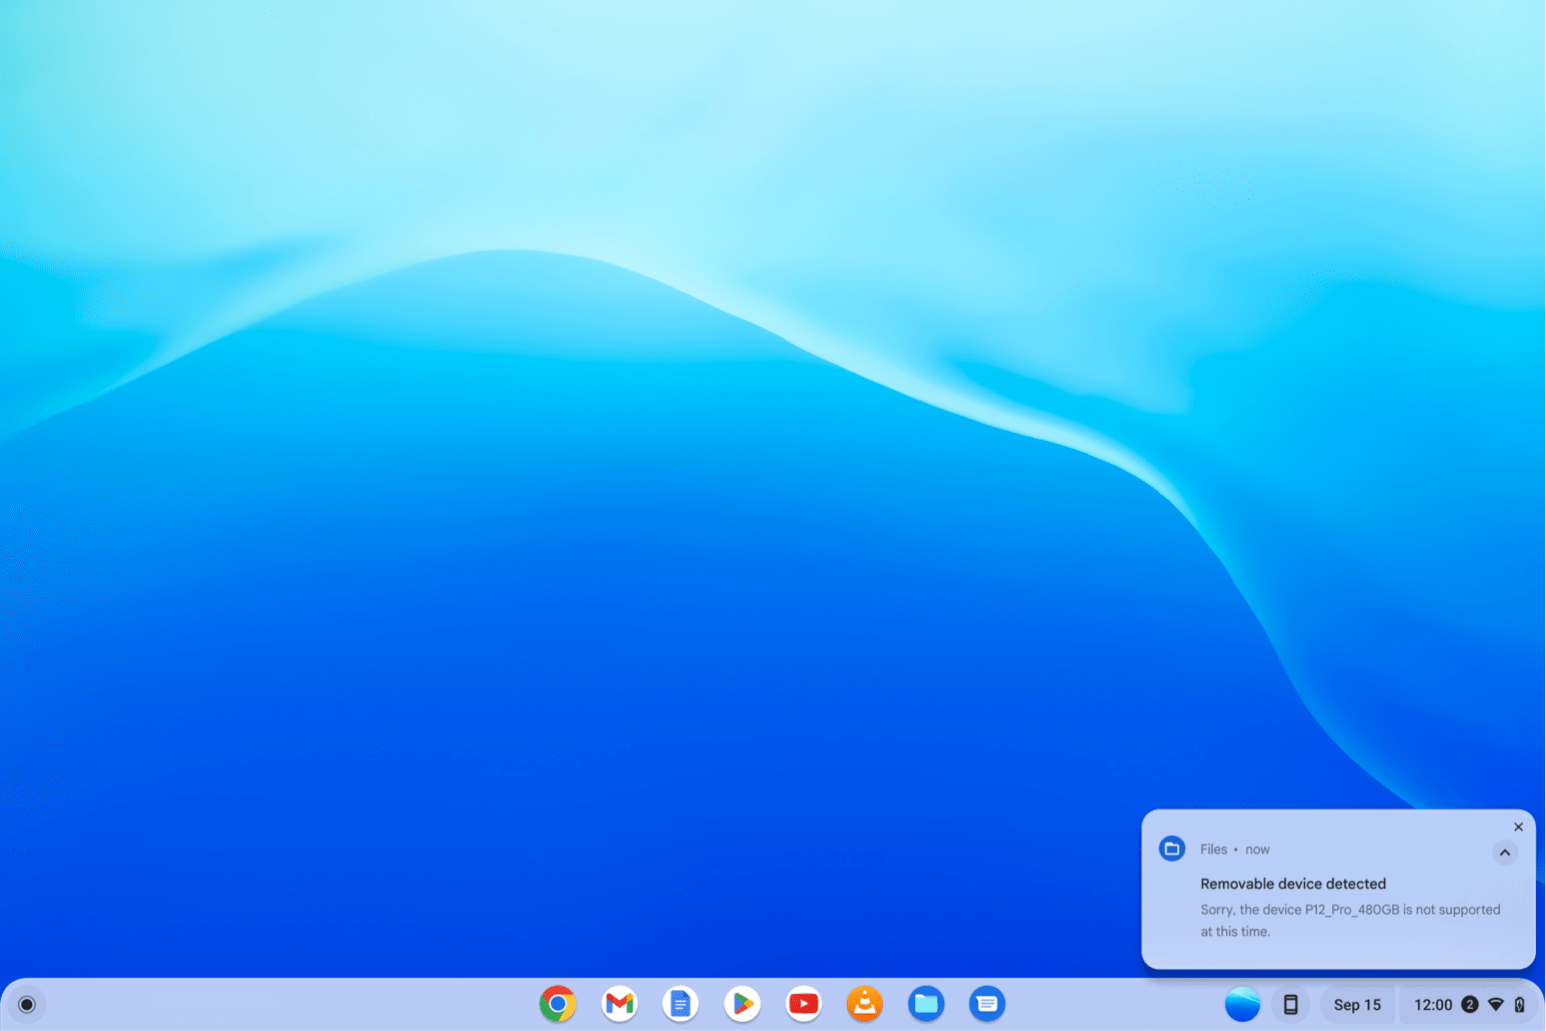
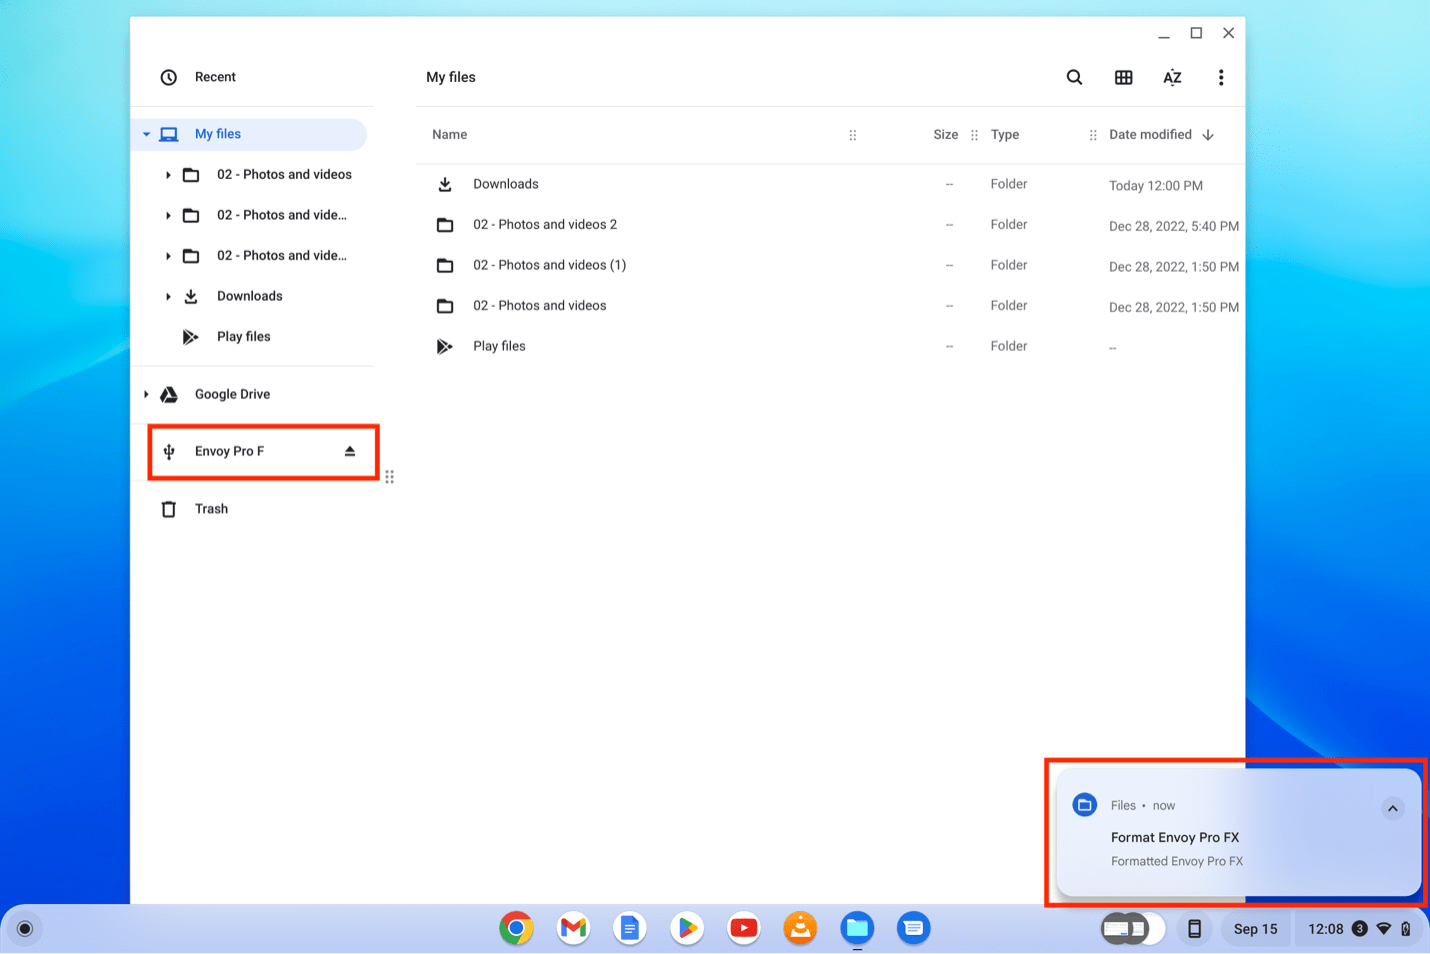
1. A notification will appear on the desktop once a Mac formatted OWC drive is connected to the system. Click on the notification to advance and format the drive solution. The device can also be accessed by clicking on the “Home Button” and selecting “File Explorer”.
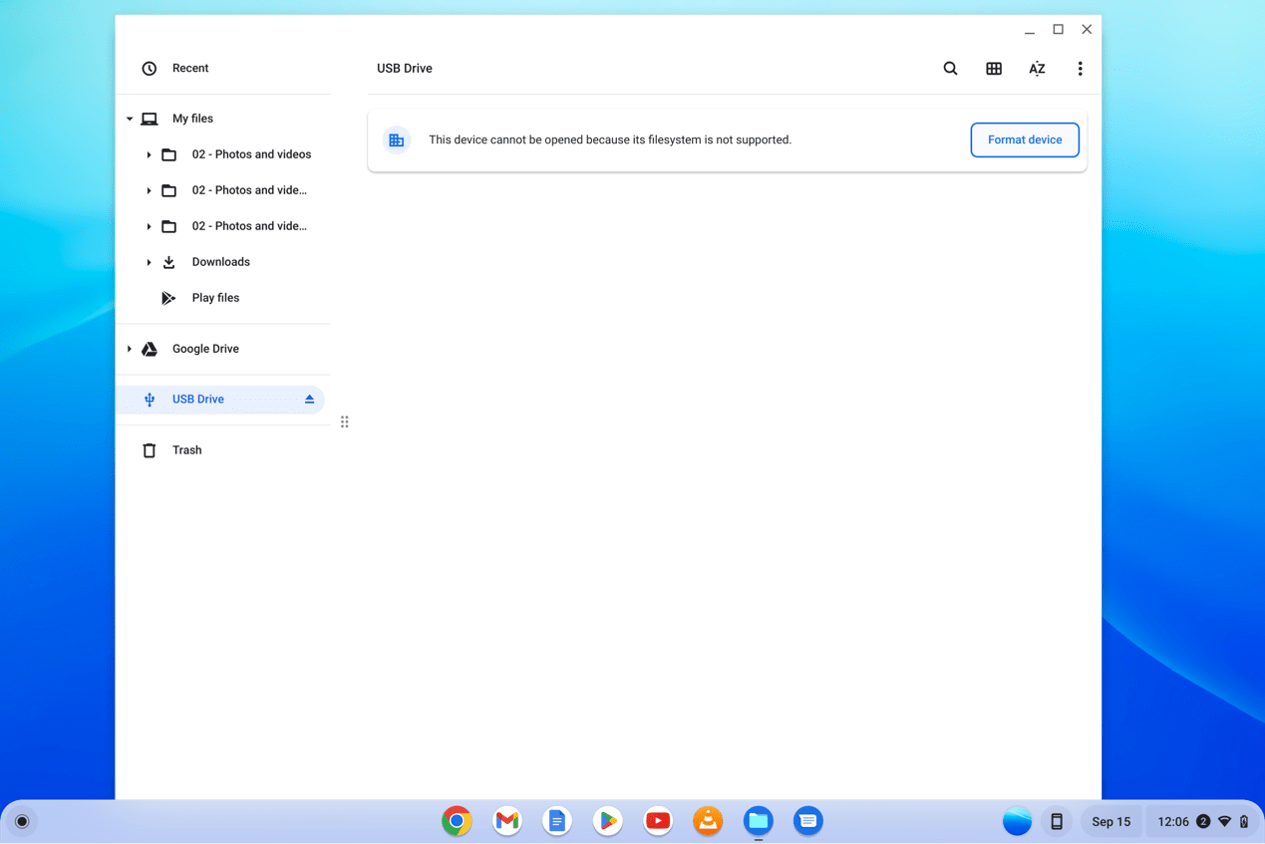
2. Select the connected OWC drive from the list on the left-hand column. Click "Format device".
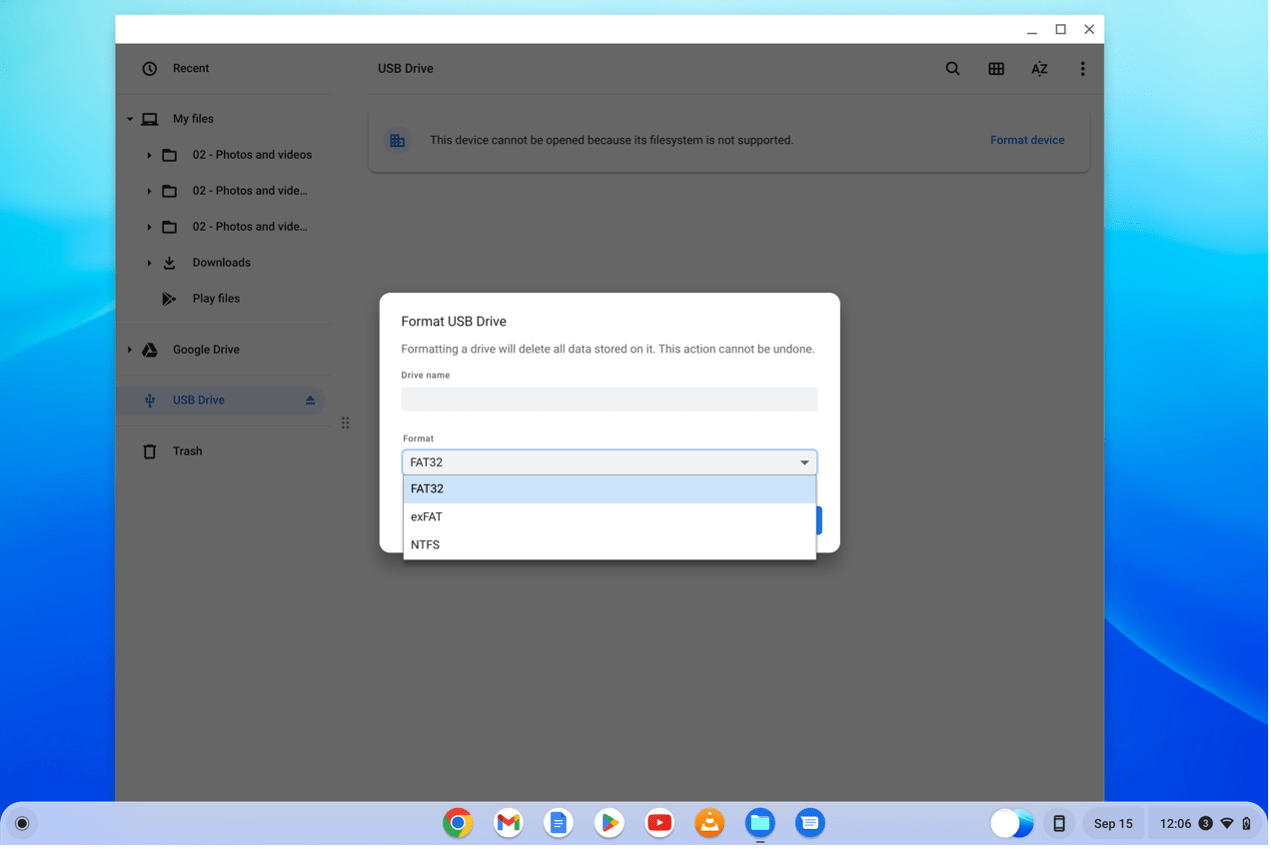
3. Select the desired Windows drive format from the drop-down menu. ‘FAT32’ is a commonly used format.
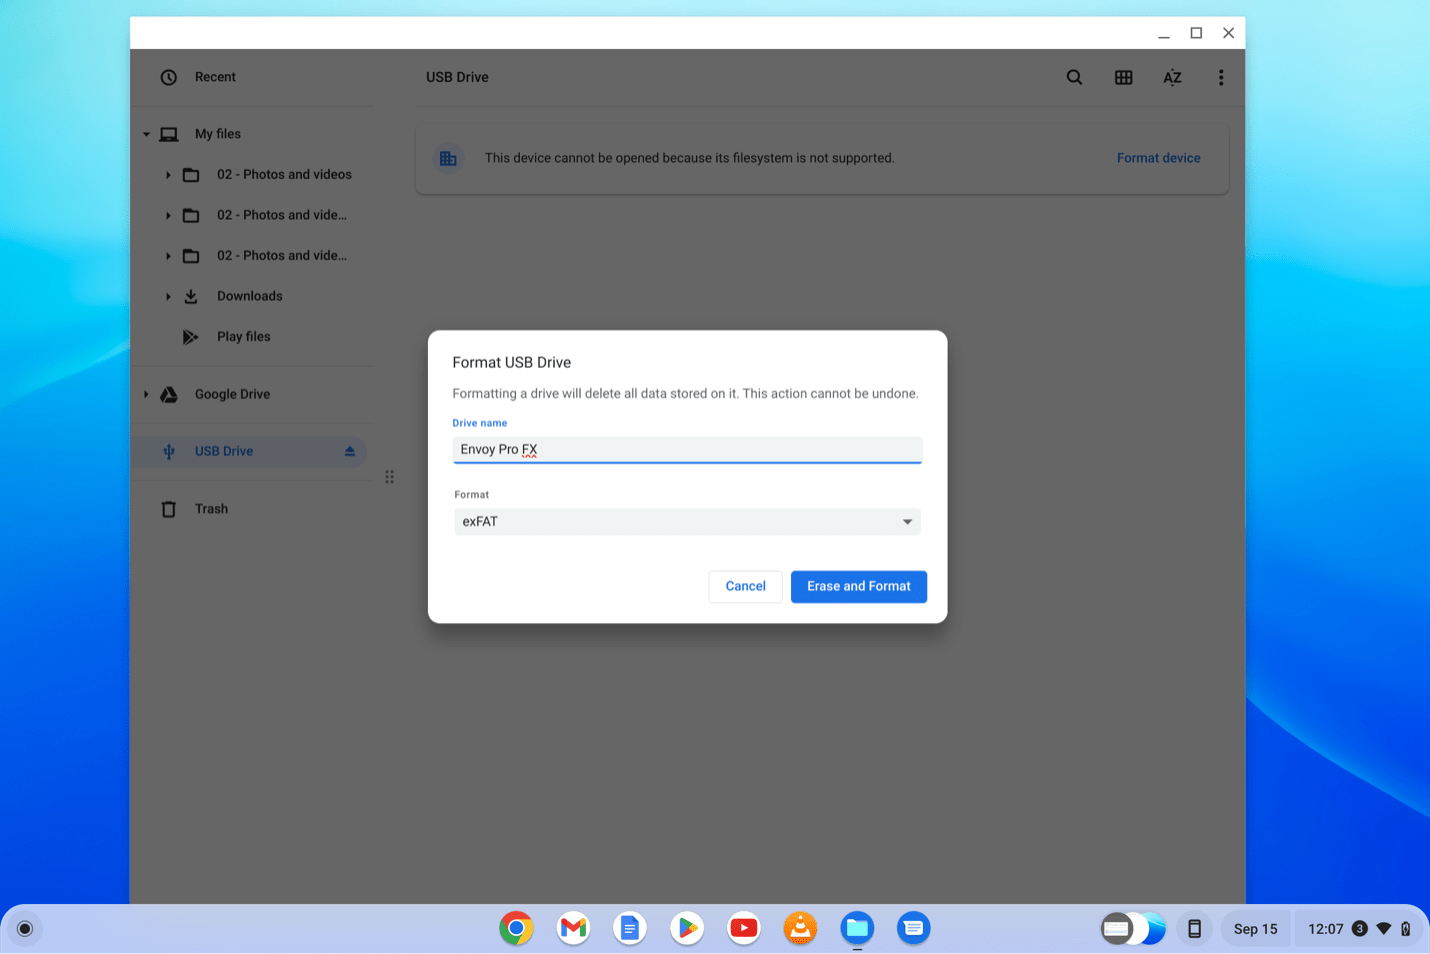
4. Enter a name for the OWC drive and click "Erase and Format".
5. The OWC drive has been formatted and is ready for use with ChromeOS.
Android Operating System
This section describes the process of formatting a Mac formatted OWC drive to work with Android operating system.
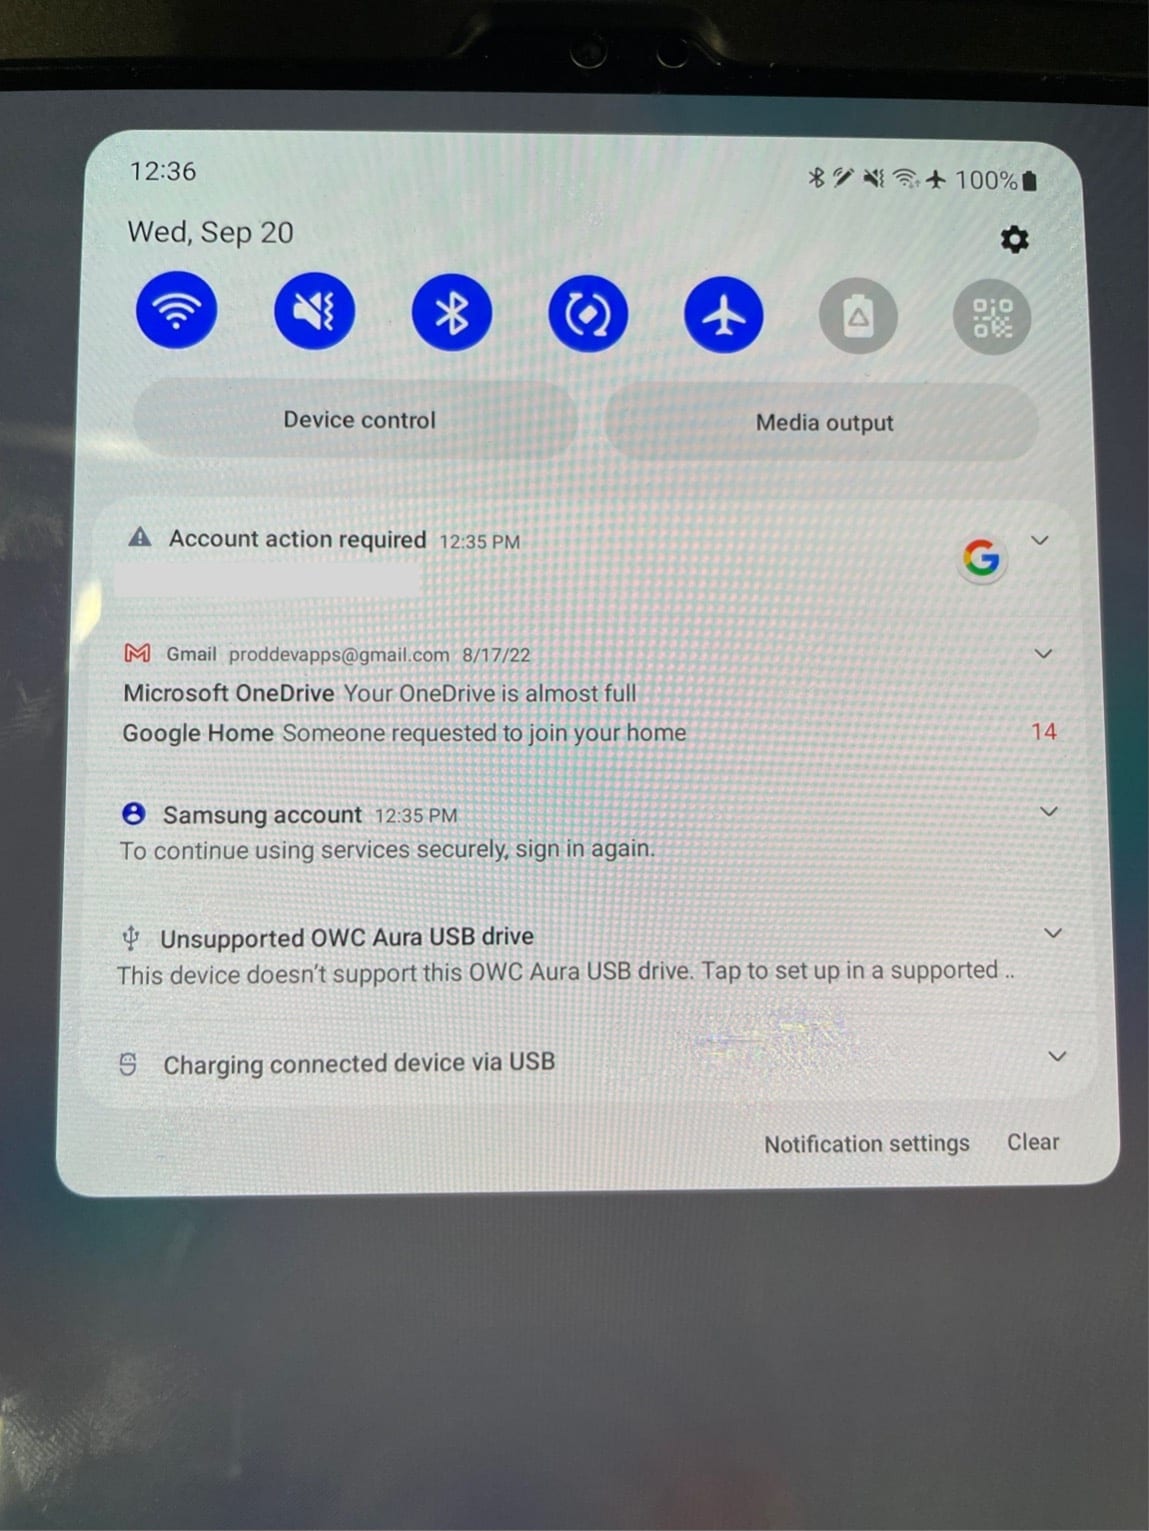
1. Swipe from the top of the screen downwards to access the notification menu. Click on the notification "This device doesn’t support this device. Tap to set up in a supported…" to advance and reformat the OWC drive.
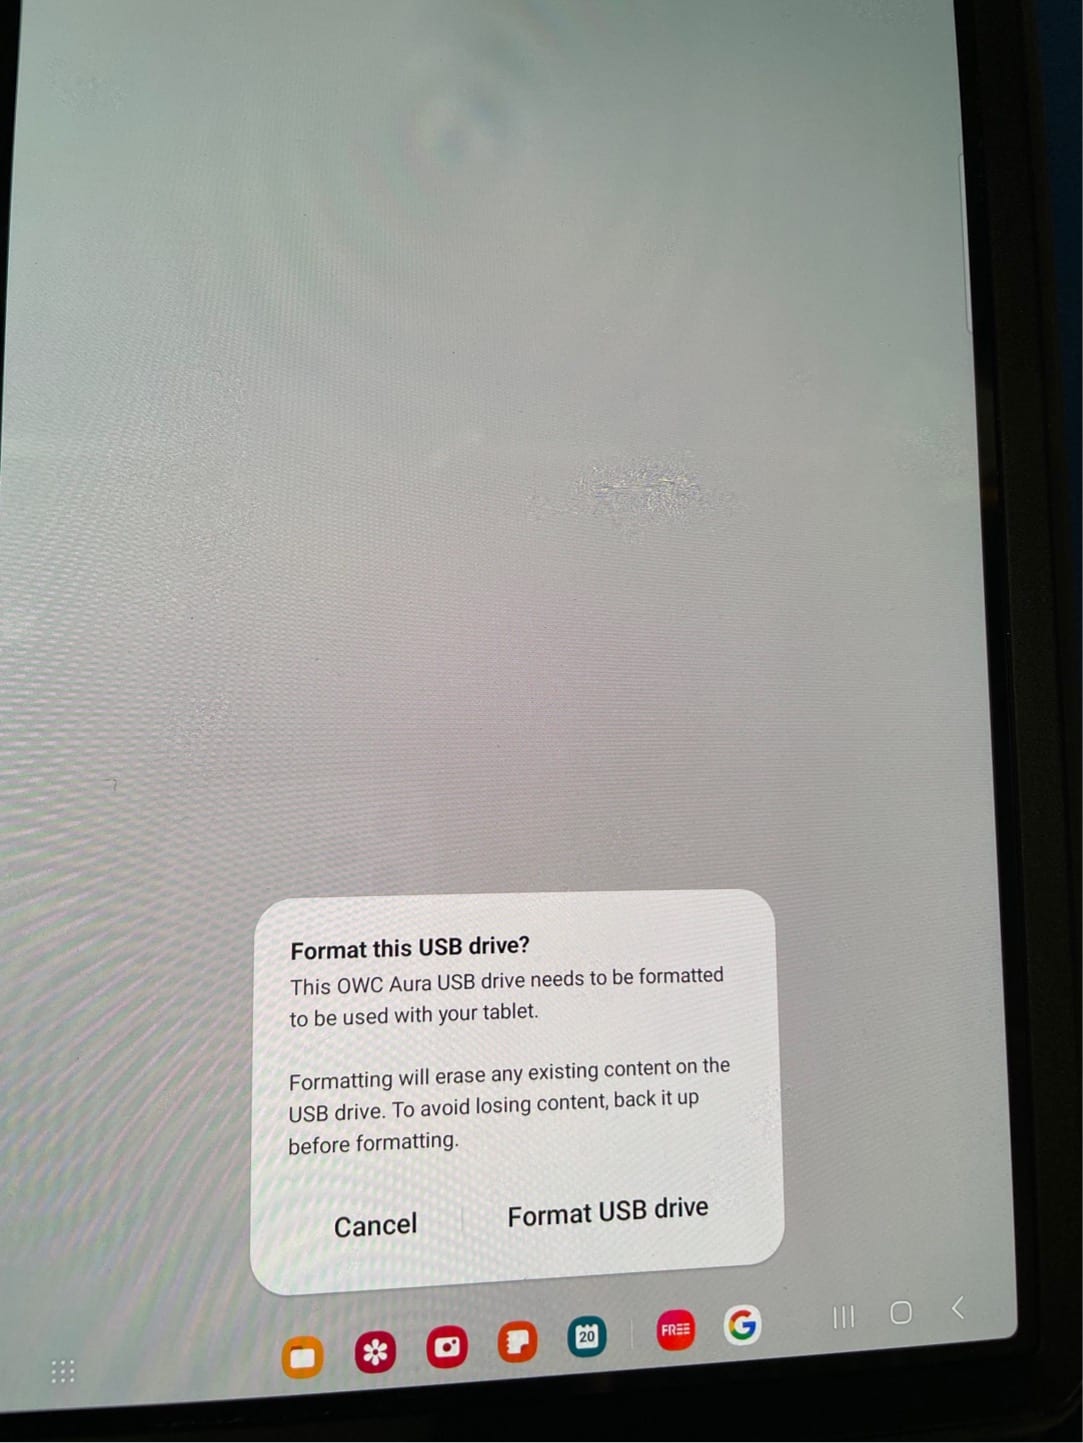
2. A formatting notification will appear asking if the drive should be formatted. Click "Format USB Drive".
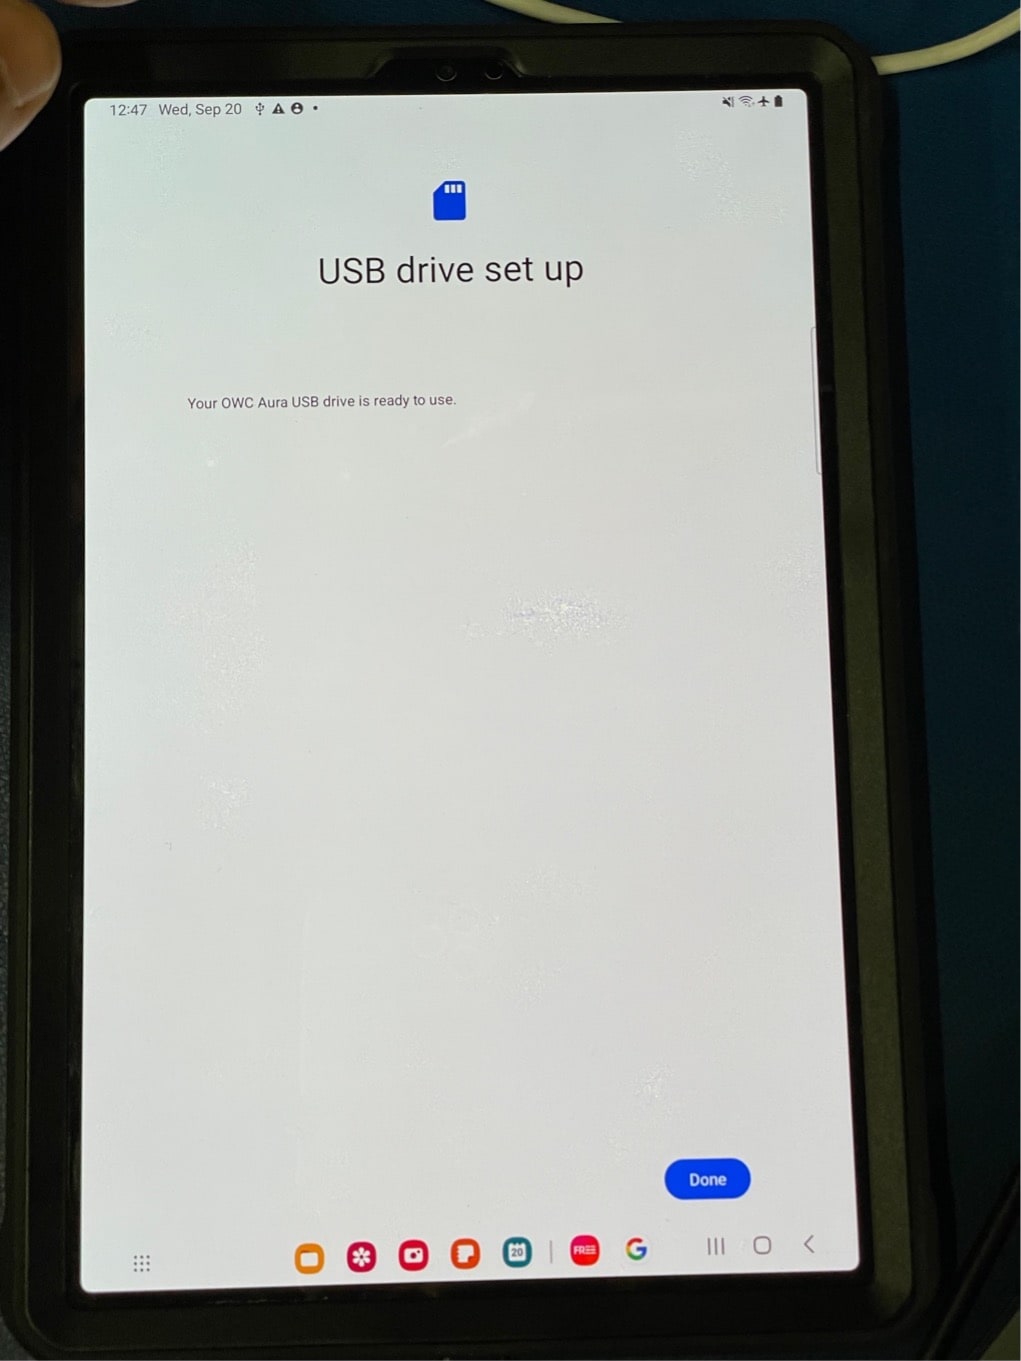
3. The OWC drive has been formatted and is ready for use with Android operating system.
Free Support Chat
Our free award-winning support team is ready to answer all of your questions. Technical support is available Monday - Friday: 9AM - 6PM. Customer Support & Sales is available Monday - Friday: 9AM - 6PM. Support is unavailable on U.S. Federal holidays. Talk to a human today.