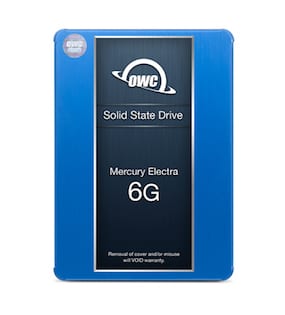
 Solid State Drives have grown immensely in popularity over the years – and with good reason considering the performance they provide. In fact, I recently upgraded my own Mac mini to a speedy OWC SSD using an OWC Data Doubler kit. One of my original hesitations with buying a Solid State Drive, however, was the relative higher cost of storage per gigabyte than an HDD. My other primary hesitation was not being able to keep all of my data on a single drive without breaking my budget. But SSD costs have been trending down, so a 240GB drive was now within my budget.
The only other hurdle I imposed on myself was how to handle my data. There are a few viable options available: I could have set up a Fusion Drive, which would have combined my 240GB SSD and the stock 500GB HDD into a 740GB drive. This would have fit all of my data, however I was not impressed when I did my Fusion testing.
I recently began doing a lot of movie editing and being able to maintain the editing strictly to the SSD would greatly improve my workflow. My other option would be to install the OS onto the SSD and split my Home folder (one’s personal account on the computer that holds all of your data by default) off onto the HDD. This setup would have given me the needed flexibility with video editing, however I felt there was another option I’d be happier with. The third option available to me was to install the OS on the SSD and keep the home folder on the SSD, but store my larger libraries of data on the HDD. Having my OS and home folder on the SSD gave me the absolute best performance, flexibility, and peace of mind.
What do I mean exactly by storing my libraries of data on the HDD? Apple’s staple iLife programs – iPhoto, iTunes, and iMovie – store their information in a consolidated package file called a library. These libraries are stored within a user’s home folder in the corresponding folders. iPhoto stores its library in the Photos folder, iMovie in the Movies folder, and iTunes in the Music folder.
So how does one setup their computer with a new SSD and keep their existing iTunes, iPhoto, and iMovie library on the original HDD? I have crafted a step-by-step guide to accomplish this setup.
Let’s take a closer look:
Step 1
We will want to make a backup of your original HDD before we do anything. My preferred backup program is Time Machine. I use Data Backup 3 as a secondary backup as well. It’s important to have a backup, just in case any issues are run in to during this setup.
Step 2
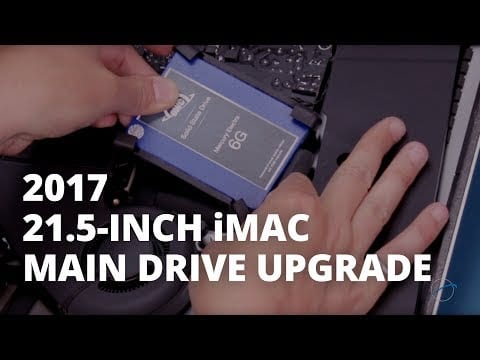
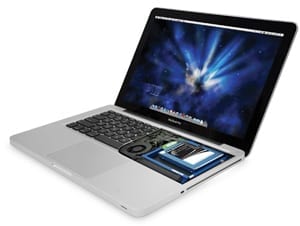
Install your new SSD into your computer. OWC offers step-by-step installation video guides for many Mac models.
Step 3
Boot your computer from your OS installer. Once we have booted from the OS installer we will need to format the SSD from Disk Utility. Next we will proceed with doing a clean install of the OS onto the SSD.
Step 4
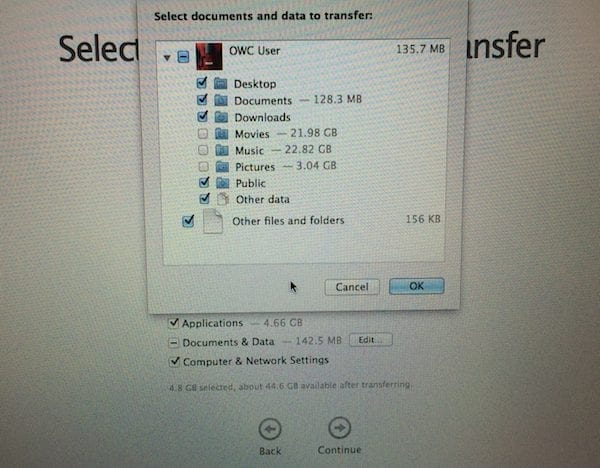
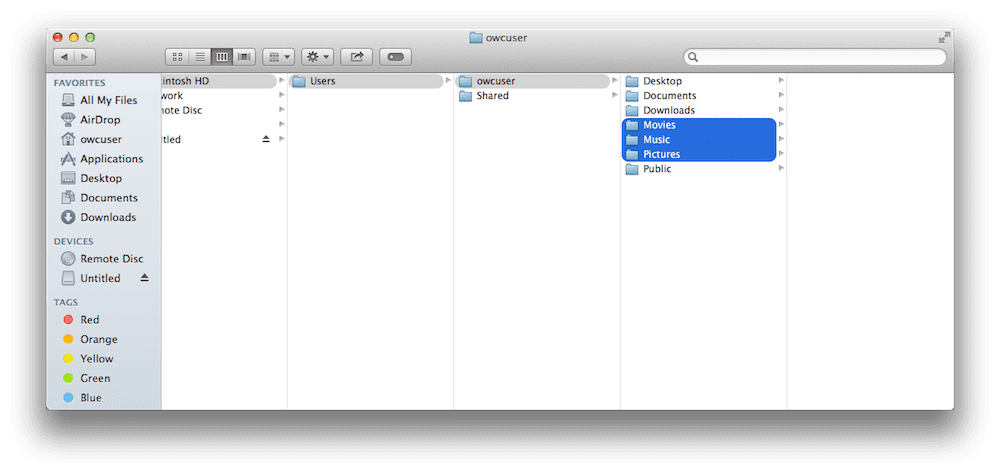
Once the OS installation has been completed the computer will reboot and begin the Mac OS X setup process. During this setup it will ask “Transfer information to This Mac.” We will want to choose “From a Mac, Time Machine backup, or startup disk.” It will then list all available options – choose your original drive. Next it will show us a break down of what we may transfer: Applications, Documents & Data, and Computer & Network Settings. We will want to specify not to transfer the Music, Movie, and Photos folder, this is done by clicking the “Edit…” button next to Documents & Data. Within the edit menu we will want to uncheck mark the Movies, Music, and Pictures folders.
These are the folders we will be keeping on the original drive to save space on the SSD. We can then click “OK” and hit the continue button. This transfer will take some time depending on how much data you have to transfer.
Step 5
Once the transfer is complete, you’ll need to select your time zone and then click the “start using your Mac” button. At this time we should see the familiar desktop from the HDD. We will want to run our software update, which is found in the Apple menu.
Step 6
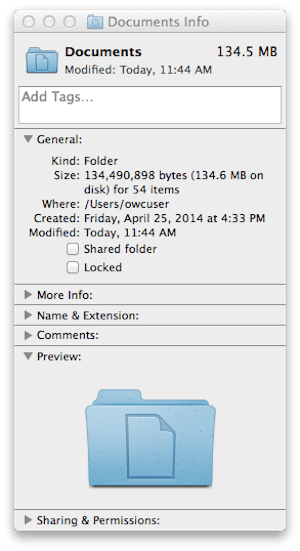
When all of the updates have been completed we will check the Documents and Desktop folders we transferred to the SSD from the HDD to make sure everything made it over properly. We will want to navigate to the Home folder on the SSD, this can be done within Finder by choosing the “Go” menu and selecting “Home”. We will then want to select the “Documents” folder and go up to the “File” menu and select “Get Info”. The size of the folder will be shown in the upper right corner of the “Get Info” window.
We will want to navigate to the HDD in Finder and proceed into the “User” folder, then your “User” folder, select the “Documents” folder in there and do a “Get Info” on it as well. We will want to do the same for the “Desktop” folder. If the sizes match for each folder we know the transfer was successful.
Step 7
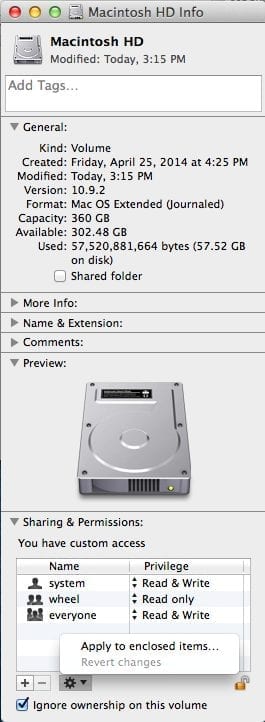
Now that we’ve confirmed our User’s folder documents and desktop folders were safely transferred to our SSD, we are now set to get the HDD transitioned into a storage drive instead of a startup drive. We will want to proceed to the “Go” menu in Finder and select computer. Within there we will be able to select the HDD and then proceed to the “File” menu and select “Get Info”. In the “Get Info” window of the HDD expand the Sharing & Permissions and click the lock in the lower right corner to unlock the permissions. The computer will prompt for the user password to be entered. Once that is done, we will want to change the Privilege for the user with the “(me)” at the end of it to “Read & Write.” Next the gear wheel below the Name column will need to be selected and chose “Apply to enclosed items…” This will bring up a status bar, which might take a few seconds up to a minute or two depending on the number of files on the drive. Lastly, we will want to checkmark the “Ignore Ownership” box at the bottom of the window.
Step 8
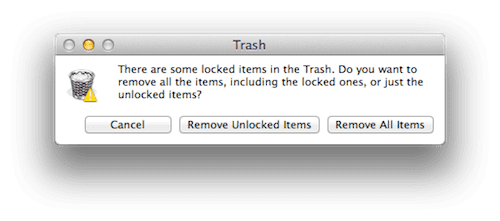
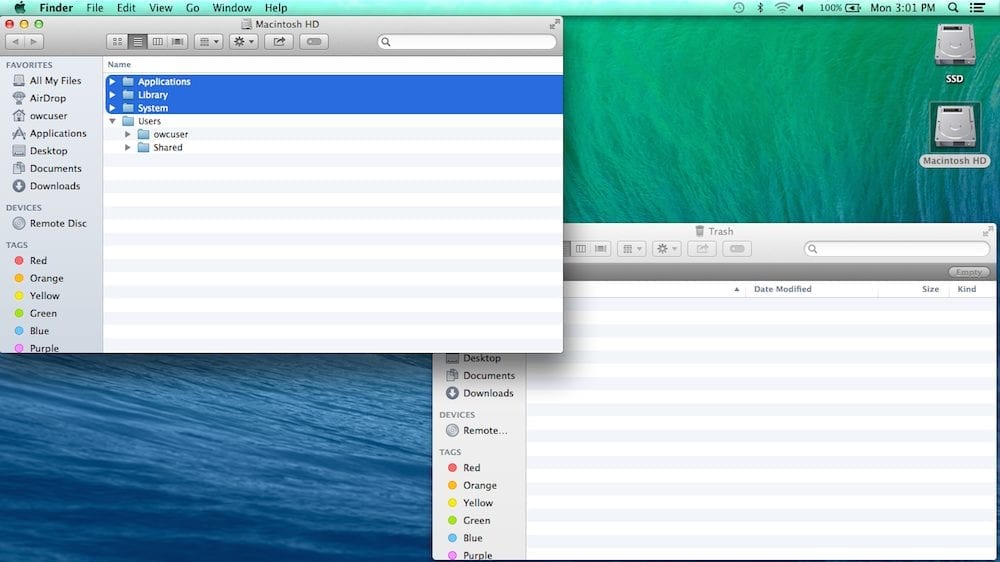
Next we will want to delete the System Folder, Library Folder, and Applications folder on the HDD since we will no longer need them. We can move those folders to the Trash and then empty the Trash. When emptying the Trash you may see a warning about deleting locked items, you can safely say remove all items.
 Step 9
Now we should only have the “Users” folder on the HDD, we will now be able to move our Photos, Movies, and Pictures folder onto the root level of the HDD. This is done with the great ease with the Finder window in the Column view. Within the HDD we will need to open the “Users” folder then the user folder. We can then click and drag the Movies, Music, and Pictures folder to the same level that the Users folder is at. Once these folders have been moved, we can move the Users folder to the Trash.
Step 10
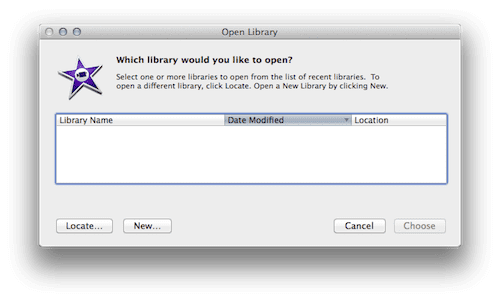
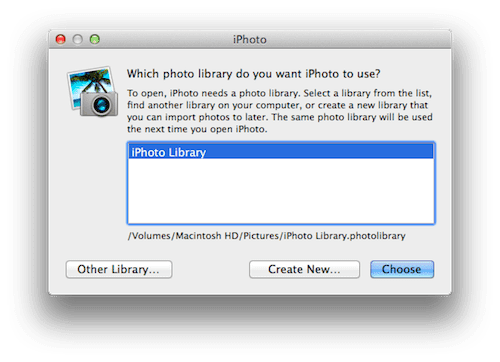
We are now set to tell iPhoto, iMovie, and iTunes where to find their libraries. While opening each application hold down the option key until a window appears asking which library you’d like to use. iTunes will require you to select “Choose Library” and navigate to the HDD and select the iTunes folder within the Music folder.
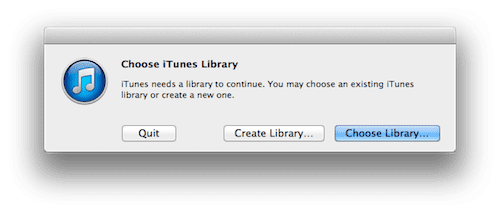 iPhoto and iMovie automatically search your computer for compatible libraries and will prompt you with the results. You can confirm it is the library on the HDD by viewing the directory path under the window. Once you’ve confirmed that it is the proper library, you can hit “Select”. The application will launch and should look identical to how it used to be!
 Any future media that is added to iPhoto, iMovie, or iTunes will now be stored on the HDD!




I know this is a very old thread but I was wondering out of curiosity (as most of this is beyond me) is it possible to split the existing fusion drive, install Catalina to the SSD using AFPS and then mount the second HDD Users? Or possibly looking at the Disk Utility design of Catalina default install, can the HDD become the Data drive?
While I haven’t tried it myself it should be possible with Catalina still
This article is immensely helpful – I have a 256GB owc drive as my boot drive in the mac and a 2TB fusion drive. But I wish I had this article when I first did the transfer, because my SSD is filling up and its starting to affect the system. Anyway, time to redo everything, I think.
Peter
mtbstrategy.com
Is there any update to this procedure regarding high sierra? i have tried several times and my libraries all transfer over. I also have a box that i can not uncheck unles I uncheck the original drive itself called library it states only 2.9gb yet my entire itunes library gets 55gb gets transferred over.
I will be doing the same thing, except I’m replacing my existing drive with a new bigger drive, how can I accomplish what you have done?
Hello Frank,
The most straightforward (while not the most time efficient) method would be to install the OS on your new bigger drive then use migration assistant to transfer your files from the original drive to the bigger drive. You can then follow this guide as normal to add a SSD to the computer.
So once I move all my data and software to the bigger drive, I then install the SSD drive, and follow the steps above, do I then have to delete any OS and program data from the bigger drive?
Ben,
2011 mac mini added 120G SSD put OSx on it left the 500G HD for data. In step 7 sharing and permissions you mentioned (me) there is no me just system, wheel and everyone. which of these need to be set to Read and Write? The picture shows system and everyone, is that what is needed?
Hello Bill,
If you do not have a user in the list and you have “everyone” as “Read & Write” then you’ll be okay.
Hi OWC,
I have a 2011 MacBook Pro 8,2 that has a data doubler with OWC Mercury Electra 3G SSD Media 120GB. I used to use that for a Piano Sample Library. This laptop is only used for “work” now (Email Photos MS Office, etc.) I have a new one for Music. Can I move the Mac OS to the SSD for better performance? Is there an updated set of instructions for the latest OS? I would also like to upgrade from 10.10 to 10.12 at the same time. is this 120GB SSD large enough for this? What is the best way to split apps, files library,etc between the two drives? The other drive id 1TB HD
thanks! LK
Ben, With everything working fine and backing up to Time Machine, I’m getting several messages as I try to Empty Trash; “The operation can’t be completed because the item “CoreServices” is in use.”, “The operation can’t be completed because the item “Library” is in use.”, “The operation can’t be completed because the item “System” is in use.”, The operation can’t be completed because the item “bin” is in use.”, The operation can’t be completed because the item “libexec” is in use.”. The only thing left in the Trash are 3 folders, Applications, Library, and Systems and those 3 folder are currently on the SSD, why won’t the folders delete I have them unlocked?
I’m sorry to hear about the continued issues AJ. I’ve sent you an email to see if we can’t get this figured out since it is a bit to complex to troubleshoot through these comments.
OWC Ben, My wife and I have 2 separate user accounts because we each have our own iPhones, so we can each have separate user accounts for iTunes & Photos without combining, How would I set this up modifying this article?
Good question AJ, the setup wouldn’t be too different for multiple users as long as privacy is not an issue, meaning the other users could see and potentially modify your libraries.
During Step 9, instead of moving the Photos, Movies, and Pictures folder to the root level I’d suggest creating a new folder with the name of the user for the folders to be moved to.
Ben, I managed to get everything done with one issue, somehow Photos app is uploading to iCloud and is doubling my photos! I had 190GB of pictures, and somehow the new setup is uploading again and doubling the pictures, any suggestions on how to correct this problem.
That is an odd issue that I haven’t come directly across yet. It could be an iCloud issue, which I’d suggest talking to Apple about. The app store has a few handy programs for removing duplicate photos as well which would be a good clean up tool. I’m sorry I don’t have much more to offer then that.
is there anything I need to do differently (repeat under a different user name) if I have more than one user on my iMac?
This is totally outdated! Do not use!!
William if you are having issues with this setup I’d be happy to help to the best of my ability.
This setup is still happily working for me with the newest OS and updates. I have begrudgingly switched over to Photos instead of iPhoto, which works with this setup.
hey Ben how do I move/map the documents folder to point to the internal storage drive?
Hello Ty,
Generally speaking anything that you’d store in the documents folder does not have a library such as the applications mentioned in the blog. Typically document applications like Apple’s Pages or Microsoft’s Word have individual file save instances that require you to confirm where you want to save the file to.
Microsoft Office 2011 (not sure about 2016 or earlier versions) does offer a nice feature of changing the default save location within the Preference of each application (Application name menu (like Word) -> Preferences -> File Location).
I have a late 2006 imac. Intel core 2 Duo running 10.6.8 Will I be able to use this system I have recently purchased a 240gb SSD. Will I be able to pair this with an external 2tb HDD to acheive this?
Yes this will work with your setup. Just make sure your external drive is mounted before launching any of the programs that has their libraries stored on the external drive.
Mille grazie!!!
Hello.
Are these instructions (Splitting Your Data) applicable to Yosemite? I found a video in Youtube under OWC with similar intent but it was still Mountain Lion. I am wondering if this was the cause why my macbook pro is not working properly after upgrading to SSD (with the original HDD for data storage). Thanks for the response.
Hi Ben,
I recently installed an OWC 240GB Mercury Electra SSD on my Macbook Pro 13″ mid 2012 and a data doubler so I can use my old HDD as data storage (just like what you have mentioned in this article). I followed this instructional video by OWC Vic on Keeping System and User Files on Separate Drives (https://www.youtube.com/watch?v=Ou-heXnkPP4). My mac worked without problems for a day then on the second day that I used it I cannot access all my files in the HDD anymore. It said I don’t have permission to that device. I redo the installation and migration with the same instructions in the video but still had the same issue. What happened was, to access my HDD I need to log out from SSD first then log in to HDD and vice versa. So to get my old files from HDD I need a flash drive or external device to copy and temporarily save my files then open it to SSD. I don’t know if the reason was because I am already using Yosemite when I did the upgrade (SSD installation). The instructional video was still Mountain Lion. If this is the case, can OWC come up with a new instructional video in this topic with Yosemite as the OS? Or can you give me any links that will resolve my case? I am not a techie guy and only rely on this kind of step by step instructional video. I really appreciate your help. Many thanks.
Hello Jan,
I’m sorry to hear about the issues. That is an odd permissions issue you are running in to. Since you’ve already tried it twice, I’d recommend trying the setup I’ve outlined in this article instead of the video.
I would recommend to restore your HDD to its original state from your back up drive and then follow the steps in this article.
Hello Ben:
I just got my iMac maxed out by OWC with 32G RAM, a 6T HDD and a 1T SSD. I have followed your directions until step 8, using my time machine backup, then it became confusing, because your references are about your original hard drive. My HDD is a brand new replacement. The purpose of this tricked out iMac is for my photography, to have all my pictures consolidated and easily available.
Hello Emil,
I recommend you do a time machine restore to your new 6TB HDD. That will allow it to act like the original drive and let you follow the steps without any alteration.
Hi Ben,
I am intending to swap the HDD in my mac mini 6,2 for a SSD and also to add a second SSD on the upper bay. I am very confused as to how to go about it. The steps outlined above are clearly explained but I struggle with Step 3. How do I start the whole thing? Do I copy everything on my factory installed HDD onto a new SDD using the ‘Express Enclosure’?
And then I add the new SSD to the lower bay of the Mac mini? My main question is how do I install OS Yosemite on the new blank SSD? Do i have to copy the OS from the Express Enclsosure?
I would like a fresh installation but if this is too difficult I am happy just copying everything that is already on the factory HDD onto the new SSD.
My ultimate goal is to have one SSD for the OS and home folder and another one (bigger) to store all types of media, as you described above.
I would be grateful if you could answer my questions. And thanks for your patience.
You’ll need to be careful with your model Mac Mini because it’ll try and create a fusion drive with two unformatted drives installed.
I’d recommend to format the two new SSDs externally in your Express enclosure. Once the drives are formatted you are free to install the drives into your Mac Mini without fearing it’ll try and create a fusion drive out of them (unless of course you ever try to reformat them). Once the two new SSDs are installed you can use the old HDD in the Express enclosure. I’d advise to do a clean installation of Yosemite on to the larger drive that you want to eventually be the storage drive. Once Yosemite is installed on the larger SSD you can use Migration Assistance to transfer all of your data from the old HDD.
Once the larger SSD has all of the data on it, you can then follow my instructions outlined above to setup the smaller SSD as the boot/applications drive.
I just order the data doubler kit and will be adding an SSD to my mac mini. I see a lot of people use the Internet Recovery System to install the OS to the SSD. Since I have the bluetooth keyboard and mouse, I assume I will need a wired keyboard and mouse for that process?
Thanks, and great blog and site. Tons of great info on here.
Hello Jeremey, a bluetooth Apple keyboard should be fine to bring up the recovery partition. They don’t always work for resetting PRAM and booting into single user mode, but generally shouldn’t have an issue with getting into the recovery partition.
Sounds good. Thanks for the response.
I dont understand what is the advantage of this solution compared to moving the whole user forlder. What makes you happier with this. Can you clarify?
In editing movies on my SSD I had them saved in a folder in my Home folder. If I had relocated the whole home folder onto the HDD, I would have had to create a new folder on the root level of the SSD. Creating a data folder on the root level of the drive that holds your Operating System is generally not recommended.
OK, I got it. I do editing with FCP 7, so I also would like the movie file to stay on the SSD.
My SSD has only 120 GB, so I would like to move other folders like Documents and Download to the HD. Do I just make an alias of them in the home folder and move them to the HD?
The Documents and Downloads folder is not easily automated like the other folders, since so many applications save to them by default.
You may leave the Documents and Downloads folder in the Home folder, I’d advise to simply create new folders on the storage drive and name them as you wish.
Within Documents programs, like Pages, Numbers, Keynote, Microsoft Word, Excel, Powerpoint, etc when you save a file it prompts you were you want to save it, simply direct it to the new folder on the storage drive.
Safari can have its default download location changed to the new folder on the storage drive. Apple’s has simple instructions here
When one listens to a music, or watches a movie, will this make HDD running during the whole time? There were some advices to make the HDDs sleep after 10 mins to preserve the battery. What I can’t understand is whether the HDD is awakened every time i access some data on it, thus putting a pressure on battery life. Thanks for clarification.
Is there any potential issues with multiple users?
The primary concern with multiple users is the music, movies, and photos are now viewable by any user that can access the drive. When these folders are located within the home folder other users have no read or write access to them.
It is possible for one user to set special read/write permissions on the drive or folder they are located on, but that is something I have not tested the reliability of.
This is good info. But why stop there? Put Documents and Downloads onto the HDD too using symbolic links and keep the SSD even more sparse.
It certainly is viable to do that. Personally I keep my downloads folder cleared out after every session, whatever got downloaded is either getting deleted or moved to another folder. My documents folder is just documents so it is under 1GB, not large enough to worry about relocating in my opinion.
Is it better to do a normal alias or a symbolic link for the download and document folders.
I wouldn’t recommend either method. You can redirect your Safari downloads to an actual folder of your choosing by following these Link instructions.
Every document you ever have you save it at some point and choose where to save it, so it is best to save it to whatever folder location you would prefer.
For instance, I use outlook that wants to put the Microsoft user data in documents, and mine is very big.
So I am doing an experiment. I have a 1 TB HD partitioned in 2 and a 120GB SSD.
I have my working system on the first partition and I installed Maverick on the SSD for a test. I put documents,Download and Desktop on the second partition with alias in the home folder of Marverick. So far outlook put its folder in the right place and I am testing to save to the aliases to see if the documents are actually going in the right folder.
What kind of problem could I encounter with this method?
thanks for your help and your patience.
I have not experimented with aliases in a few years. I found managing the alias links tiresome and annoying when they broke. If you find your method works please let us know, alternative methods are always welcomed!