![]() The Mac comes equipped with a number of apps, including Safari, Mail, Photos, Calendar, Contacts, and many more, that are used every day by most Mac users.
The Mac comes equipped with a number of apps, including Safari, Mail, Photos, Calendar, Contacts, and many more, that are used every day by most Mac users.
There’s also a class of apps known as utilities that are often overlooked by both new and well-seasoned Mac users. That’s why this week, we’re going to look at utility apps everyone should be aware of.
Mac Utility Apps
For the most part, the utilities we mention come with a Mac, meaning you don’t need to find and download them; they’re already present, although a few are well hidden. But we’re not going to limit our look at utilities to just those available from Apple. Many third-party developers have created very useful utilities that either supplement an existing Apple utility or provide new capabilities or services.
The utilities mentioned in this guide have all been tested with macOS Sierra, and we expect they’ll work with newer versions of the Mac OS as well. These utilities have all worked with previous versions of the Mac OS, but we didn’t research when they first became available.
Activity Monitor
One of the utilities I use most often, Activity Monitor, is available at /Applications/Utilities/. I have Activity Monitor configured to start automatically at startup, and show disk activity in the app’s Dock icon. You can also set the Dock icon to display CPU usage and network traffic. Surprisingly, Activity Monitor’s Dock icon can’t display memory usage, something it was able to do in previous versions. Thankfully, there are quite a few third-party apps that can monitor memory usage, which we’ll get into shortly.
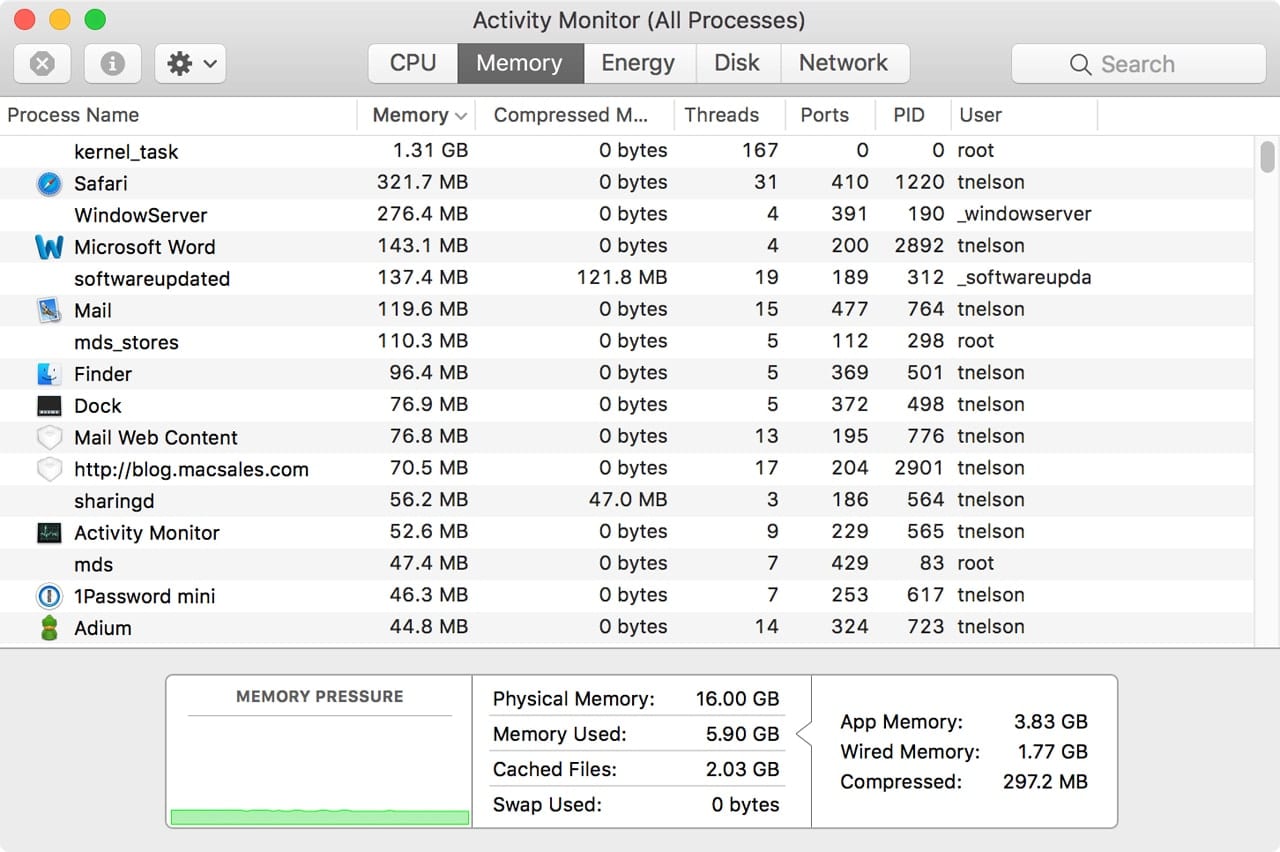
Activity Monitor displays real-time, or close to real-time, status about how your Mac’s resources are being used; specifically, CPU, Memory, Energy, Disk, and Network resources. Activity Monitor provides access to each category through a tab interface on its toolbar.
Ever wonder which app is hogging your CPU resources, making your Mac feel sluggish? Activity Monitor can tell you with the click of the CPU tab, letting you know the percentage of CPU power being used, how much CPU time a particular app is using, and a number of other useful bits of information.
Activity Monitor can also let you know how your memory is being used, and can be used to help you decide whether additional memory would be helpful. The Energy tab can let you know which apps and processes are sucking the most life from a laptop’s battery, while the Disk tab shows you which apps are using your disk resources the most. And finally, the Network tab lets you know which apps are network hogs; it also provides an overall look at network performance.
Activity Monitor can also kill apps and processes that are running, as well as display information about a running app, including which files are currently in use. In addition, Activity Monitor includes a number of diagnostics that can help pinpoint problems with your Mac, specifically, System Diagnostics and Spotlight Diagnostics.
Most of these diagnostic reports are geared toward helping developers and Apple support personnel troubleshoot problems, either with your Mac or a specific app. If you would like to try out the diagnostics, open Activity Monitor, then click on the gear menu and select Run System Diagnostics. Once the diagnostics are completed, a Finder window will open and show you a zipped file that, when expanded, contains a number of text files showing the results of all the diagnostics that were run.
If you need to kill a runaway process, simply select the process from the list, and then click the kill button (it looks like an X in a stop sign).
Disk Utility
I like to think Disk Utility is one of the most often used utilities supplied by Apple. Besides its ability to erase, format, and partition storage devices, Disk Utility can also be an integral part of your Mac maintenance routines, with its ability to verify drives and repair common disk issues.
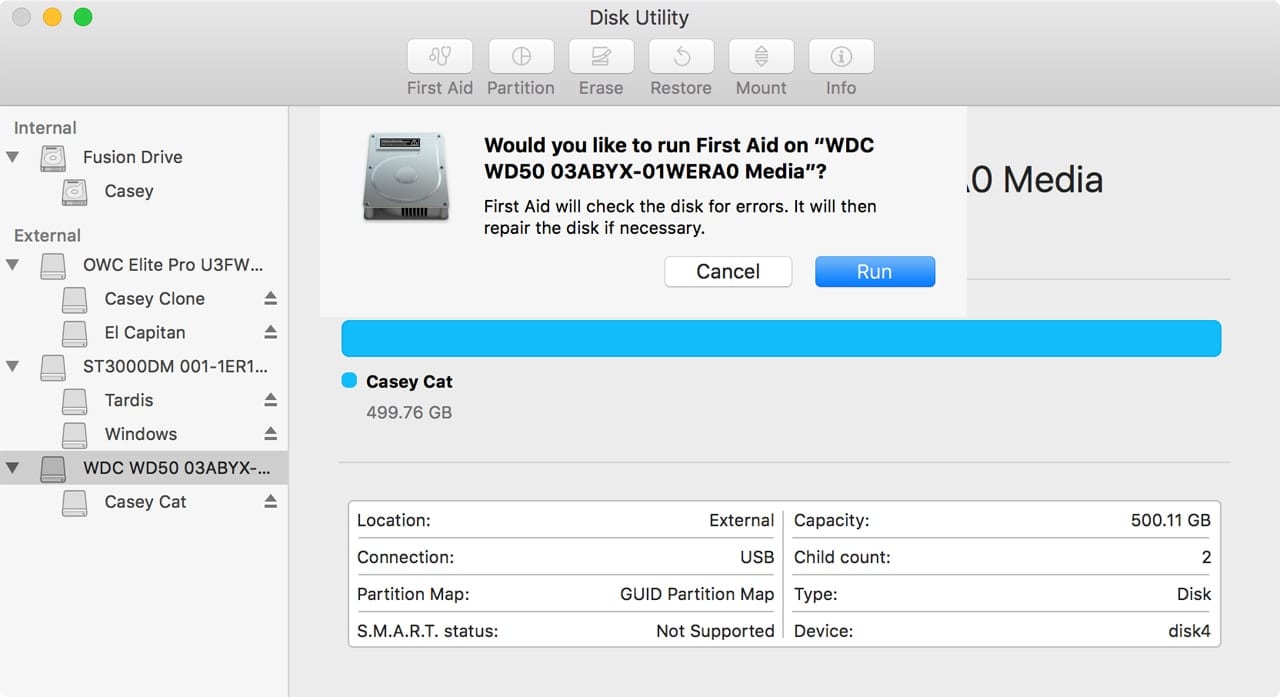
It’s an all-around workhorse for any drive and storage-related tasks you may need to perform, including securely wiping your drive. It’s another utility that I keep in my Dock for handy access.
Audio MIDI Setup
Sure, your Mac has a Sound preference pane that lets you control basic sound stuff, such as volume and balance, and select an input source or output destination; it even lets you assign alert sound effects. But it doesn’t give you anything more than basic controls; no fine-tuning, no sample rates, and no advanced multi-channel capabilities.
That’s where Audio MIDI Setup comes; you’ll find it at /Applications/Utilities/. This utility is filled with options that can be used to control sound input and output for both built-in sound devices and external sound processing equipment you may be using with your Mac.
You can set sampling rates for devices to improve quality or to decrease the amount of data being generated, and use the Configure Speakers utility to create a multi-channel listening environment. This utility will allow you to assign an audio channel to any speaker connected to your Mac.
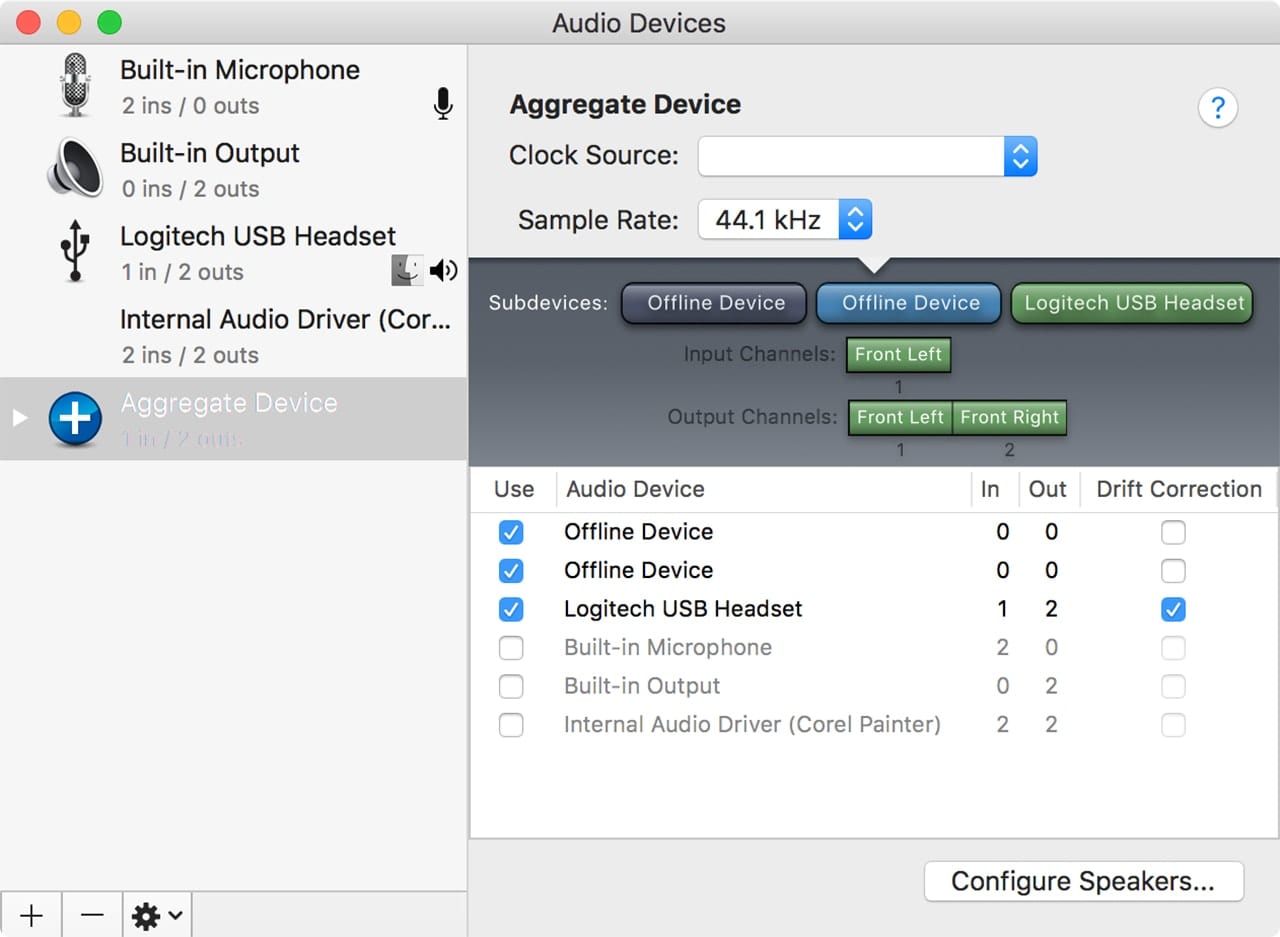
You can also create aggregate devices that allow you to group two or more devices to work together, such as a set of microphones and a headset for monitoring.
Another available option is to create multi-output devices. This allows you to assign the same source to play through two or more devices at the same time. I use this capability to send audio to multiple speakers around the house.
Once you create or add various devices, they’ll be available in the standard Sound preference pane.
And that’s just the Audio part of the Audio MIDI Setup utility. If you have MIDI devices, this is the utility to use to add, remove, and test them. You’ll find the MIDI option by selecting the Show MIDI Studio item under the Window menu.
Network Utility
Network Utility is a Swiss Army knife of network troubleshooting tools. When you find you can’t connect to the Internet, open a favorite website, or wonder why your favorite online game is suddenly almost unplayable, it’s Network Utility that will likely be able to root out the issue.
Network Utility contains 8 helpful network utilities all rolled into one easy-to-use app. The only problem with the utility is figuring out where it’s located on your Mac.
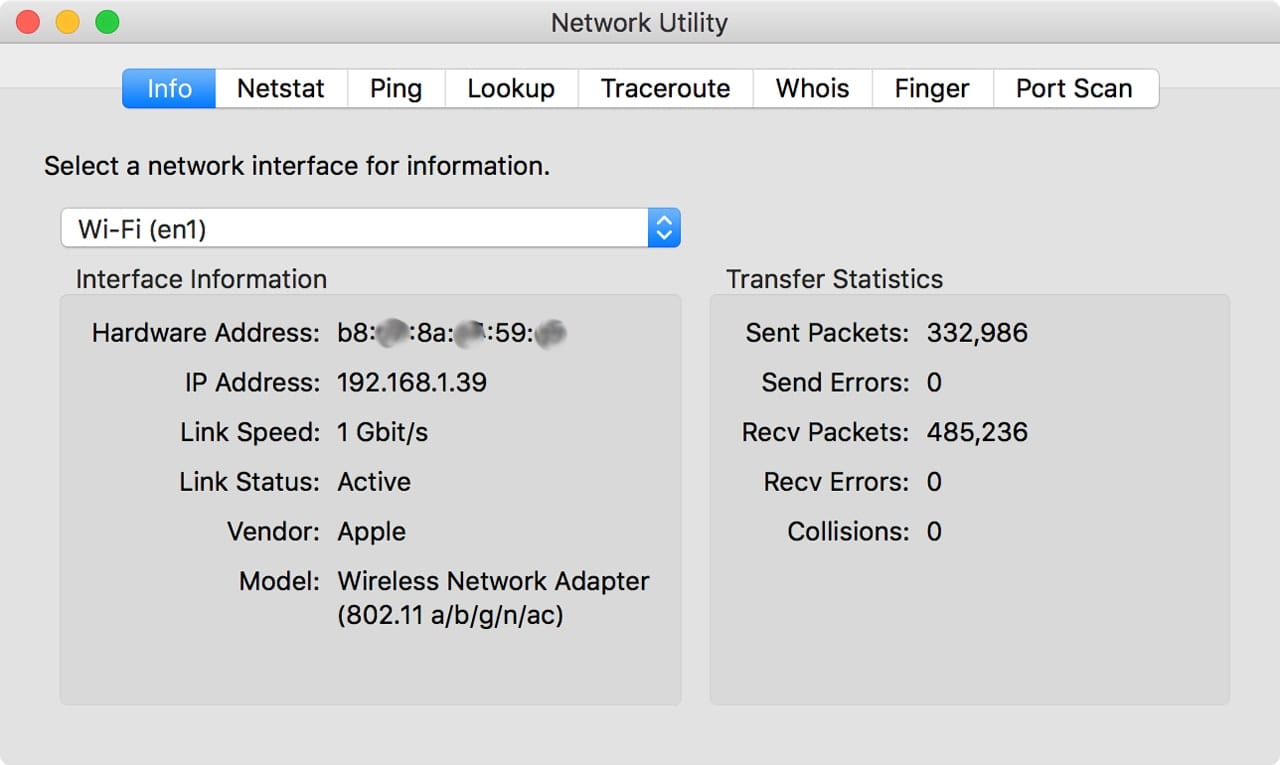
Originally, Network Utility was located at /Applications/Utilities/, and that’s where it stayed until OS X Mavericks came along. For some reason, Apple moved Network Utility to a new home at /System/Library/CoreServices/Applications/. Now that you know how to find it, you can use the Rocket Yard Guide: Using macOS Sierra’s ‘Hidden’ Network Utility to learn how to use all the included features of this fascinating network utility.
Wireless Diagnostics
Unlike the AirPort Utility for setting up an Apple AirPort router, Wireless Diagnostics can be used to troubleshoot and monitor any Wi-Fi or Bluetooth connection you may have, regardless of the manufacturer. That makes Wireless Diagnostics a go-to tool for both fixing wireless issues you may have and fine-tuning your connection for best performance.
You can launch Wireless Diagnostics from its location at: /System/Library/CoreServices/Applications/, or you can option-click the Wi-Fi menu bar applet and select the Open Wireless Diagnostics item.
The utility starts with a bit of an introduction, explaining that the diagnostic tool will create a diagnostic report in the /var/tmp folder. While the report can be helpful for some, it tends to be just a collection of reports containing current settings in all the various preference files used by your Mac’s wireless service. While helpful for remote diagnostics, you’ll likely find the options under the Window menu much more useful.
Info: Provides a look at the current state of both the Wi-Fi and Bluetooth connections.
Logs: Allows you to set up logging operations as well as view the resulting logs. Logs are a good way to find intermittent issues you may have.
Scan: Examines the current Wi-Fi environment your Mac is in. It can display the best available channels to use in your area, as well as the current signal levels, noise, and security settings of Wi-Fi connections it finds.
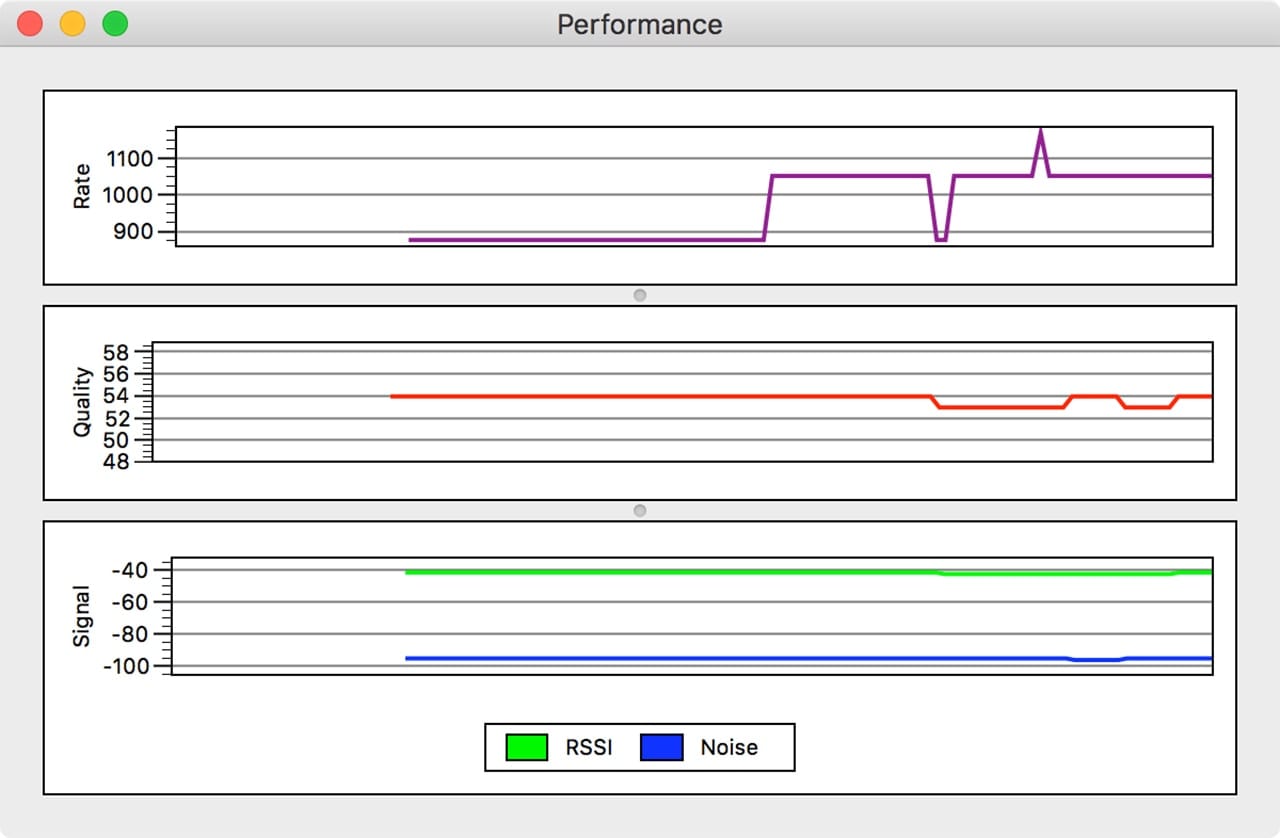
Performance: Displays a set of real-time graphs showing signal strength, quality, and transmission rate of the Wi-Fi signal you’re connected to.
Sniffer: Allows you to set up your Mac as a sniffer to capture Wi-Fi traffic for later examination.
Monitor: Similar to the Performance display, but uses a smaller, less intrusive window that can be kept open and out of the way.
Memory Clean 2
A little ways back I bemoaned the loss of Activity Monitor’s ability to show memory information in its Dock icon. I really like to be able to see in near real-time how much RAM I’m currently using on my Mac at any given point.
I could just leave Activity Monitor open on the Memory tab, but that means another app window cluttering up my desktop, and more than likely, it will just get covered up as the day goes on.
Memory Clean 2 solves this problem by displaying available memory directly in the Mac’s menu bar. It also allows me to set a threshold for monitoring free memory. If the amount of free memory goes below the threshold, the menu bar icon will turn red. It seems just about every time my Mac seems to be slowing down, it corresponds to low free memory.
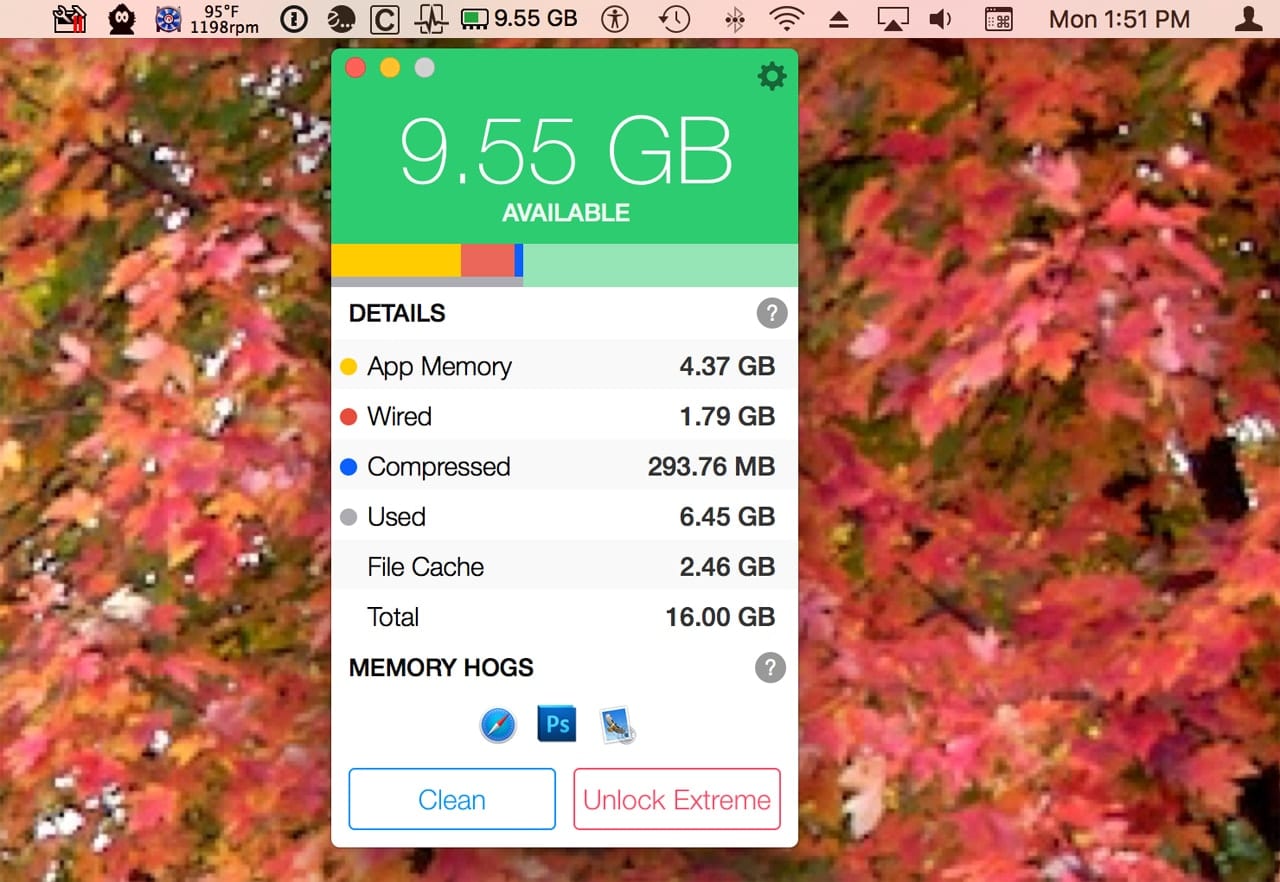
Memory Clean 2 also has the ability to free up memory when needed, though I confess I don’t use this feature since, generally speaking, the Mac is pretty darn good about managing its own memory needs.
There are other memory monitoring apps available, including iStat Menus, which is a favorite of many Mac users. But Memory Clean meets my minimal needs, displaying free memory in the menu bar, and it has a nice price: free.
Find out more about memory monitoring in How to Monitor Your Mac’s Memory Usage.




Your menu bar is packed. You should try Bartender (https://www.macbartender.com). I find it “just works.”
I wish the equalizer found in iTunes was available globally. The speakers in my monitor are unlistenable as-is, but ok-ish with some EQ. But now, that means iTunes only.
and wither the command line “srm” … we barely knew you. I wish Apple would also make computers again.
One invaluable feature of Audio MIDI Setup addresses the problem of prefab speaker systems whose short and long cables force the right and left speakers to have to be set up reversed if you chose to locate your CPU on the opposite side of the desk from where the manufacturer assumed. A simple control in Audio MIDI Setup lets you reverse the L and R channels of the Mac — the only place I know of where this behavior can be controlled.
“Memory Clean 2 also has the ability to free up memory when needed, though I confess I don’t use this feature since, generally speaking, the Mac is pretty darn good about managing its own memory needs.”
You obviously don’t watch DVDs then (either from your HD or optical drive). When used as an HTPC and you do watch movies, OS X caches them to RAM. It stopped doing this in 10.11, but once again does so in 10.12.
So after a few movies or binge viewing a season of a show I like, my system ends up hitting the VM compressor something fierce because there’s no free RAM after caching all of those watched DVDs. That’s where Memory Clean 2 would come in handy. Or you can use the always free *purge* command from Terminal (sudo purge) and get most of your RAM back.
When you’re running from SSDs, the RAM cache becomes much less useful as even though RAM is several orders of magnitude faster than even the best NVMe SSD, unless you’re timing it with a chronometer, you’ll almost never notice the boost. And losing that much RAM to cached files and ending up with compressed RAM hurts more in the long run since once RAM is compressed it is NEVER FREED UP. Not even purge can free up compressed Ram. It stays compressed until you restart.
That sounds like a problem with QuickTime, iTunes, DVD video player and/or all of the above. Kill dem apps! Free your RAM!