Last week, we started our foray into the Mac’s Accessibility features with an overview of the services available, and a look at the General category, which provides quick access to many of the Accessibility features. If you would like to review Part One of this series, you can find it at:
macOS 101: Getting Started With the Mac’s Accessibility Features.
In Part Two, we’re going to look at the Vision category, including:
- VoiceOver: The Mac’s built-in screen reader.
- Zoom: The ability to enlarge or shrink the view on the Mac’s display.
- Display: Options to enhance the display for easier viewing.
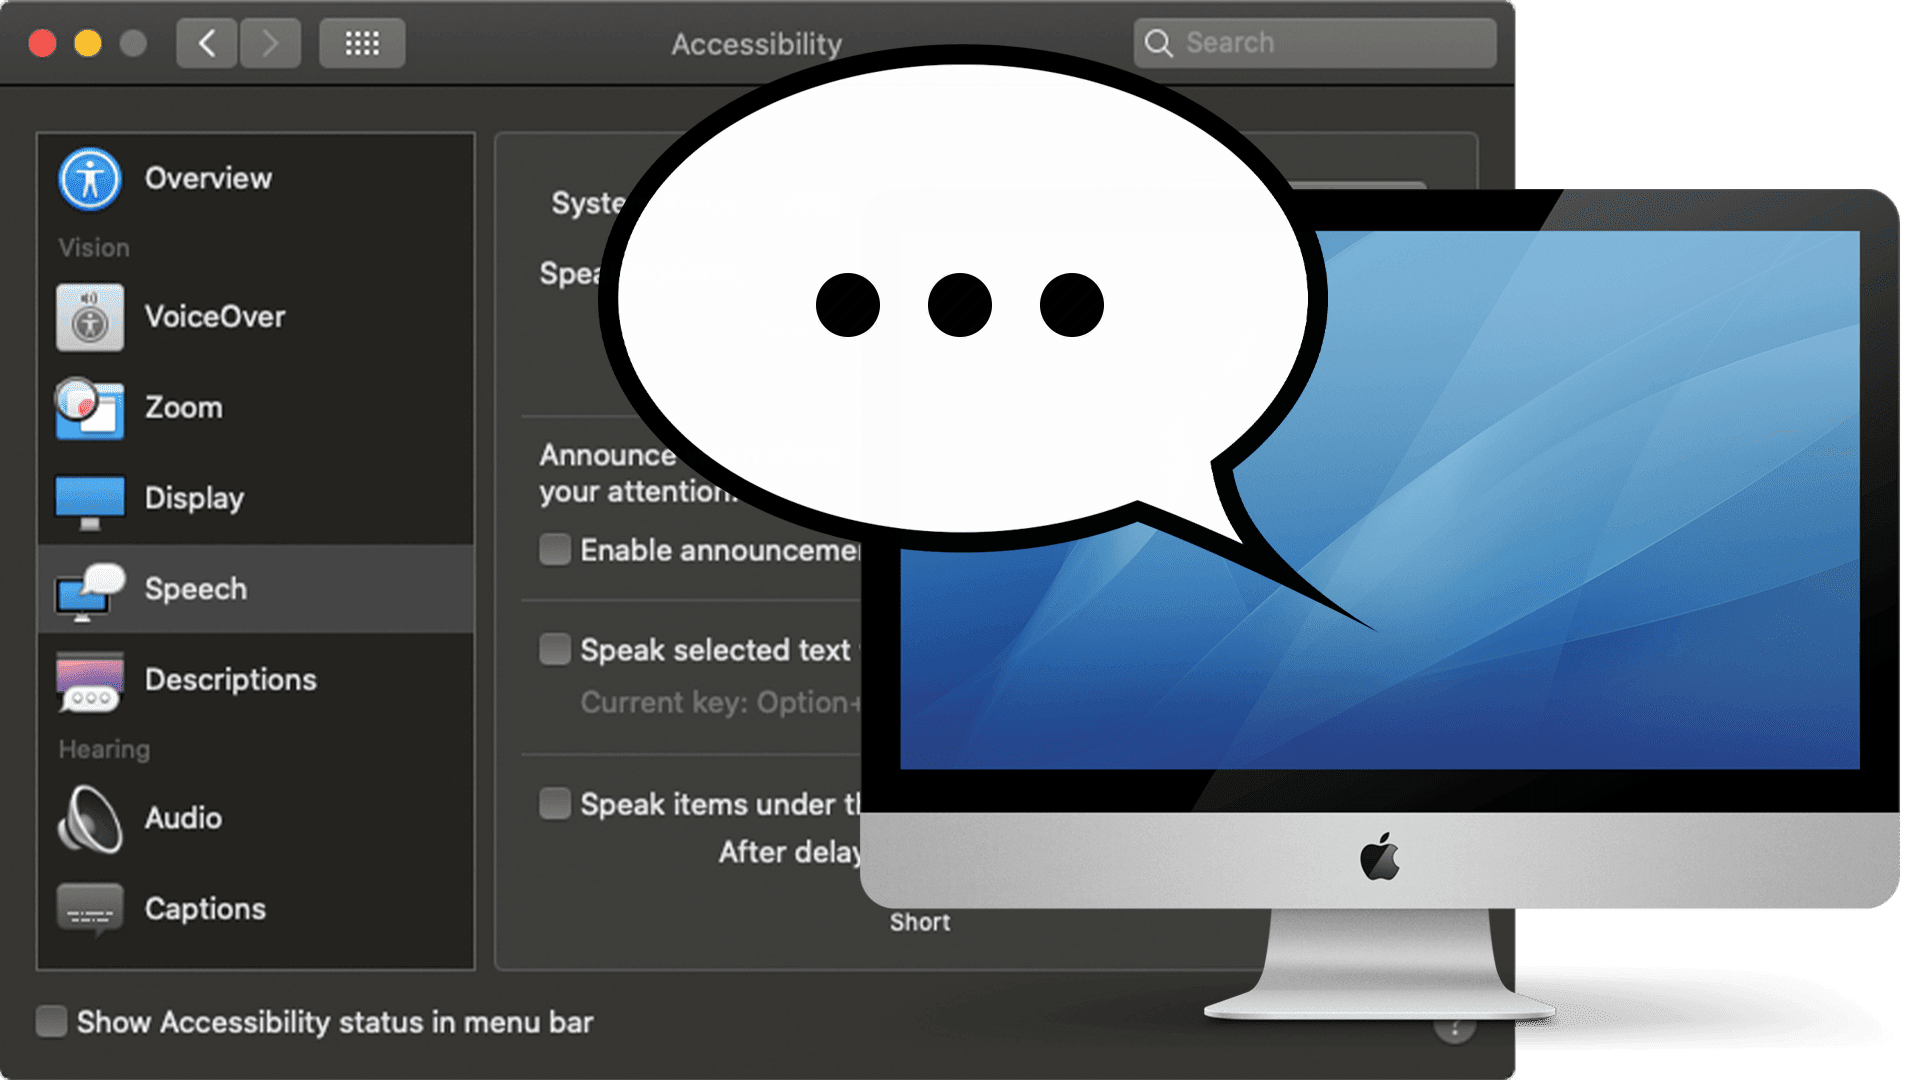
- Speech: Using the Mac’s speech options to read alerts, speak text, and modify characteristics of the voice used in the VoiceOver application.
VoiceOver
VoiceOver is the Mac’s screen reader app, though it does quite a bit more than just telling you what’s happening on the screen. It provides voice descriptions of each onscreen item, suggestions about how to use them, supports 35 languages and braille display, and offers a wide range of voice options, including the ability to control your Mac with just a keyboard.
VoiceOver is often thought of as an app that’s included with the Mac OS, but actually it’s a core service of the operating system. This allows third-party developers to integrate VoiceOver into their apps to provide simplified navigation with their products.
To configure and use VoiceOver:
Launch System Preferences by clicking on its Dock icon, or by selecting System Preferences from the Apple Menu.
In the System Preferences window that opens, select the Accessibility preference pane.
If you have Siri up and running, you can say “Hey Siri, open the Accessibility preference pane” as an alternative.
In the Accessibility preference pane, select VoiceOver from the sidebar.
The VoiceOver options will be displayed in the configuration pane.
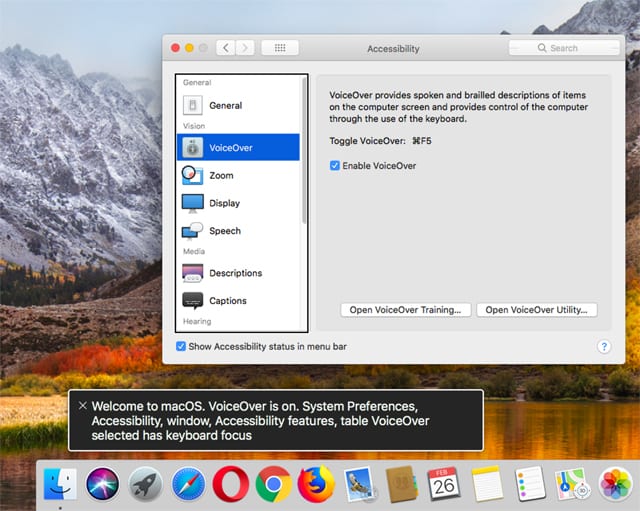
To enable Voiceover, place a checkmark in the Enable VoiceOver box, or use the command + F5 keyboard combination. You can also use Siri by speaking, “Hey Siri, turn on VoiceOver.”
VoiceOver can also be turned on using the Accessibility Shortcut panel. See Part One of this series, macOS 101: Getting Started With the Mac’s Accessibility Features, for details.
Once VoiceOver is enabled, a caption panel will appear in the bottom left corner of the screen. Within the panel, the text that VoiceOver speaks will be displayed.
VoiceOver will speak and display descriptions of each element on the screen as you interact with them. Besides speaking a description, the VoiceOver caption panel will provide hints and instructions for how to interact with the various elements you encounter.
VoiceOver provides a large number of ways to interact, including an extensive collection of keyboard shortcuts, gestures, and other input methods. A complete list of all the ways to interact are a bit beyond the scope of this overview, however, VoiceOver has a built-in training system that takes the user through the process of using the Mac via VoiceOver commands.
To launch the VoiceOver training, return to the Accessibility preference pane.
Make sure VoiceOver is selected in the left-hand pane, then click the Open VoiceOver Training button.
The training instructions will be displayed. You can move through the training pages using the arrow keys on the keyboard. Use the Escape key to end the training.
Apple also has a VoiceOver Getting Started Guide that I highly recommend. The guide is also available in an English Unified Braille version, and an embossed braille version is available to order.
The Getting Started Guide covers working with text, navigation, VoiceOver basics, working with tables, navigating the Internet, and much, much more.
VoiceOver tip: Control + Option is the default set of VoiceOver keyboard modifiers, and is referenced in most VoiceOver keyboard commands. If you’re using OS X El Capitan or later, the caps lock key also works as the VoiceOver modifier. It lets you press a single key, and when VoiceOver is enabled, the caps lock key doesn’t function as a normal caps lock anyway.
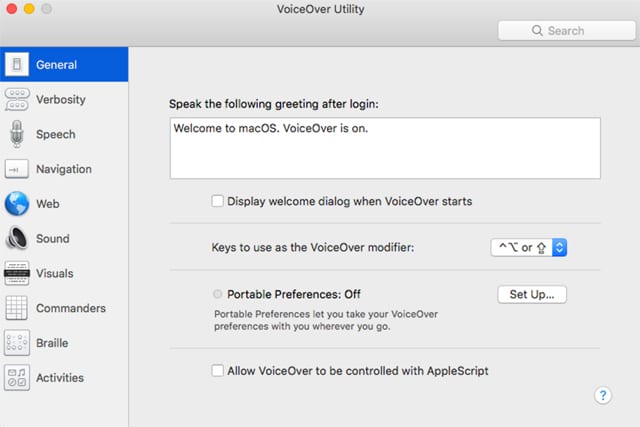
The last component of VoiceOver we will cover is the VoiceOver utility, which provides a way to customize VoiceOver to work the way you would like it to. You can customize the following:
- Verbosity: Specify the verbosity level for speech, braille, text, announcements, and hints.
- Speech: Select the voice, rate, pitch, and volume, as well as how certain text is pronounced.
- Navigation: Customize how VoiceOver works with cursors, groups, redundant items, and more.
- Web: Control how web pages are navigated.
- Sound: Change basic sound parameters.
- Visuals: Control VoiceOver cursor size and movement, caption panel size, braille panel font size and color, and menu font size.
- Commands: Allows you to assign VoiceOver commands to keyboard characters
- Braille: Customize settings for an attached braille display.
- Activities: Create sets of preferences for use with specific activities.
To access the VoiceOver Utility, return to the Accessibility preference pane.
Make sure VoiceOver is selected in the left-hand pane, then click the Open VoiceOver Utility button.
You can also ask Siri to do it by saying, “Hey Siri, open VoiceOver utility.”
VoiceOver tip: Use the Speech options in the VoiceOver utility to try out different voices. Alex Compact and Fred are popular VoiceOver voices to use. Be sure to try a voice with different speaking rates and pitch to find one that intones clearly.
Zoom
Zoom allows you to use keyboard shortcuts and gestures to zoom the display in and out, letting you get a close-up view of a screen element, or back off to see a wider view.
To access the Zoom options, return to the Accessibility preference pane and select Zoom from the list in the left-hand sidebar.
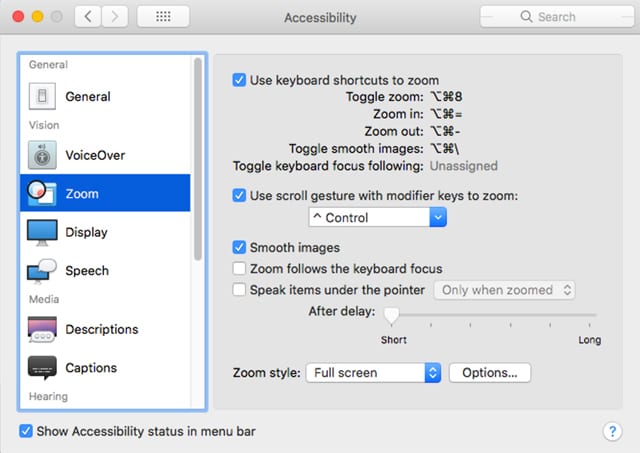
To enable keyboard control of the zoom functions, place a checkmark in the box labeled Use keyboard shortcuts to zoom.
To enable gestures to control zoom, place a checkmark in the box labeled Use scroll gestures with modifier keys to zoom.
Use the dropdown menu to select a modifier key to use for the gesture zoom.
You can make zoomed images appear cleaner by placing a checkmark in the Smooth images box.
To have the zoom be applied to the area of the display currently in focus, select Zoom follows the keyboard focus.
Use the dropdown menu to select the zoom style to use, either Fullscreen or Picture-in-Picture.
Display
Display allows you to modify display options to make it easier to view the screen. These options are in addition to the basic Display preferences available in the Display preference pane.
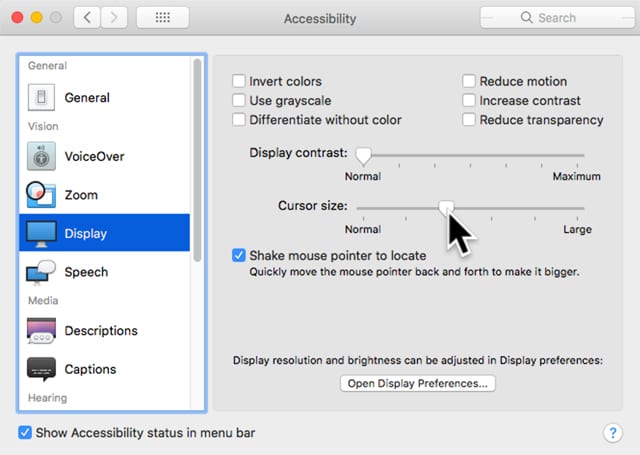
In the Accessibility preference pane, select Display from the list in the left-hand sidebar.
You can place a checkmark in the following options:
- Invert color: This will invert the colors on your display. It will allow the use of white text on a black background, though other colors will be inverted as well.
- Use grayscale: Removes all colors other than grayscale from the screen.
- Differentiate without color: Uses shapes instead of color to convey status or information.
- Reduce motion: Reduces or eliminates movement of elements on the screen when opening apps, switching between apps (including the desktop), or using the Notifications service.
- Increase contrast: Increases the contrast of borders, such as those around buttons, menus, and sliders, to make them stand out better.
- Reduce transparency: Removes the transparent effect used on some Mac screen elements, such as the menu bar and Dock, to increase contrast.
Other display options include:
Display contrast: This slider can be used to increase the overall contrast of the display.
Cursor size: This slider will increase the size of the pointer cursor.
Shake mouse pointer to locate: Placing a checkmark here will cause the pointer to enlarge horizontally when shaken. This makes locating the mouse pointer an easier task when it’s lost amongst the background.
Speech
Speech allows you to customize the system voice used on your Mac.
To access speech options, open the Accessibility preference pane, and then in the left-hand sidebar, select Speech.
Use the System Voice dropdown menu to select a voice to be used system wide. The Mac comes with a number of voices installed, and a large number of additional voices are available. If you don’t find a voice to your liking, select Customize from the dropdown menu. You can then preview the available voices, and select additional voices to be downloaded and automatically installed.
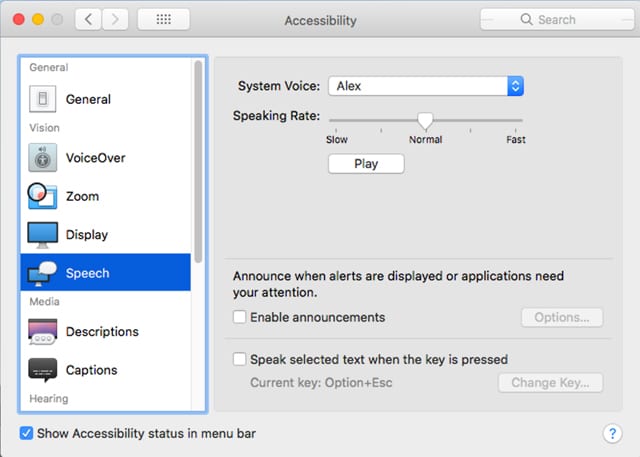
The Speaking Rate slider can be used to speed up or slow down the speaking rate. Use the Play button to hear an example of the currently selected voice rate.
Place a checkmark in the Enable announcements box to have your Mac speak when alerts are displayed or apps need attention. The Options button allows you to select a different voice to be used for announcements.
You can have your Mac speak any text that has been selected (highlighted) by placing a checkmark in the box labeled Speak selected text when the key is pressed. You can then use the Change Key button to select a keyboard combination to be used with the speak text option.
Accessibility: Media, Hearing, and Interacting
The next installment of macOS 101: Accessibility Features will cover the remaining categories: Media, Hearing, and Interacting. These categories include settings that allow the Mac to take dictation as well as be controlled by voice commands. You can also control your Mac using one or more devices, including a keyboard, mouse, joysticks, gamepads, or other dedicated devices.
