
Space, the final frontier. It may seem like an astronomically difficult problem, trying to keep enough free space on your Mac’s startup drive, especially if you have a Mac with a small SSD.
Space is precious, and one of the largest users of your drive’s space is likely to be your various media libraries. You likely have one or more photo libraries, as well as all the music, videos, podcasts, audiobooks, and mobile apps that are managed by your iTunes app. In many cases, your iTunes library is one of the main users of drive space.
Whether you are running out of space with Mojave or earlier, or want to make a backup before upgrading to Catalina, this Rocket Yard guide can help!
One of the best ways to increase the amount of free space on your startup drive, and better manage your media libraries, is to move them from their usual home to an external drive. This allows you to use a large but relatively inexpensive drive to house all the data.
Consider this:
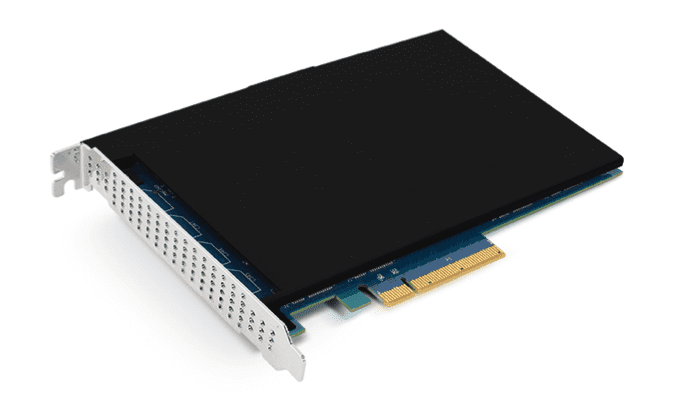
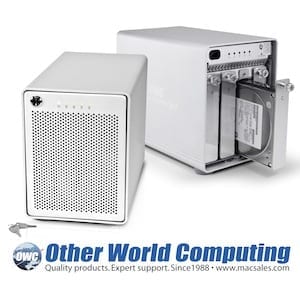
A new USB 3.0 external drive with a 2 TB hard drive installed can be had for less than $150, possibly even less if you already have an enclosure to use, or a hard drive kicking around.
That’s why one of my recommendations for controlling drive space issues is to consider moving your media libraries to an external hard drive.
Move iTunes Library to External Storage
In this tip, we’re going to show you how to successfully move your iTunes library from its default location on your startup drive to an external drive connected to your Mac. This method will result in a seamless move, with your iTunes app able to pick up right where it left off, with no hiccups.
The first step in the process is to determine how much external storage you need by finding out how big your current iTunes library is. This will help determine a bare minimum size for an external dedicated to iTunes, though I suggest you use this number only as a reference. I recommend choosing a larger size that will accommodate any expected growth in the library, as well as any additional media libraries you may choose to install on the external now or in the future.
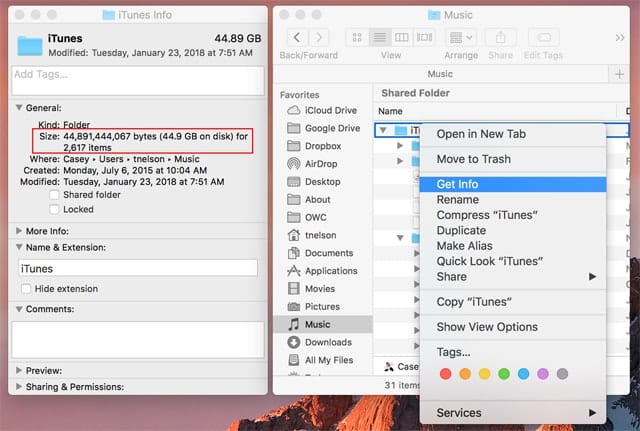
Find Out How Large the Current iTunes Library is
The default location for the iTunes library is in your home folder, within the Music folder (~/User_Name/Music).
To find out how big the library is, perform the following:
- Open a Finder window and navigate to: ~/User_Name/Music.
- Right-click or command-click the iTunes folder, and select Get Info from the popup menu.
- In the Get Info window that opens, make a note of the folder size found near the top left of the window, just under the General: section.
- The size listed indicates the current size of the iTunes library.
- You can close the Get Info window.
The size listed is just about the bare minimum. I say “just about” because you’ll need slightly more capacity on the external to ensure the library will fit. As an example, my iTunes library is about 49 GB, not very big as iTunes libraries go. It’s unlikely that my 49 GB library would fit on a 50 GB external (if you could still find such a small drive), due to the amount of space the external will reserve for itself during the formatting and partitioning process. It would be better to go up a size, from 50 GB to 60 GB, as the minimum space needed.
To this minimum, add space for expansion. Perhaps you’re an avid collector of new music and podcasts, or you like to install lots of mobile apps. All of these things will take up additional storage. I suggest going with the largest external drive your budget will tolerate. This will ensure you don’t need to expand the drive size in the near future, and you can always use any unused space for other data, perhaps your photo libraries, or to stream movies from.
Interface Speed
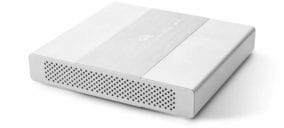
This is an easy one; a USB 3.0 or better interface should be all that’s needed for an iTunes media library. This should provide sufficient bandwidth to play back any current iTunes content. If you want to future-proof your investment, consider using a USB 3.1 Gen 2 enclosure, which provides twice as much bandwidth as USB 3.0 or USB 3.1 Gen 1.
You could also consider moving to a Thunderbolt-based enclosure if you plan to use the external drive for even more bandwidth-intensive storage, such as movie/video/image editing libraries.
Making the Move
Before you begin the actual process of moving the iTunes library files around, it’s a good idea to have a current backup. After all, this process includes moving and deleting files; if something goes wrong, you’ll be thankful you have a backup to use for recovery.
The easiest way to move the iTunes library is to ensure that iTunes is in control of managing the library for you. Essentially, iTunes can be set up to use media files scattered anywhere around your Mac, or it can be set up to gather all the media and place them into a folder structure that iTunes manages.
It’s this last configuration that we want to use, since it gathers all needed files under the iTunes folder, allowing us to copy just the content of a single folder to the new external drive.
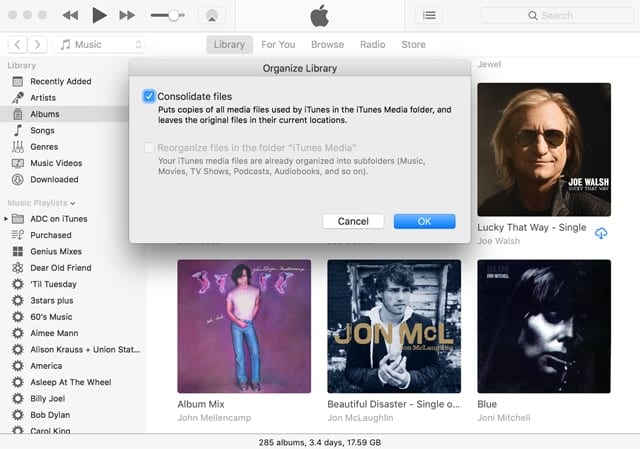
- Launch iTunes, and select “Library > Organize Library” from the File menu.
- Make sure there’s a checkmark in the Consolidate Files box, and click OK.
- We’re going to assume that you haven’t previously changed the default iTunes library location. If you have, please substitute your iTunes library location in the following steps.
- iTunes will copy needed files and place them all within the iTunes folder; iTunes won’t move or delete the originals but leave them where they were. This process can take a bit of time if your iTunes library wasn’t previously consolidated. Play a game, take a coffee break. When you come back, the consolidation should be done.
- All of your iTunes media files are now located in the iTunes folder, within the ~/User_Name/Music folder.
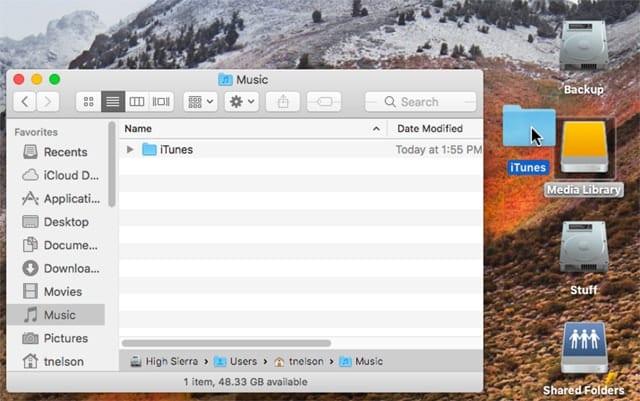
The next step is to copy the iTunes folder to the external drive you plan on using.
- Quit iTunes.
- Open a Finder window and navigate to ~/User_Name/Music. An easy shortcut to use is to click on the Music folder in the Finder sidebar, if present. You can also select Go to Folder from the Finder’s Go menu, and then enter ~/User_Name/Music, replacing User_Name with your actual user account name. As an example, I would enter ~/tnelson/Music.
- Copy the iTunes folder by dragging it to your external drive.
The Finder will display a progress window as the files within the iTunes folder are copied.
Depending on how large the folder is, the copy process can take quite a while. This is another advantage of selecting a higher performance interface for the external drive; it can reduce the copy time.
Once the copying is complete, you need to tell iTunes where the new library is located.

- Hold down the Option key, and launch iTunes.
- iTunes will tell you that it needs an iTunes library. You can Quit, Create Library, or Choose Library. Click the Choose Library button.
- You’ll be presented with a standard Open dialog box. Navigate to your external drive and select the iTunes folder, then click the Open button.
- iTunes will finish launching and open with the new iTunes library selected.
At this point, you should ensure that iTunes is indeed accessing the new location and that you’re able to play back various iTunes media files.
To ensure the new library location is being used:
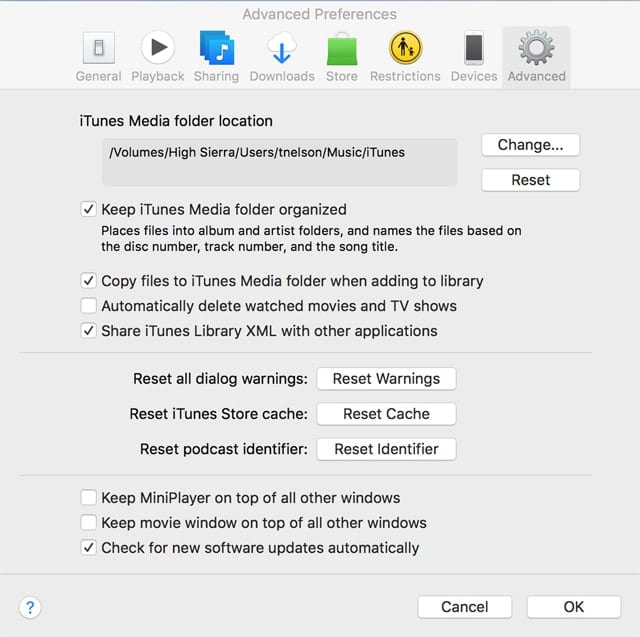
- Select Preferences from the iTunes menu.
- Click the Advanced icon in the toolbar.
The first item displayed under Advanced is the current iTunes library pathname. It should display a pathname similar to:
/Volumes/External_Drive_Name/iTunes/iTunes Media
If not, you can click on the Change button, navigate to the iTunes folder on your external drive, and then click the Open button.
Once you’ve confirmed that the correct library is being used and that iTunes is able to play the library’s media files, it’s time for some general cleanup.
Clean Up Old iTunes Files
So far, you have:
- Picked an external drive to store your iTunes library.
- Copied your existing library from your startup drive to the new location on your external drive.
- Told iTunes about the new location of the library.
- Verified that iTunes works fine with the new location.
Now it’s time to clean up the old library files to make room on your startup drive.
- Open a Finder window, and navigate to the old Music folder at ~/User_Name/Music.
- Select the iTunes folder and drag it to the trash, or right-click on it and select Move to Trash from the popup menu.
- Once the files are in the Trash, right-click on the Trash icon in your Dock and select Empty Trash from the popup menu.
The old iTunes library, along with any other files that may have been in the trash, will be deleted, freeing up space on your startup drive.
General Tips
- If you’re using Time Machine to back up your iTunes library, make sure the external is not excluded from the locations being backed up. You can do this by opening the Time Machine preference pane and selecting the Options button.
- Make sure the new iTunes Library location is not in the Exclude list.
- If you use one of the other popular backup apps, make sure the new iTunes library location is included in your backup process.
- The consolidation process you used to put all the media files within the iTunes library means that if you have media files scattered around your Mac’s storage system, they are no longer being used by iTunes. If there are no other apps using them, you could free up additional space by deleting these files.
- Do not use an external Time Machine drive to store the iTunes library. It’s not a good idea to have both the original files, and the backup of those files, on the same drive.
- Choose an external drive large enough to accommodate your iTunes library as well as any other media storage needs, such as your Photos library.
And most importantly…
Subscribe to the Rocket Yard Newsletter for more tips, tricks, and quick answers!



Thanks for this article. I ran into difficulties following advice posted elsewhere about transferring my iTunes library to an external drive. You guys bailed me out. I’m an OWC customer and also enjoy reading Rocket Yard Weekly Saturday mornings.
Hey OWC! I’d love an update on this info for macOS Monterey!
Amen to that. Plus how to import playlists into Music.
Please allow a ‘Print’ option
This has all changed with Catalina, particularly 10.15.6. An update would certainly in order.
I’ve spent the better part of a week solid on the phone with Apple senior support advisors, trying to solve problems that this update caused. Finally, a senior service advisor advised that Catalina was not designed to support music libraries other than on the internal HDD (or presumably SSD). So In order to get it working, more or less, I had to copy 1.2 Tb of music files back to my internal HDD (after upgrading to a considerably larger capacity HDD), and starting over from scratch, building a new library etc…
At this point I suggest, based on my experience, that Catalina, and the integral Music application, are not suited for managing a large music or other media library housed on an external drive.
This works to move iTunes, but the “Music” item in the left column of the Finder view doesn’t point to the new directory on my external. I can’t find a way to deal with the original link because the OS is protecting it from manipulation.
Is there some magic to change the destination behind that icon?
TIA – Linda
Linda,
I believe this is strictly a problem with Catalina for those of us wanting our music files on an external drive. Mine actually began when I first installed Catalina ~ 8 months ago. The Music library did not simply copy the previous iTunes library. Rather, Catalina apparently erased it from my HDD and supplanted it with a new Music library of music on my internal HDD. As I had at the time no music on the internal HDD, it was a small library indeed.
With some good work by Apple senior support advisors, I was ultimately able to reconstruct a library of the music on my external drive. That worked well until I installed 10.15.6.
Once again the Music library file disappeared, and this time the only solution finally amounted tp copying all music files (1.2 Tb worth) onto my now very much enlarged internal HDD, and let the Music do its thing in creating a library of the duplicate music files now on my internal HDD. This took a lot of effort by Apple support personnel up to and including the engineering level.
On several occasions I asked different support advisers why I couldn’t simply direct Music to look to the external HDD to build a directory. In essence the answer was ‘…that’s not the way that Catalina/Music was designed and built.’ In other words, It is what it is!
Not satisfying, but there you have it. We’re not likely to get any real change until Big Sur, if then.
Note that it is possible to revert to Mojave ( the OS before Catalina ) and iTunes. I considered that, but for a number of reason’s decided against it.
Linda,
In my last reply I suggested one could solve these problems by reverting to Mojave and iTunes. I’ve now been told that that can’t be done because Catalina changes firmware (here and there), rendering reversion to Mojave/iTunes impossible. So it really is a Catalina only problem, with no way apparently, to go back. What I think of that, is that from an engineering perspective it s…s in a big way.
Great job! Very complete
Thanks so much! I have been dealing with limited space on my MacBook Air for so long… I have since moved my iTunes and iMovie libraries to an external as well as Drop Box. I now have 24 gigs of free space. I feel so much lighter! Thanks again.
Thank you for the clear instructions.
Such things are a minefield for people like me who are not tech savvy!
Very Useful – Thanks
Nice post! As for me, I found a tool designed by DRmare also can help do this.
This atrial is really good but I am confused. The process keeps referring to moving iTunes library.
Will this process work with MacOS 15 Catalina. If so what would be the file name, still iTunes?
Thanks
Great information, but what are the differences between this iTunes external media setup the new Apple Music App that has now replaced iTunes?
There are quite a few differences which is why it might be good to have a copy on an external drive before upgrading. Check out this article for more information on the new Music app.
This was great and very detailed for us non-computer persons. Thank you.
I moved to a laptop as my primary work computer, and moved both iTunes and iPhoto libraries to an external. It works fine, but is a headache when on the road, and without my external drives… Is there a way to switch to “road mode” with a smaller library stored on my internal ssd? Similarly, iPhoto… and I cannot sync my iphone and ipad while on the road….
You know what iTunes needs? An action to “remove and archive” an album, but with a twist. I have an Apple Music Family Subscription, and I could save a ton of space if I could offload music that I can stream directly via my Apple Music subscription.
I don’t want to lose the music, or lose its place in my library, but a simple “offload this album to external drive & replace with Apple Music version” would allow me to reclaim drive space without worry about losing “hard copies” of my already-ripped albums.
How do I make a back-up of my iTunes once I’ve copied it to another drive? How do I update the back-up as I add more media? What steps do I take to make a 3rd iTunes folder that is another duplicate and that I use on my laptop?
It would be sweet if we could do the same with iPhone/iPad backups. It would be even sweeter if iTunes let you choose where to store those backups. Those are the biggest space hogs we have and with iPhones having more storage than older laptops it’s a problem.
It is high time for APPLE to dislodge and separate the multiple media formats it controls under the iTunes umbrella. I rarely use it for anything these days. It is cumbersome and controls way too many formats. The name has the word “TUNES” in it, for heavens sake. Music should be its SOLE focus. The others should each have their own apps. iTunes has lived way past its usefulness nad needs a facelift STAT.
Can a hard drive be connected to the router and accessed; instead of having to plug in the drive to my Air each time I want to surf iTunes?
Hi Ming, that was interesting. I checked my MobileSync folder and found 10.7 Gb. Not too big but my Mobile Applications folder is in my iTunes folder. Where is yours? This is on my MacMIni (late 2012) OS 10.12.6, iTunes 12.7.3.46. I have moved my iTunes library several time over the past years: external HDDs, replace my internal HDD with two SSDs in a striped RAID today.
Hi Tom,
One thing which surprised me is the size of the MobileSync folder (under ~/Library/Application Support) which is used by iTunes but is not under Music. Over the course of several years and devices mine has grown to over 200GB.
Since it is not under Music changing the location of the iTunes folder does not change the location of the MobileSync folder … I had to use a symbolic link for that.
Have fun.
Ming