Using an external device
In Using an External Drive as your Startup Drive: Part 2, we’ll take a look at additional issues you may encounter while setting up and using an external for
External Drive Interface Choices
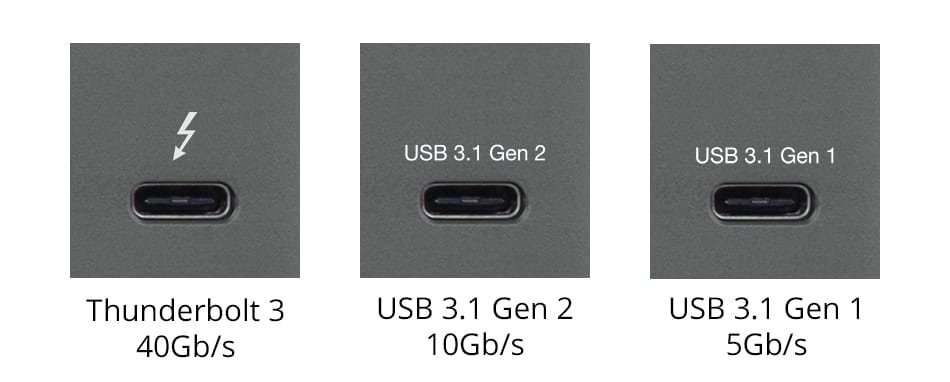
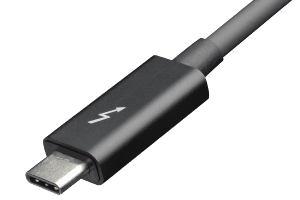
One of the first considerations when choosing an external storage device is how it will interface with your Mac. There are a number of interface types to choose from, but for most of us, the choices will come down to USB 3.1, USB 3.2, and Thunderbolt. You can find more details in the Rocket Yard guide:
What’s the Difference Between Thunderbolt 3 and USB-C and Which Should You Use
How to Enable a T2-Equipped Mac to Boot From an External Device
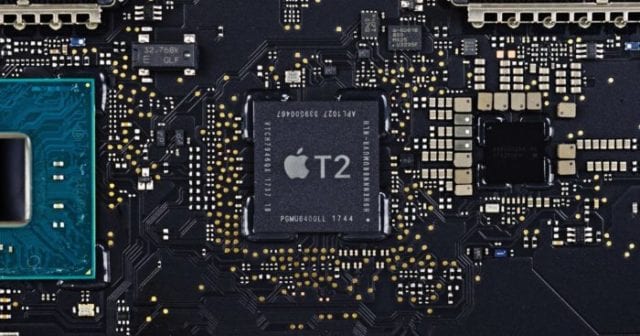
If your Mac includes a T2 security chip, there are a couple of additional steps you’ll need to perform to allow your Mac to start up from an external device. The T2 chip helps protect your Mac against unauthorized access by providing a secure boot environment that ensures the Mac only boots from an authorized (signed) version of the Mac OS. It also prevents booting from external devices that someone may connect to your Mac.
Since our goal here is to boot from an external device, the settings for the T2 security chip will need to be changed. Apple provided the Startup Security Utility so that a user with administrator privileges can alter the default security settings.
The Security Startup Utility is part of the macOS Recovery volume that is hidden on
Access the Recovery Volume
Start by shutting down your Mac.
Once the Mac is off, hold down the Command and R keys (⌘ + R) while starting up your Mac. Continue to hold down the keyboard shortcut until you see the Apple logo. If you’re using a Bluetooth wireless keyboard, you may need to start up your Mac and wait to hold down the keyboard shortcut until after you hear the startup chime. Try both methods if you need to.
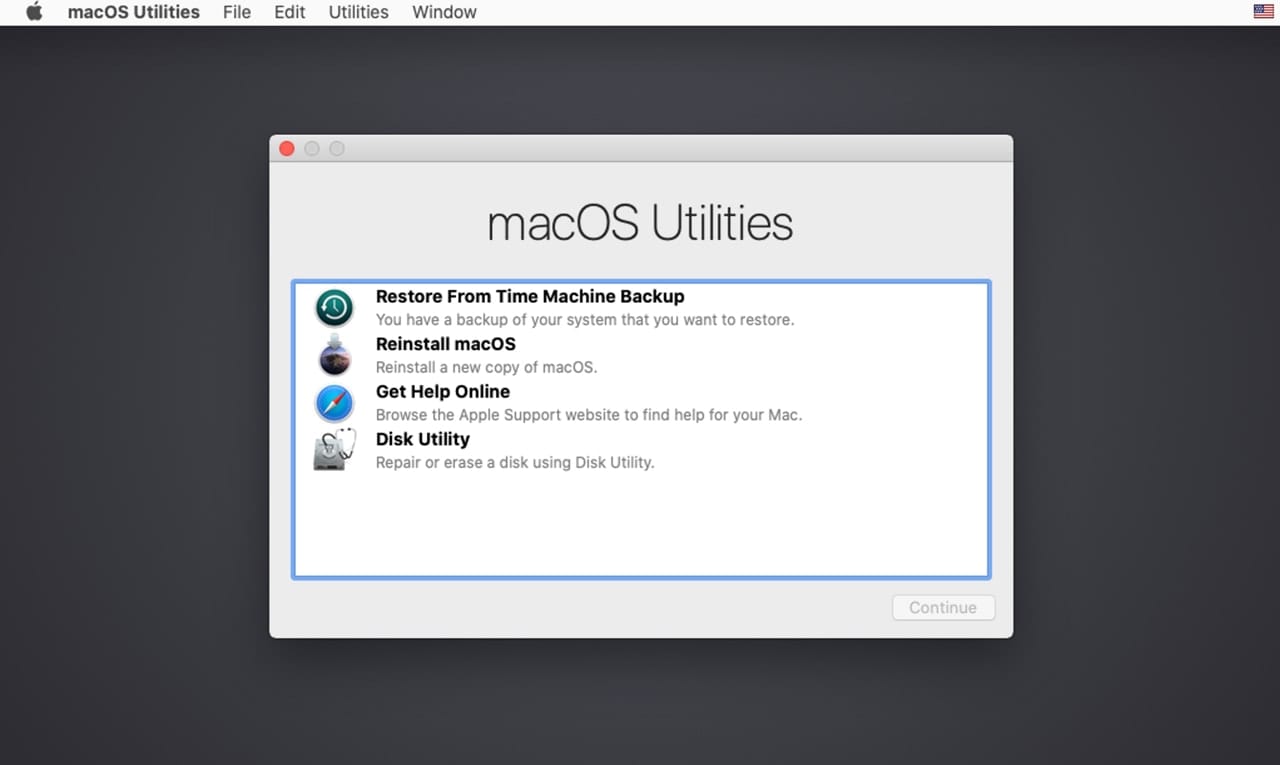
Once the Apple logo is present, you can release the keyboard shortcut.
After a brief wait, you should see the macOS Utilities desktop appear.
Jump ahead in the instructions to Using the Startup Security Utility
Use Internet Recovery
There’s an alternate method for accessing the recovery volume should the above method fail. When that happens, the usual cause is that
If you can’t access the normal recovery volume, you can use a secondary method—Internet Recovery—to gain access to the macOS
Internet Recovery results in the same recovery tools being available but doesn’t require a working startup drive. Internet Recovery requires a connection to the Internet via your local network. Once the connection is made, the recovery tools are downloaded to your Mac from an Apple server. If you’re connecting via Wi-Fi, you may need your network password or security key, so be sure and have them handy.
To use Internet Recovery, start up the Mac while holding down the Command, Option, and R keys until you see a spinning globe. Once you see the globe, you can release the keys. It can take a while before the recovery utilities are displayed, so be prepared to wait a bit. When I started my Mac up via Internet Recovery, it took just shy of 5 minutes; your time may be longer or shorter, the point being, go make some coffee or tea while you’re waiting.
Using the Startup Security Utility
No matter which of the two methods you used to start your Mac, you should now be at the macOS Utilities desktop.
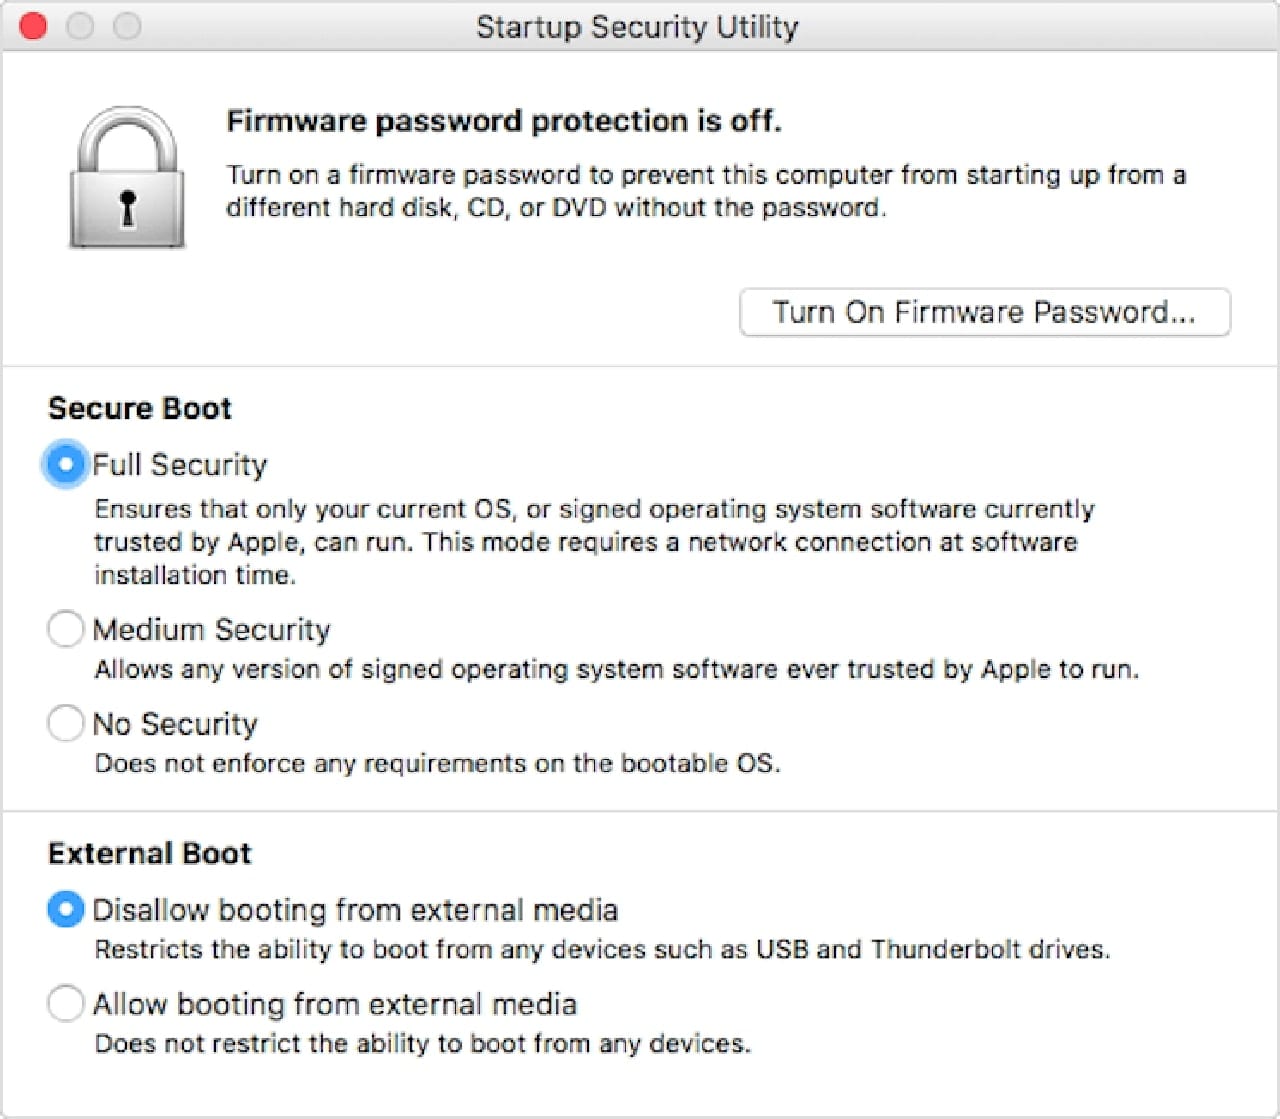
Select Startup Security Utility from the Utilities menu.
You will be asked to authenticate. Click or tap Enter macOS Password, select an administrator account, and enter the password.
The Startup Security Utility window will be displayed.
In the External Boot section, select the option labeled Allow booting from external media.
If you intend to run a current version of the macOS from the external drive, this is all you will need to do. However, if you’re planning to run an older version of the macOS, you may need to change the choice in the Secure Boot section.
Make your choices and then quit the utility by clicking the red close button in the top left corner of the window.
At this point, you should be able to start up from an external drive that has a bootable macOS volume. If you haven’t yet configured the external with a boot system, jump ahead to: Installing macOS on an External Device.
To select a new startup drive, select Quit macOS Utilities from the macOS Utilities menu.
A sheet will drop down, allowing you to cancel the restart, restart, or Choose Startup Disk.
Select the Choose Startup Disk option.
A list of available startup disks will be displayed. Make your choice and click the Restart button.
The Mac should restart from the selected device.
Installing macOS on an External Device
Depending on the reason that you’re switching to an external drive as your primary startup device, there will be different ways to install the macOS onto the external.
Cloning the startup drive: If you’re moving to an external because you need more storage space on the startup drive, or you’re moving to a higher performance device and your current internal startup device is otherwise in good shape, then using a cloning tool to copy of all the information on the current startup drive to the new external may be a good choice. This method will preserve all of your current data, including the
There are a number of ways to make a clone using various utilities:
Tech Tip: How to Use the Restore Feature of Disk Utility to Clone a Drive.
Carbon Copy Cloner: A favorite of the Mac community for creating bootable backups and clones.
SuperDuper: Another user favorite. If you’re working with macOS Catalina, make sure you have the correct version of SuperDuper.
Install a Fresh Copy of the macOS
If you’re upgrading your system with a new bootable external storage system, you may want to consider installing a new, clean copy of the macOS. Once a clean install of the macOS is performed, it will be like the first day you turned on your Mac, only you’re going to have a faster or larger startup drive to use.
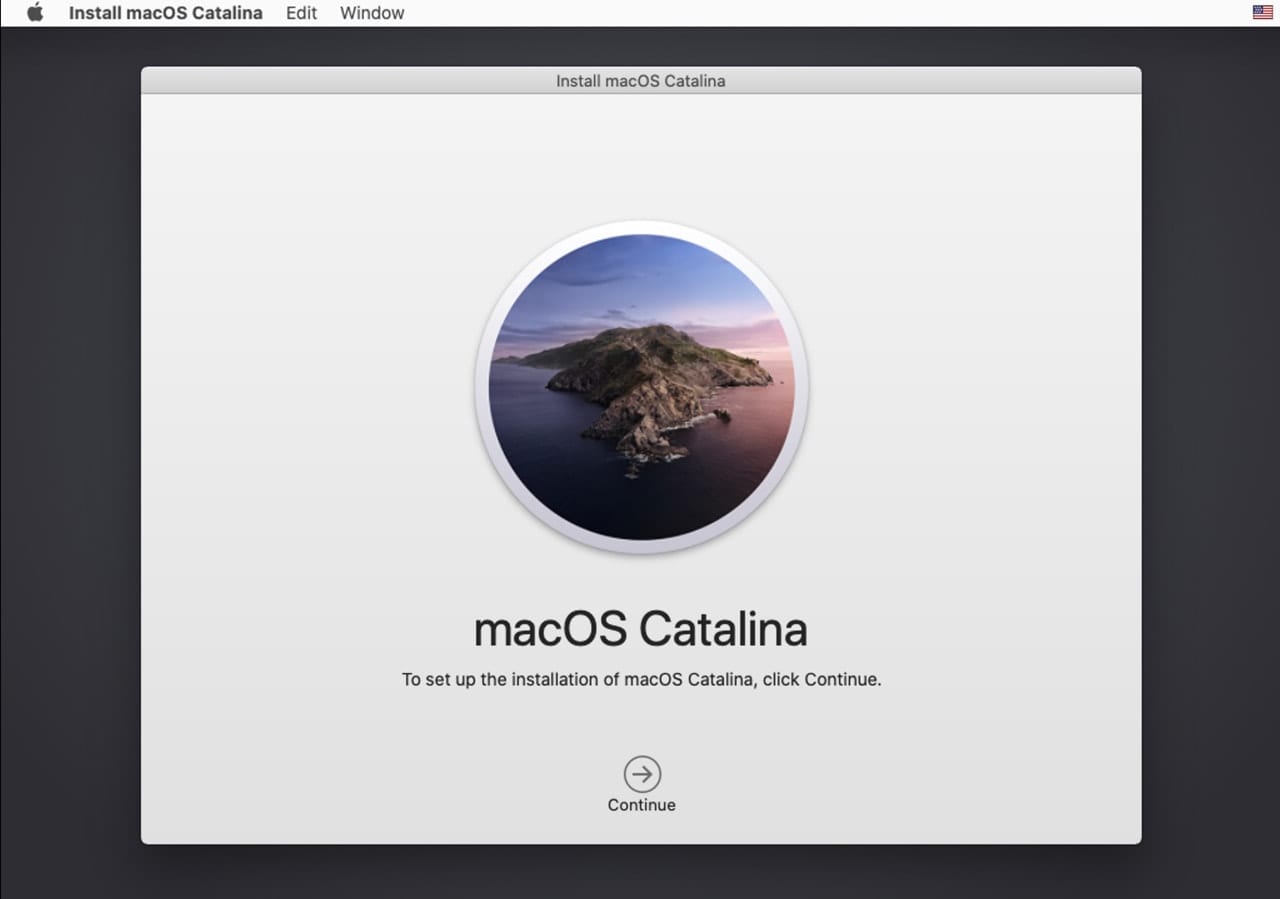
You can find instructions in one of our Rocket Yard install guides:
- How to Clean Install macOS Catalina
- Mojave Upgrade Vs. Clean Install: We Explore the Options
- How to Perform a Clean Install of macOS High Sierra
Alternative Method to Install a Clean Copy of the macOS
The Recovery volume has the ability to reinstall the macOS. You can use this method to perform a clean install, provided the version of the macOS you wish to use is the same one you were using before you decided to move to an external boot device.
If you want to install a different version of the macOS, you’ll need to use the methods outlined in the Install a Fresh Copy of the macOS section, above
Use the instructions above in the Access the Recovery Volume section, or the Use Internet Recovery section, depending on the condition of your internal startup disk.
Once the macOS Utilities desktop appears, select the option to Reinstall macOS and then press the Continue button.
After a brief wait, the macOS installer will appear.
The installer will display the name of the macOS version it will install; be sure and confirm it’s the correct version you wish to use.
If it is the correct one, click or tap the Continue button and follow the onscreen instructions.
When you get to the point where you choose the drive to install the operating system on, be sure and choose the external device. After that, you can just follow the instructions provided by the installer.
What to Do With the Internal Drive
Using an external as your primary startup device frees up the internal drive your Mac normally uses. If the internal is in good shape, then you have extra storage space you can make use of.
You can put this storage space to work in a number of ways:
Clone of the external startup drive: Having a clone on the internal would allow you to be back up and running quickly should any calamity befall your external drive. If it’s on a portable Mac, the clone will let you leave the external behind if you need to take the Mac on the road. Just remember to clone or sync both startup devices when you get back.
Time Machine backup: If the internal is large enough, it may make a good candidate to be used as your Time Machine backup drive.
Emergency bootable system and troubleshooting tools: If the internal drive is too small for backup use, you may want to use it as an emergency recovery drive. To do this, perform a clean install of a system, then add any troubleshooting tools or apps you need.
Library storage: Depending on the size and possibly the speed of the internal, it may make a good place to keep your various media libraries, ensuring they’re always available by having them stored in the internal drive.
Any combination of the above: If the internal drive is large enough, consider combining the popular uses mentioned above. A Time Machine drive that has a bootable system could be very helpful when you need to restore your data after a device failure.
More Externals to Consider
In Part 1, we looked at three popular choices for external startup drives. In Part 2, I’d like to bring your attention to a few additional choices that may meet your needs:
OWC Mercury Elite Pro Dock: Don’t let the Dock name fool you. This Thunderbolt 3 dock includes dual drive bays that can accept 2.5-inch or 3.5-inch drives configured in one of four hardware RAID configurations.
It also includes a frontside SD card reader, two USB 3.1 Gen 1 ports, a DisplayPort 1.2 with support for 4K displays, and a 1 GB Ethernet port for fast file transfers.
OWC Express 4M2: This Thunderbolt 3 enclosure can have up to 4 M.2 NVMe SSDs archiving up to 2800 MB/s transfer speed, and support for up to 8 GB of storage.
OWC Mercury Elite Pro Quad RAID: Using a USB 3.2 Gen 2 interface, this quad drive bay enclosure can reach speeds of 947 MB/s. It comes with the SoftRAID engine that supports RAID levels 0, 1, 4, 5, and 1+0.
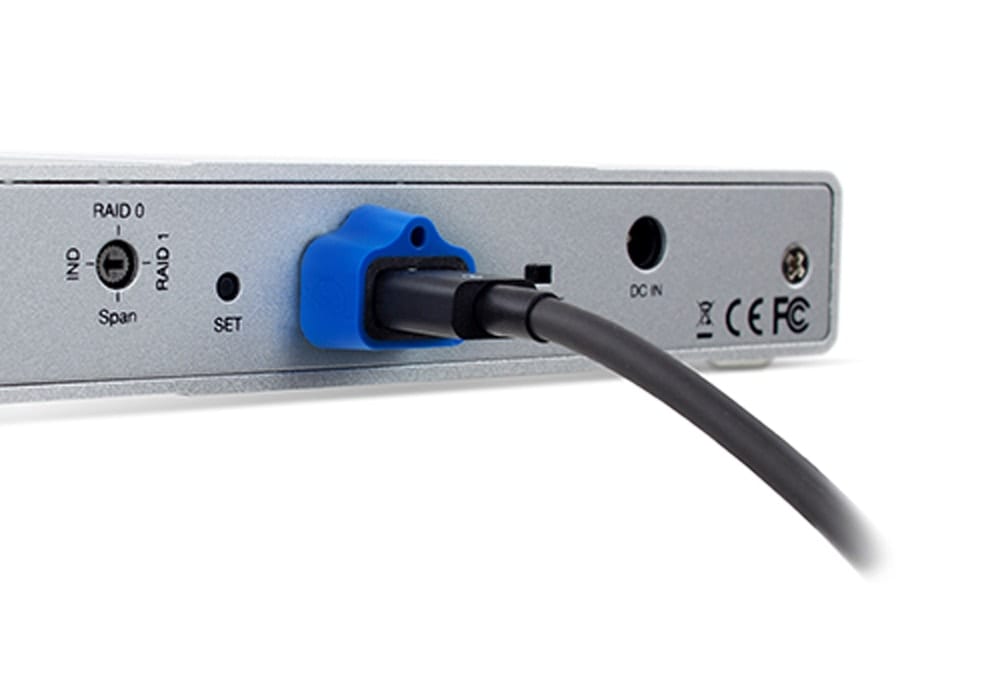
OWC ClingOn: This may not be a storage device, but it can help ensure your external drive stays connected to its cable. The ClingOn works with Thunderbolt 3 and USB-C cables to keep the cable anchored to the drive, ensuring the cable doesn’t come loose. Say goodbye to data interruptus.


I have a 27″ Late 2015 iMac where the 3TB internal Fusion drive has died, and I was hoping to be able to repurpose an 8TB Mercury Elite Pro Dual, set to RAID 1 (which would make it show up as a 4TB drive with redundancy) and use that as a fast Thunderbolt 2 startup drive.
Maybe I missed it being mentioned in either article, but as far as I can tell, a RAID drive (set to RAID 0, 1, or Span) cannot be used as a startup drive (unless it’s set to IND for individual drives), and yet you promote numerous RAID drives as a solution for an external startup drive. Can you please clarify this point?
how can I boot from an external drive when I cannot open my 2011 21.5″ IMAC and cannot access utilities or any diagnostics. I do not have the the initial password and none of the keystrokes are effective or have any impact.The only screens that come up are the file folder with flashing Question mark or the lock icon when I press Command + R
Connect the external drive. Start up your iMac- hopefully you have a wired keyboard.
Hold the option key down after you press the start up button. When it starts up you will have the option to startup from the external drive. Select with mouse.
hi, I have my external drive running my Mac, I have it Passworded at start up, but how do I secure it when not in use? Because when the mac is running on internal, i can plug in the external and access it’s files without it’s seperate password. i want to prevent anyone that has stolen it from just plugging it in to their computer and accessing the files without actually booting it. Or will this not happen?
Hey,
Thank you for the informative article.
Quick question,
Can you run High Sierra from an external drive using a MacBook Pro (16-inch, 2019)
2.3 GHz 8-Core Intel Core i9 that runs Catalina internally?
Thank you!
Hi, a really useful document, thank you. I cloned my 3tb fusion drive to a 2tb external SSD (2019 iMac with i9) using CCC and set up to boot from the SSD. This seems to have worked but on closer inspection on Finder it would appear the Documents folder was not copied to the SSD and so various applications (Lightroom in particular) is still accessing the fusion drive which I really want to stop using altogether as I feel it is the slowest element in my computer. How can I move the documents folder to the SSD and stop all use of the internal drive? Many thanks
All the above is pretty straightforward. My problem is I want to use an external Thunderbolt-3 SSD as a boot drive on my Thunderbolt-2 iMac (Late 2013.) That would really upgrade the machine. Is there an adapter and cable you make?
We don’t make a cable, but Apple does.
Thanks. Aware of Apple’s cable. This adapter cable would have to be used “backwards”. And a separate thunderbolt(2) cable would be needed to connect the adapter.to the Thunderbolt-2 port on the iMac.
The question is (before shelling out for a OWC SSD drive) does OWC have a tested solution to this setup and what data speeds might OWC be prepared to affirm?
I would have to look into specific numbers for specific drives, but I can tell you that any drive used will be limited to Thunderbolt 2 speeds/capabilities.
Hey PJ,
Not sure if Thunderbolt3 can work in this model of iMac, but you wont get anything performance-wise if you do. Thunderbolt performance is the best you will get (which has been awesome for me, 15s bootup!) I ended up going with a transcend JetDrive 855. Its native NVMe and is Thunderbolt which is what that model iMac uses. However, this article needs updated on how to do this for this iMac. As the user Duane has noted, there is no secure boot or external boot options in security settings utility, just firmware. However, you CAN get it to boot from external reliably.
TB
actually, user was Aaron… not Duane… oops.
Thanks. ‘Goes without sayin’ the speed will not be near Thunderbolt-3 – it’s just that Thunderbolt-3 SSDs are widely available.
‘Did not think there might be a problem booting the iMac from this setup!
So… ‘would really like to have that “CAN” unpacked?
It seems that the clone was not successful. Lightroom will go to the original drive for the it’s library. You have to direct LR to see the different location of the library. That has to been within LR.
As far as the other documents- where are you looking? Go to the root user folder and then Documents- I betcha they are there. But if not then the clone was not successful-do it again.
Hmmm, this makes me curious about the possibility of setting up the “Macintosh HD” and “Macintosh HD – Data” containers that are created upon Catalina or Big Sur install on two separate physical drives, say, an internal 256GB SSD for the system (“Macintosh HD” ) and a 4TB external drive, TBolt 3 w/one of your TBolt enclosures (“Macintosh HD – Data”), so that the boot always occurs on the internal SSD, and no need to disable the external boot protection in the System Startup utility. Is this even possible to do? Or do APFS containers all have to exist within the same physical drive? Thanks for any info you can provide on this.
I just finished installing a 2.0TB OWC Envoy Pro EX with Thunderbolt 3.
The unit runs faster than it did off the internal Apple 1Tb SSD, even
with the use of a cable from the external drive to the unit. I am running
a 2017 27″ iMac (i7 cores). Plainly, the technology of the SSD has advanced
in the couple of years since Apple produced this unit–enough so to make a
noticeable difference in the boot time and speed generally. It flies.
Thanks!!
The article says the internal drive can be used as a Time Machine backup destination, but as far as I can see that is not true. The internal disk space can indeed be used across a network, but not from the external SSD that the same machine is booted from. I was hoping to do this on my client’s network, so if I’m mistaken and someone knows how to back up an external ssd to the internal hdd of the machine it connected to please let me know.
I wish the “Secure Boot” and “External Boot” security options appeared on my iMac when in the Startup Security Utility… but sadly, they don’t. Only the Firmware password protection option shows. I think IT disabled access, although otherwise the machine felt and behaved out of the box. Is there some magical tweak I could do in Terminal or something to get back in the External Boot game?
What about file system impact on external booting? Is an external drive formatted in APFS bootable? Must the external drive be formatted in HFS+ in order for it to be bootable. Since, most internal drives today are not replaceable would that mean that upon failure of the internal that all future operation of what used to be an APFS formatted system would now we operating on HFS+
Externals can be formatted with either HFS+, APFS, or the appropriate file system for the system you wish to run.
When APFS was first introduced on the Mac it was restricted to internal SSDs. Those restrictions have been removed as APFS matured.
Tom
Great article! I have been thinking of adding an external boot drive for a long time. I have a late 2015 21.5” iMac (iMac,2) with a 1TB fusion drive. I need >=2TB of boot drive storage at the same or better performance than my current boot drive. Any OWC product suggestions?
There are several good options listed in Part 1 of this article: Using an External Drive as Your Startup Drive: Part 1 – hope this helps!
Please let me clarify. Part 1 doesn’t quite offer a solution. My Mac is an iMac16,2 (sorry for the typo in mt first reply). It does not have TB3 ports nor does it have USB3.1 ports. I do not not want external storage using USB3.0 since it’s performance will be less than what I currently have. Does OWC offer any TB2 solutions?
Apologies, for some reason my brain saw 2017 and not 2015! Here are several OWC TB2 external storage solutions: https://eshop.macsales.com/shop/thunderbolt/thunderbolt-2-external-drives
If none of these seem to fit the bill, I would encourage you to contact Customer Support – they may have additional solutions for you!
Yes but the newer macs do not have a startup chime.
So there is no way to startup to Recovery with a wireless keyboard. I usally use a wired keyboard. But if no keyboard is available and bluetooth is not executed – what do I need to do to startup into recovery
I followed the advice above, when I enter the Startup Security Utility I’m asked to authenticate and told that no administrator is found…sounds like it’s tech support time. I miss the old days of easily booting to a drive of your choice using the option key at startup. I’m running a new iMac Pro.
You can not set a soft raided disk array as a start up disk.
Will what you have described in this great article also work with the newest 16 inch Macbook pro. I would like to boot this computer when I get one with a older OS system, such as EL Capitan.
I don’t have one of the new 16-inch MacBook Pros to check for you, but generally speaking I do not think it will work.
The problems is using an older OS with a newer Mac. It is likely that El Capitan will not include the needed drivers and system components to work with the specific hardware contained within the new 16-inch MacBook Pro.
In general, the oldest version of the OS that a Mac model will run is the orginally version that was included when the Mac was released. In the case of the 16-inch MacBook Pro, that would be macOS Catalina.
There have been exceptions in the past, so if anyone can run an older version of the OS on a 16-inch MacBook Pro, let us know.
Tom
I will check it out this week if possible with high sierra. Thanks for the input.
Thank you, I will see if I can find someone to try to start up the new MacBook Pro with a older system.
I would like to go back to my old OS.I have several programs on my Mac Book Pro 13″ that will not run on macOS Catalina. I would like to make a bootable usb or SSD drive with Mojave .
Great. Please, bring external portable SSD with 4 TB and 8 TB and even larger. Now that is possible without RAID. As smaller and lighter as possible. Thanks!
Rest assured that OWC is working on this. :-)
Great! Any tentative release date, even if approximate? CES 2020 announcement? I won’t tell anybody…
;-)
Seriously, is it weeks, months or years away? Other manufacturers are taking advantage!
Even if I knew, I would be able to say! :-)