

The more I use my iPhone 12 Pro Max camera, the less I use my expensive Canon mirrorless digital camera. The reason? I find it much easier to achieve certain effects with the iPhone than with the much bulkier digital camera. One look that outdoor photographers love is the “blurred” or “milky” water effect. Today I’ll show you how to take iPhone photos using this effect.
What Is The Blurred Water Effect?
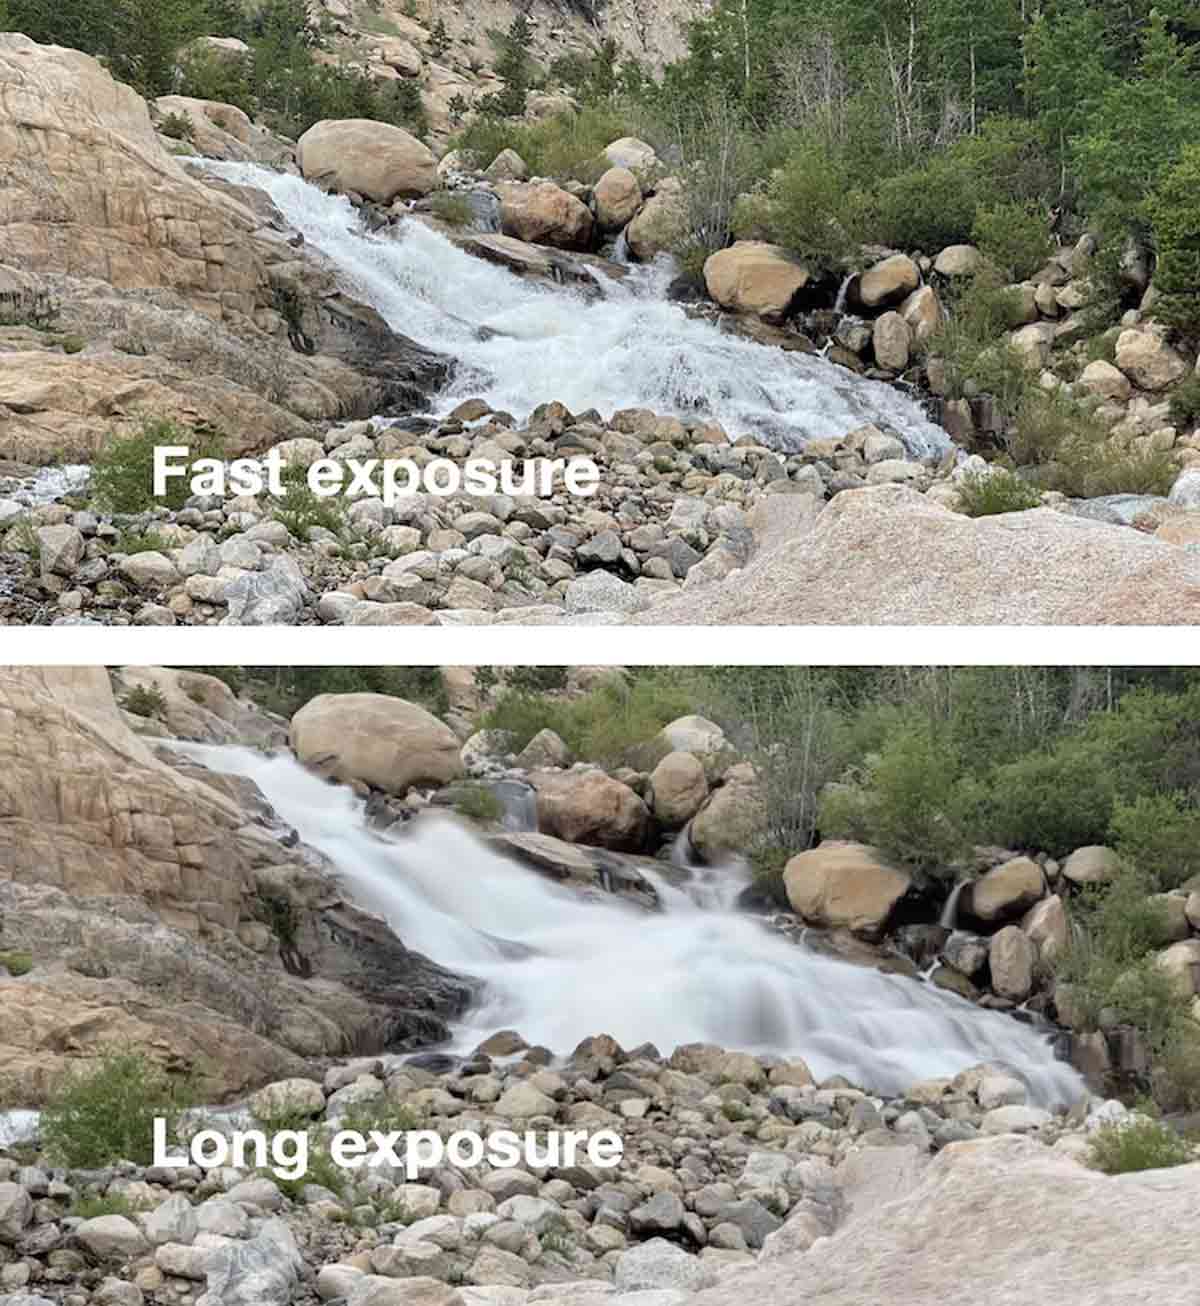
Our iPhone cameras take photos at the highest possible shutter speed to reduce blurring from motion. When taking a photo of a waterfall or running creek, this means that the surface of the water is very static. In many cases, you can actually see individual drops falling.
The blurred or milky water effect uses a longer exposure time to give the waterfall or stream an attractive and artistic look:
The Secret To Blurred Water: Live Photo
iPhone cameras using the standard Camera app don’t have the ability to adjust both exposure time and aperture to the same extent as “true” digital cameras. The Live Photo capability of the Camera app simulates a much longer exposure by stacking individual frames of the short video.
Shooting The Subject With Live Photo
Live Photo is a feature of many iPhone and iPad cameras. To see if you have this capability, launch the Camera app and look for the Live Photo button:
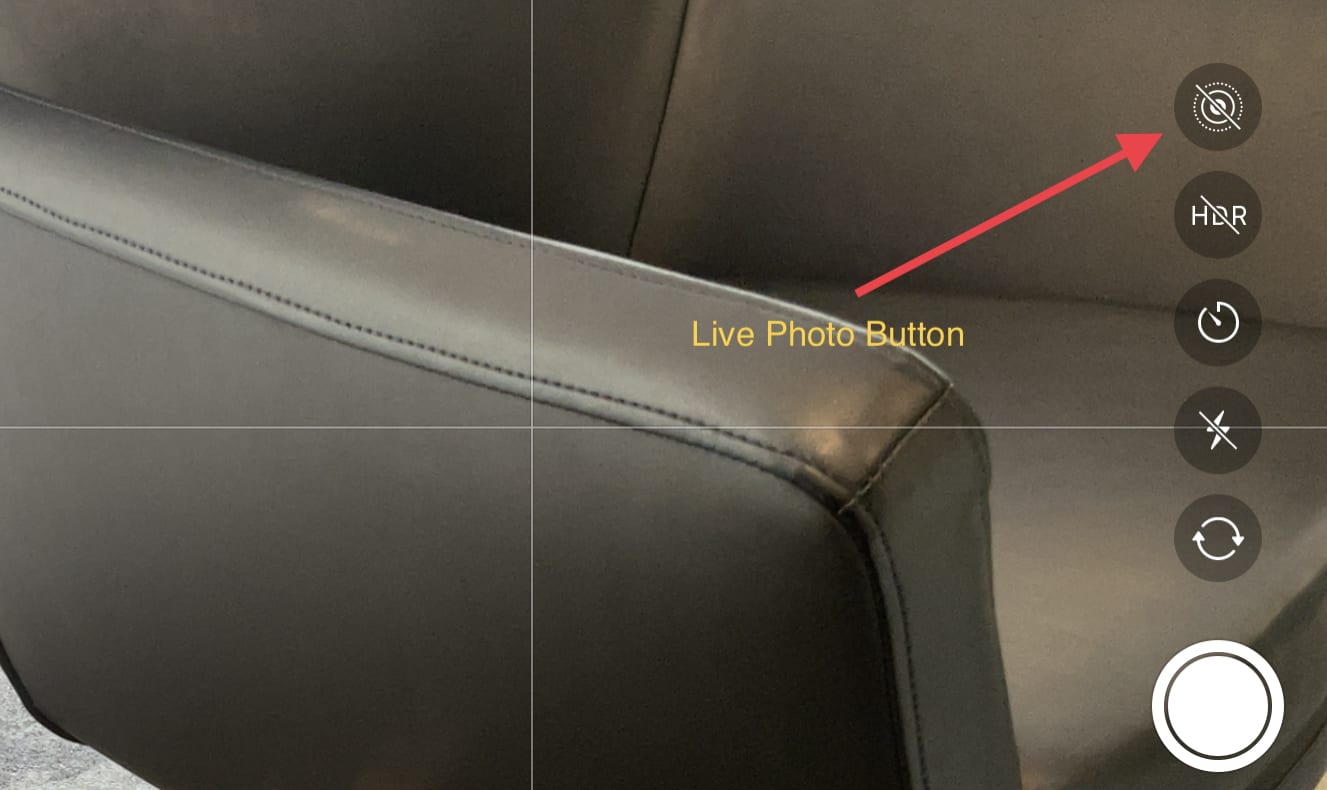
A line through the Live Photo button (see screenshot above) indicates the feature is disabled. I usually only turn on Live Photo when I want to take specialty shots or Live Photo’s, disabling it for most photos. Why? Live Photos take up much more storage than regular photos.
Tap the Live Photo button to enable the feature, and it turns yellow to indicate that it’s “live”. The word “LIVE” also appears momentarily in the viewfinder, highlighted in yellow.
Next, compose your shot in the viewfinder. Since you want to minimize camera motion as much as possible, placing your iPhone or iPad on a tripod is a good idea.
Ready? Tap the shutter button or use a remote to avoid touching the iPhone or iPad. Tip: if you have an Apple Watch, use the Camera Remote app to control your camera — including Live Photo, High Dynamic Range, and a timer — without touching the mobile device.
The Long Exposure Comes To Life In The “Darkroom”
When viewing the Live Photo you just took in the Photos app, tap and hold it to see the whole 3-second video. To get to our long exposure and blur the water, swipe up on the Live Photo.
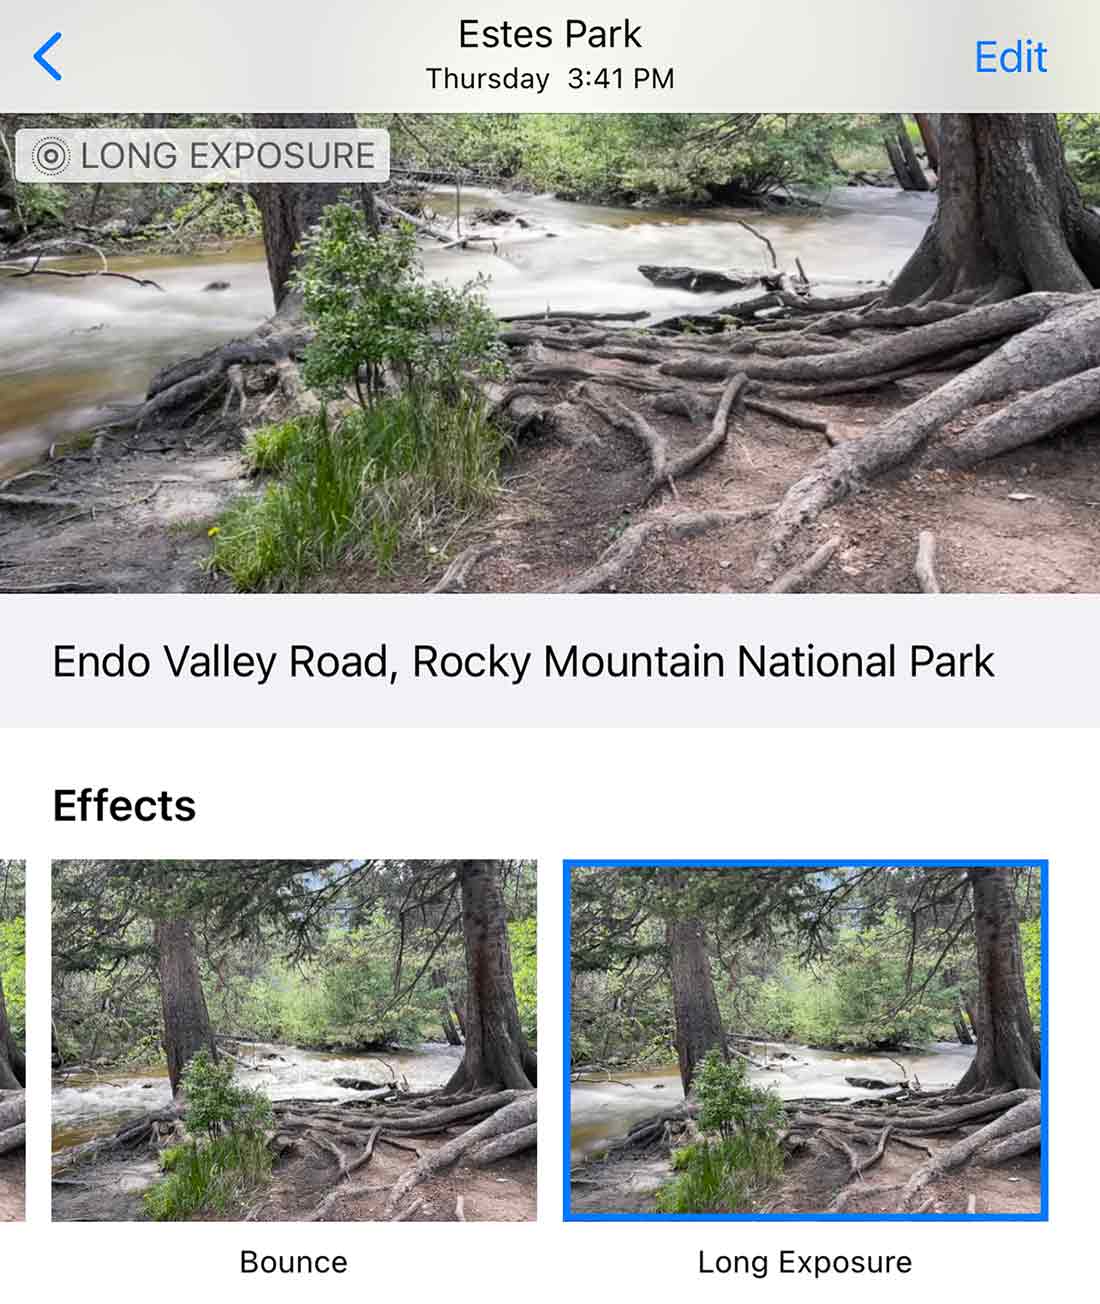
You’ll see four Effects listed (see screenshot above): Live, Loop, Bounce, and Long Exposure. Tap Long Exposure to apply the effect. After a few seconds, the effect is applied. You can revert the picture to a Live Photo at any time. Just use the same “Swipe Up” gesture, then tap Live.
I’ve found the “Blurred Water” effect of long exposures to be useful in taking images of moving vehicles, people walking, and more. It’s a fun tool to try, and if the effect doesn’t look artistic you can always revert to the Live Photo.
Want to save a Live Photo as a still picture? In Photos, select the photo and tap Edit. A Live Photo button appears with the other editing tools at the bottom or side of the screen. Tap that button, and a yellow “LIVE” button appears at the top of the screen. Tap that, and Live Photo is turned off. You can even select one frame to save as a still photo by scrubbing the video frames at the bottom of the image. Don’t worry, you can still turn the photo back into a Live Photo if you wish.


How much for your camera, since you don’t want to use it anymore?