

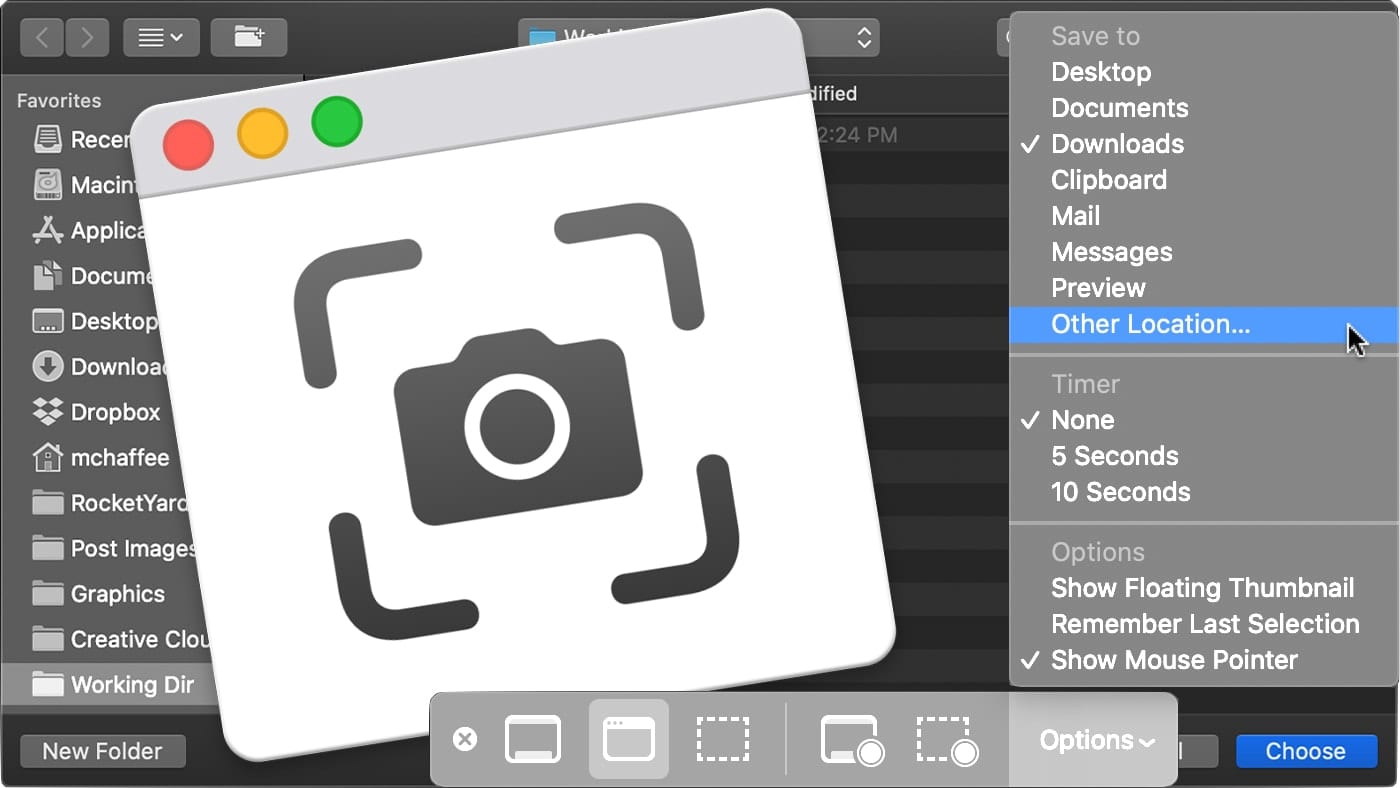
Taking screenshots of a webpage is a normal operation for many. Perhaps it’s to capture an image for a meme, graphs for a presentation, or to send that annoying error message to a disbelieving customer service rep. Whatever the reason, some of the standard Mac screenshot options may not do the trick.
Most of us are familiar with Shift-Command-3 to capture the entire screen, or Shift-Command-4 to capture a selected portion of a screen. You may even be familiar with Shift-Command-5 to capture a single window. But what if you want to take a scrolling screen capture of an entire webpage? The aforementioned tools can’t do that – they can only capture visible areas of your screen. So, is it even possible to take a screenshot that includes a portion of a webpage you would normally need to scroll to see?
Yes, there is! But it does take a few extra steps than just executing a single keystroke combination.
Screenshot a Webpage
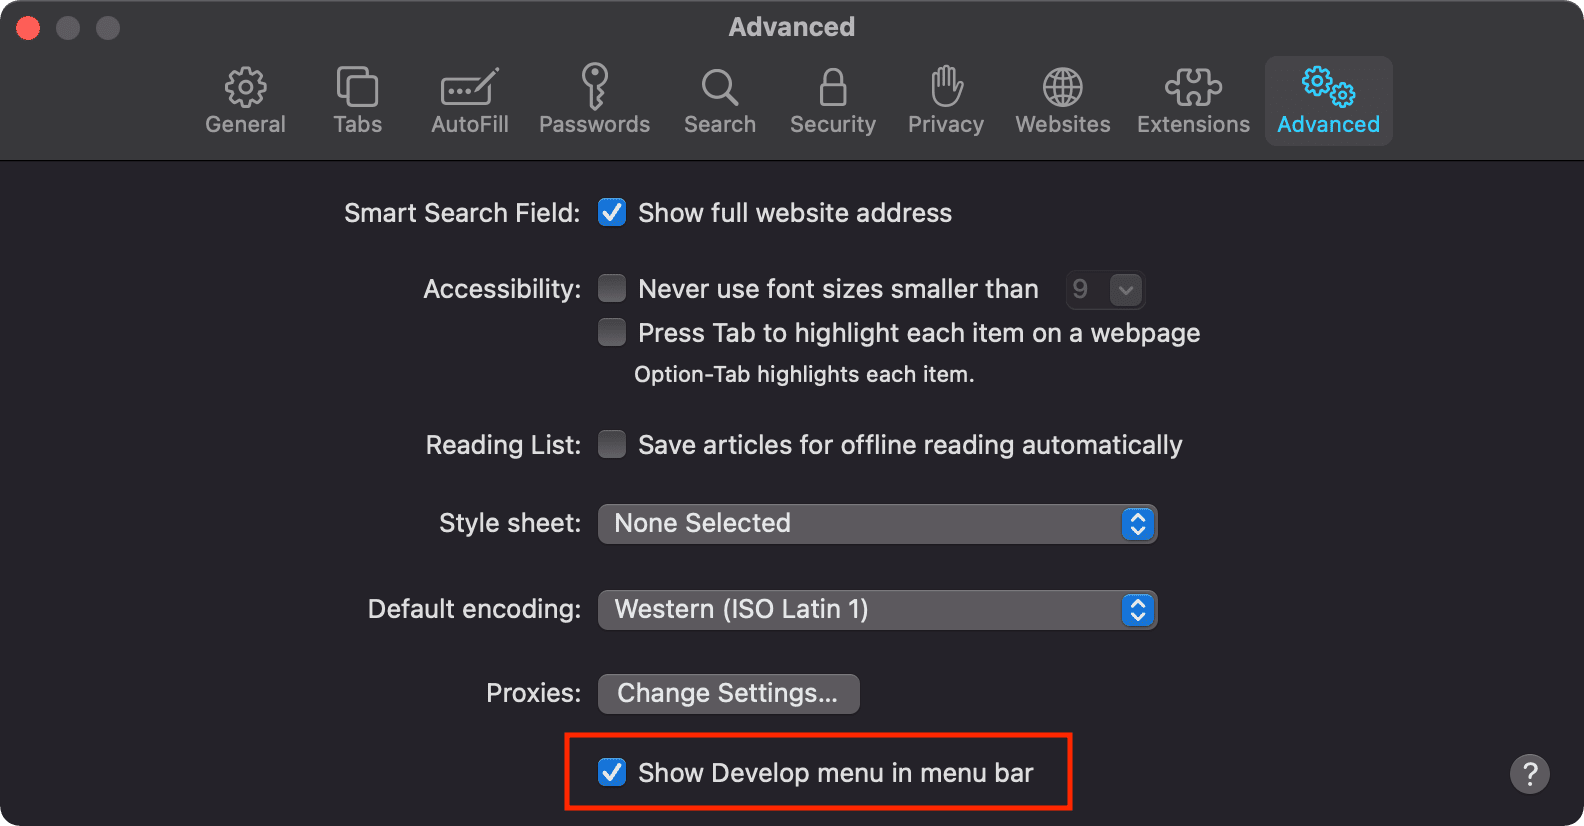
- Open Safari and go to “Safari > Preferences…“
- Click the Advanced tab and toggle on “Show Develop menu in menu bar.”
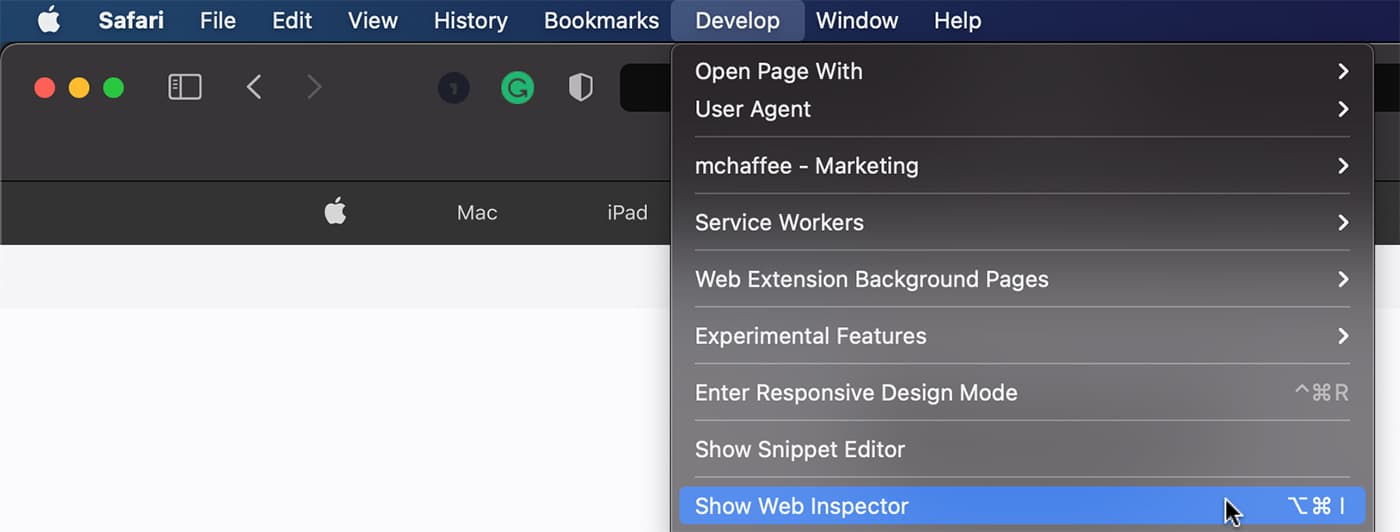
- Navigate to the webpage you want to capture and from the Develop menu, choose “Show Web Inspector.” Alternatively, you can hit alt-command-I (⌥⌘I).
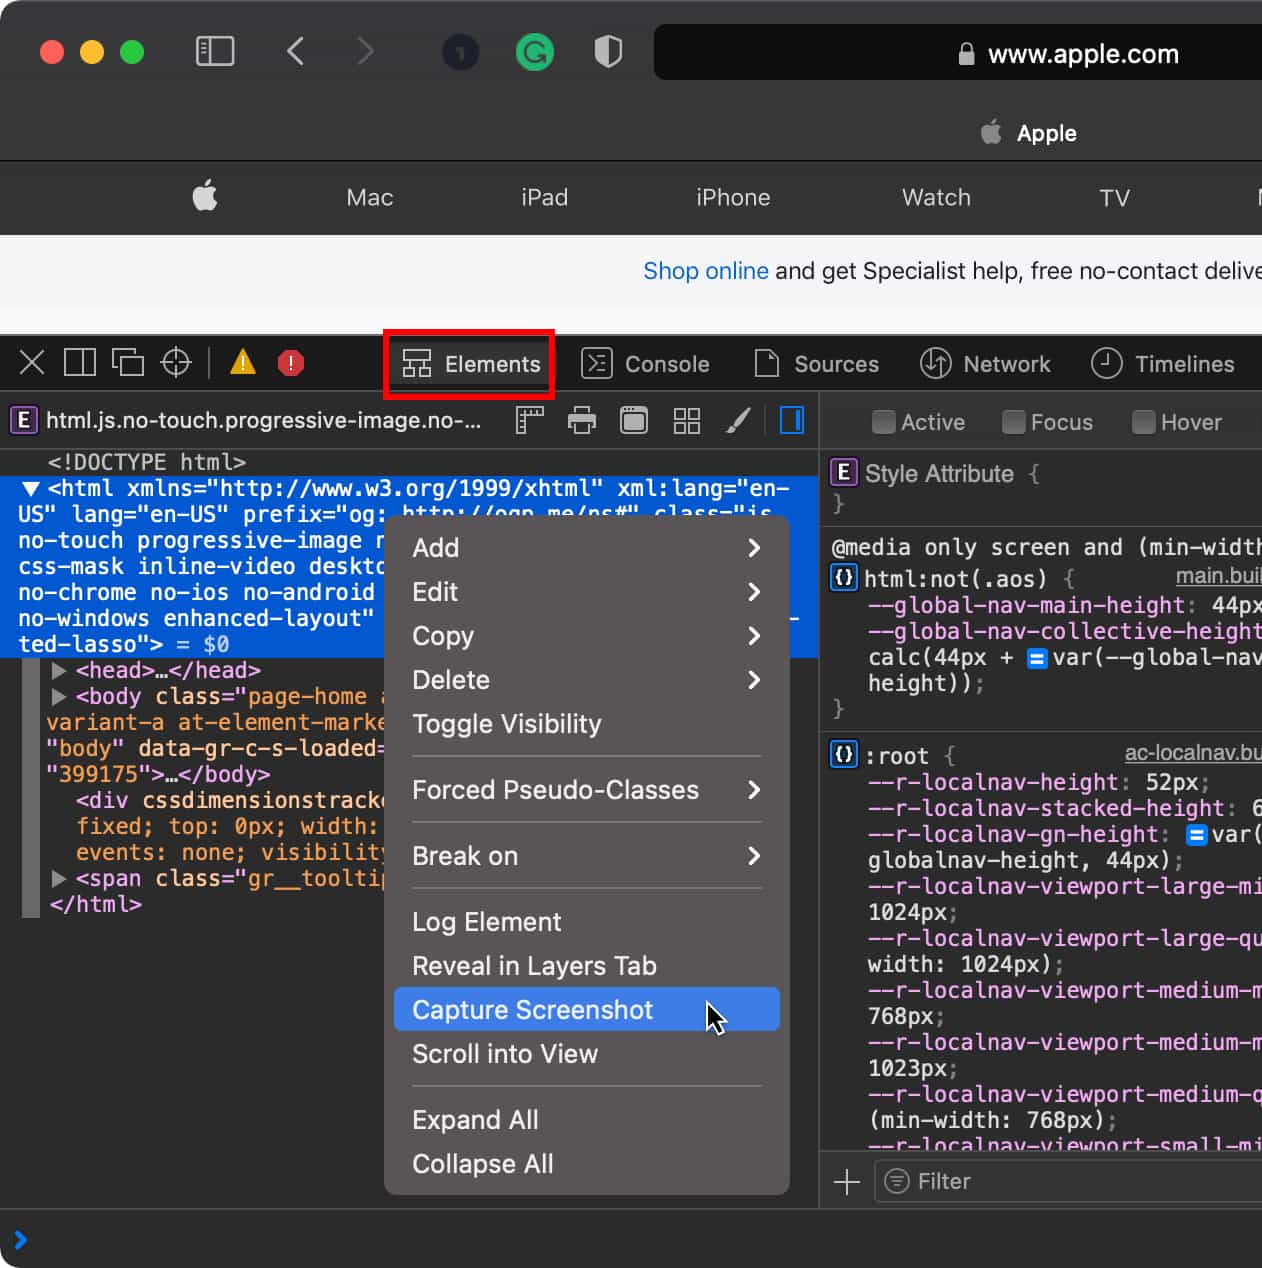
- Select the Elements tab and right-click on the line that begins with “<html…”
- Choose Capture Screenshot
- Give it a moment to do it’s magic, and then select a name and location to save the file.

All done! Well, almost…
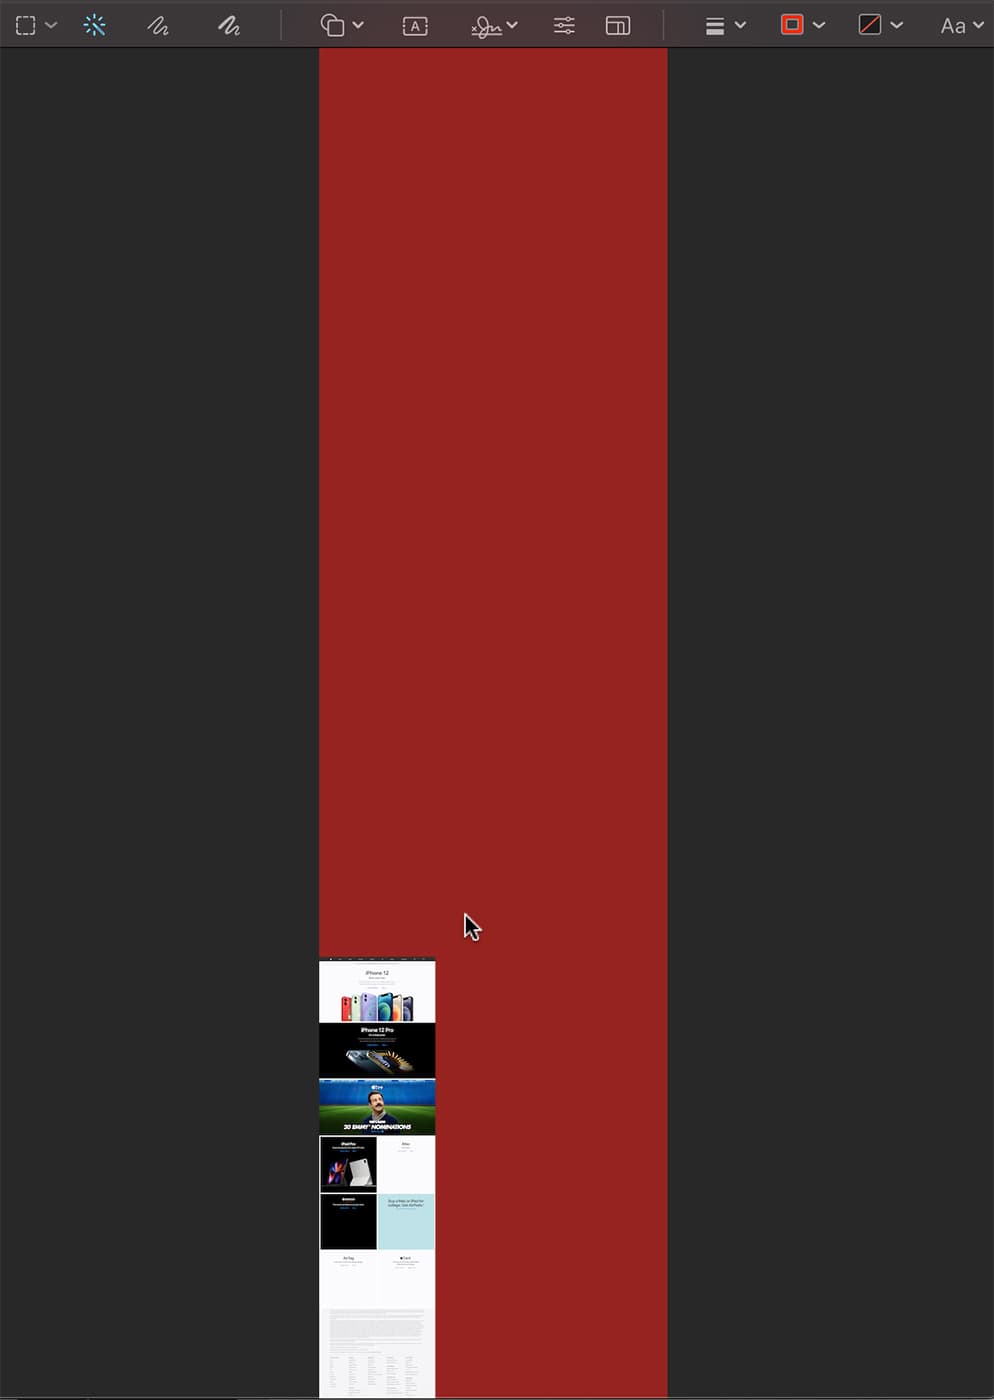
Clean Up
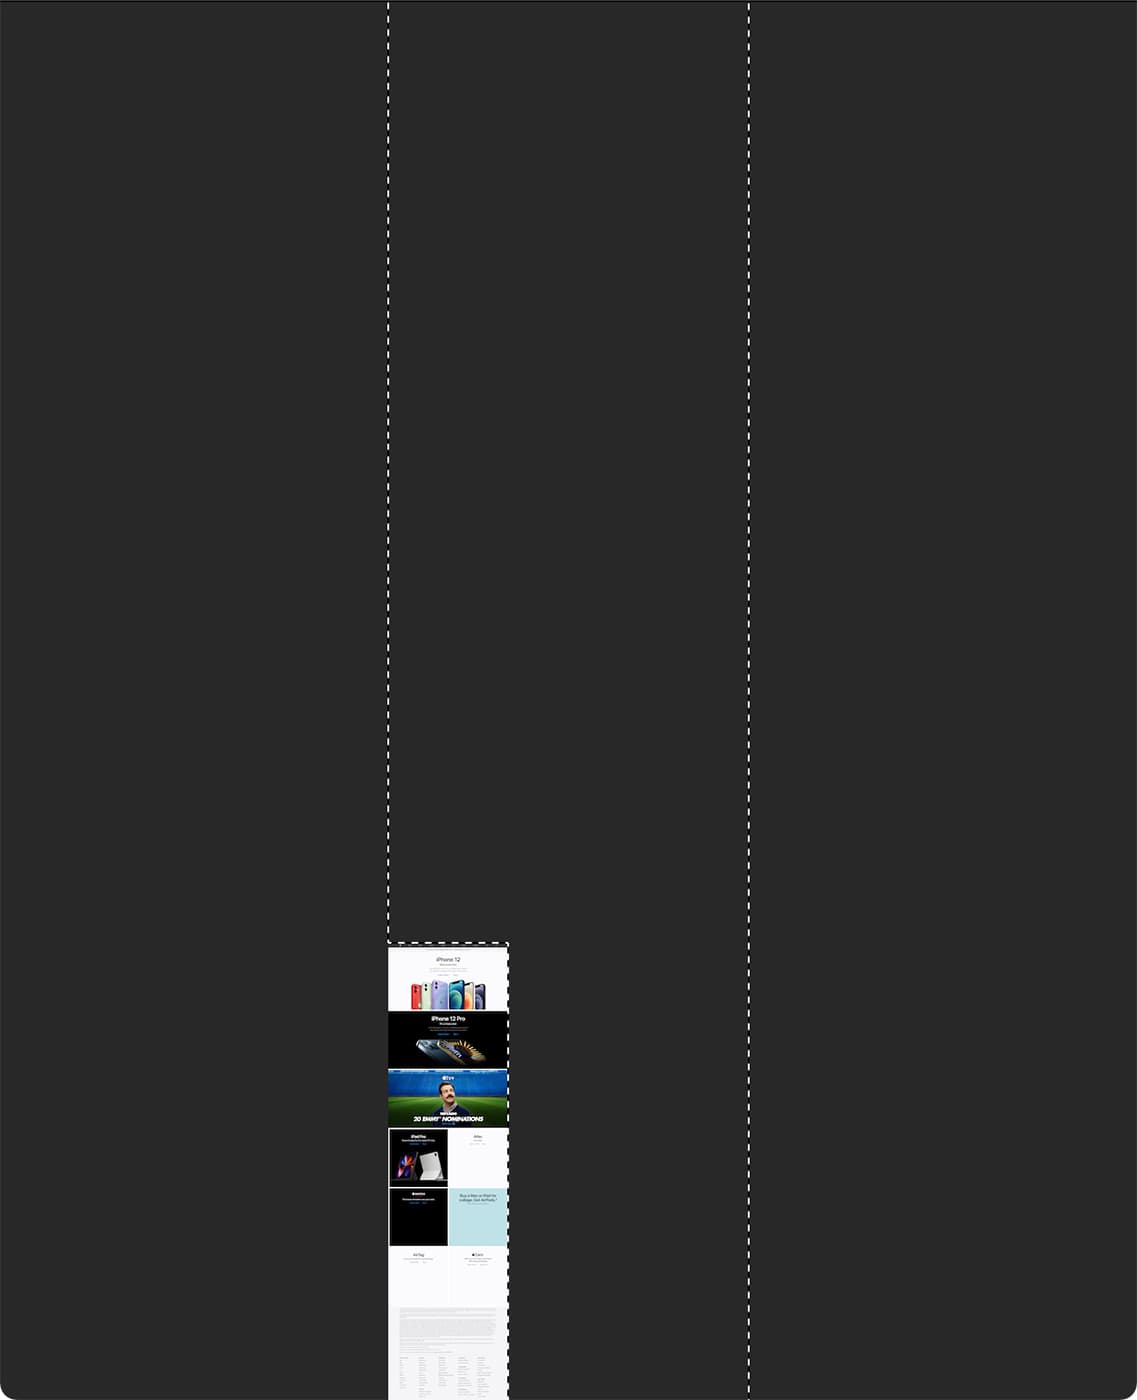
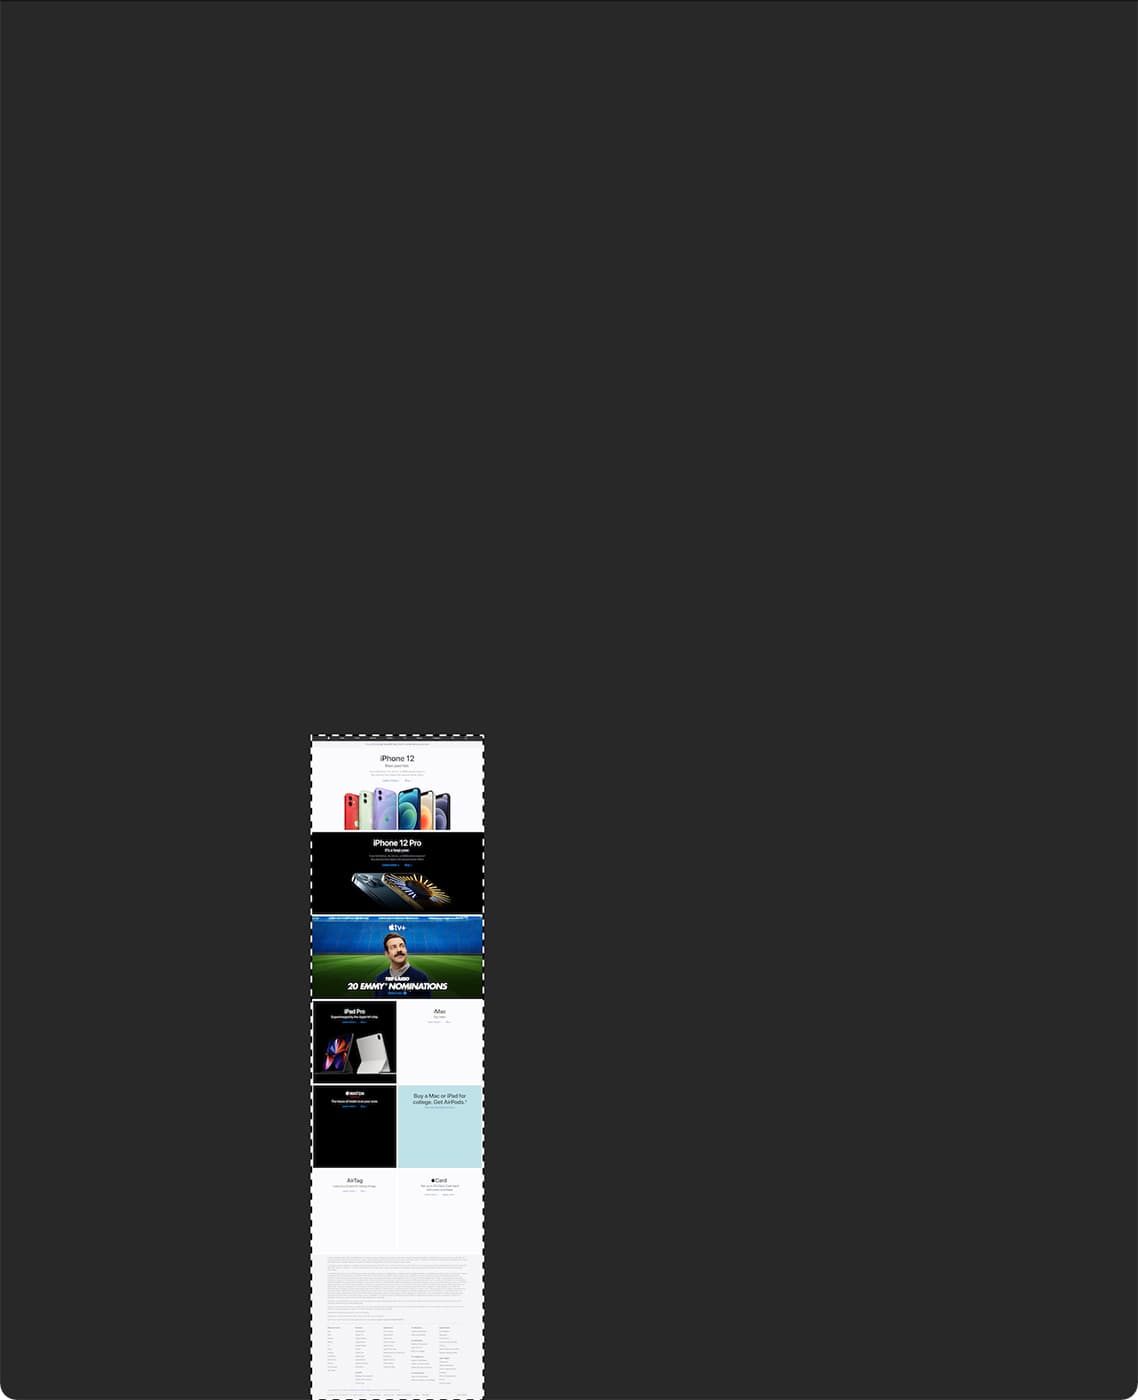
This could just be an issue I run into, but when capturing entire pages in this manner, there is a lot of empty container buffer around the image in the PNG file. You can see this in the Quick Preview of the file:
Let’s fix that.
- Open the file in Preview. If Preview is already your default application to open PNG files, you can simply double-click its icon.
- Click the Show Markup Toolbar icon
 and select the Instant Alpha tool.

- Drag the crosshairs in the empty area around the image. You’ll see the empty space selected and highlighted in red. Drag too far, and you’ll pick up the image itself. Don’t do that, we only want to select the empty area.
- When you let go of the mouse button, the highlighted color will disappear and be replaced with a dotted line indicating the selected area.
- Hit Shift-Command-I (⇧⌘I) to invert the selection.
- Hit Control-K (⌘K) to crop the image to the selection.
- Now you can hit Save (⌘S) and you truly are done. One cleaned up screenshot of an entire webpage.

Congrats!


OH man, Thank you so much for this post. it really helped me and saved a lot of my time.
Hi Owen,
Thanks for the helpful screen capture. I cannot get the clean up to work. The Shift+Command+I doesn’t work and I cannot get the Control+K to work. Can select the red area but that’s it.
Hoping you can help.
You show us how to capture OTHER web pages but NOT your own? That’s not cool dudes! If its not NOT for you, its not OK for anyone, right?
on Catalina, the part involving Preview to crop the image was a bit different, but I figured it out. Click on the show Markup Toolbar icon, then click on Rectangular Selection, then draw a box around the bit of interest, then click on “crop” in the toolbar. Repeat if needed. Zoom as needed.
Thanks for the insight!
Tried it on the article and when I try to pen saved .png I get message that either file is corrupted or can’t open the file format.
I ran into this also, then I quickly realized the file does not have the .png extension. Recaptured the screen and ensured when renaming the file, I added .png. Opened as a webpage though not as a preview. Still to figure out how to set preview as the default file opener for png files.
I’ve often wanted to do this. However, on this very page, while the initial steps seem to work, the resulting .png is un-openable by Preview or Pixelmator Pro or Quicklook.
(“It may be damaged or use a file format that Preview doesn’t recognize.”)
File->Print->Save as PDF, and File->Export as PDF work as expected in Safari (full HTML-rendered page) with the added features of selectable text and extractable images in the PDFs (for those memes y’all).
~Tim~
macOS Big Sur, 11.4
Safari 14.1.1
Awesome tip! These are the articles that make it worthwhile to keep visiting Rocket Yard of OWC. Thanks. BTW an application to do it is Paparazzi! (but it does not work in all cases)
https://derailer.org/paparazzi
I just tried that same Apple webpage with Safari 14.1.1 in OS 11.4.
Went to File > Export as PDF… and bingo! Got a nice high-res 8.2MB PDF on my desktop instantly. Image is clean, no unexpected margins.
That works! Thank you!
Huh. I just tried that in Mojave with the latest Safari (14.1.2), using this webpage for the test.
I end up with a 20.6mb file ending in .PNG format, but which will not open. It’s either “damaged” or in a format that Preview can’t open.
Very odd.
In most other applications, this function would be easily performed using the Print button, and then Save as PDF. It is truly unfortunate that web developers have blocked the normal Print functionality on the web.