Welcome back to the 12 Days of Backups! In our last post, we discussed how easy it is to set up iCloud Backup for Apple mobile devices – the iPhone, iPod touch and iPad. Today we’ll look at how to set up your mobile device to back up to your Mac.
Why would I backup to my Mac instead of iCloud?
Not everybody wants to back up their iPhone or iPad to iCloud, which is why backing up to your Mac can be a good idea. For example, let’s say that you don’t want to spend the money for iCloud storage, or you’re on a very slow Internet connection that makes it impossible to back up to the cloud. Backing up to your Mac regularly ensures that you still have your information available if your mobile device must be reset.
Requirements
To use macOS to back up your iPhone or iPad, you must be using macOS 10.15 Catalina, macOS 11 Big Sur, or macOS 12 Monterey. Earlier versions of macOS use the iTunes app to back up your mobile device, which we’ll demonstrate in the Day 10 article.
You’ll also need a USB to Lightning (iPhone, iPod touch, iPad) or USB-C to USB-C (iPad Pro) cable to connect the device to your Mac.
Connecting to the Mac
Now you have the Mac running macOS Catalina or newer, and you have a proper cable. You have your Mac and iPhone/iPad. Next, use the cable to connect your two devices, and then click on the Finder button in the Dock.
In the sidebar on the left side of the Finder window you’ll see a section titled “Locations.” Look for the name of your iPhone (mine is named “Glacier”), and click it.
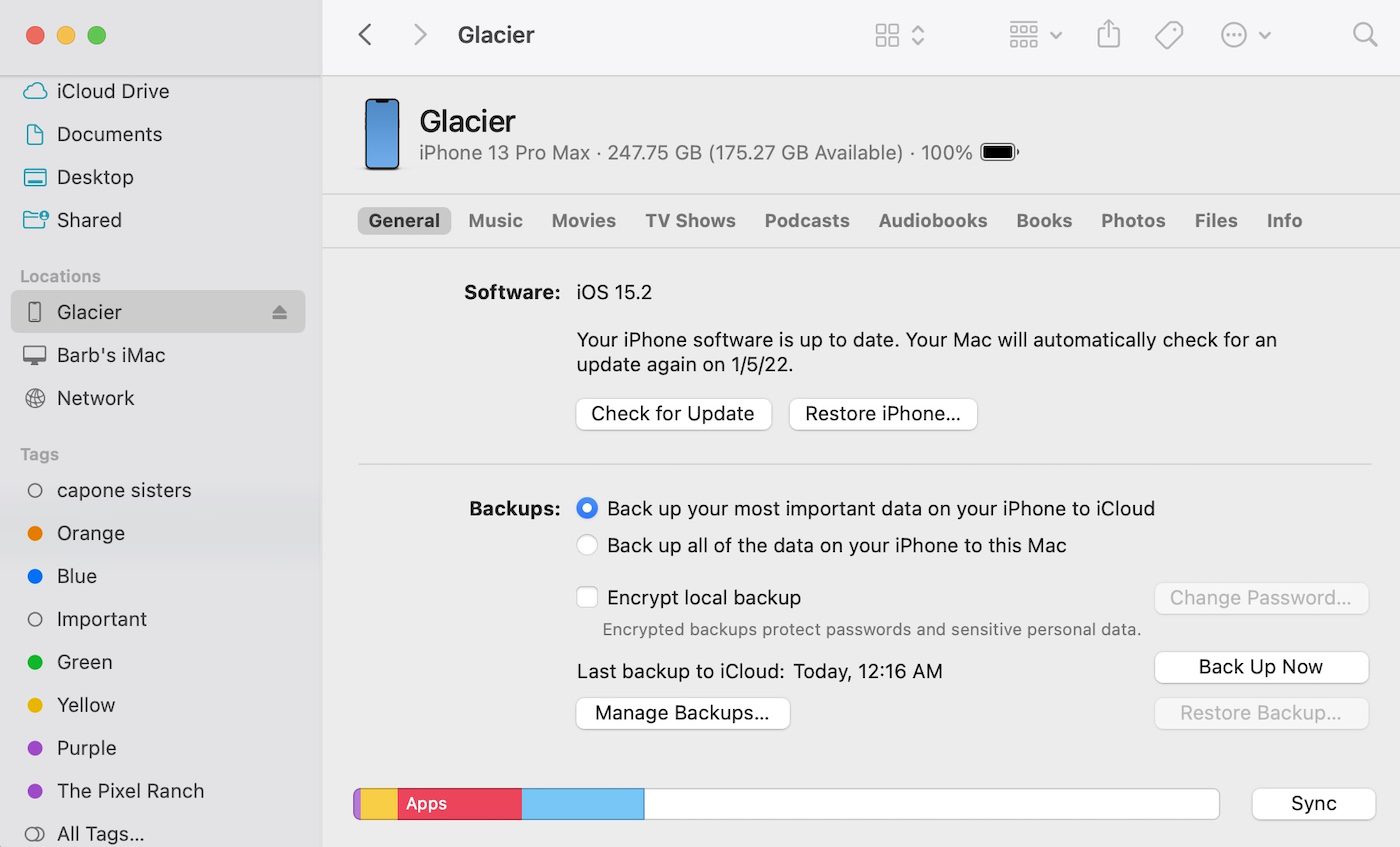
What you see in the screenshot above is similar to what you’ll see, although your device’s name and other details may differ. At the top is information about the type of mobile device, how much storage is available on it, and what the current charge is.
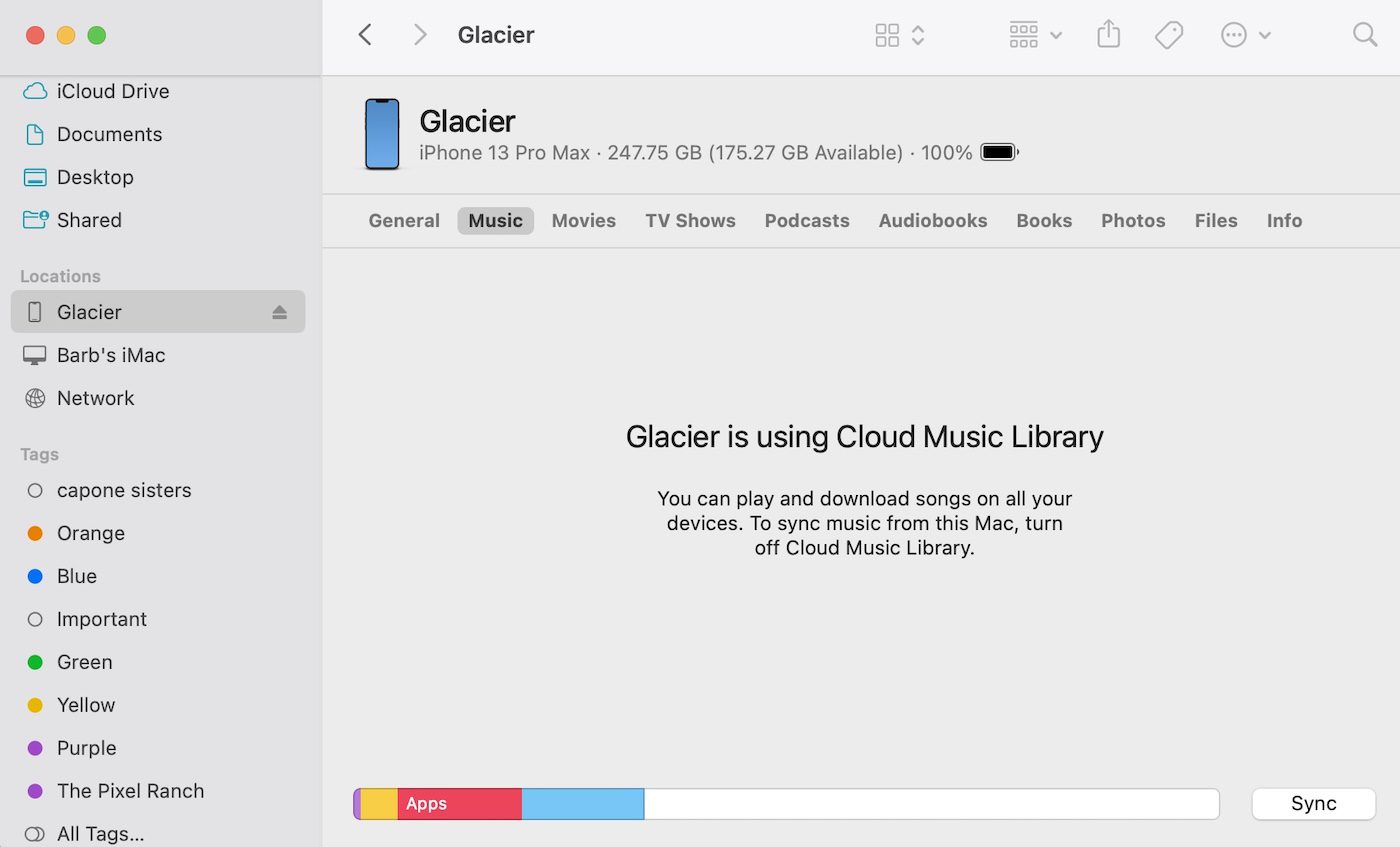
Next are a bunch of tabs for major types of content (Music, Movies, TV Shows, Podcasts, Audiobooks, Books, Photos, Files) as well as general info. In some cases, clicking on a tab shows that you’re using cloud storage. In this example, clicking on Music showed this screen:
Also in the Finder view of your device is an area called “Software.” Click this to see the current version of iOS or iPadOS that the device is running. There’s a button for checking for updates, and this is a way to install your updates. Finally, there’s the ever-important Restore iPhone/iPad button. Click this button if you need to restore data onto an iPhone or iPad from your Mac.
Back up the iPhone or iPad
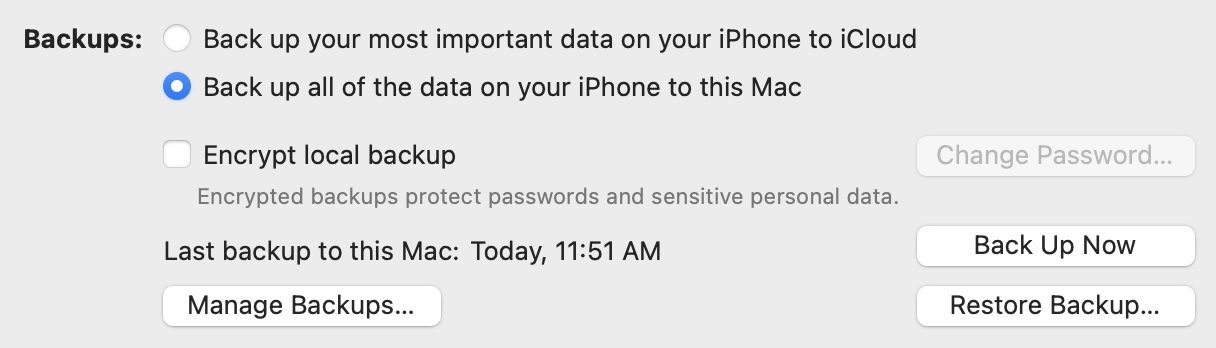
Before you can restore your device from a Mac, you need to back it up to the Mac. Right now, the Finder view of this iPhone is showing that my “most important data” is backed up to iCloud. To back up the iPhone to the Mac, just click the Back up all of the data on your iPhone/iPad to this Mac button.
There’s an option to encrypt all of the information backed up from the device, which protects your passwords and other sensitive personal data. Check the box next to Encrypt local backup to do this. When prompted, enter an encryption password.
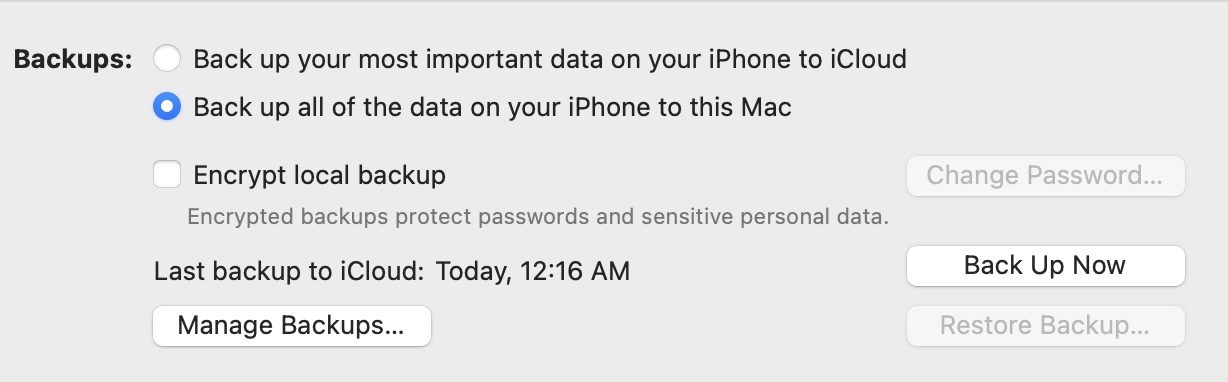
Click the Back Up Now button, and the backup begins. You’ll see the “barber pole” striped status line at the bottom of the Backups area indicating the work is beginning, then an actual progress bar.
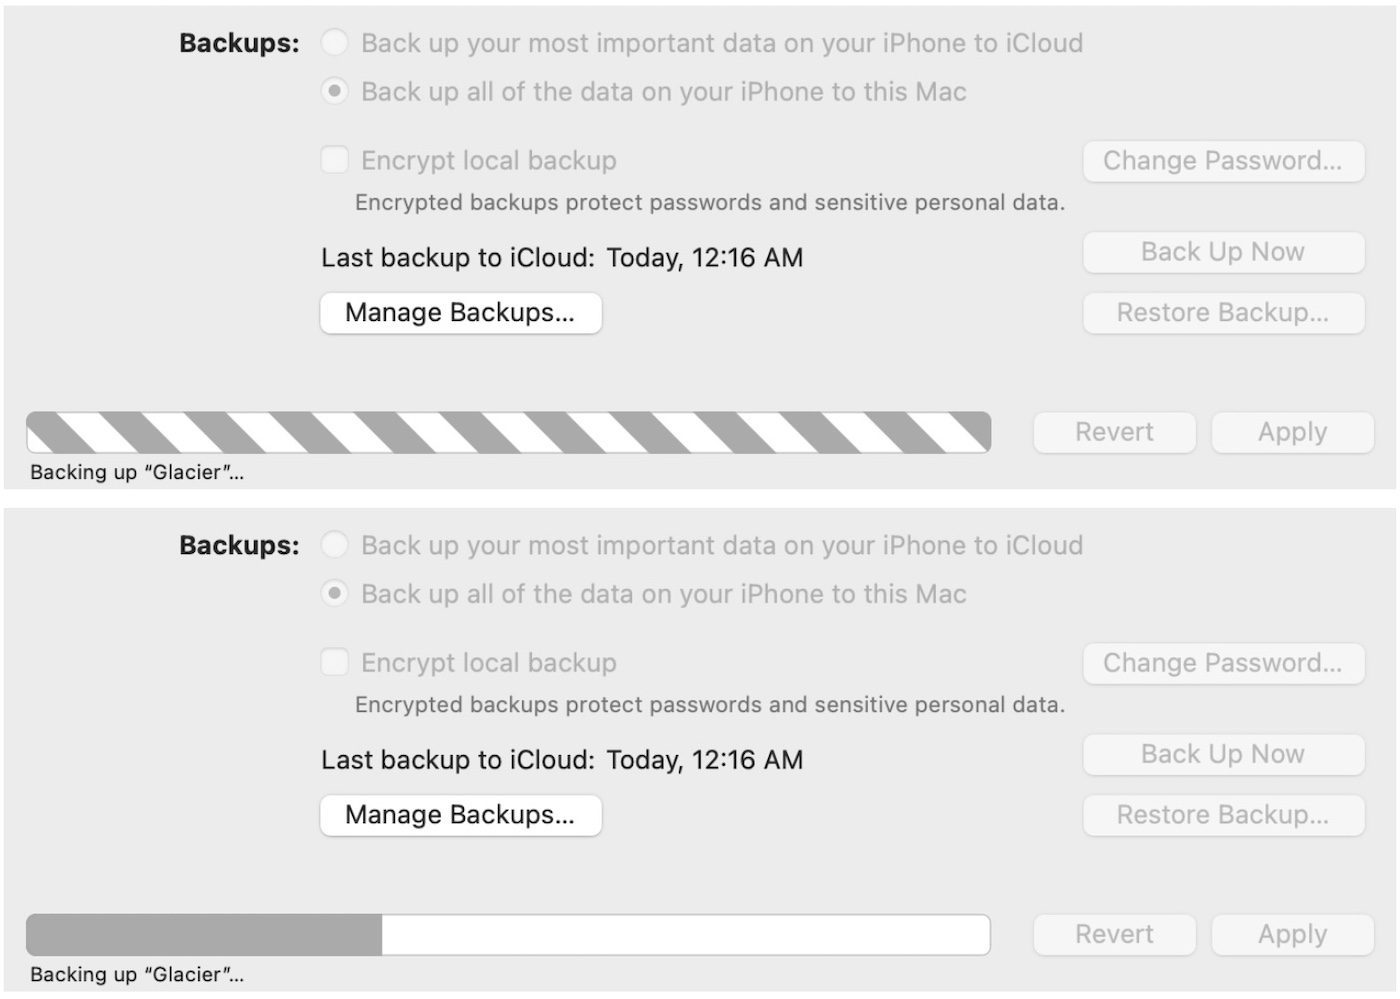
When Finder is finished backing up, you’ll see a message (below) indicating when the device was last backed up to the Mac:
Now you can disconnect the iPhone or iPad.
Manage Backups
Backing up iPhones and iPads to your Mac take up a lot of storage, and each backup is stored separately. At some point, you may want to delete older data. Click the Manage Backups… button and you’ll see a list of stored files:
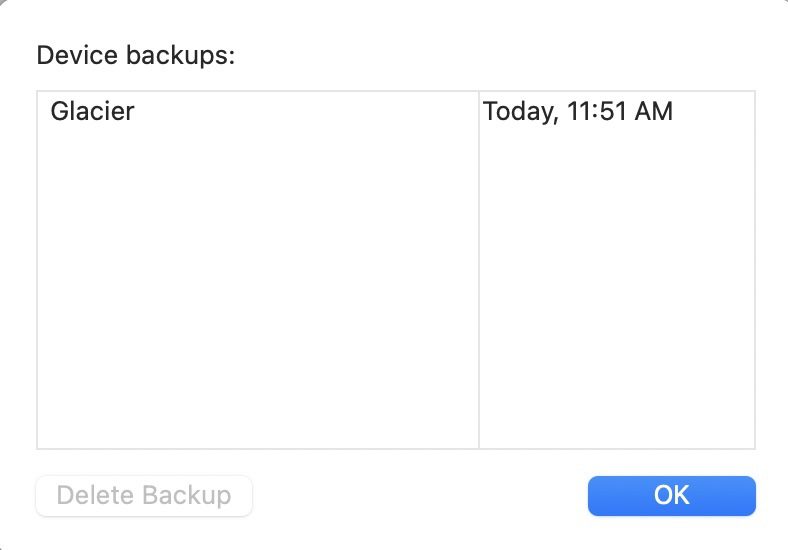
To get rid of any one of the files, simply click on it, then click the Delete Backup button.
Want to know where all of these files are stored? In the Finder, select Go > Go to Folder or press Shift – Command (⌘) – G. Type or copy and paste this text into the address field: ~/Library/Application Support/MobileSync/Backup/
Press return, and you’ll see one folder for each time you backed up in a folder titled “Backup”:

Deleting a top-level folder deletes the entire backup.
Related Topics
This article is part of our 12 Days of Backups series that began on December 27, 2021 and ends in January, 2022.
- The First Day of Backups – Time Machine
- The Second Day of Backups – Third-party Mac Backup Apps
- The Third Day of Backups – MacBook Backups with the OWC Envoy Pro FX
- The Fourth Day of Backups – iMac Backup with the OWC Mercury Elite Pro
- The Fifth Day of Backups – Mac mini Backup with the OWC miniStack STX
- The Sixth Day of Backups – Mac backups for photographers
- The Seventh Day of Backups – Online backup solutions for Mac
- The Eighth Day of Backups – iCloud backup for iOS and iPadOS
In addition, you may wish to check out these other articles: