

I have a love-hate relationship with all-in-one printers. I like that I can print documents when I need to, and I’ve found that document scanners save a lot of time. However, most of these printers come with software and drivers that can be infuriatingly bad. Fortunately, Apple provides a macOS app that works with most all-in-one printers: Image Capture.
Why use Image Capture instead of my printer/scanner apps?
With my past two all-in-one printers, I’ve found that the software and drivers that come with them are problematic. For example, last year I purchased an Epson ET-4760 EcoTank printer because I was constantly changing print cartridges in an HP laser printer I owned. I decided to try the Epson software with the new device, and that was a mistake.
The drivers included often kept me from printing unless I reloaded them each and every time! The scanner software was usable, but required hand-cropping of images smaller than a full page in size. Frustrated, I deleted all of the Epson apps. Instead, I let macOS find my printer and supply its own internal driver. That driver works each and every time with no issues.
For scanning, I started using the macOS Image Capture app and quickly found it was more functional than the Epson software. It also didn’t load up my Mac with bloated software.
Using Image Capture
When your Mac identifies your all-in-one printer over Bonjour (Apple’s implementation of zero-configuration networking), it recognizes that the device not only prints, but has other functions like scanning and fax send/receive. When you launch Image Capture the first time, it discovers applicable devices. Those devices may appear on the Image Capture app sidebar under Devices, Shared, or both.
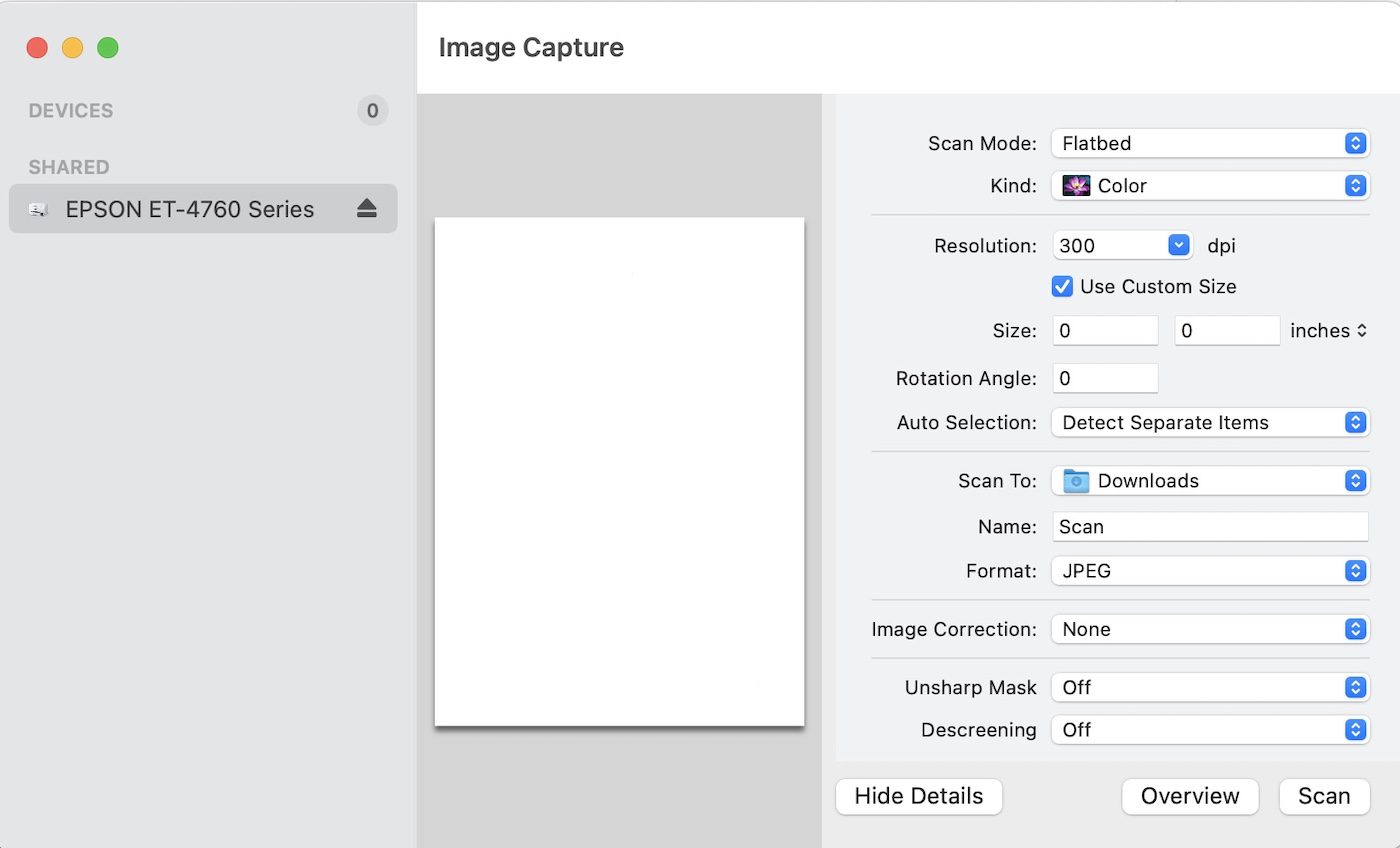
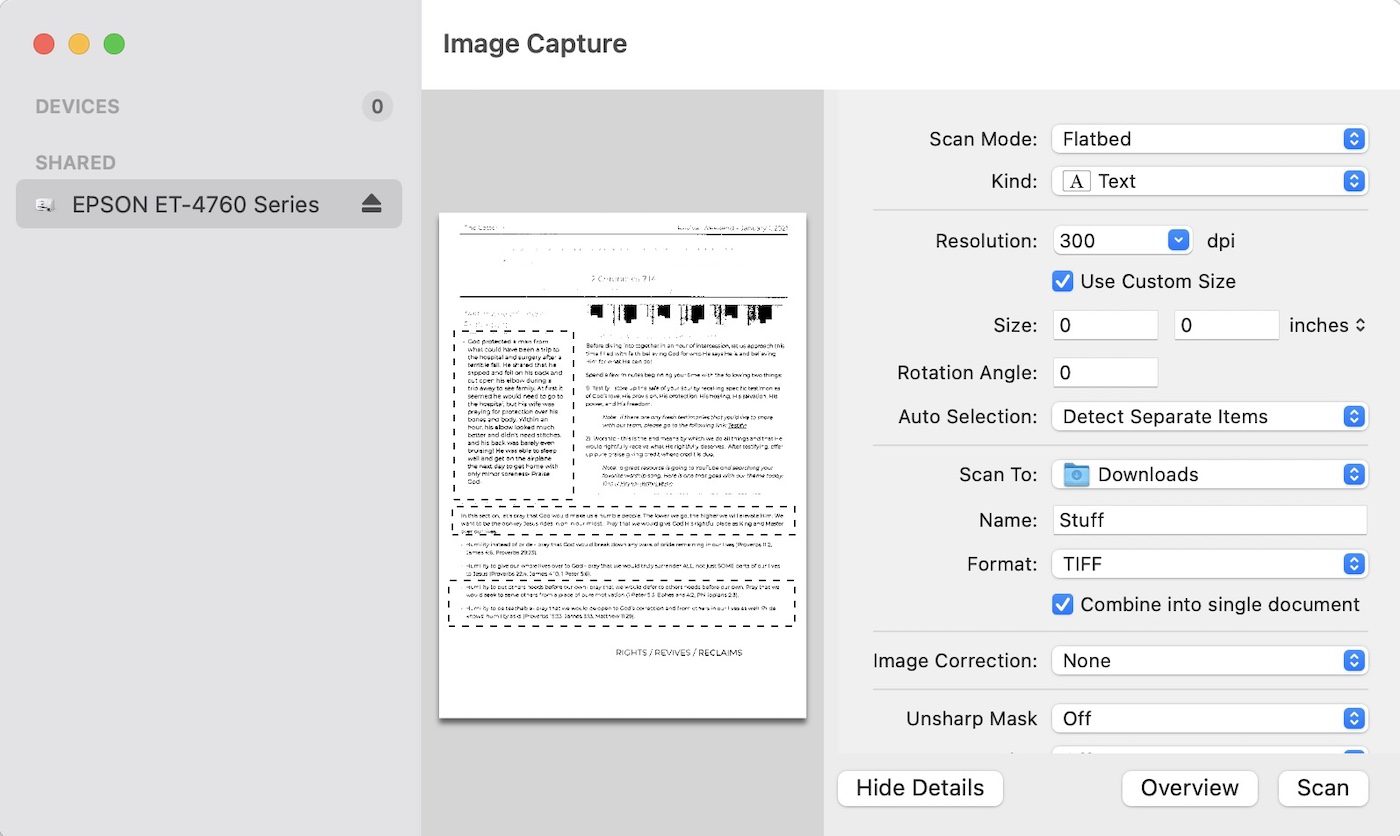
There are three areas of the app window visible in the image above. The sidebar lists the devices, the center pane shows a thumbnail of the page being scanned, and the right pane displays setting details. Let’s go through those details.
Scan Mode
Scan Mode usually has two settings for most all-in-one printers. Flatbed is used to scan items that are placed on the glass surface of a scanner, while Document Feeder allows multiple pages to be stacked in a feeder and scanned all at once. While Document Feeder works well when feeding in a large number of pages that are all identical in size, thickness, and texture, it fumbles when scanning different sized pages or “slippery” paper like receipts.
Kind
The next setting, Kind, describes how the item is scanned: in color, black and white, or text. Color and black and white are pretty self-explanatory—it’s like taking a color or black and white image of your original document in a standard image format like JPEG or PNG. Text scans the document in the TIFF, PNG or PDF format (your choice). When scanned in TIFF, the text is recognized and may be copied and pasted.
Resolution
Resolution describes how fine the scan detail is, ranging from 75 dots per inch (dpi) to 9,600 dpi. For scans you’re sharing on the internet, 75 dpi is fine. If you want a high-resolution scan of a photo or painting, 9,600 dpi will grab all the details, but create a very large file. Choosing 300 dpi, industry-standard for most print publishing, will give you a good balance of fine detail and manageable file size.
Use Custom Size / Size
The next two settings are used to define the size of the page(s) you’re scanning. When scanning regular documents in US Letter or Legal sizes (or their metric equivalents), deselect the Use Custom Size check box, then select the proper page size. For my all-in-one, the choices were A4, B5, US Letter, A5, A6, and A8. I’m in the U.S., so I chose US Letter (8.5″ x 11″). Your scanner may handle US Legal (8.5″ x 14″)—mine doesn’t.
Use Custom Size is helpful when scanning smaller items like checks, driver’s licenses, and the like. Check this and a dialog with size, rotation, and auto selection options will appear:
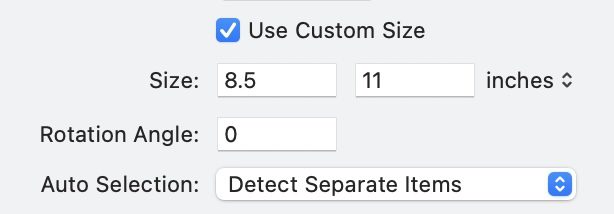
Auto Selection’s Detect Separate Items is very useful. For example, when scanning checks, I can place them on the flatbed, do an overview scan (which scans the entire glass area), and it automatically selects and scans each individual check as a separate item.
The other choice under auto selection is Detect Enclosing Box. When an overview scan has been done, it’s possible to drag out a box over items you wish to scan. When you click the Scan button, Image Capture ignores all scanned content with the exception of the boxed area.
Scan To
Every scan needs to be saved somewhere on your Mac. Scan To displays the folder currently selected for saving your file and provides a way to change to another folder.
Name
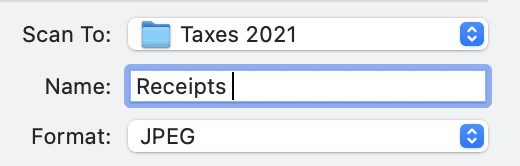
It’s nice to be able to name your scans something descriptive. By default, Image Capture provides “Scan” as the name. Multiple scans are named Scan 1, Scan 2, etc… Let’s say you’re scanning receipts from 2021 for tax purposes. Type “Receipt” into the Name field to prefix your scans with that word:
Format
Image Capture has a lot of different file formats for you to save your scans in. For images, choices include JPEG, HEIC, TIFF, PNG, JPEG 2000, GIF, BMP, and PDF.
Selecting Text under Kind (described earlier) limits your choices to TIFF (which is then run through optical character recognition to allow copying the text), PNG, and PDF.
Just after the Format selector is a check box labeled “Combine into single document.” I’ve found this useful in scanning documents that have text in columns or rows that I want to capture. When using “Detect Enclosing Box,” surround the text with dragged boxes, then click Scan.
Here I selected a callout and two paragraphs of a document. When scanned, a single TIFF document was saved with three pages, one for each piece of text. Then I opened the TIFF document in Preview, selected the text, copied it, and pasted it into another document.
Image Correction
Image Correction is an Image Capture setting used to make scanned images look better. There are two major settings: Manual and None. Select Manual to see a choice of tools that varies based on whether the image is black and white or color. For black and white images, you can manually adjust brightness and contrast while viewing the results in the thumbnail.
Color images get a few more control sliders:

With this scan of a print, the brightness was acceptable, the tint was slightly reddish, and I made the colors somewhat “warmer” and more saturated. When your manual corrections seem off, use the Restore Defaults button to bring things back to how your original scan appeared.
Unsharp Mask
Have an image scan that appears slightly “soft” or unfocused? Unsharp Mask uses a technique that creates a blurred negative image that makes a mask of the original image. That mask is then combined with the original image to create an image less blurry than the original.
Image Capture provides three levels of Unsharp Mask: low, medium, and high. Applying Unsharp Mask is a good method of bringing out details in a photo, although overdoing the masking can produce “fake”-looking results.
Descreening
Halftone images are used in many printed materials like newspapers and magazines. In a halftone, dots of varying size and color are printed on a background material to simulate the appearance of a continuous-tone image. When halftones are scanned, Moiré (interference) pattern artifacts can appear and distort the scanned image.
Descreening is a digital method of removing those artifacts from scanned halftones. Like Unsharp Mask, this tool has low, medium, and high levels that you can apply to a scanned image.
If the scanner in your all-in-one printer is causing you frustration, dump the software that came with it and give Image Capture a try. You may find, as I have, that it resolves a lot of issues.
Related Topics
The Rocket Yard is filled with thousands of articles to answer your questions or stimulate creativity. You may find these articles to be helpful:


Separate printer (laser), scanner here. Have never bothered using scanner software. Have been using VueScan for years and years and it supports some pretty old scanners. Easy to use, can be complex if you need it…
But will look into Image Capture; always useful to know two ways to do one thing…
My Canon PIXMA TS8120’s scanner has gone on the blink; it produces a washed-out band 1″ wide on the left side of the scan. I’m not into buying a whole new multifunction just for the scanner. Fortunately, I have an “old” Canon LiDE 90 scanner. But my MacBook Pro (macOS 10.12 Sierra) doesn’t see it. Turns out it’s just one generation too old: Apple’s “Printer and scanner drivers” page (https://support.apple.com/en-us/HT201465) shows the LiDE 100, but not the 90. And Canon’s last driver for it won’t work past 10.8 Mountain Lion. Fortunately, I have an “old” 2008 Aluminum MacBook, upgraded with an OWC SSD, which works very nicely in 10.6 Snow Leopard with the Canon driver and Image Capture.
Another option that gets good reviews is the VueScan utility. But I’m not up for paying more money to use something I already bought that still works. Getting tired of the upgrade treadmill; my next step is going to be Linux/Open Source.
This post did not say what version of Macos and/or ImageCapture is required for this functionality. Also, I assume this functionality does not work with older printers, or hardwired printers.
Sadly, many of the articles lack statements of the version of Mac OS, etc.
That said, ImageCapture has not changed much in all these years. I still use it with my hardwired HP 5500 series (circa 2004) via USB to a 2010 iMac i7 with Mac OS X 10.6.8. Also use it with Canon MX922 (circa 2013, though I bought mine in late 2015) semi-hardwired… on LAN hardwired to router via Ethernet port, via 2019 iMac i9 with macOS 10.14 Mojave.
A solution for older scanners …
I have a Canon DR-2010M, which is a nice duplex scanner. Unfortunately, there are no drivers for MacOS BigSur. After a moment of seething, I solved my problem with VueScan from Hamrick Software. It works as well as anything I’ve used in the past.
Note: I have no connection to Hamrick Software.
Unlike the author, I have an Epson graphic-arts scanner separate from my printer (I dislike all-in-one machines). That may account for some of my different experience; it’s possible that the Epson driver I use may be different software from what the author is referring to.
Although Image Capture can be convenient, I’ve found Epson’s driver to be more powerful, giving me more useful options.
Epson’s driver is infuriating, however. For example, although I can save many different overall settings in the driver (and access them through a popdown menu)… they always have generic names “Setting 1”, “Setting 2”, and so on. Try remembering what that means when you’ve saved 20 different configurations! In order to give them descriptive names like “24bit_1200dpi”, I’ve had to hack into the driver’s saved preferences later, and manually rename my settings in the code/text. Which is ridiculous (and my custom names get wiped out eventually anyway). On the other hand, my custom names for individual sub-settings I create, such as for the driver’s Histogram, Image Adjustment, Tone Correction, and so forth, are easy to set up within the driver and are saved properly.
When I get a chance I’ll take another look at Image Capture alongside this article; perhaps it has more power features hidden away that I didn’t notice. Thanks for the article.
Steve, thanks, even HP printers have their problems and issue as I own a HP OFFICEJET 8600. I looked at the EPSON and I was close on buying but will now hold back.
The larger question I have what is then the best all in one device scanning/printing for MACOS if it is not HP & EPSON.
Your thoughts from a very warm summery Melbourne, Australia
That’s all I ever use with my HP & Canon AIO printers, since Mac OS X 10.6.8. Never used anything else. Consistent from printer to printer.
I only wish Apple had not done away with the faxing software. The only way now is to printer and manually fax or use an older Mac OS.