


Last week, I showed you how to scan documents using the Files app on iPhone and iPad. One reader asked about how to scan photos using the Apple mobile devices, and that’s the topic of today’s article.
Why Scan Photos?
I’m of the age where I have a lot of photos taken prior to the digital photography era. It’s much easier to view and search photos in Apple Photos or similar apps than it is to go through boxes of loose photos or slides.
As you probably know, Photos does a lot of indexing behind the scenes. It “looks” for items in the photos like trees, animals, cars and so on. It’s also very good at recognizing faces in the photos. Getting all of those old photos into Photos allows that indexing to take place with no work on your part.
Scanning photos also means that you can fix faded or discolored images, making them look brand new. You’ll save a lot of storage space by throwing away the physical photos after they’re scanned.

Scanning Services
There’s one negative to scanning your own photos — it takes time. Those who are short on time but have money to spend can just box up photos and send them to a scanning service. You’ll receive the scanned images in a digital format either online or on a DVD.
Check with local camera shops as they may offer scanning services. You can also go to places like Walgreens that have photo kiosks available for digitizing negatives, slides and prints.
For hundreds or thousands of photos, a service like ScanCafe, DiJiFi, LegacyBox, or DigMyPics is best. Most of them work on the basis of scanning everything you send them, then letting you pick and choose which of the images you want to keep. Pricing varies and scanning services are not cheap, but you’ll be getting top-quality work done without doing anything but sending the originals.
One more advantage — if you have old home movies, scanning services can transfer them to common digital formats.
Scanning Photos on the iPhone or iPad
Don’t have many “analog” photos to digitize? Using your iPhone or iPad to do the work is quite simple and can have great results. Photos can be scanned using apps that come with each iPhone or iPad, and there are fancier alternatives available in the App Store. Let’s go through some of the more popular methods for scanning prints.
Camera App
One very easy way to grab a photo is to just use your iPhone or iPad Camera app. Make sure that your photo is laying on a flat surface, and that it is well-lit and without glare or reflections. I find it useful to use the crosshairs of the Camera app to ensure that my iPhone or iPad is parallel to the image so that the picture is not distorted by perspective.
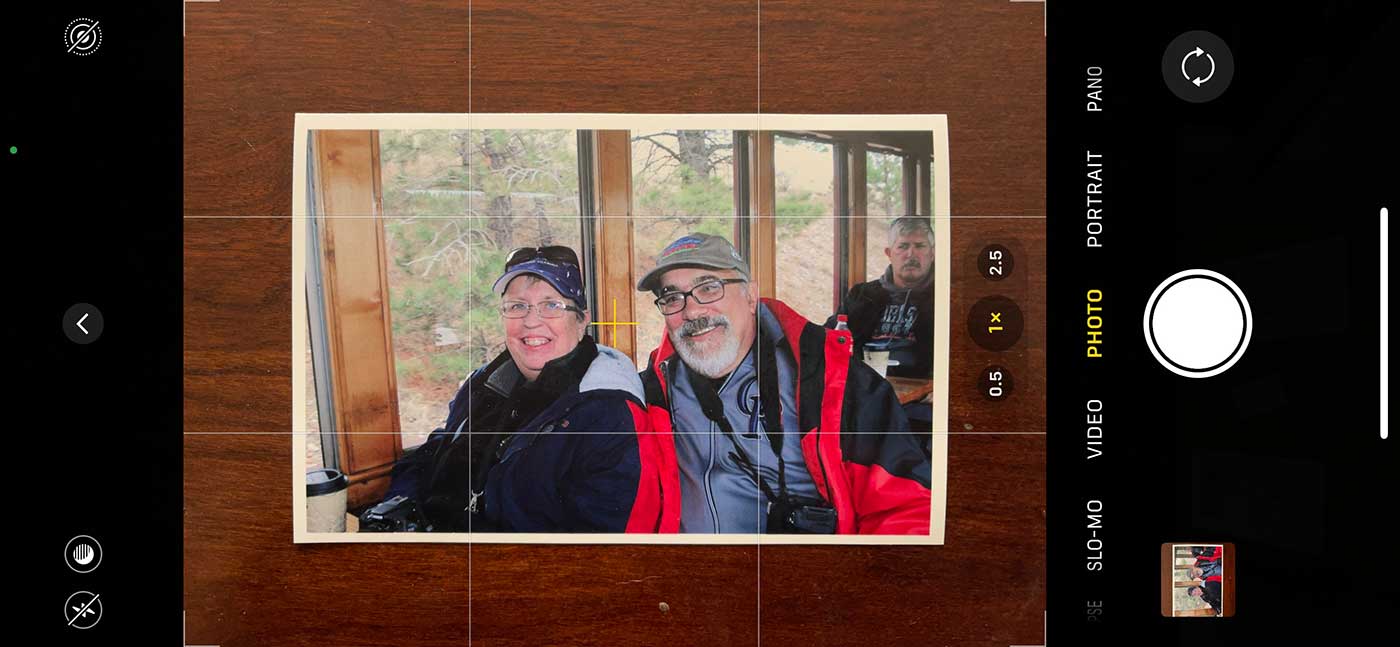
In the image above, you can see the yellow crosshairs between the couple in the picture. When the iPhone or iPad is not parallel to the photo being scanned, you’ll see two white crosshairs. Move the phone or tablet to make the crosshairs align.
Other things to note: turn off the camera flash, make sure you’re not taking a Live Photo, and also be certain to use Photo mode — not Portrait mode.
Edit the Scanned Photo
Once your image has been snapped, it’s time to edit it in the Photos app. In the case of the image above, editing was rather simple. I just needed to tap the crop button, then get rid of the desktop and white edges of the photo by dragging the white corner handles (see image below).

The Photos app also helps adjust the color if an image is faded. Tools in the iPhone and iPad Photos app can also increase the sharpness of slightly fuzzy images, make dark images brighter (and vice-versa), and increase the saturation of colors.
If you use iCloud photos to synchronize your photo library between devices, you can even use the retouch tool in the Mac version of Photos to get rid of scratches or blemishes on the original photo.
Scan Using The Files App
Want to scan your images directly to an iCloud Drive folder or a server? Use the Files app and follow the instructions in this post to scan the photos.
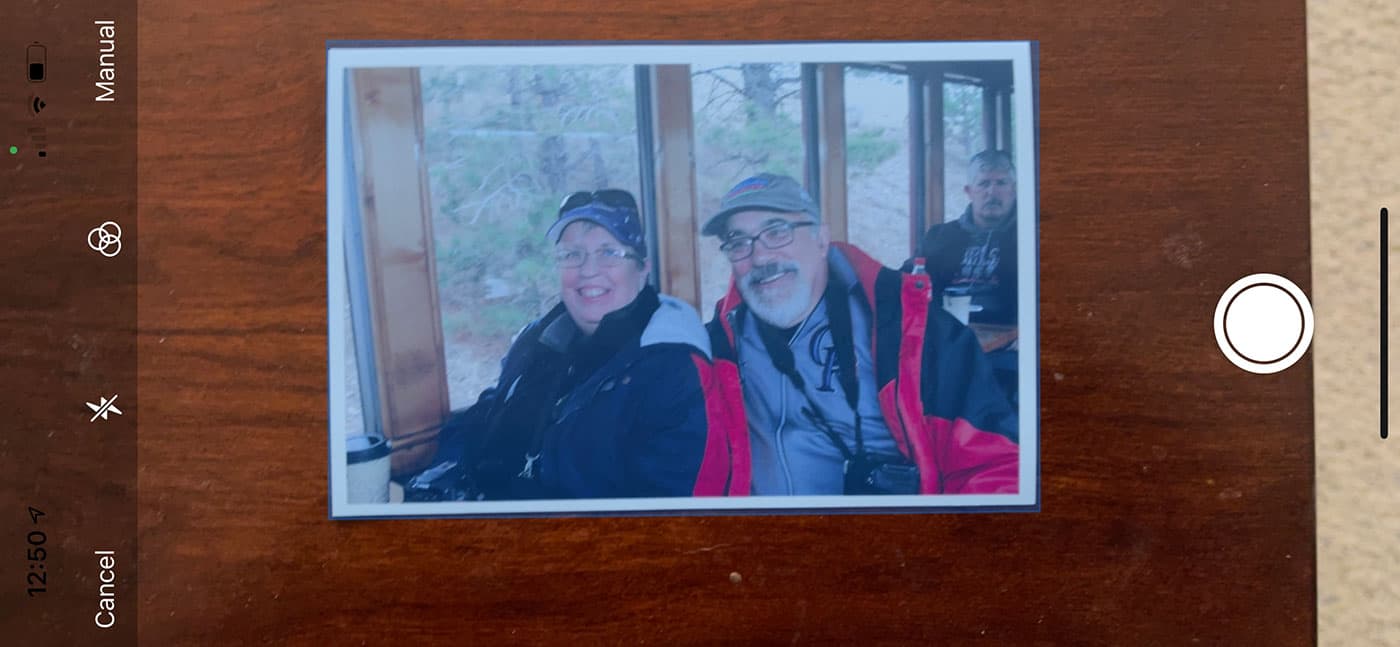
Rather than using the automatic scan capabilities of Files, you’ll want to tap the Auto button to revert to using the Manual shutter. Once again, turn off the flash, and tap the color button (the three joined circles) to select Photo as the source. As with document scans, the scanner places a blue filter over the area to be scanned (see image below).
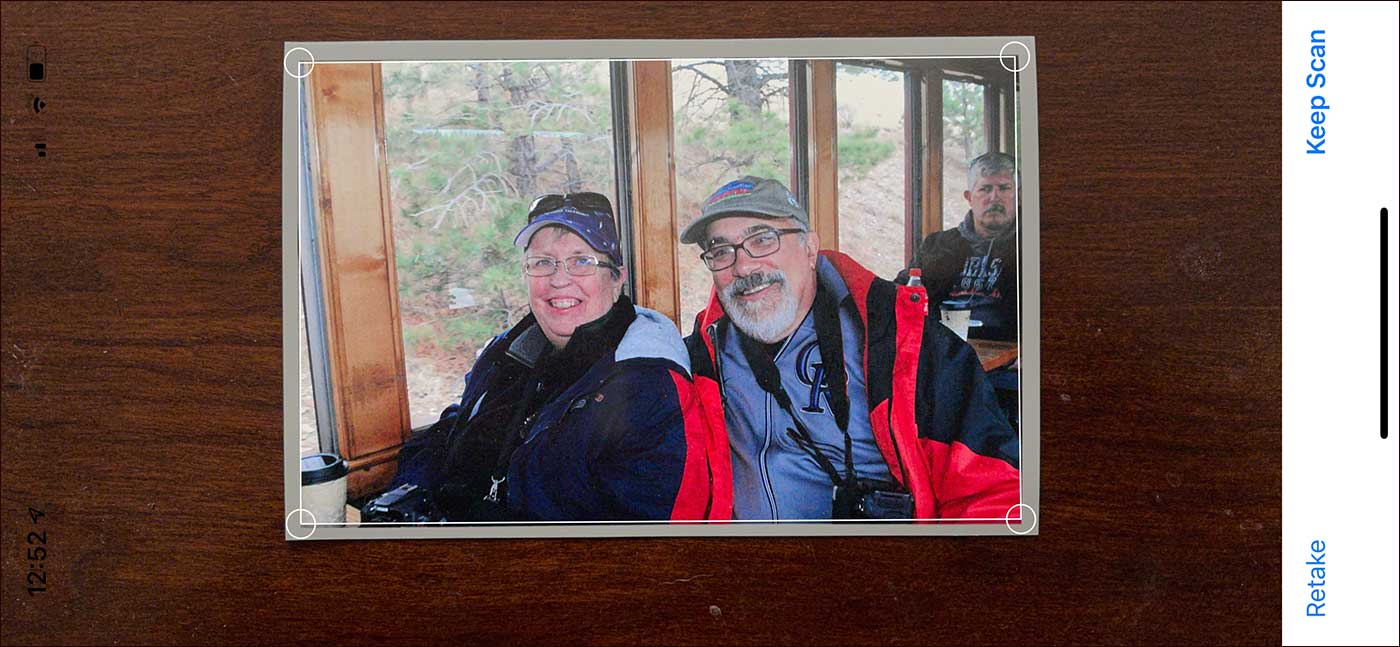
Tap the white shutter button to capture the image. Next, drag the corner handles to crop any parts of the image you don’t want (the white border, for example). When you tap the Keep Scan button, the scanned photo is cropped and any perspective distortion is removed (see image below).
Keep Scan also stores your photo in the folder of your choice, whether that is in iCloud Drive or an alternative cloud storage service.
Other Photo Scanning Apps
Earlier I mentioned that there are third-party apps available that specialize in scanning of photo prints. In this section, I’ll look at a few of the available options.
Photo Scanner Pro
Photo Scanner Pro (previously known as Unfade Pro) is a fast and easy way to capture, edit, and enhance photo prints. The app is pricey ($14.99 one-time purchase). But compared to a scanning service, that cost is negligible.
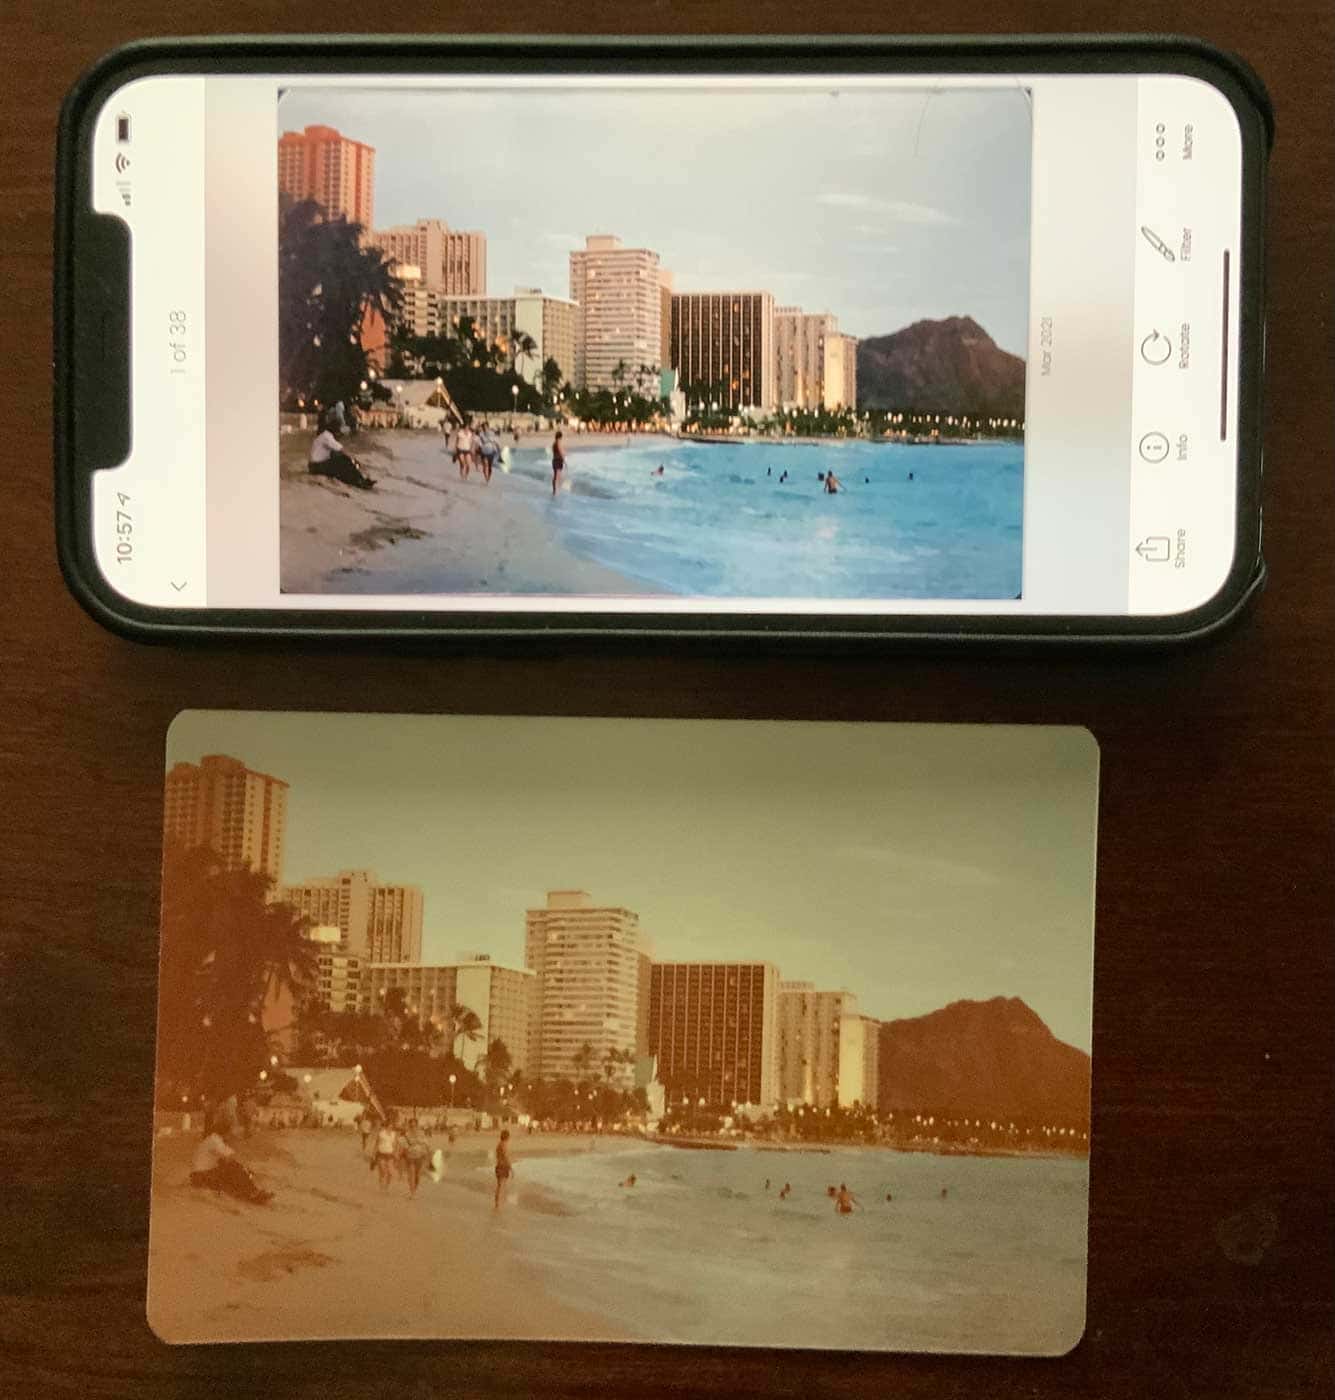
The app does a great job of detecting the edges of photos, then cropping them. Filters automatically correct most of the color shifts that happen with old prints (see image below). All scans immediately end up in the Photo Library or iCloud for safekeeping.
One thing I love about Photo Scanner Pro is its ability to let you change the date, location, and title of each scanned image. For old photos, this is really useful if you know the date and location. The built-in Apple apps — Camera and Files — simply mark each scanned image with the current date.
For example, my wife has photos of the Apollo 15 moon rocket launch that she took as a teenager. It was possible to change the date of the scans to July 26, 1971, the location to the exact spot where she saw the launch, and give them titles that made sense.
PhotoScan by Google Photos
Some people seem to get glare in their scanned photos regardless of how hard they try. PhotoScan by Google Photos (free) eliminates glare by combining five photos.
To begin, you point the iPhone camera at the photo you wish to scan, then press a shutter button to start the process. After a scan, four large dots appear around the corners of the photo along with a circle. Move the circle to each of the dots in turn by moving the camera, and PhotoScan takes four more images. The combined image is saved to your Photos library.
Don’t expect the spectacular results that you see with Photo Scanner Pro, as PhotoScan does not automatically adjust for fading or color shifts. Instead, you’ll need to try tweaking the scanned image in Photos using the edit tools. I found this to be more trouble than it was worth, as I could never achieve the same results as Photo Scanner Pro.
Photo Scan App by PhotoMyne
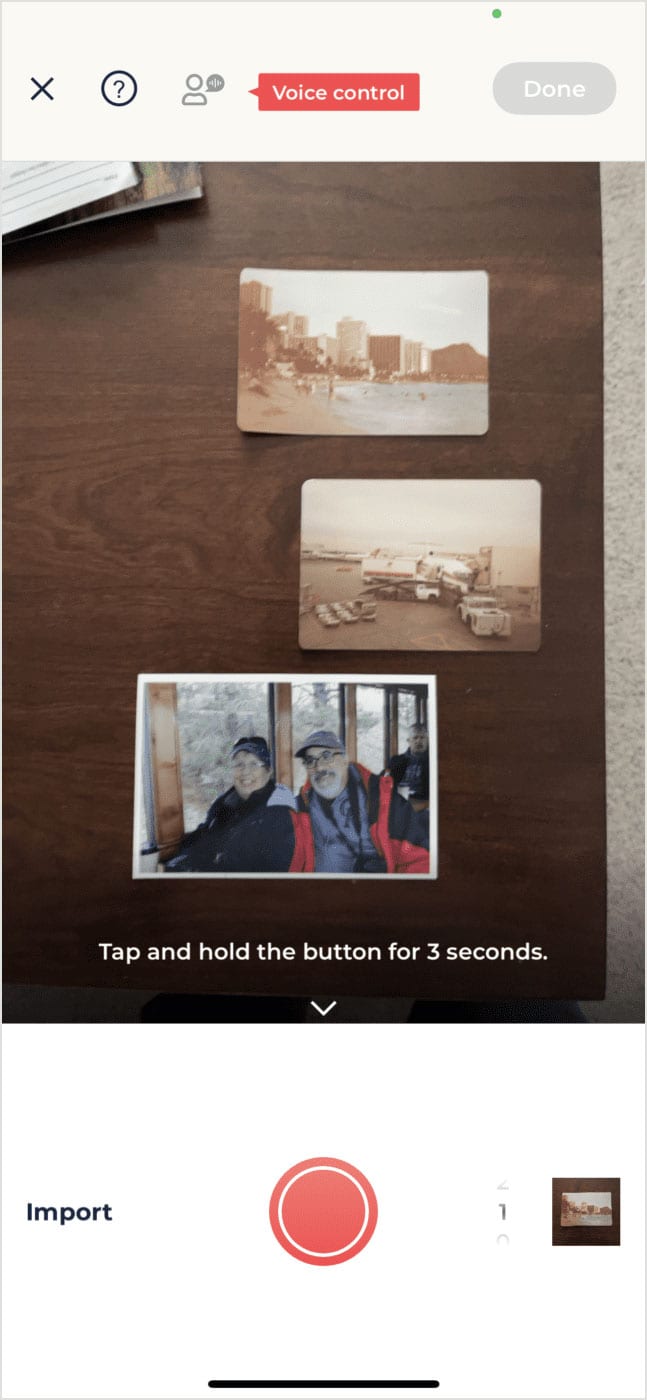
One final choice is another app that is similar to Photo Scanner Pro — the Photo Scan App by PhotoMyne (free 3-day trial, then $9.99 per month or $39.99 annually). When scanning a photo with the PhotoMyne app, you hold the iPhone over the photo and tap a shutter button for three seconds. Once that is complete, the app does a pretty good job of finding the edges of the photo, cropping it, correcting for perspective, and color correcting it.
The PhotoMyne app’s best trick is being able to scan multiple photos at one time. In other words, place five or six photos out on a surface and it scans them all in one shot, crops them, does the color correction, then saves the individual photos (see image at right). Have a lot of photos to scan? PhotoMyne is going to be the best app to get through the hard work quickly.
Voice Control
I also like its ability to let you make the scan without tapping the scan button. Sometimes that tap can be just enough to blur a scan. PhotoMyne has a voice control command that, when activated, lets you scan with the word “Go”.
PhotoMyne also lets you provide an audio annotation to your photo of up to one minute in length, and you can scan the back of a photo if someone has written names on it. Like Photo Scanner Pro, the app lets you add change the date and location for scanned images.
Although it’s the most expensive of the three apps discussed here, the PhotoMyne subscription can be canceled at any time. Plan to do a bulk scan of a bunch of prints, then cancel the subscription when you’re done.
Whatever method you choose, getting those old photo prints digitized is your first step in enjoying them conveniently on your favorite device.


Thanks for the interesting content.
I’m curious if you have done the math on finished resolution after straitening & cropping compared to a 600 DPI flatbed scanner that most scanning services would use. Do yo have better/more scan data for editing the image as you would from a scanner?
I’ve had trouble getting rid of reflections and uneven lighting too.
If I’ve downloaded the right app, photo scanner pro has moved to a subscription service