Did you know that you can set permissions for items on macOS? Permission settings let you choose who can view and alter files on your Mac. The latest version of the operating system—macOS Catalina, requires express user permission before apps can access data in the Documents, Desktop, and Downloads folders.
Permissions and macOS Catalina
Apps must also gain permission to access iCloud Drive, folders from third-party iCloud storage providers, removable media, and external volumes. Permission is also required before an app can perform keylogging, capture a screenshot, or capture a video recording of your screen. You must first change permission settings at the bottom of the Info window for a file, folder, or disk in the Finder.
(The Finder is the home base for your Mac. You use it to organize and access almost everything on your Mac, including documents, images, movies, and any other files you have.)
OK, back to permissions. For example, you can change permission settings for a folder so that other users who log in to your Mac or connect to it for file sharing, can view but not change files in a folder.
To assign permissions to users and groups:
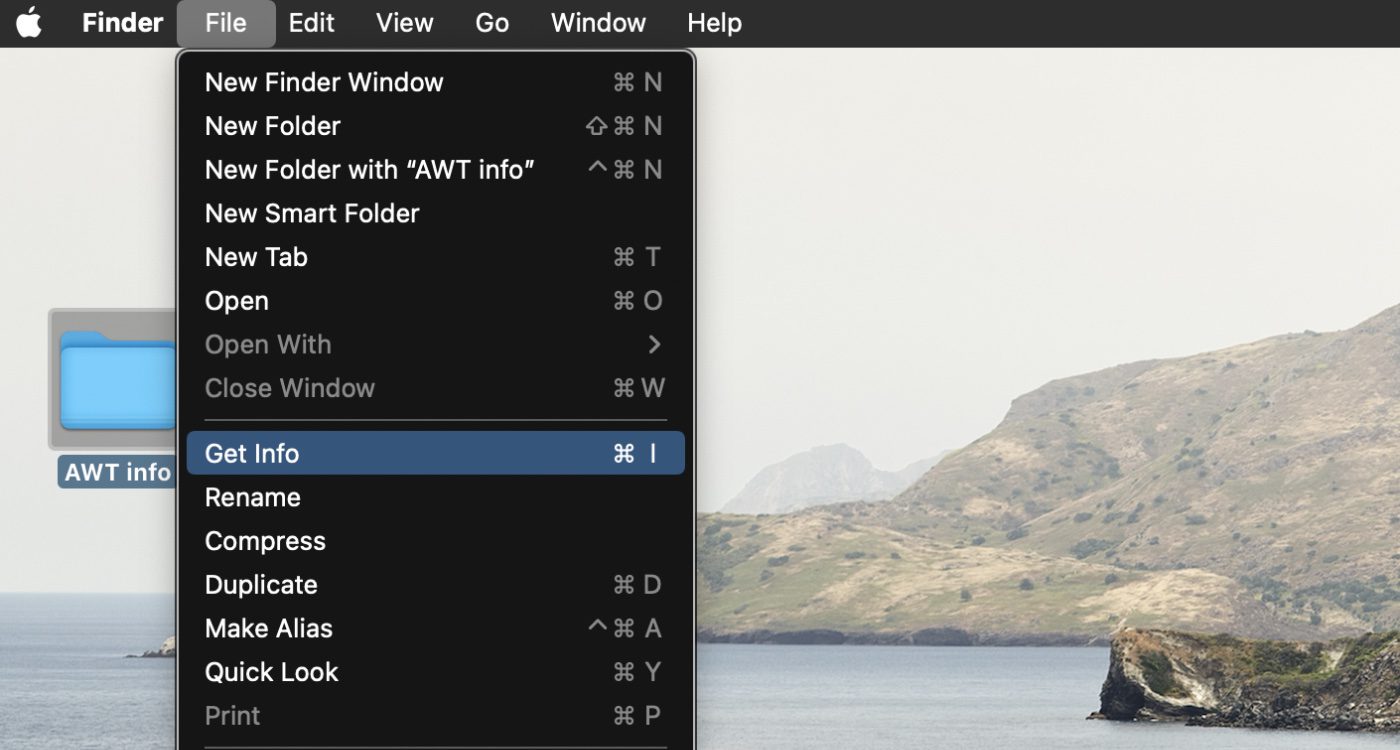
- Select a disk, folder, or file, then choose File > Get Info.
- If the information in Sharing & Permissions isn’t visible, click the disclosure triangle.
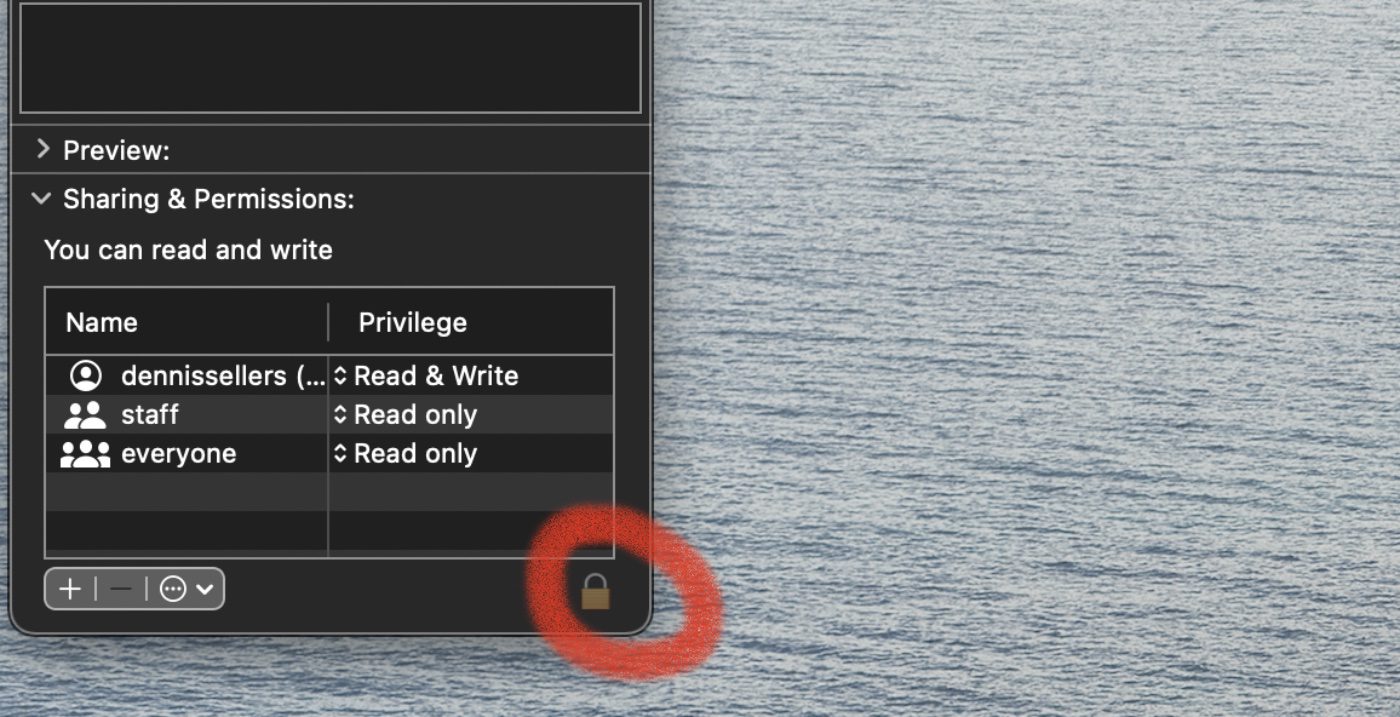
- Click the lock icon to unlock it, and enter an administrator name and password.
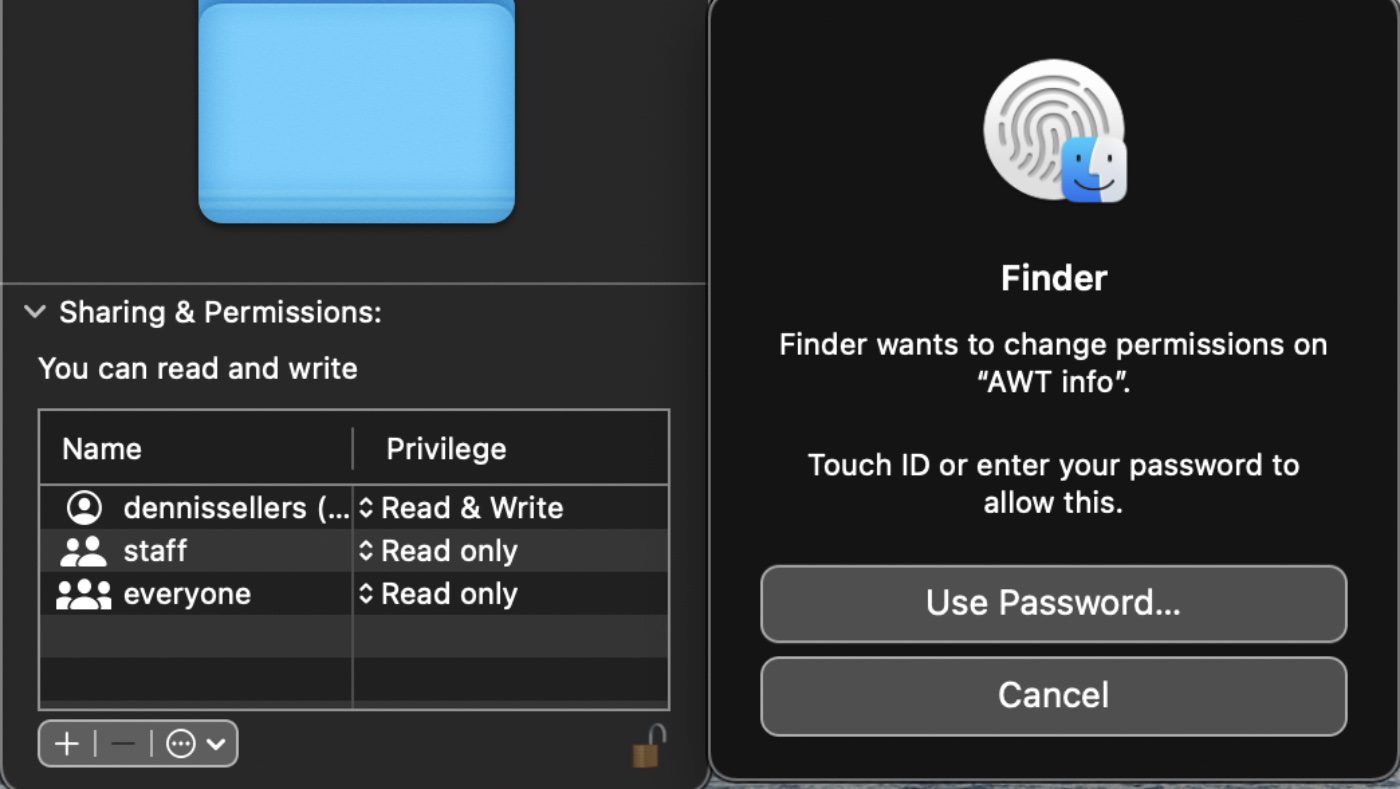
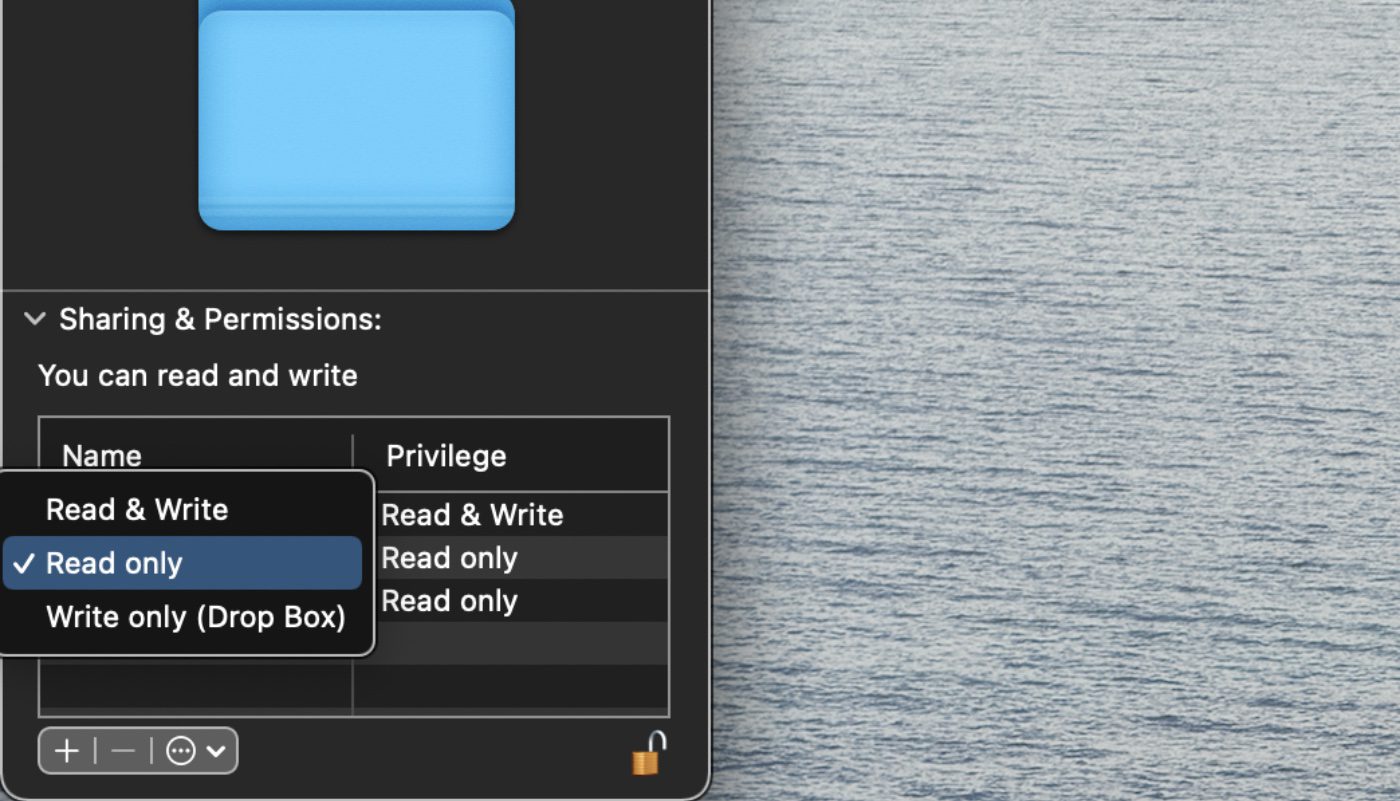
Click a user or group in the Name column, then choose a privilege setting from the pop-up menu. Read & Write allows a user to open the item and change it. Read Only allows a user to open the item, but not change its contents. Write Only allows users to copy items to the drop box, but not open it. Only the owner of the drop box can open it. No Access blocks all access to the item.
To apply permissions to all items in a folder or a disk:
- Select a folder or a disk, then choose File > Get Info.
- Click the lock icon to unlock it, then enter an administrator name and password.
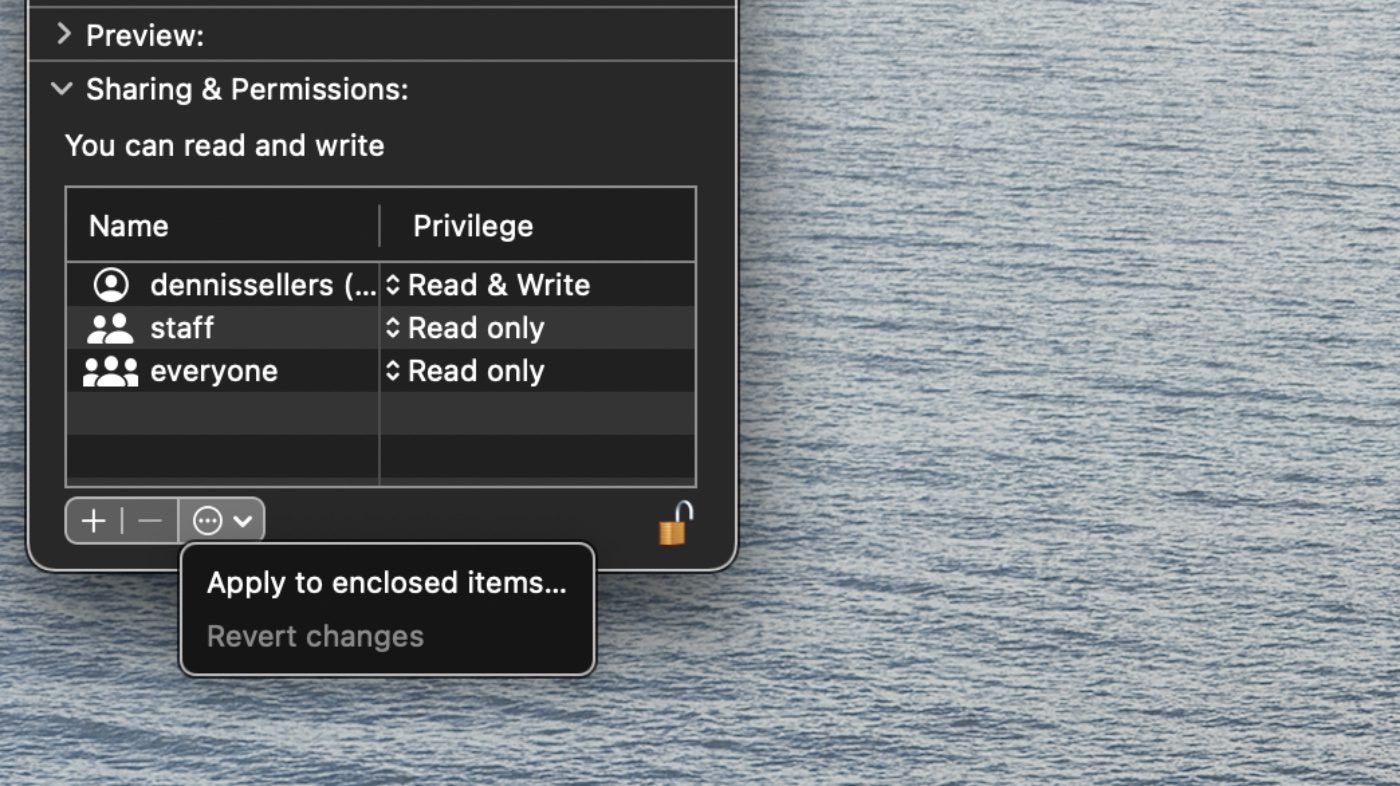
- Click the Action pop-up menu, then choose “Apply to enclosed items.”
To add or remove a user or group in the Name column:
- Select an item, then choose File > Get Info.
- If you don’t own the item, click the lock icon to unlock it, then enter an administrator name and password.
- In the Sharing & Permissions section, do one of the following:
- Add a user or group: Click the Add button below the list, select a user or group, then click Select.
- Remove a user or group: Select the user or group, then click the Remove button below the list.
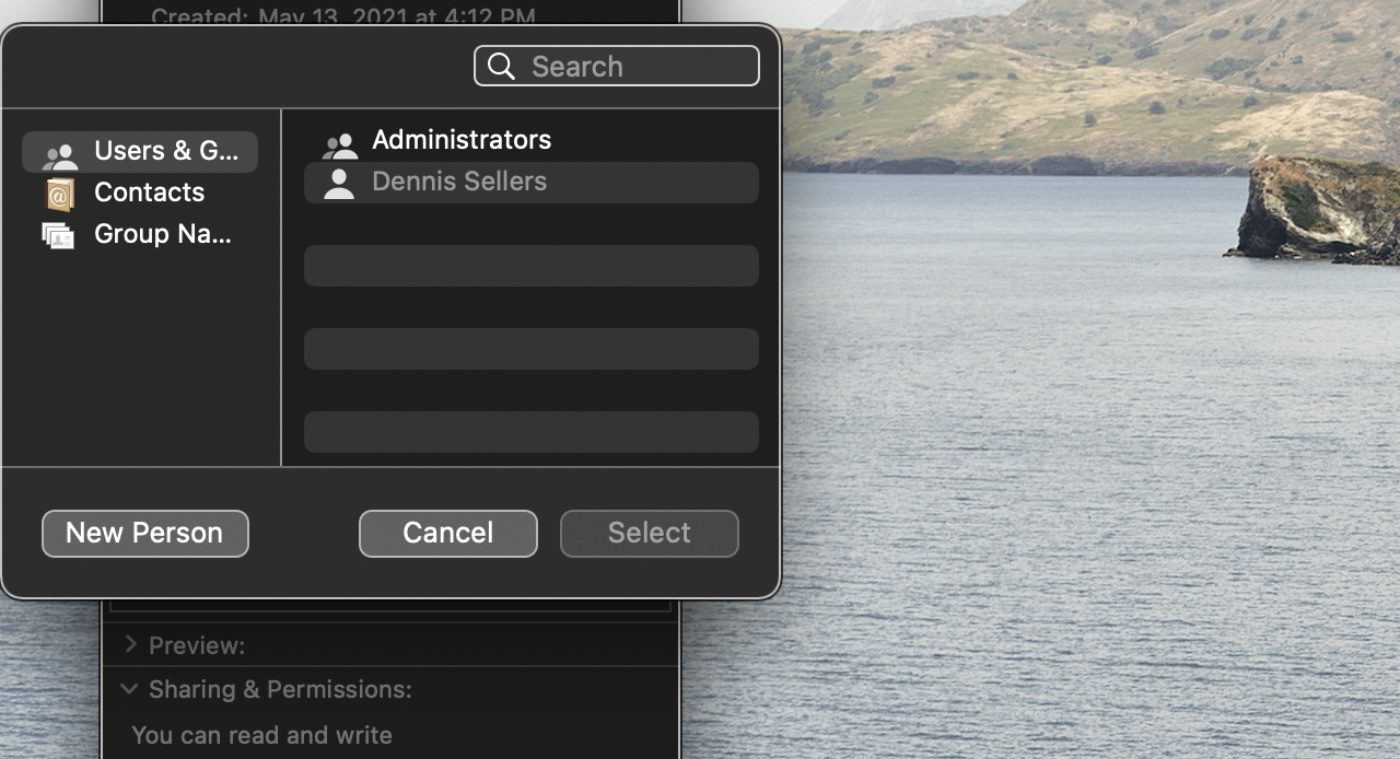
You can undo any changes made in the Sharing & Permissions section of an Info window since opening it, except applying permissions to all the items in a folder or disk. Here’s how:
- Make sure the Info window remains open after making your changes.
- Click the Action pop-up menu, then choose “Revert changes.”
- When you’ve made all the desired changes, click the lock icon to, well, lock up your permission alterations.



Mac Studio m1max external TB3 (owc encore express blade)
Boot back up in read only. No way for admin user to change!
What’s the Magic way through this?
Back up clone, but can’t engage audio drivers. (Avid)
Monterey 12.3.1
Catalina? We are two versions newer now!