You can share your Mac’s Internet connection with other users on your local network using macOS. Here’s how to do it in macOS Monterey. Below, we cover how to share your connection in macOS Ventura.
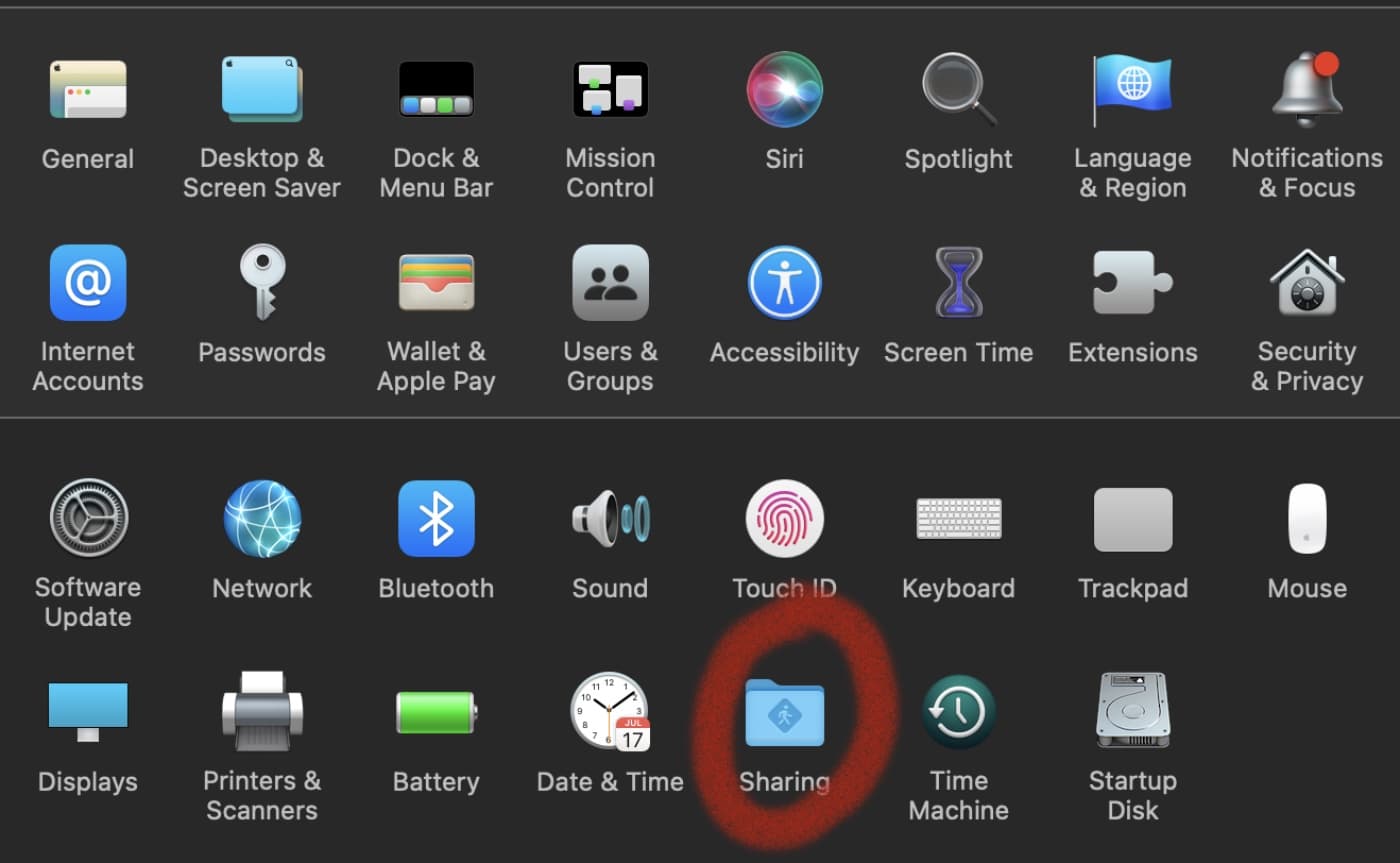
° Go to Apple menu > System Preferences > Sharing.

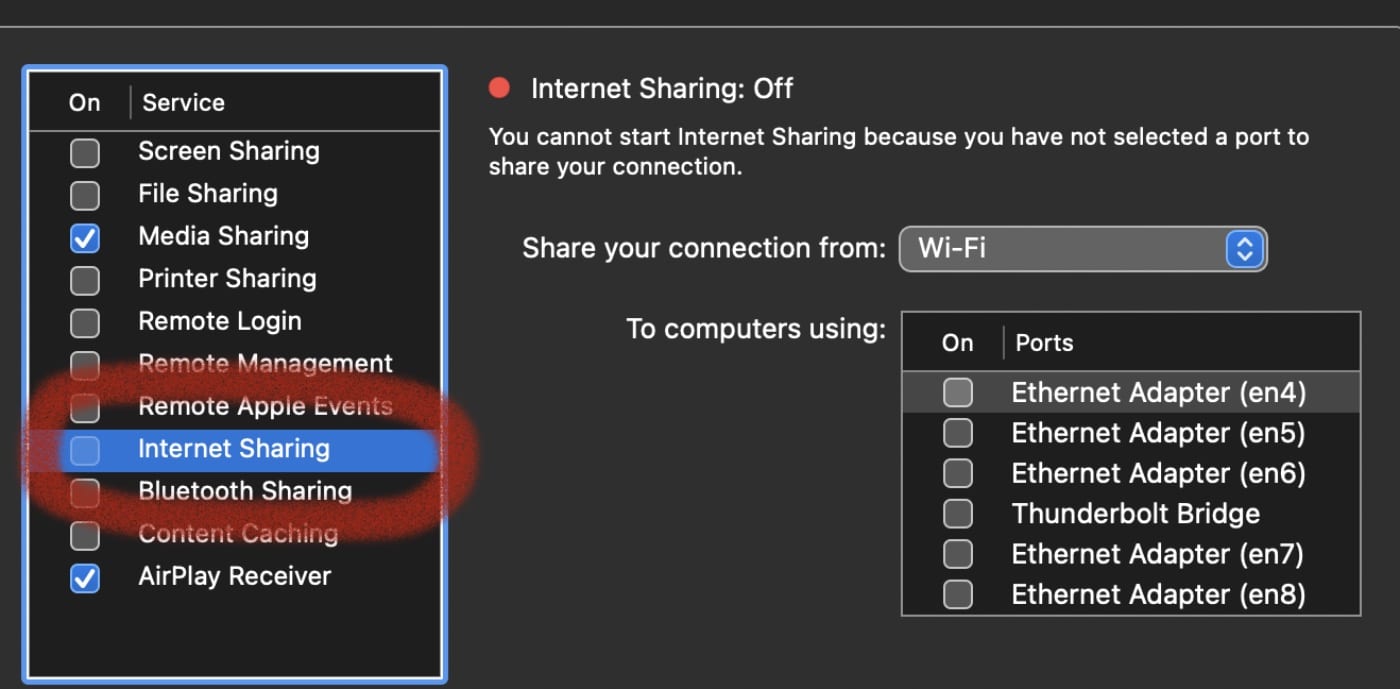
° Select the Internet Sharing checkbox
° Click the “Share your connection from” pop-up menu, then choose the Internet connection you want to share. For example, if you’re connected to the Internet over Ethernet, choose Ethernet.
° It’s important to note here that if you want to share your connection to other computers via Wi-Fi like a wireless hotspot, your Mac will need to be connected to the internet via Ethernet. For the “Share your connection from” box, you’ll need to choose Ethernet.

° Select how you want to share your Internet connection in the “To computers using” list. From “To computers using,” you’ll select Wi-Fi if your Mac is connected to the internet via Ethernet, and you’ll choose an Ethernet option if your Mac is connected to the internet via Wi-Fi.
° If you share your Internet connection using Wi-Fi, deselect the Internet Sharing checkbox, click Wi-Fi Options, give your network a name.
° Click the Channel pop-up menu, then choose another channel if you don’t want to use the default channel.
° If available, click the Security pop-up menu, then choose an option. Choose WPA3 Personal if all computers that use the shared connection support WPA3. Select WPA2/WPA3 Personal if some computers that use the shared connection support only WPA2.
° Enter a password. If you want to see the current password, select the “Show password” checkbox below the password.
° In the Service list at the left, select the Internet Sharing checkbox.
° If you’re sure you want to turn on Internet sharing, click Start. If you’re not sure, click Cancel.
Apple says you should note that if your Internet connection and your local network use the same port (Ethernet, for example), you should investigate possible side effects before you turn on Internet sharing.
In some cases, sharing your Internet connection disrupts the network. If you use a cable modem, for example, you might unintentionally affect the network settings of other ISP customers, and your ISP might terminate your service.
To set up internet sharing in macOS Ventura
° Open the System Settings app then click General > Sharing
° In the next menu you will see the option for Internet Sharing with an on/off toggle to the right. Next to the toggle you will see an info icon (i). Click the i.
° From here, the instructions are very similar to what was outlined above. You’ll select the internet connection you want to share. One thing to note: you can’t share a Wi-Fi network via Wi-Fi in macOS. So if you plan to share your connection over Wi-Fi like a wireless hotspot, from the “Share your connection from” field you will choose Ethernet and connect your Mac to the internet over Ethernet.
° From “To computers using,” you’ll select Wi-Fi if your Mac is connected to the internet via Ethernet, and you’ll choose an Ethernet option if your Mac is connected to the internet via Wi-Fi.
° If you share your Internet connection using Wi-Fi, deselect the Internet Sharing checkbox and then click Wi-Fi Options, and give your network a name.
° Click the Channel pop-up menu, then choose another channel if you don’t want to use the default channel.
° If available, click the Security pop-up menu, then choose an option. Choose WPA3 Personal if all computers that use the shared connection support WPA3. Select WPA2/WPA3 Personal if some computers that use the shared connection support only WPA2.
° Enter a password. If you want to see the current password, select the “Show password” checkbox below the password.
° To save your connection parameters, click OK and then click Done.
° With your connection saved, turn on Internet Sharing by clicking the toggle to the right of Internet Sharing on. Then click the warning that pops up and click Start.


