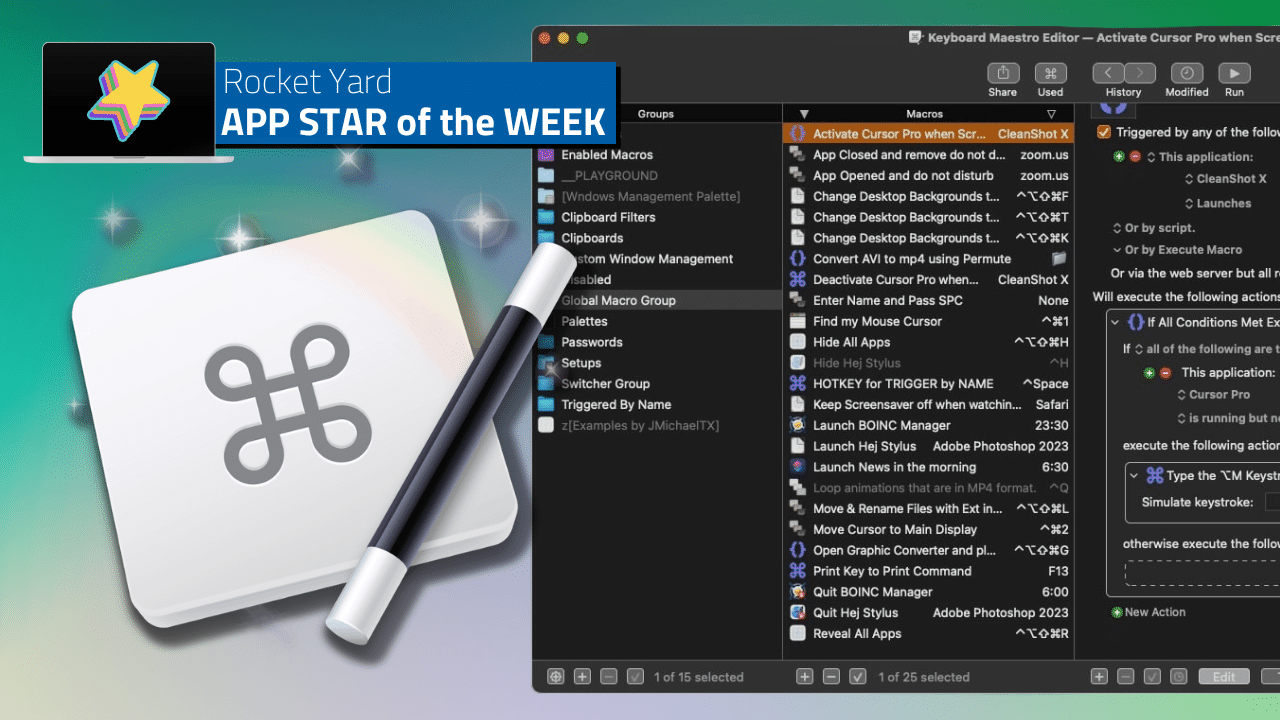
Computers were created to make our lives easier. Or so many of us thought. While computers afford us many conveniences (and distractions) in the modern era, there are many moments where we invariably find ourselves performing tediously repetitive computing tasks.
For example, below are a few tasks I perform multiple times during the week:
- Moving specific files from a series of nested folders into one common folder
- Launching a secondary app automatically, to accompany the launch of another app
- Automatically logging into a specific website at a specific time
- Quickly changing to a solid color desktop background when recording a screencast
- Opening an app to run tasks at a specific time during the evening, and subsequently quitting the same app early in the morning
And that’s where a program like Keyboard Maestro comes in. Keyboard Maestro (currently at version 10) is a powerful Mac-only automation tool from Stairways Software. With Keyboard Maestro, users can automate tasks, control applications and even manipulate text and images.
I have been a Keyboard Maestro user for three years. What I like about it is how accessible Keyboard Maestro is to both new users and pro users alike. You don’t need to be a programmer to write your own Keyboard Maestro macros.
So how does it work?
First, you’ll want to have a specific automation task to perform. Keyboard Maestro includes a few automation tasks to get you started with. (My suggestion would be to start with a few simple tasks, to get your bearings on how the program works.)
After launching Keyboard Maestro, you’ll see the main interface, sporting three columns. The left most column contains Groups – which are a collection of related Macros. The middle column shows the Macros within a specific Group (as seen in the middle column), while the right-most column shows a specific Macro, which you can either edit or execute.
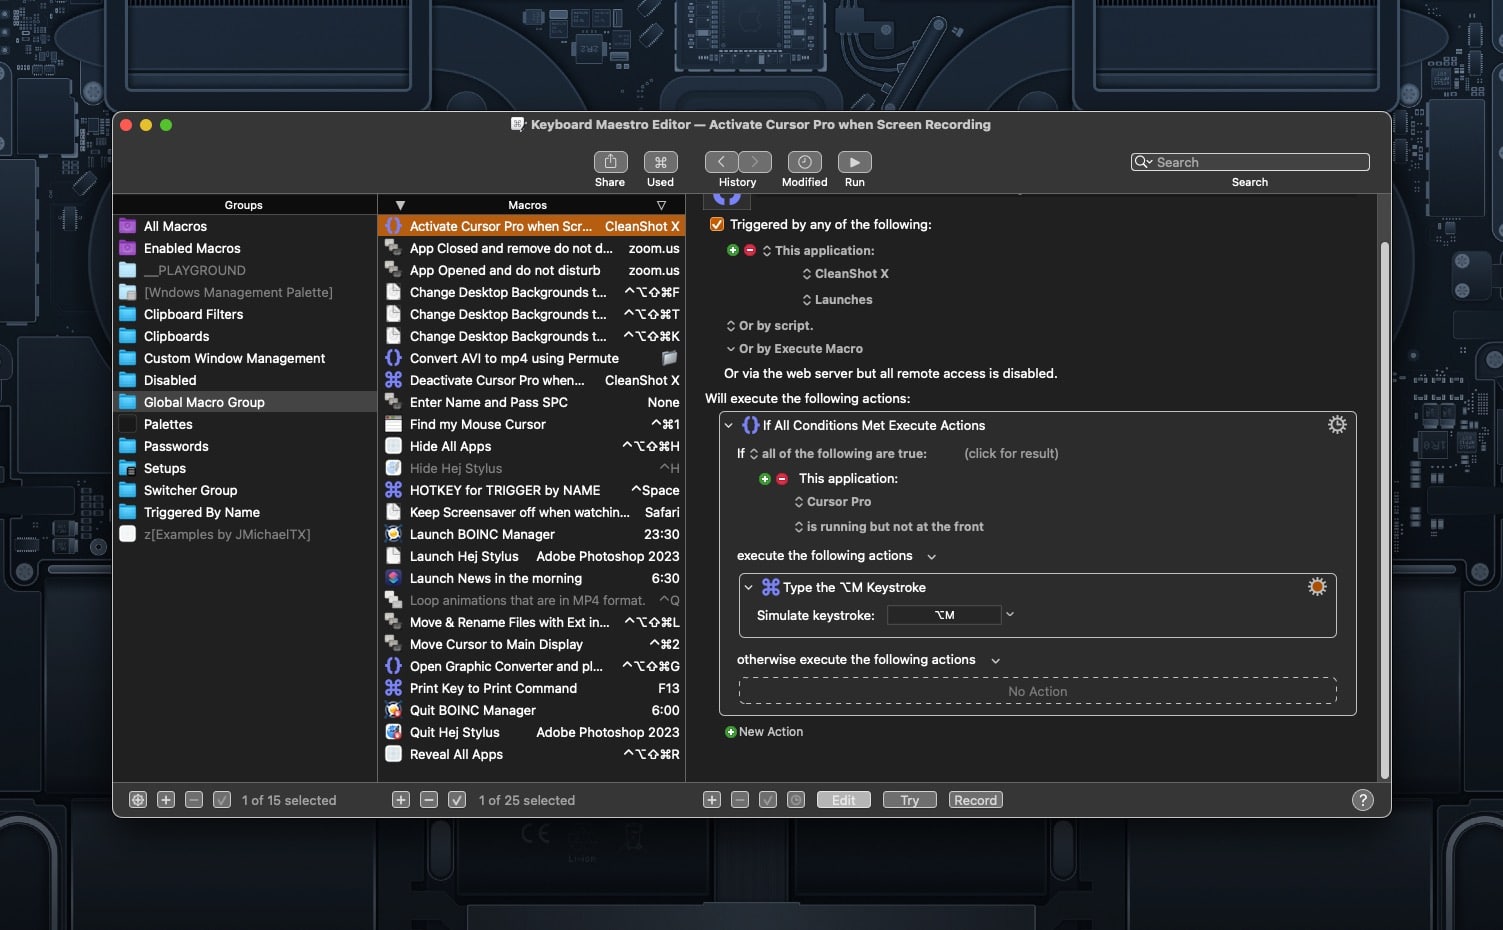
When making a new macro, you’ll see a new pop-up pane showing Categories (i.e. Image, Text, Music Control, etc.). Within each Category is a list of Actions that can be performed. For example, under the Image category, you can flip an image, set the image DPI, get an image’s size, and much, much more.
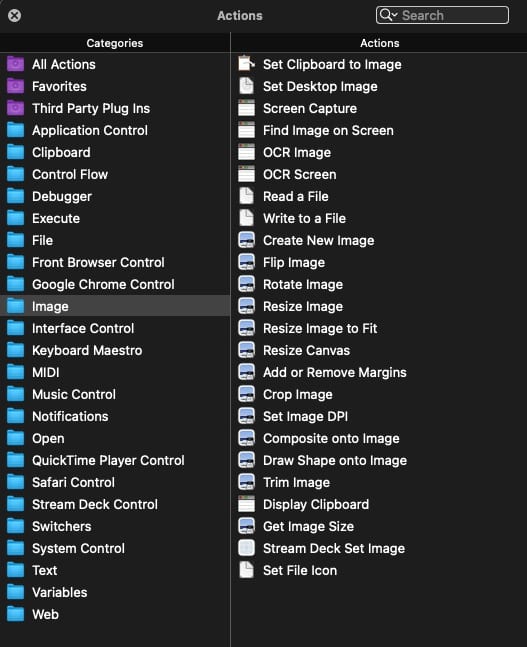
Actions can be dragged into the third column in the Keyboard Maestro main interface. This column is where you build you macro using one or more Actions. This approach is very similar to making automations using Apple’s Automator program.
For new Keyboard Maestro users, I recommend starting off with a simple Macro, like the one shown below.
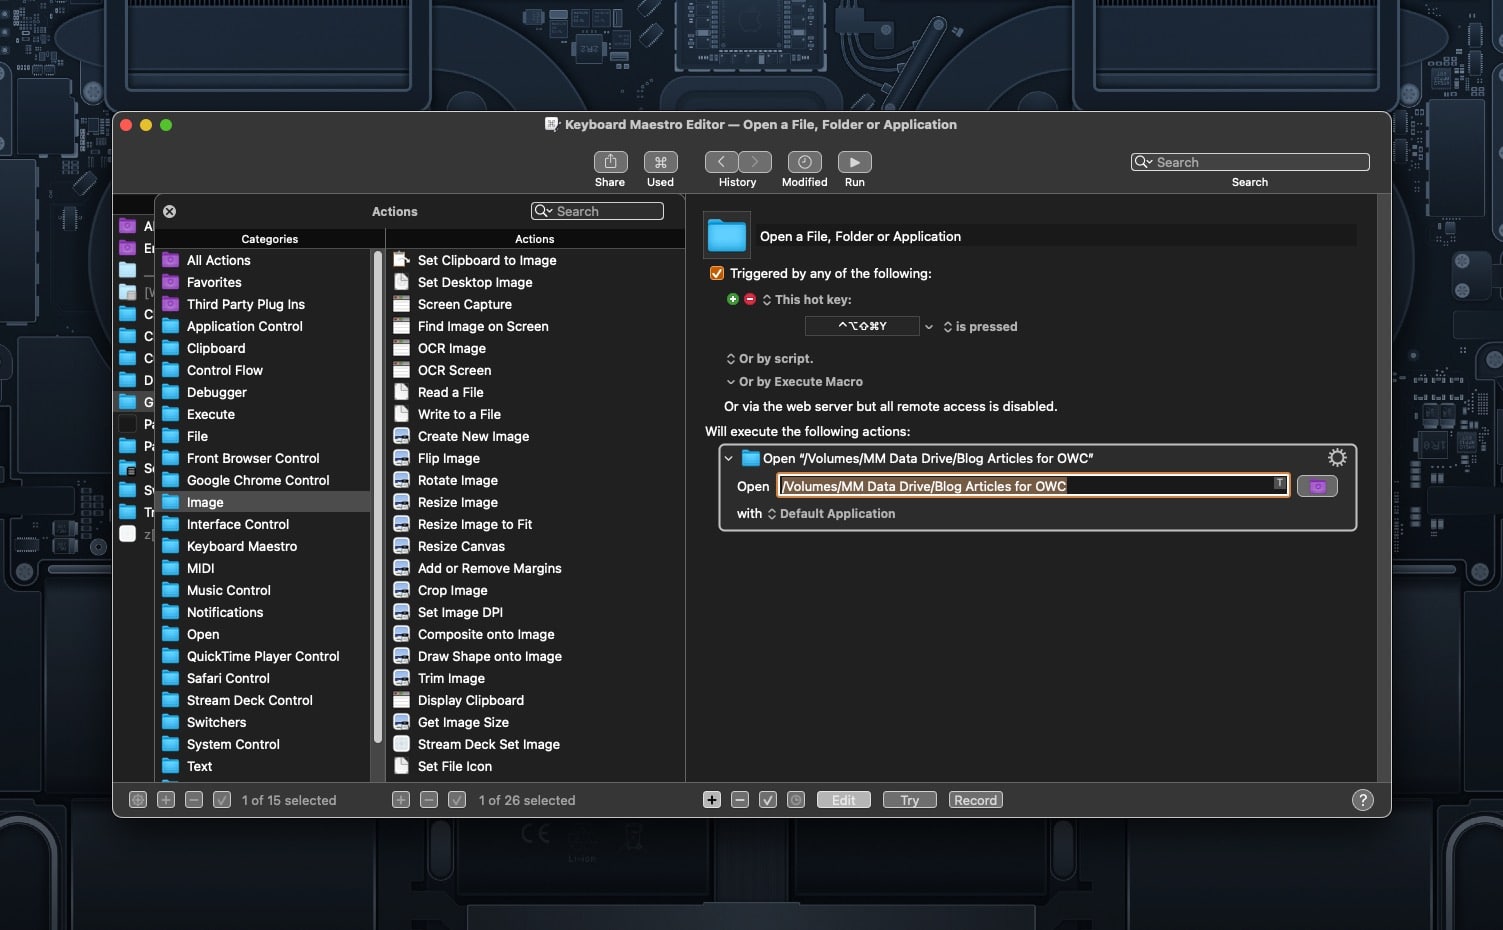
The above Macro will open a folder called “Blog Articles for OWC” when I press Command-Shift-Control-Option Y.
In Keyboard Maestro, macros run when a trigger occurs. A trigger can be a keyboard command, the insertion of an SD card, a specific time of day, the making of a new folder etc. When the trigger happens, the Macro runs.
In addition to assembling a Macro from individual actions, you also can create a macro by having Keyboard Maestro watch and record your steps. If you require a more complicated automation, you can find a wealth of previously-built macros on the Keyboard Maestro forums. And you can mix and match between recording parts of a Macro, using a built-in Action, and modifying an existing user-created Macro. Like LEGOS, I can build a Keyboard Maestro Macro using a combination of methods.
Once you’ve built a macro, you can test it out by clicking the Try button located at the bottom of Keyboard Maestro’s interface. If your Macro has an error, you can click the Edit button to modify it.
Keyboard Maestro’s list of built-in actions is impressive. You will find everything you need to make powerful automations right out of the box. And if you dream of even more power and flexibility – good news! – Keyboard Maestro works really well with other automation tools, such as Apple’s Shortcuts, Automator, and even the venerable AppleScript. This versatility means there’s even more power to leverage when making your automations. Below is a Macro I created to launch my favorite News sites (set in Apple Shortcuts) at a specific time in the morning.
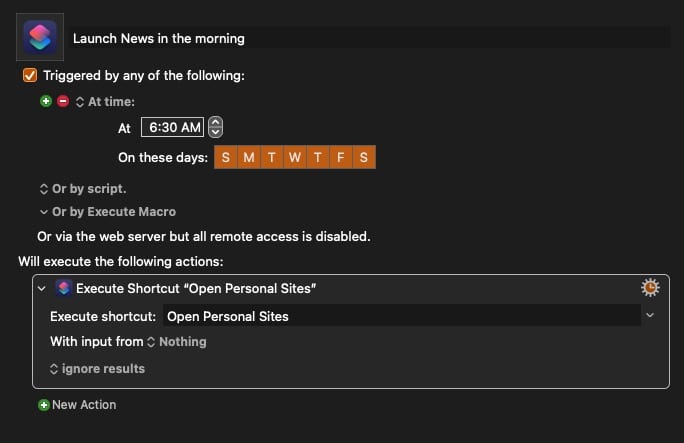
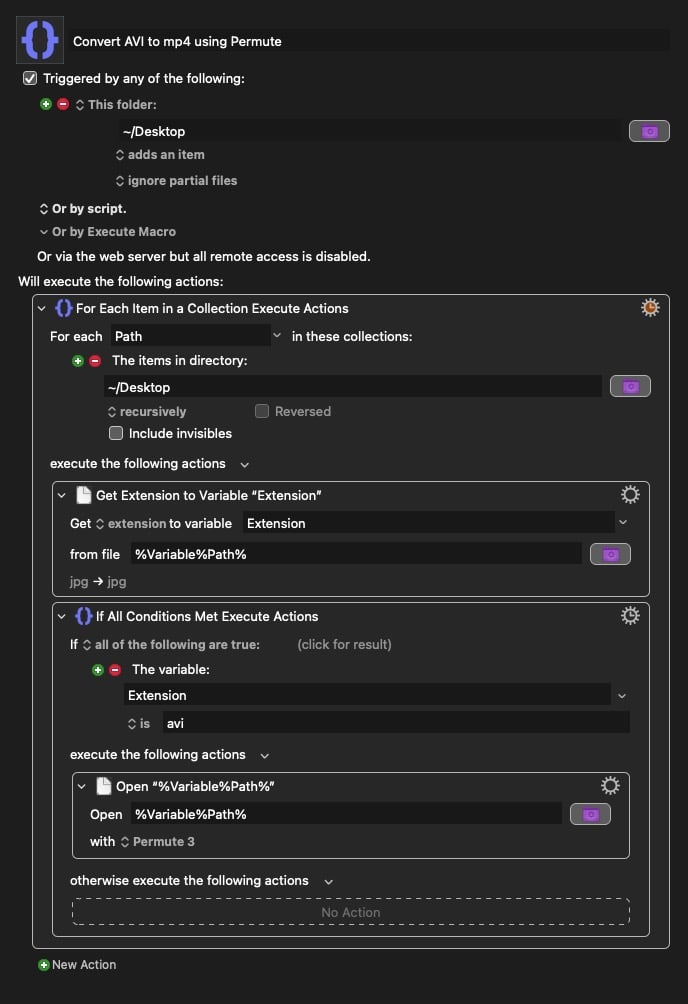
For power users, Keyboard Maestro offers familiar programming elements you can use within your Macros, such as variables and loops. In the example below, I am using variables and a “for” loop within a Macro to automatically convert any AVI video files sitting on my Desktop into the more efficient MP4 format. This macro will also work for any nested folders that are on my Desktop.
Keyboard Maestro works on Intel Macs and is also fully optimized for newer model Apple Silicon Macs. If you have more than one Mac, Keyboard Maestro will optionally synch your Macros across each machine. As a user who drives two Macs, I find this feature incredibly convenient.
The Keyboard Maestro Wiki is quite comprehensive and does a solid job of getting new users up to speed. For users needing additional guidance and inspiration, I highly recommend David Spark’s Keyboard Maestro Field Guide. David’s video-based course really helped me unlock many of Keyboard Maestro’s powerful features. Once you’ve had a chance to kick the tires with this tool, check out the vibrant Keyboard Maestro community, where you’ll find plenty of knowledgeable (and friendly) Keyboard Maestro users to discuss and share Macros with.
Keyboard Maestro is an indispensable tool for improving my productivity. It’s reasonably priced for what it does, and the developer, Peter N Lewis, provides excellent support should you need it.
You can download Keyboard Maestro and run it as a free trial to see if it’s right for you. Keyboard Maestro costs $36US for a one-time purchase, or $25US if you’re upgrading from a previous version. Keyboard Maestro 10 requires macOS 13 or greater.



Spiffy article Krishna!
I migrated from QuicKeys when they passed on. Loved the simple interface. Maestro carries some that and adds great deal of potential programming. I will check out the video series you recommend.
Can’t live without it.
Best as always,
Loren