
If you’re using Continuity Camera and FaceTime in macOS Sonoma, you can improve the image quality with the Studio Light feature. Here’s how to get started.
About Continuity Camera
Continuity Camera allows you to use your iPhone as a webcam with your Mac. This alone leads to a huge upgrade for your video calls because the cameras in the iPhone provide higher resolution, better color, and more light to the image you’re sending than the cameras built into your Mac.
To use Continuity Camera Apple recommends that your iPhone be near your Mac, locked, stable, and in landscape orientation to allow apps to choose your iPhone automatically, or in portrait orientation.
Continuity Camera works wired or wirelessly. To keep your iPhone charged while in use, plug it into your Mac or a USB charger. Your Mac will notify you if iPhone battery level gets low. Follow these steps, and your iPhone’s camera and mic are available to apps that can use them such as FaceTime.
When you launch FaceTime or another compatible video call app like Zoom or Teams, Continuity Camera should kick in automatically. If it doesn’t, choose your iPhone camera from the app’s video menu, camera menu, or other setting. In FaceTime your iPhone camera is available from the Video menu.
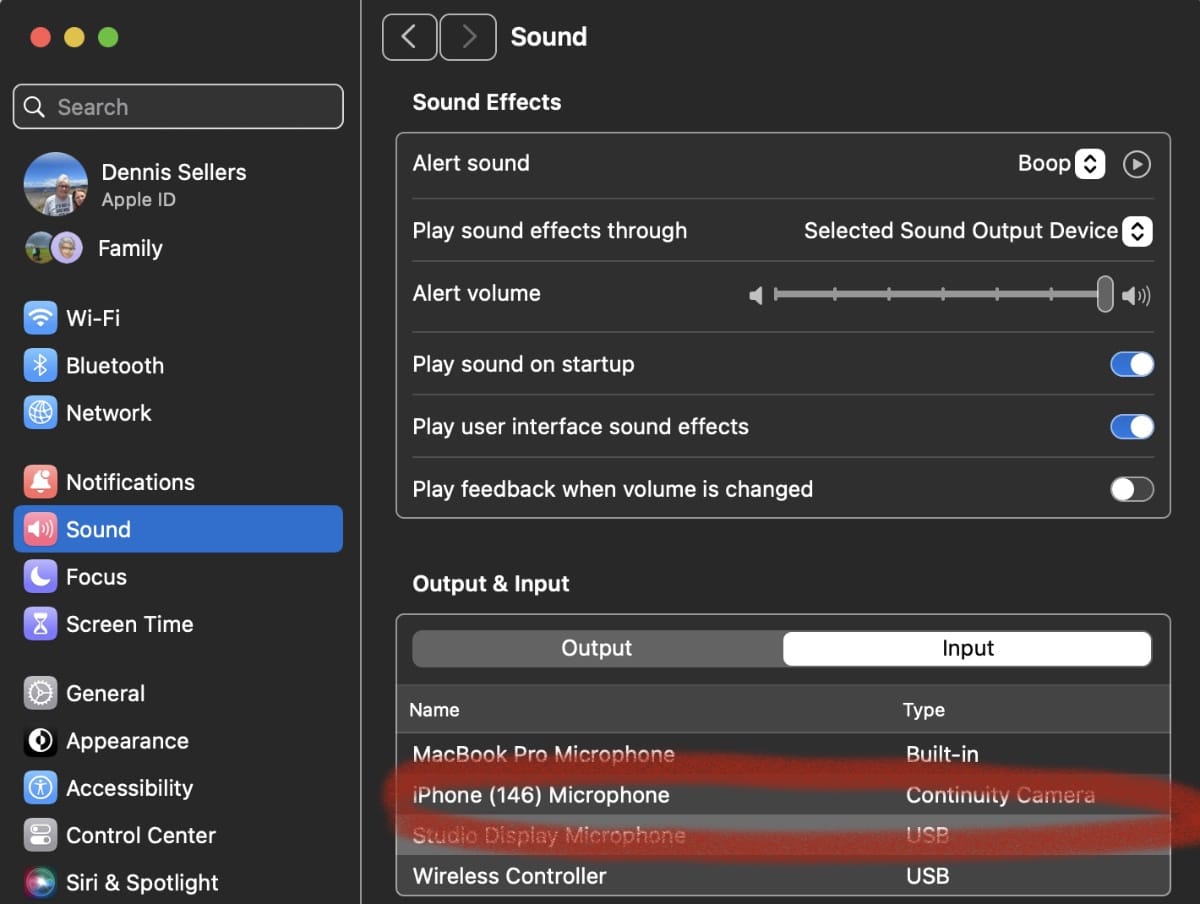
Your iPhone mic is available separately to apps that offer a mic setting. Or you can go to Apple menu > System Settings, click Sound in the sidebar, then select your iPhone mic in the Input tab.
You don’t need to choose your iPhone mic, unless your Mac has no built-in or external mic. Your app might then choose your iPhone mic automatically.
About Studio Light and how to use it
Studio Light is a new feature for FaceTime in macOS Sonoma. Basically, it dims the background and highlights your face, artificially simulating the effect an actual studio light would have in your space. Here’s how to use it:
° Launch FaceTime or another compatible video call app.
° Click the green/white icon that pops up in the Menu Bar.
° Under the camera selector dropdown, you’ll find three or four features depending on the iPhone you have connected: Center Stage, Portrait, Studio Light, and Reactions. Click Studio Light to enable it.
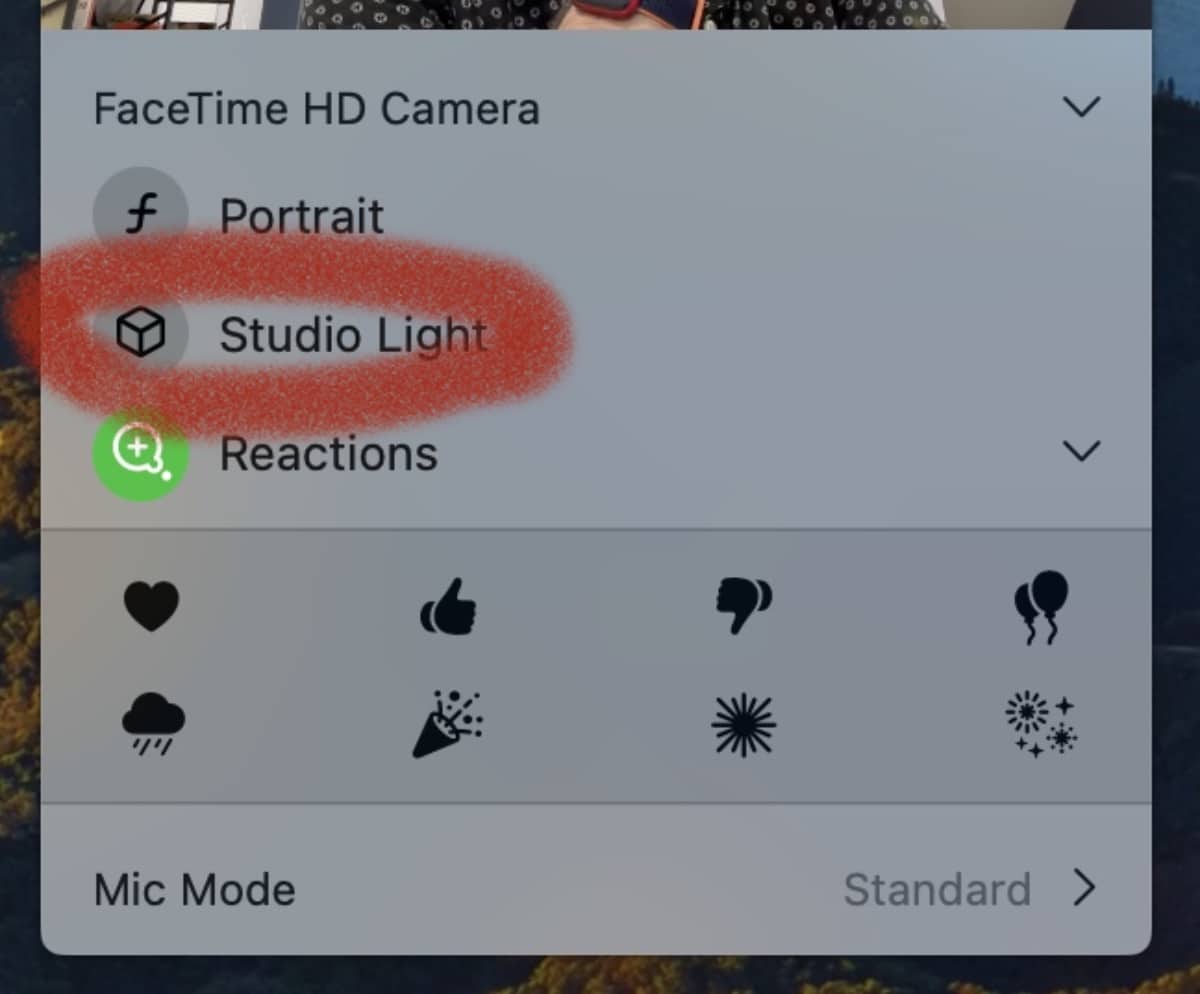
You’ll automatically see the difference in lighting, although the amount of difference depends on the ambient lighting in the room.




This sounds very handy but you lost me at step 2 under About Studio Light: “Click the green/white icon that pops up in the Menu Bar.”
What menu bar? When I start FaceTime on either my iMac of my iPhone I simply get two options: Create Link or New FaceTime, followed by a list of previous calls. No Menu Bar. No camera selection options.
I’m running iOS 17.4.1 on the iPhone 15 and Sonoma 14.4.1 on the iMac.