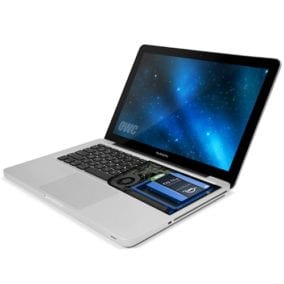
 You might find yourself using the optical drive in your 2012 MacBook Pro less and less. Or maybe the optical drive no longer works, and you would rather have more internal storage than replace it.
With the OWC Data Doubler, it’s possible to add up to 2.0TB of internal storage to your MacBook Pro. Or you can add an OWC SSD for speedy boot and app loading times.
The Data Doubler is a custom engineered anodized aluminum bracket with that fits perfectly in your MacBook Pro’s optical bay and is ready to mount your 2.5” HDD or SSD. It also comes with all the tools needed for installation.
With OWC’s DIY Data Doubler kit and installation video (below), you’ll open a new world of possibilities for your 13” non-Retina 2012 MacBook Pro9,2. (Note: It is highly recommended that you backup your data before installing Data Doubler.)
If you are unable to watch the video above, or would like to see a quick guide on installing the Data Doubler, we have put together a step-by-step guide below for replacing your 2012 MacBook Pro’s optical drive with an OWC Data Doubler. (Note: The 2012 MacBook Pro’s optical bay cannot reliably support SATA 6Gb/s SSDs and HDDs. However, SATA 3Gb/s SSDs and HDDs will work without issue in the optical bay. If you’re installing a SATA 6Gb/s drive with your Data Doubler, it is recommended that you install the 6Gb/s drive in the main drive bay and use the Data Doubler to install the stock 3Gb/s drive in the optical bay.)
Step 1) Open Your MacBook Pro
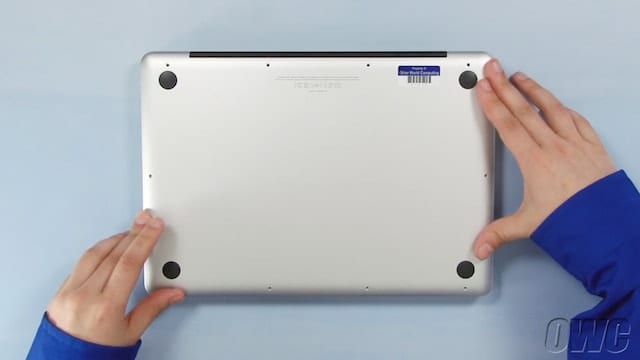
Discharge static electricity and then turn off your MacBook Pro and place it on a soft static free surface. Use a Phillips screwdriver to open the bottom plate of your MacBook Pro and set the screws safely aside.
Step 2) Disconnect Battery & Data Cables
Set aside the MacBook Pro’s bottom casing and use a nylon tool to gently disconnect the battery connector from the logic board. Then use the nylon tool to disconnect the three data cables.
[nggallery id=116]
Step 3) Remove the Optical Drive
Remove the three screws that hold the Data Doubler in place. Note: To access the second screw in the top left corner, you will need to loosen the module that is held down by three screws seen in the second image below. You can then remove the second and third optical drive screws on the left side. Then use your nylon pry tool to gently lift the drive from the bay.
[nggallery id=117]
Step 4) Remove SATA Connector & Mounting Bracket
Gently pull out the SATA connector and unscrew the mounting bracket from the optical drive.
[nggallery id=118]
Step 5) Install the Drive into the Data Doubler
Install the new HDD or SSD into the Data Doubler with the included screws. Next, slide in the SATA connector that you removed from the optical drive and attach the mounting bracket to the Data Doubler using the screws that held it to the optical drive.
[nggallery id=119]
Step 6) Install the Data Doubler
Carefully slide the Data Doubler in to place and use the original screw on the right side of the Data Doubler. Then use the two included longer OWC screws on the left side of the Data Doubler. Once that is done, reinstall the module above the Data Doubler with the original three screws.
[nggallery id=120]
Step 7) Re-assemble the MacBook Pro
Follow the original steps in reverse order to re-assemble your MacBook Pro and connect all cables and the battery. You may now flip your MacBook over and turn it on.
If you have installed a brand new drive with the Data Doubler, you will need to format it before use. Instructions can be found at www.macsales.com/format
MacSales.com offers a wide selection of external optical solutions for those who still need to utilize optical media. You can even get an external enclosure for your still-functional Apple SuperDrive from your MacBook Pro.





I replace my DVD drive with a SSD drive as well as the main drive making a RAID 0 with both. it was working fine but had to reformat the drive to install 10.15 , now I have the system in one drive and media folders in the other . I need to replace the media drive but I’m not sure witch is witch
Hello!
On my 2012 MacBook Pro (MacBook 9,2), I see a 6 Gigabit link speed where my optical drive currently is. [The negotiated speed is 1.5 Gigabit, as expected.]
Can I therefore install a SATA Ⅲ drive in my optical bay and expect it to run at full speed?
Hi J.P., you are correct, a MacBookPro9,2’s optical connect can run a SATA III drive at its full speed.
w00t, thanks for confirming, Jamie!
Yes, it would work just fine.
My main sata drive does not work because of a broken SATA cable. Can I use the superdrive bay as a main drive instead? please answer me im desperate I need my laptop for work
i have a 1TB HDD that i got from my old samsung laptop, would it work if i put it as a secondary HDD in my macbook pro mid 2012?
I’ve just installed a data doubler with a 2tb SSHD and everything is just fine so far.
I just noticed that the system option menu of the drive (that used to be the SuperDrive) stays with a eject item in it.
Well, I didnt click it to see what would happen, but is there anyway to take that out of there and maybe assigning it to the usb external case?
Do you have this for a 15″ early 2011 MacBook Pro?
Hi, Robert. The Data Doubler is compatible with the 15″ early 2011 MBP. Here’s a link: https://eshop.macsales.com/Search/Search.cfm?Ntk=Primary&Ns=P_Popularity%7c1&Ne=5000&N=7854&Ntt=data+doubler Be sure to read all notes under the Compatibility tab to ensure you get the correct drive for your model. If you have any more questions, feel free to contact our customer support team!
Thank you for the fast reply. I am looking into buying a unit. Just cannot figure out which one.
Hi, Robert. This is the correct Data Doubler for your MacBook Pro. https://eshop.macsales.com/item/OWC/DDAMBS0GB/
Thanks for the information. I am looking into making a purchase. Thanks again.
No problem! We’re here to help if you need it. Here is an installation video if you do decide to install a Data Doubler: https://eshop.macsales.com/installvideos/macbookpro_15_unibody_early11_dd/