While we’ve been primarily focused on how to install the macOS Sierra public beta and how to make an install USB drive for macOS Sierra, we’re sure that some Rocket Yard readers have also installed the iOS 10 beta on a handy iOS device.
If you didn’t heed our advice and installed iOS 10 on your primary iPhone or iPad anyway, you might be wishing you had a way to get back to iOS 9. Today, we’ll show you how it’s done:

1.) Disable Find My iPhone (or iPad) on your iOS device. This is easy to do; just launch Settings, then scroll down to iCloud and tap it. At the bottom of the iCloud settings is Find My iPhone — tap it to open it, then tap the green toggle switch (see image at right) to disable this feature. Note that you’ll need to enter your Apple ID password to shut off Find My iPhone.
2.) To install the beta OS, you had to connect your iPhone or iPad to a Mac or PC with iTunes installed. Connect your iOS device to that computer now and launch iTunes.
3.) At this point the device needs to be put into what’s called DFU — Device Firmware Update — mode. Press the iPhone or iPad power and home buttons simultaneously for 10 seconds, then release the power button while continuing to press the home button.
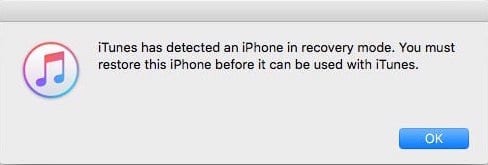
4.) iTunes should now display a notification noting that it has detected an iPhone in recovery mode and that it needs to be restored before it can be used (see image below). Click OK.

5.) You’re going to see two buttons (see image below), only one of which should be highlighted — Restore iPhone… (or iPad…). Click it, and you’ll be asked to confirm that you wish to restore the device to earlier firmware. Click “Next” and “Agree”, and iTunes will begin to restore the device.

6.) Reverting your iPhone or iPad to iOS 9.3.3 or whatever version you select will take about 20 minutes. If at any point you run into issues, you’ll be asked to select the iOS 9.3.3 (or other) ipsw file manually. From the prompt that appears, select the ipsw file you downloaded previously, click on Open, and then click on Restore.
Note that if you need to download an iOS 9.3.3 ipsw file, a quick Google search for “iOS 9.3.3 restore files” (or whatever version you may need) will display several sites with download links. Both RedmondPie and OSXDaily are safe sources for the files.
Remember to download the proper ipsw file for your device, as each model has its own firmware file. If at any point your device just doesn’t cooperate in reverting to the earlier firmware version, start over at Step 3 by placing it into DFU mode again while connected to a Mac or PC running iTunes.
Related Articles


