 This fall we are sharing a series of simple design techniques for Illustrator, Photoshop, and After Effects. Rather than setting up a tutorial where you follow a “recipe” and end up with our design instead of your own, we show core workflow steps that allow you to try different tools or looks. Where pitfalls or caveats were found, we’ve noted them so that you can avoid problems. The idea is to get you experimenting with these powerful apps and enjoying the creative process! While you don’t need to be an expert to follow along, it is a good idea to familiarize yourself with each application and its core features before you begin.
 Setup: the application versions used for this article include Adobe Illustrator CC, 2015.3.1 release, and Adobe After Effects, CC 2015.3 release. Both apps were installed on a Late 2013 MacBook Pro with an OWC SSD and 16GB of OWC RAM. The system version is OS X 10.11.6.
Important: Don’t forget to save your work periodically as you progress through the article. Illustrator can be a fickle beast, especially if you have a modest amount of RAM installed. We recommend a system with at least 8GB of RAM — if you’re sharing memory capacity among Creative Cloud apps as we did, 16GB is a better bet.
Introduction: Adobe Illustrator is one of the more complex apps in Adobe’s suite; a good way to move past the intimidation factor is to open a new document and create a simple project. The tips presented below show how to prepare the letters or symbols you design, so that they can later be animated in Adobe After Effects. The animation component is covered in Part 2 of this article.
Step 1) Set up your Illustrator artboards.
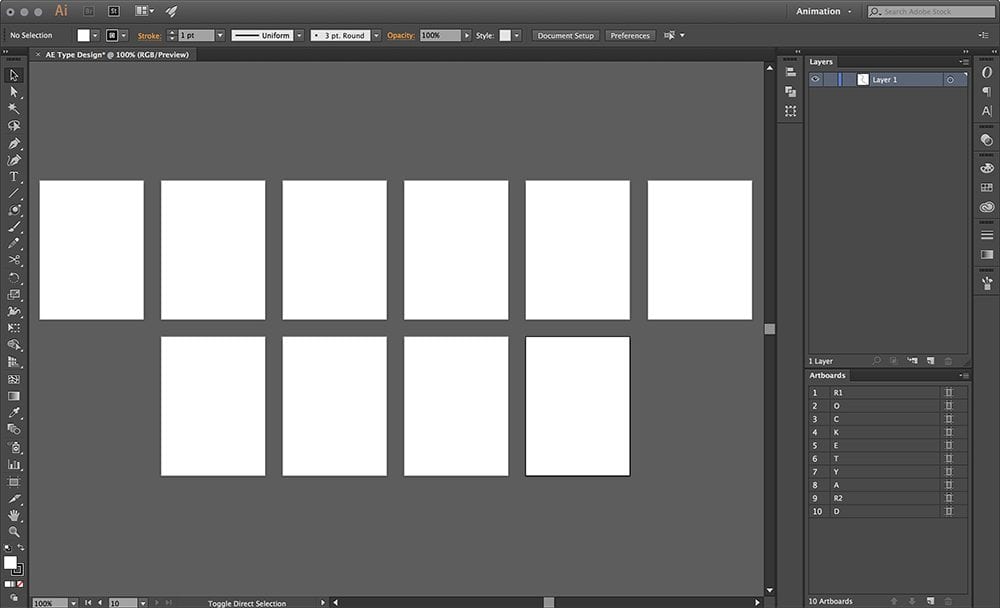
Think of artboards as “compartments” where you can isolate elements of your design —in this case, one artboard should be used for each letter or symbol you design. The artboards need to be reasonably compact so that several can fit within your After Effects composition. (For example, if you want the final output to be standard HD, the elements would all have to fit easily within a frame that is 1920×1080 — or 1080p.) Artboards can be set up when you create a new document, as shown below. You can also add them as you go, using the Artboard Tool and Artboards panel.
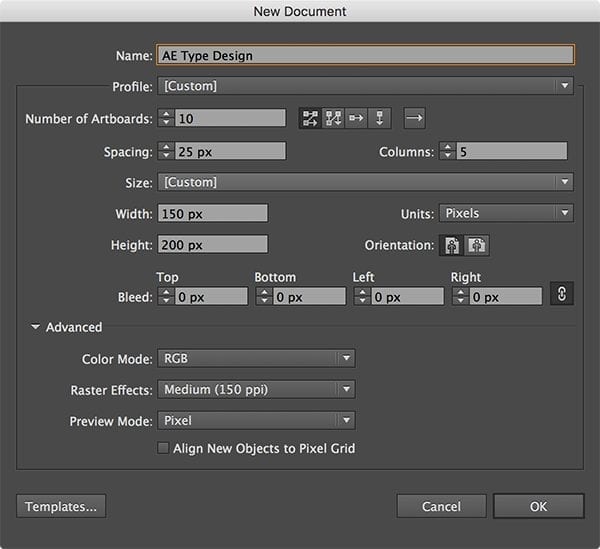
Once the new document opens, use the Artboard Tool (shortcut: Shift-O) to select individual artboards and re-arrange them as needed. It’s also a good idea to open the Artboards panel and double-click each artboard so you can rename it according to the letter or symbol that it will contain.
Step 2) Create one letter or original symbol on each artboard.
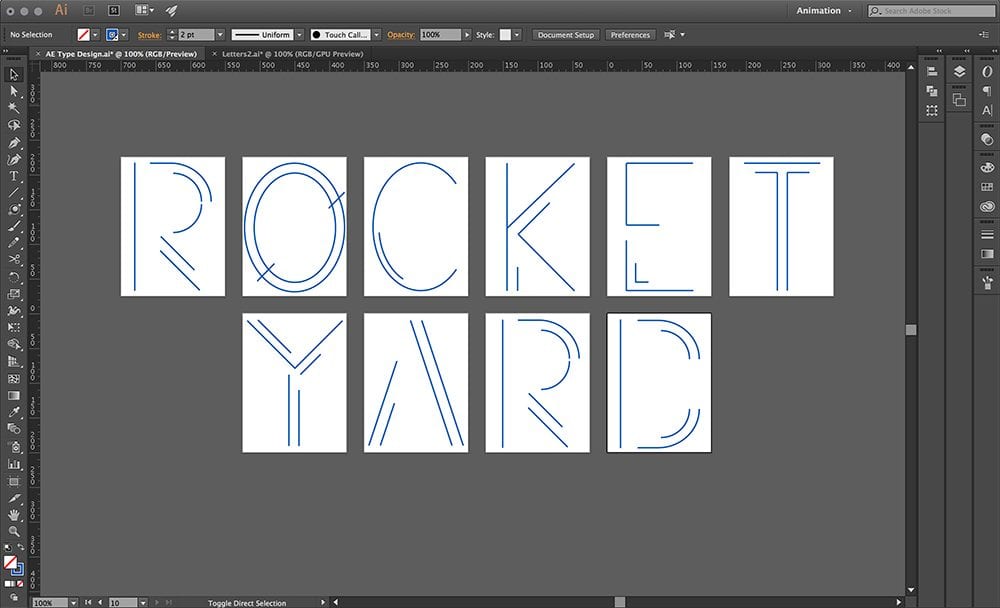
We used the Line Segment and Arc tools to draw out abstract, minimalist variants of the letters from of ‘Rocket Yard.’ You can also use the (Bezier) Pen Tool or the Pencil Tool, as well as the Polygon, Star, Ellipse, and both Rectangle tools for this type of project. When designing your letters or symbols, be sure that each one consists of individual paths and lines. If possible use stroke options instead of fill options to style your design — animating letters or symbols can be problematic if they contain fills.
If you need to combine two items — for example a line and an arc or two curved paths — so that they can be animated as one item, select them on the artboard, right-click and choose ‘Group.’ When you generate individual layers in the next step they will remain together, so that they eventually animate together. The screenshot below shows our letters with each artboard scaled to fit.
Warning: the animation technique we will use later is not compatible with styled Brush strokes or objects generated by the Symbol Sprayer Tool. To learn about all of the different tools available and how they work, please see the Illustrator Help files.
Step 3) Convert your lines and paths to layers.
After you’ve created your letters or symbols, notice that it results in a single, top-level Layer with dozens of lines and paths indented beneath it. It’s difficult to know which elements belong to which letters, but more important is the fact that if you want to animate the individual elements, each one needs to be a top-level layer in the Layers panel.
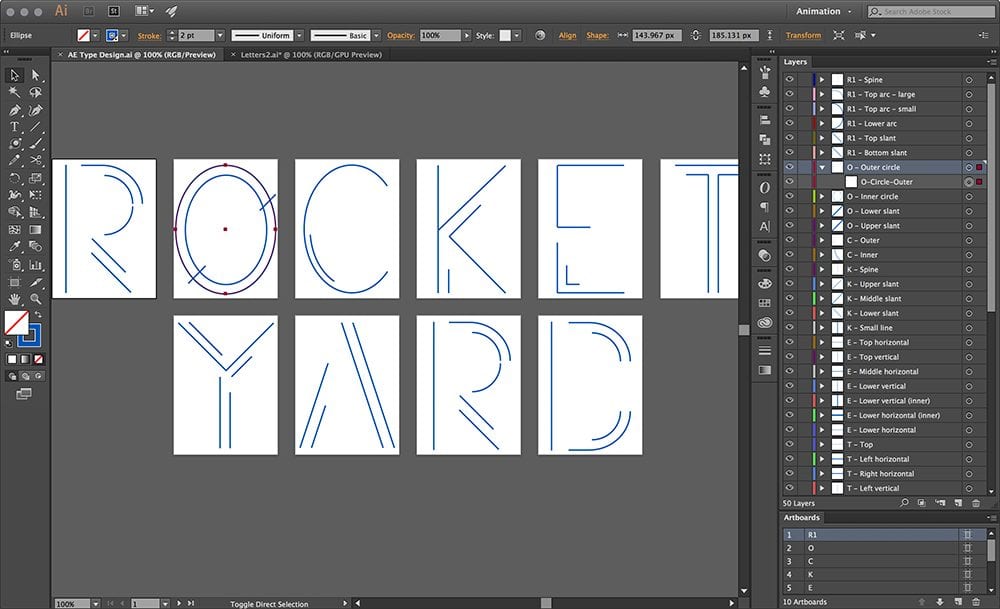
There are different ways to accomplish this including scripts you can download, but all methods require you to manually reorganize your design assets afterward. Here’s the method we used: 1) make sure none of the elements within your artboards are selected, then highlight the top layer that contains all the design elements, 2) open the Layer panel’s pop-up menu, and 3) Select ‘Release to Layers (Sequence).’
This generates individual, color-coded layers for each element. You can then drag these elements to the same level as the primary layer and order them as you see fit. Be sure to rename your layers by double-clicking on the original label in the Layers panel, so that you know which elements belong to which letters or symbols. The image below shows what our letters looked like after the individual elements had been released to layers, re-ordered, and renamed.
Step 4) Save each artboard as a file.
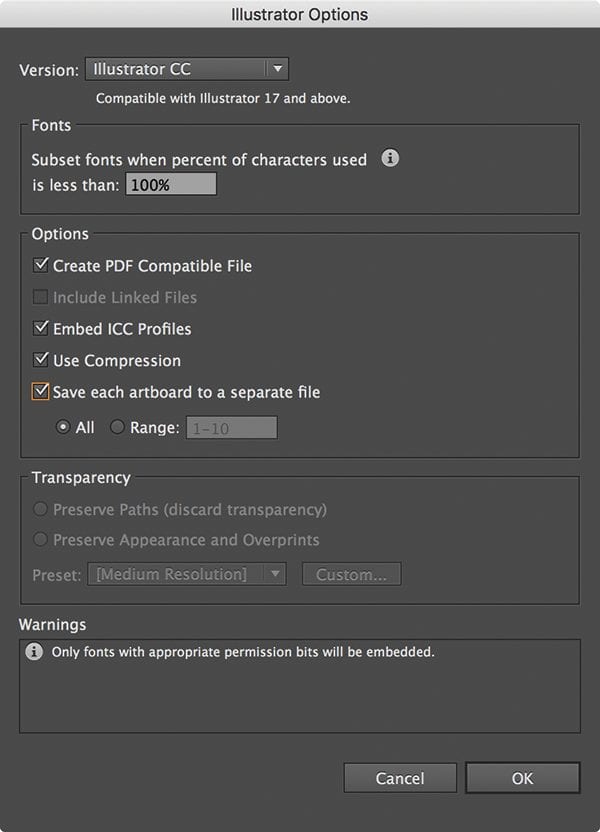
When we import the letters or symbols into After Effects, it is useful to set them up as separate compositions so they can be animated individually, before being grouped with the other letters or symbols. To do this we need to save each artboard as its own Illustrator file. Choose File > Save As, and make sure the format says ‘Adobe Illustrator (ai),’ then click Save. It is OK to replace the existing file if you want to use the same name.
Within the Save As options window that appears; choose ‘Save each artboard to a separate file’ and select ‘All’. When you’re ready, click OK. Illustrator will automatically name and number each file. For example:
Originalname.ai
Originalname-01.ai (Artboard 1)
Originalname-02.ai (Artboard 2)
etc
Wrap-up: in the next article we’ll jump into After Effects and show how to import and optimize your vector assets, and then use simple effects and keyframing techniques to create an animation that you can export to a QuickTime or other movie file.
Note: The Rocket Yard and MacSales.com are not able to offer technical support on any aspect of the Creative Cloud Suite or the tips provided in this series of articles. If you would like to learn more or need help, please visit Adobe’s support pages for additional tutorials, as well as support resources and official documentation.


