![]()
[Update 01/31/18: macOS Server Will Lose Many Services this Spring: Here Are Alternatives]
[Update] Find the entire macOS Server series here!
This is the fourth in an ongoing series on The Rocket Yard describing how to use Apple’s macOS Server to provide services to users both inside and outside of a local network.
Previous articles include:
- Part 1: Background and Setup
- Part 2: Serving a Small Business
- Part 3: Router Configuration and Open Directory
Configuring File Sharing
The first service that we’ll set up for our users is file sharing. This means that we’re going to allow users to connect to the server and have access to folders in which they can store or share files with others.
In this example, we’ll set up a shared folder for a hypothetical group of users at our company “Astounding Photos”. To keep this folder separate from the server’s hard drive, we’ll create it on a second drive called “Backup”. It’s an OWC miniStack with 1 TB of storage, although a real company would most likely use a drive or RAID array with much more storage to share among multiple users.
We’ll create a folder in the Finder on our Backup drive and call it “Photo Tools”.
Next, we go to the running Server app and select File Sharing from Services in the sidebar. To add a shared folder, we click the now-familiar plus-sign button ( + ) below the Shared Folders section.
The usual Apple Finder “Choose” dialog appears, and from this we’ll select the folder named “Photo Tools” that’s on our Backup drive. Click the Choose button to denote the location of the folder. You don’t have to limit yourself to a folder — that “folder” can actually be a complete storage volume. However, for security it’s best to keep users — especially those coming in from outside of your network — limited to one specific folder rather than an entire hard drive or RAID array.
Restricting Access To The Shared Folder
Now it’s time to restrict access to the Photo Tools folder. We only want the admin and our Photographers group (created last week) to have access. To do this, click the Photo Tools shared folder to select it, then click the pencil button below to edit the folder permissions (see screenshot below).
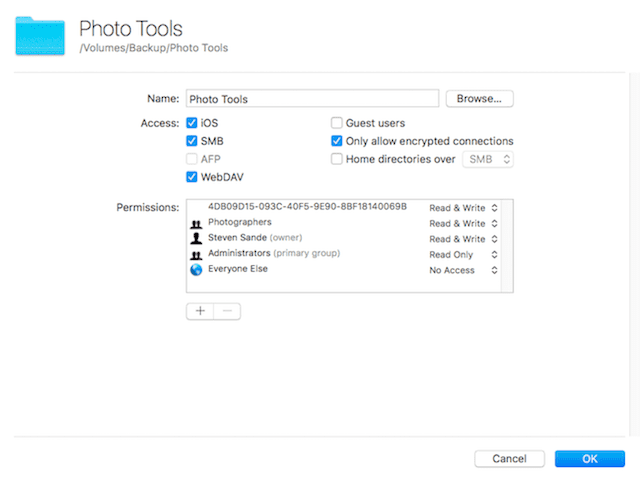
Here we can change the name and location of the folder, set up the type of access (we’ve selected iOS, WebDAV and SMB, and are only allowing encrypted connections). It’s also possible to add guest users, although that’s not a good way to “lock down” a server.
Next, we want to give the Photographers group created earlier full read/write access to the folder. To do this, click the plus button and type “Photographers” into the field that appears. By default, the Photographers group is provided with read/write access. If you only want the Photographers to be able to read items but not make any changes to anything in the Photo Tools folder, select Read Only from the picker at the right side.
Once all of the permissions for this folder have been set up, click the OK button to apply those permissions to the folder. Note that it may take a minute or so for this to occur depending on the speed of your server.
Enabling File Sharing
The hard work is done. Now it’s time to actually turn on File Sharing and allow users to gain access to this folder. All that’s required is clicking the button on the right side of the File Sharing pane of the Server app.
You’ll be asked if you wish to extend the service to the Internet. In our examples, we’re assuming that we want access from anywhere, so be sure to say “Yes”. Note that in this case, since I’m using an AirPort Extreme and allowing the Server app to configure it for services, it will open up the proper TCP/IP and UDP ports for file sharing to occur.
Once File Sharing is enabled, the “On/Off” button turns green, and a small green dot appears to the left of the File Sharing service in the Server app sidebar.
Connecting to the Server from a Mac
We’re sharing a folder (Photo Tools) with our Photographers group. That means that if we’re members of that group, we’ll have access from other Macs on the network.
From another Mac on this network, we see the device name “Astounding Photos Server” under Shared in the Finder sidebar. Clicking it will show a blank screen until a user connects to the server. In this case, I’ve added myself to the Photographers group, and I want to gain access to the Photo Tools folder from another Mac (see screenshot below).
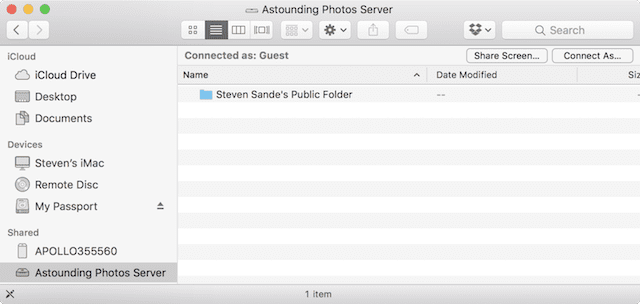
Clicking the Connect As button at the top right of the Finder window, I’ll enter my user name and password for the account, then click Connect. Sure enough, my Mac authenticates with the server, then displays the three folders that I have access to: One called Photo Tools, “Steven Sande’s Public Folder” and another folder called “stevensande”. The “stevensande” folder is a private folder in which I can store documents, while the public folder is where I can put documents that anyone can have access to. Finally, that Photo Tools folder is shared between me and the other photographers (see screenshot below):

It’s good practice to drop some files into your various folders to make sure that permissions are set up properly. If permissions are set up as “read only” for a folder, you’ll only be able to read and copy items that are stored in that folder and will not be able to change files nor add new ones. Full “read/write” access will provide the ability to add, delete and edit files.
Connecting to the Server from an iOS device
During setup of the shared folder, we checked the box marked “iOS” to allow iOS devices to have full access to the Photo Tools folder. Now we’ll connect to the server from an iPhone.
You may be thinking “Is there a server access app I can buy?” No, it’s all built into iOS! The following instructions show how to do this from iOS 10.3.
1 – Launch Settings
2 – Scroll down to “Mail” and tap it to open
3 – Tap Accounts
4 – Tap Add Account
5 – Tap “Other” at the bottom of the list of account types
6 – Tap Add macOS Server Account
Provided that your server is properly “advertising” itself on the network, you should see it appear in the list of servers:
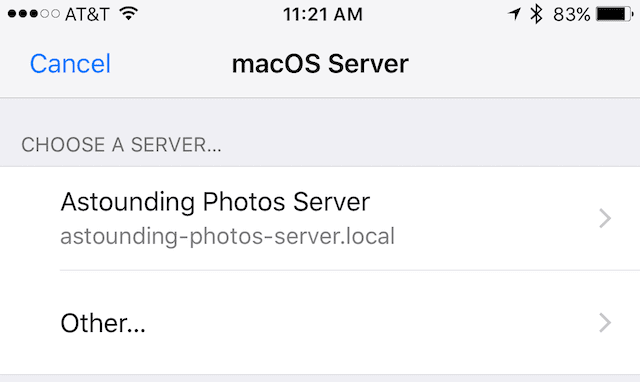
Next, tap on the name of the server, enter the user name and password for your server account, then tap Next. If your certificates are in order, the server will be added to your device. If not, you may see a “Cannot Verify Server Identity” dialog — just tap “Continue” to log in. One other note: if you’re attempting a connection from outside your network, you won’t see the server listed. In that case, you’ll need to enter the host name (i.e., “server.astoundingphotos.com”) as well as the user name, password and description.
In our example, we only have one service currently running on the server — File Sharing. It appears on the list of services (see screenshot below), and tapping on the button to the right of the File Sharing name enables that service.
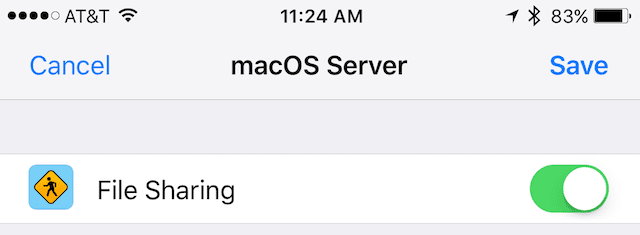
Now tap Save and the server and service appear on the list of accounts. How can we determine if File Sharing is really working? Try using an app that uses cloud services, like Pages. A “Locations” button appears in the upper left of the documents screen. Tap on it, and a list of available “drives” shows up including WebDAV, iCloud Drive, and OS X Server (see image below).
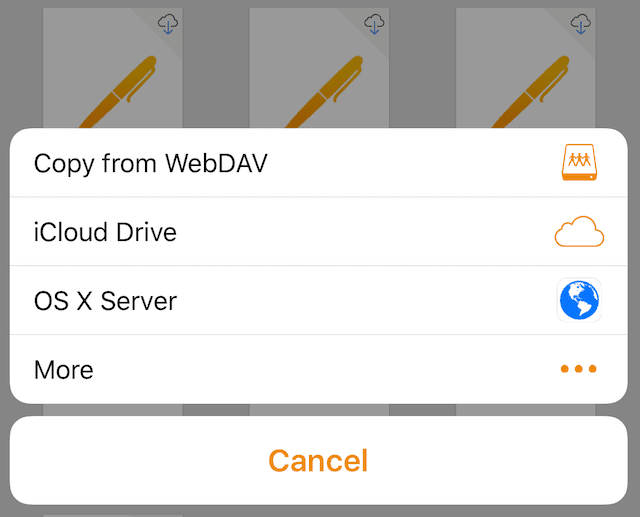
Tap on the OS X Server button to begin storing or retrieving documents from the available folders on the server (see screenshot below):
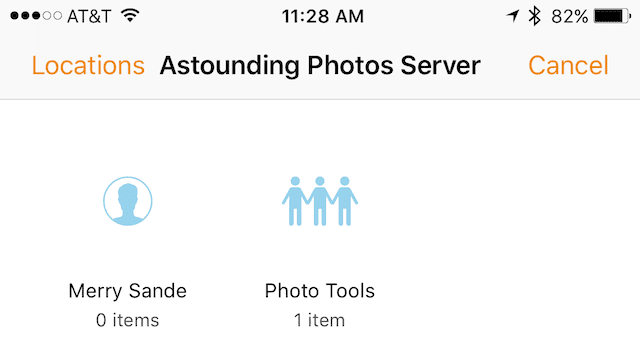
In our example, two folders are available for our user — the Photo Tools folder we’ve made available for members of the Photographers group and a personal folder.
Adding A Wiki
The next service we’ll set up is a Wiki — if you’re familiar with Wikipedia you’ll know that these are editable online documents that can be used to provide a sharable store of information for a company. For example, many small to medium size businesses provide Wikis for employees with information on benefits, company regulations, and so on.
Adding a Wiki is quite simple. In the macOS Server sidebar, click on Wiki under Services. Next, click the button in the upper right corner to enable the service (see screenshot below; the button turns green to indicate that it is enabled).

You’ll be asked if you wish to allow access to Websites from the Internet — click the Allow button.
By default, all users can create Wikis. To limit this to those users who are in a particular permissions group, just click the Edit Permissions button and change the setting from “all users” to “only some users”. For this example, I let the Administrators and Photographers groups have access.
Now creating a Wiki or one of the other online services that’s available to users is quite easy. Click the button marked “Open in Safari” from the Server dashboard, or point a web browser on another machine to the address of your server, and you’ll see this default screen:
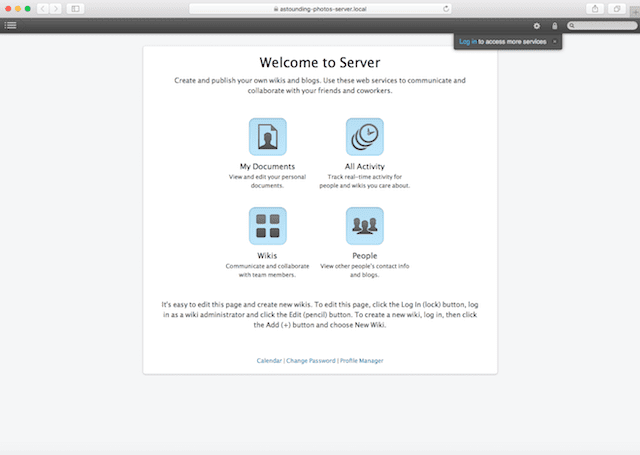
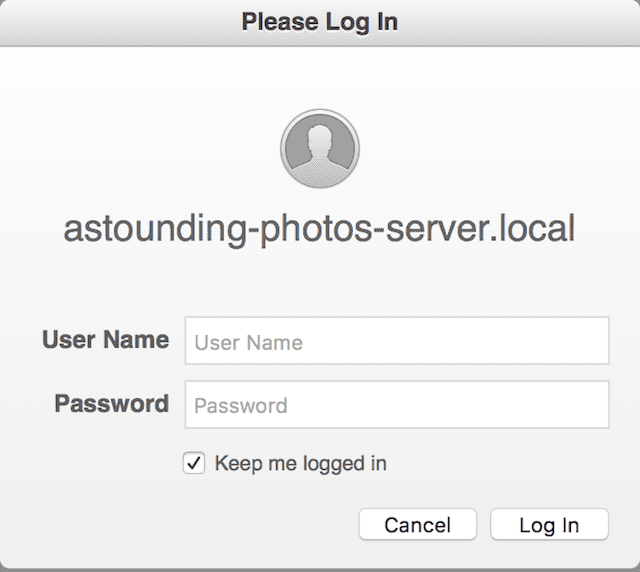
The screenshot shows how the Wiki can be used. As noted on that page “It’s easy to edit this page and create new wikis. To edit this page, click the Log In (lock) button, log in as a wiki administrator and click the Edit (pencil) button. To create a new wiki, log in, then click the Add (+) button and choose New Wiki.” Here’s the standard login dialog:
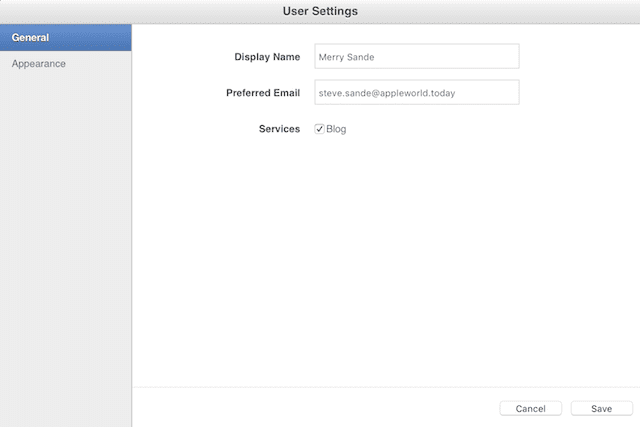
Once the user is logged in, one of the first things they should do to identify themselves to others in the group is change their user settings. Click the gear icon at the top of the page, and two settings panes are available – General and Appearance. General has a space for Display Name — for example, a person may wish to have a nickname shown on the Wiki instead of his or her actual name. There’s also a slot for a preferred email address, and then a checkbox for “blog”. That’s right — there’s a blogging tool built in, so users on your server can make posts about what they’re doing. When this is checked, a third user setting appears named Blog Permissions (see screenshot below):
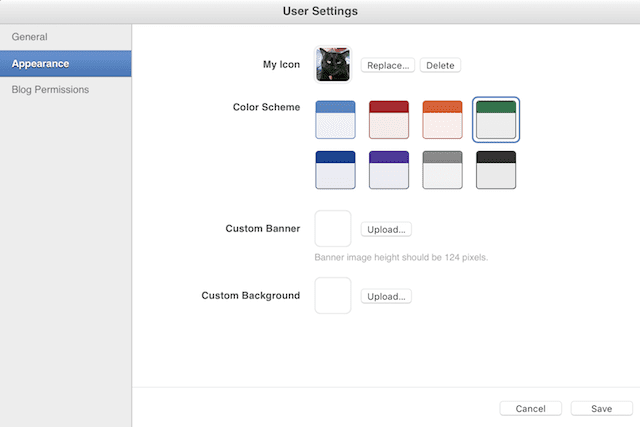
The second settings pane is marked Appearance, and provides a way for each user to make their page appear different to others. They can upload a photo as an icon, change the color scheme of the page to one of eight choices, upload a custom banner for their page, or even have a custom page background. In this example, I’ve uploaded a photo of the user (yes, it is a cat…) and changed the color scheme to green. Click the Save button to save your changes (see screenshot below):
Now the user can begin to save documents, write blog entries, and even keep his or her personal information sheet up to date. Opening the document with the name of the user, an online editor appears and can be used to write text, add code, or perform any number of other tasks. These documents are also editable in Pages, Numbers and Keynote.
When many people in a workgroup have edited their personal pages and begin to keep blog entries, selecting “All People” from the menu (accessible in the upper left corner of the web page) displays a directory of server users who have logged in and the time and date of their most recent activity (see screenshot below). Clicking on each name displays the user’s edited page describing them.

We won’t get into too much detail about how to use the Wiki pages, as complete instructions are provided when a new user first logs in. Just let it suffice to know that users can create and edit documents, upload documents, create blog posts, and so on. It’s a wonderful way to build an intranet for your small business, with information about each employee and a way to share documents easily with others.
In the next installment of this series, we’ll set up our server with several more services: Mail and Calendars, plus a few “bonus extra” services.



I know this article is aimed towards servers, but can non-server shared folders be accessed this way by IOS on a local network? Limited to server status only?
Well, the Server product is available from the Apple Store for $20, so it’s not a big deal to buy and install on a Mac.
If I check “Create personal folders when users connect on iOS” under Server.app -> File Sharing, where are those folders created?
Hi, David —
Thanks for the question! The personal folders that are being created for iOS users that connect are located under /Library/Server/ServerDocs/Personal Folders/**** — where **** is the user name.
Steve
OK, thanks. (I’m not sure where I expected them, but that’s not where I would have guessed :-)