Disk Utility![]() , the macOS Swiss Army knife for working with disks and storage volumes, may have a few blades missing, especially when it comes to working with unformatted drives and unused space on a disk or storage volume.
, the macOS Swiss Army knife for working with disks and storage volumes, may have a few blades missing, especially when it comes to working with unformatted drives and unused space on a disk or storage volume.
In versions of Disk Utility that came with OS X Yosemite and earlier, you could enable hidden debug modes in the Disk Utility app that allowed you to see and interact with all the space on a disk, including hidden elements, such as the Recovery volume or the secret EFI partitions.
In this Rocket Yard article, we’re going to look at how to enable Disk Utility to view and work with the types of disk spaces you’re likely to encounter, including:
- Unformatted disks
- Empty disk spaces
- Containers and volumes
We’ll also demonstrate how to use Terminal to access the remaining hidden disk structures that Disk Utility can’t view directly, including:
- Recovery volumes
- EFI volumes
- Preboot and Boot volumes
Using Disk Utility to Access All Devices
Disk Utility is configured by default to only show formatted volumes. This makes using Disk Utility with existing volumes an easy task since there are only a few, and sometimes only one, volumes displayed, cutting down on what could be an overwhelming list of disks, containers, volumes, RAID slices, etc.
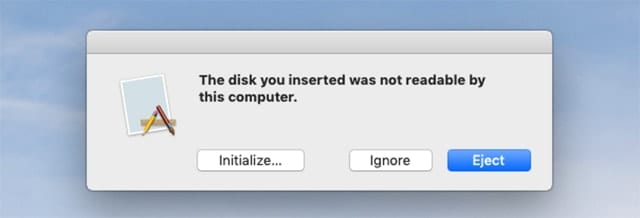
The disadvantage, however, is that it can make it difficult to work with new unformatted disks you may be using for the first time. This includes working with unformatted drives as well as unformatted USB flash drives.
Tip: When we speak of unformatted drives, we’re including any disk that uses a format that your Mac can’t natively work with.
Disk Utility lets you pick which display mode to work in: Volumes only, All Devices, or only a selected drive. You can switch between them at any time, and Disk Utility will update the display immediately; no need to close and reopen the Disk Utility app or restart your Mac.
Show Only Volumes
This is the Disk Utility default and will only display properly formatted volumes. To select this option:
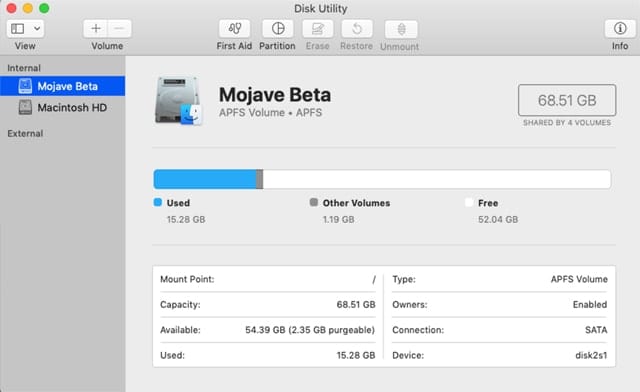
From Disk Utility’s toolbar, click the View button and select Show Only Volumes from the dropdown menu. You can also select Show Only Volumes from Disk Utility’s View menu.
In the Disk Utility sidebar, you’ll see the list of items change to only show individual volumes. The listed volumes should correspond to the local volumes that show up on your Mac’s desktop, or in the Finder sidebar.
Show All Devices
This setting will display all storage devices connected directly to your Mac. In addition to each device being displayed, a hierarchical listing will show how each device is organized, i.e., how many containers, partitions, or volumes each device contains. Absent from the hierarchical view will be any of the items Apple has decided to hide from the end user, such as EFI volumes and Recovery volumes.
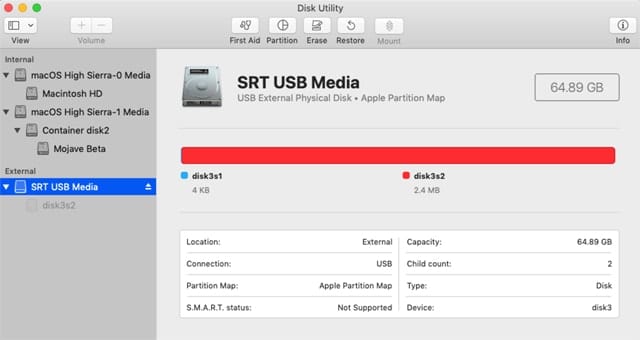
From the Disk Utility toolbar, click the View button, and then select the Show All Devices item from the dropdown menu. You can also select Show All Devices from Disk Utility’s View menu.
The Sidebar will change to display all locally connected devices, presented in a hierarchical view starting with the physical device, than any containers and volumes the device may have been partitioned into.
Hide the Sidebar
For the ultimate in simplicity, you can choose to hide the sidebar and remove any listings of devices or volumes from view.
From the Disk Utility toolbar, click the View button and select the Hide Sidebar item in the dropdown menu. You can also select Hide Sidebar from Disk Utility’s View menu.
The sidebar will close, and the last selected item in the sidebar will become the only item listed in the Disk Utility window.
Initializing or Formatting a New Device
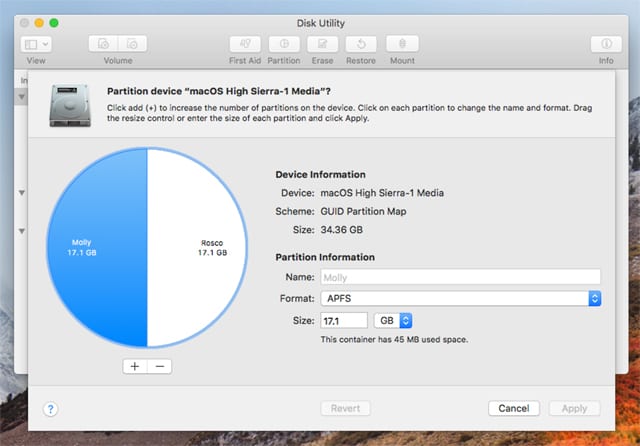
When you need to format a new device, or divide a device into containers or volumes, it’s best to set the View to Show All Devices. This will allow you to select the correct device from the sidebar list and perform the necessary tasks.
You can find out more about formatting and partitioning a device in the following Rocket Yard Guides:
- Partition Drives & Create APFS ‘Containers’ for Space Sharing with Disk Utility
- How to use macOS Sierra Disk Utility to Partition, Erase Drives
Erasing or Repairing a Volume
If all you need to do is erase an existing volume or attempt to repair a volume, you can use either the Show Only Volumes or Show All Devices view. If you need instructions for repairing a volume, check out the following Rocket Yard Guide:
Accessing Devices and Volumes That Don’t Show Up in Disk Utility
Even with the various Disk Utility view options we discussed above, there can still be times when a device, container, or volume fails to show up. If this should happen to you, you can use the Terminal app to see if your Mac can see the storage device.
Make sure the device is physically connected to your Mac and powered on.
Launch Terminal, located at /Applications/Utilities.
At the Terminal prompt, enter the following:
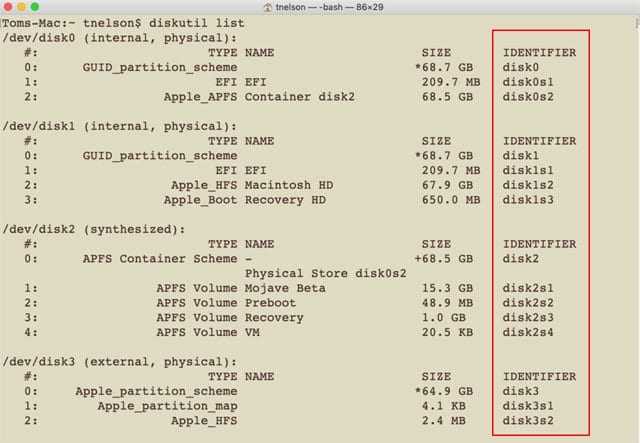
diskutil list
Terminal will display a list of all storage devices currently connected directly to your Mac. Each device Terminal finds will be listed by the device identifier; usually disk0, disk1, etc. You’ll also see how each device is partitioned into containers and volumes.
Some of the hidden volumes you’ll see in Terminal that don’t show up in Disk Utility include the EFI volume and the Recovery volume. In the case of APFS formatted devices, you may also see a Preboot volume and a VM volume.
We don’t generally recommend attempting to manipulate any of the hidden volumes. However, if you have a volume that is failing to show up on the desktop, in the Finder, or in Disk Utility, you can try using Terminal’s diskutil mount command to make the volume appear.
diskutil mount /dev/disk#
Where disk# is the disk identifier of the volume you discovered using the diskutil list command. As an example, let’s mount the Recovery volume, which in this example is disk1s3. We would enter the following at the Terminal prompt:
diskutil mount /dev/disk1s3
Press enter or return.
Disk Utility should respond by telling us that Volume Recovery HD on /dev/disk1s3 mounted.

Mounting APFS Volumes
The process for mounting APFS volumes is pretty much the same, with just one additional step. In some instances, the mounted APFS volume won’t appear on your desktop or in the Finder sidebar. However, the APFS volume was successfully mounted; you just need to view the mount point directly from within the Finder. The default mount point is the directory /Volumes. You can view this directory by doing the following:
Bring up a Finder window, and then select Go to Folder from the Go menu.
In the Go to Folder sheet that drops down, enter /Volumes, then click the Go button.
The Volumes folder that will be displayed will include the APFS volume you mounted.
Why Mount Volumes with Terminal
The primary reason for using Terminal to examine storage devices connected to your Mac, as well as to mount volumes that for some reason failed to mount automatically, is to try to correct issues you may be having with devices or volumes. Once mounted, you can use Disk Utility’s repair tools, or if needed, its erase and partition tools.
The exception is those volumes Apple has marked as hidden. Even when mounted, they will not appear in Disk Utility, though some third-party disk apps can work with them.
The diskutil command contains many additional options that can allow you to work directly with any connected storage device, letting you mount, unmount, format, partition, and work with APFS containers and volumes. Attempting to unravel all of the capabilities of diskutil is beyond the scope of this article, however, you can learn more by entering the following at the Terminal prompt:
man diskutil
Then press enter or return.
A full description of the diskutil command will be displayed, including descriptions of all the options, and examples of how some of the options work.
You can use the space bar to move forward a page, or the B key to move backwards, a page at a time. The up or down arrow keys will move you line by line.
Press the Q key to quit the man page view and return to the normal Terminal display.
We highly recommend that if you intend to use diskutil commands to format, erase, repair, partition, or manipulate a storage device in any way, beyond just viewing a list of devices, or mounting a wayward volume, that you have a current backup of all storage devices as well as a good understanding of the diskutil options you are using. A wayward diskutil command line entry can result in a loss of data that may not be easy to recover from.


Thank you
Thank you! I’ve been searching for a missing partition on a 1TB hard drive for hours before you gave me the idea to show every volume in disk utility.
Hey! In the Disk Utilities I encountered a problem where the MacOS partition went “Unformatted”… And whenever I try to access the MacOS it gives me a white stop sign… So I have installed a new mac on an another partition but I still can’t access the old MacOS partition. Are my Data and Work still there? If yes how to get it out? Thanks in Advance.
Hi.
I can’t view a partition on my drive with Disk Utility. I have installed Linux distro on my Mac in dual-boot config, but now I am looking to remove it as I am in need of that spare disk space. How do I format the partition and use it on MacOS again? I run OS X 10.13.6 (High Sierra)?
Thanks!
Very generally speaking, it sounds like the partition you can’t see is using one of the common format used with Linux such as ext, ReiserFS, jfs. Most of these common Linux formats are not visible with Disk Utility.
You may be able to remove the partition using Terminals diskutil command or by using a Linux live distribution on a flash drive to reformat the partition to a format the Mac can work with such as MS-DOS or exFat.
Tom
??? EFI ???
expand your acryonyms
Extensible Firmware Interface. It has do with firmware versions and security. But everyone calls it EFI.
It should be noted in the article’s initialization/formatting section that Disk Utility will NOT let you partition a drive until you format it at least once.
An uninitialized drive must be formatted first before you even get access to the partition option. And even then, you have to format, then click on the drive *volume* in the sidebar, and *then* the drive device itself to access partitioning features.
Also, when partitioning, the RIGHT side is partition 0 (the first partition on the device). This is important if you’re multibooting and installing Windows, which expects to be on the first partition. OS X doesn’t care, but other OSes do.
You don’t specify which version of macOS you are working with in this article. I’m currently running 10.12.6 Sierra and there is no View button in the Disk Utility menu bar. However, I currently see a hierarchical view in the Sidebar.
The various view options for Disk Utility was added with macOS High Sierra. I think it was done to hide some of the complexity of the then-new Apple File System (APFS).
Earlier versions of Disk Utility have the single hierarchical view, while versions that were included with OS X Yosemite and earlier could have all of the hidden volumes, partitions, and unformatted space made visible using a Terminal command to enable a hidden debug menu within Disk Utility”
defaults write com.apple.DiskUtility DUDebugMenuEnabled 1
You could turn off the debug menu with the following Terminal command:
defaults write com.apple.DiskUtility DUDebugMenuEnabled 0
Remember the debug menu is only for Mac’s running OS X Yosemite or earlier.
Tom N.
Thanks. I thought that might be the case, but it pays to be sure. Apple keeps changing this stuff, unfortunately. They seem to have a policy that if it ain’t broke, fix it anyway.