![]() Backing up your Mac can be a very easy process. Pick a drive to use for your backups, turn on Time Machine, and you have a basic backup system in place with very little effort. Time Machine has a lot going for it, including the ability to recover older versions of a file from the backup device. That can be invaluable when you need to know what was in a document a few versions back, or even a few years back.
Backing up your Mac can be a very easy process. Pick a drive to use for your backups, turn on Time Machine, and you have a basic backup system in place with very little effort. Time Machine has a lot going for it, including the ability to recover older versions of a file from the backup device. That can be invaluable when you need to know what was in a document a few versions back, or even a few years back.
But there are a few things Time Machine doesn’t do well, such as restoring all of the data on a failing startup drive. The process of recovering the information from a Time Machine drive can be long and arduous, and having to wait a few hours to get back to work can really throw a monkey wrench into your schedule.
That’s one of the reasons I recommend using a second backup strategy, based around cloning the data on your startup drive. Cloning can let you get back up and running in the time it takes to restart your Mac. It lets you continue to work while you order a replacement storage device for the volume that failed. It can also take some of the tension out of what can be a very stressful time.
Using Time Machine and a cloned startup drive is such a powerful backup system that it’s the basis for all of the backups in our home and office environments.
Which brings us to this week’s Rocket Yard guide: Use Multi-Bay Enclosures for Better Backups
Using External Enclosures with Two or More Bays
Let me be clear: a multi-drive backup system doesn’t have to be built from multi-bay enclosures. You can successfully make use of multiple single drive enclosures and achieve equivalent results. But using multi-bay enclosures has a few advantages:
- Fewer power bricks and cords to clutter up your work area.
- A single connection to your Mac leaves more ports available for other uses.
- Available with 2, 4, or 6 drive bays, or even more.
- Many multi-bay enclosures support various RAID types.
- Can be used for multiple tasks, such as backups, media libraries, bulk storage, and media editing.
External Enclosures to Consider
With so many multi-bay drive enclosures available, you may want to look at the following as good examples of enclosures to consider for this backup system.
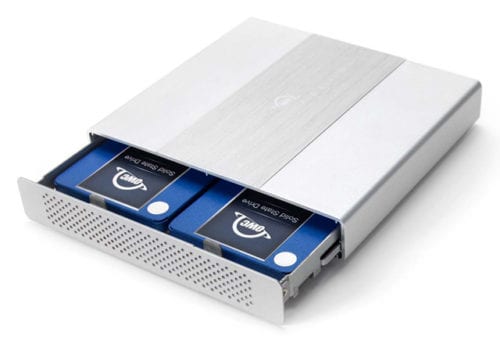
OWC Mercury Elite Pro Dual Mini: This dual-bay enclosure is designed to accept 2.5-inch drives, the same size used for most laptop drives as well as SATA-based SSDs. It makes use of hardware-based RAID that supports RAID 0, 1, SPAN, and Independent drive modes. The enclosure makes use of USB-C 3.1 Gen 2, providing speeds up to 10 Gb/s. Its small size and use of USB 3.1 Gen 2 connections make it a great choice for backups, as well as image or music libraries.
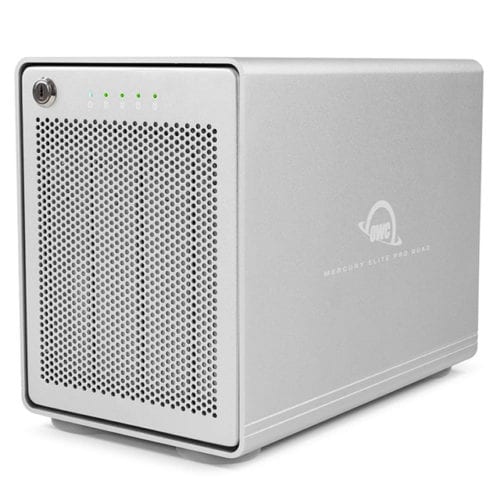
OWC Mercury Elite Pro Quad: This quad-bay enclosure works with both 3.5-inch and 2.5-inch SATA-based drives, with no adapters needed. It comes with SoftRAID XT Lite, supporting RAID 0, 1, JBOD. This enclosure uses USB-C 3.1 Gen 2, providing speeds up to 10Gb/s. This enclosure is also available with an advanced version of SoftRAID that adds support for RAID 4, 5, and RAID 1+0.
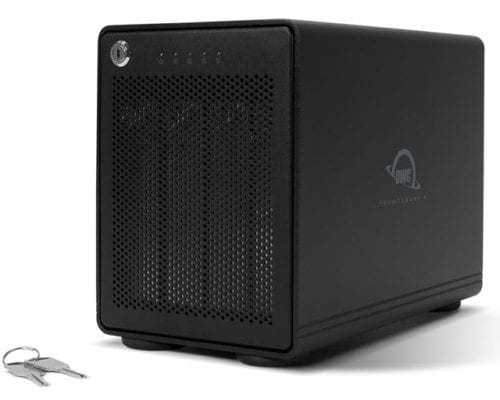
OWC ThunderBay 4: A quad-bay enclosure that supports 3.5-inch or 2.5-inch drives with no adapters needed. It makes use of SoftRAID XT Lite, and supports RAID 0, 1, and JBOD. This quad enclosure makes use of Thunderbolt 3 to provide the highest sustained performance of our suggested enclosures for backup.
- Other OWC enclosures to consider
- Tech 101: Choosing an External Enclosure to Meet Your Storage Needs
Types of Drives to Install in an Enclosure
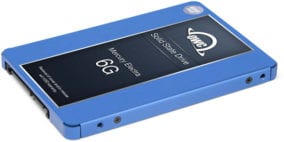
All of our suggested enclosures will accept standard rotational hard drives or SATA-based SSDs. If you’ll be using this setup only for backup, hard drives may be an economical choice, providing the largest amount of storage space at a low price. If you’ll be using these enclosures for other types of workflow, the faster SSDs may be a better choice. Don’t forget you may also mix and match storage types; a slower hard drive with a large amount of space for your Time Machine drive, and an SSD for cloning your startup drive, allowing for better performance should you need to boot from the clone.
 Once you’ve decided on the enclosure and the type of drives, it’s time to set up your backup system.
Tip: Some multi-bay enclosures only allow booting from specific bays. Check the manual for your enclosure and use the bootable bay for the drive that will be housing the clone.
Formatting Your Backup Drives
You can use Disk Utility, a handy app that comes with your Mac, for formatting your new drives. Formatting the drives isn’t difficult, but there are a couple of gotchas to be aware of:
Time Machine: At the time of this writing, Time Machine can only use HFS+ formatted disks as the drives to be used for the backups. Time Machine can back up volumes that use HFS+ or APFS, but the destination drive must use HFS+. This may change in the future, but for now, make sure you choose Mac OS Extended (Journaled) as the format type in Disk Utility.
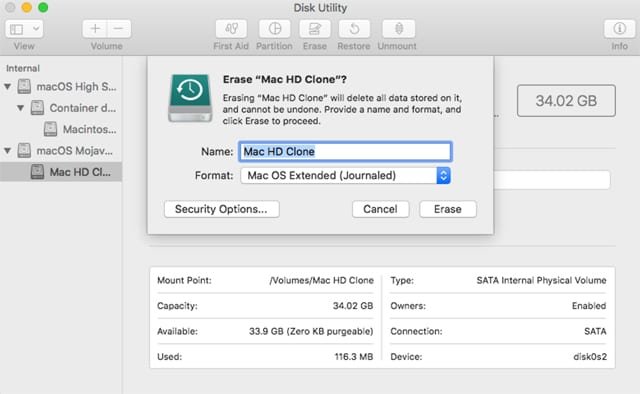
You may find Partition Drives & Create APFS ‘Containers’ for Space Sharing with Disk Utility helpful for formatting a drive with APFS.
Setting Up Time Machine
Time Machine’s setup process hasn’t changed too much since it was introduced. You’ll find easy-to-follow steps in the Rocket Yard guide: Time Machine: What It Is, How It Works, How to Use It with Your Mac.
Additional Time Machine guides you may find interesting:
- Backup Month: Time Machine Local Snapshots
- Tech 101: How to Schedule Time Machine Backups
- How to Create a Robust Backup System in Three Phases
Set Up Carbon Copy Cloner
There are quite a few options for creating a clone of a startup drive; for this guide, we’re going to use Carbon Copy Cloner. Don’t worry if you’ve decided to use a different app to create your clones; just make sure the app allows you to use a schedule to automate the cloning process. You don’t want to find yourself in a situation where you need to boot from the clone only to discover that the last time you updated your clone was a few months ago.
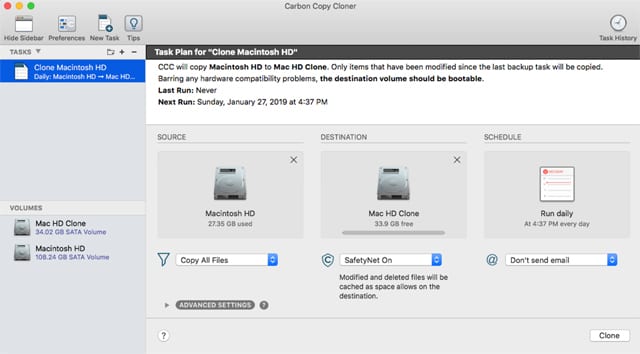
These instructions are for version 5.x of Carbon Copy Cloner; other versions may be slightly different. If you run into a problem, Bombich Software, makers of Carbon Copy Cloner, has extensive FAQs, manuals, and support on their website.
With the new external multi-bay enclosure powered on, and the drives mounted on the desktop:
Launch Carbon Copy Cloner, usually found in the /Applications folder.
From the toolbar, click the Show Sidebar button.
The Sidebar will be displayed, showing all of the tasks that have been created.
If this is your first time using Carbon Copy Cloner, a single task will be listed. You can click on the task name to change the default name to something more descriptive.
In the main window, click within the SOURCE area.
A list of mounted drives will be displayed; select the drive that will be the source for the cloning.
Click the DESTINATION area.
A list of mounted drives that you can use as the destination for the clone will be displayed. Make your selection.
Click in the SCHEDULE area.
A sheet with a dropdown menu will appear; use the menu to select one of the scheduling options. For general usage, cloning as often as daily or no longer than weekly, may be an appropriate selection. For this example, select Daily.
Set the Repeat every X day to the number of days between each cloning. Setting the value to 1 will update the clone every day. Setting the value to 2 updates the clone every second day.
Set the start date and time. This will dictate when the first clone is created, and the time of day when each additional cloning process is run.
There are additional scheduling options to consider; make your selections and click Done.
Click the Save button when you’re satisfied with the settings you’ve chosen for the cloning task.
If this is first time you’ve used Carbon Copy Cloner, you may be asked to install a helper app along with granting Carbon Copy Cloner full disk access (this depends on the version of the Mac OS you’re using). Grant the needed permissions to continue.
Quit and then relaunch Carbon Copy Cloner to ensure it has full access to the startup drive.
Make sure the task you created is selected in Carbon Copy Cloner’s sidebar, and then click the Clone button to start the first clone process.
After the clone is completed, you may close Carbon Copy Cloner; any scheduled cloning will occur as configured.
Don’t Forget to Test
Now that you have your dual backup (Time Machine & Cloning) in place, don’t forget to test the backups to make sure they’re working correctly. Use Time Machine and make sure you can restore a file from the backup. Try restarting your Mac from the cloned drive to make sure a bootable backup was created.
With everything working, the only question left is, “What else can I use multi-bay enclosures for?”
Let us know how you’re using your external drives by posting in the comments, below.


Time Machine volumes can be APFS now.
We have always used a clone but as things are moving ahead so quickly we can always improve our setup its good to be able to get some decent information to inform us as to what is really going on many Thanks.
Which enclosure is best used to repurpose NAS drives (removed from Apple Time Capsule or purchased separately) and placed on my home network through an ethernet connection? I would like to place this storage device in a secure location, away from my office, and then swap out the NAS drives to off-site storage on a periodic basis. Advice?
Yes but! If you put both ccc and timemachine backups in drives in one enclosure you have created a single point of failure. Also, quite often the enclosure will not reboot after a powercut so that gives you another weakness