


Intermittently, you may need to do a factory reset of your iPhone in case it is glitching or experiencing technical errors. Doing so may help with troubleshooting some issues.
A factory reset is also necessary if you plan to sell your iPhone and want to wipe all personal data from the device. When you reset your iPhone, it will be an empty slate—void of contacts, downloaded applications, pictures, playlists, password memory, or anything else. This is a hard reset option that returns the iPhone to its initial configuration, and restores it to original factory settings.
Therefore, it is necessary to be mindful of the factory reset process before you commence so as to prevent the unfortunate loss of important data.
How to factory reset an iPhone
A factory reset removes everything on the iPhone, and deletes all stored data. Before you reset your iPhone, it is important to follow the steps described below.
Backup your iPhone
If you plan on factory-resetting your iPhone, you will need to create a backup of the data stored on the device in case you need to access it at some point in the future. When you purchase your next phone or iPhone, you can restore your data by transferring it from the saved backup.
The easiest method of backing up data on your iPhone is by using iCloud.
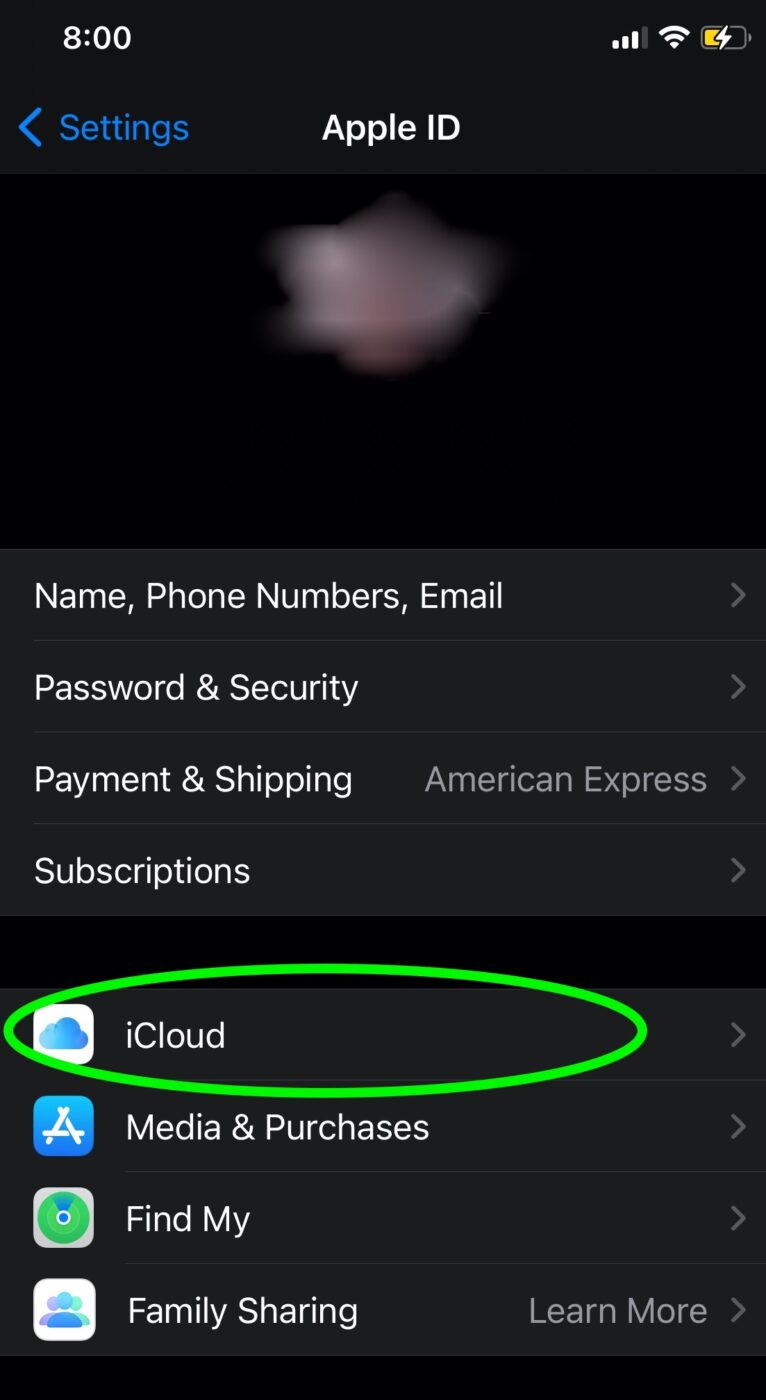
1. To access iCloud, open the Settings app and click on your Apple ID right at the top of the page.
2. When your Apple ID page opens up, click on the iCloud tab.
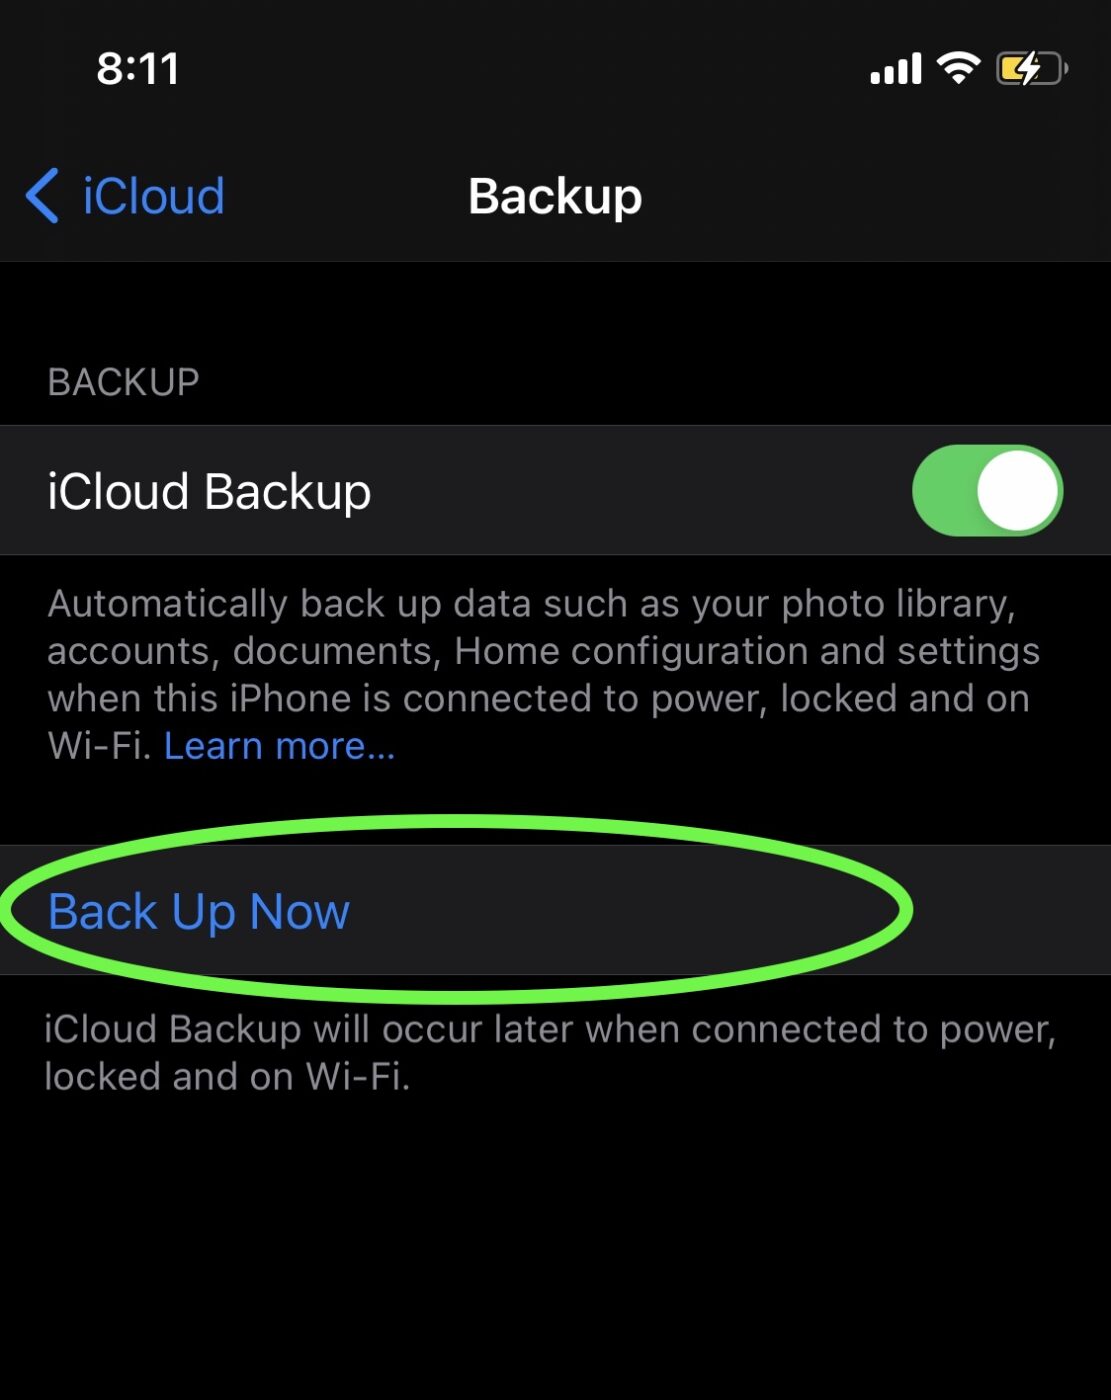
3. From there, scroll down and select iCloud Backup.
4. Click on the Back Up Now tab to commence backing up to iCloud.
You also have the option of backing up your device on your Mac. For this, you just need to plug your iPhone into the computer and click the Finder sidebar on your Mac. At the top of the Finder window, click General, then select “Backup all the data on this iPhone to this Mac.” You can also encrypt your backup data and protect it with a password. For this, select “Encrypt local backup.” Finish off by clicking Back Up Now.
Unpair your Apple Watch
Before resetting your iPhone, it is important that you unpair your Apple Watch (if you had one paired with your iPhone). For this, you need to access the Apple Watch app on your iPhone, while your Apple Watch sits in close proximity.
- To begin, head over to the My Watch tab and from there select your watch.
- Choose the information icon next to the watch that you plan to unpair. Select the Unpair Apple Watch tab.
- Next, you will be asked for confirmation to unpair the Apple Watch successfully.
Before your watch is erased, the iPhone will create a backup of your Apple Watch data. You can easily use this backup to restore your Apple Watch if you plan on pairing it with a new iPhone.
Turn off your iMessage
If you are moving to a non-Apple phone, you will be required to deregister iMessage prior to resetting your iPhone. It is important to note that you are not required to deregister iMessage if you are moving to an Apple phone.
- Begin by making sure that you are connected to a cellular data network.
- Head over to the Settings page of the iPhone, and choose the Message tab.
- From there choose to turn off iMessage.
Toggle off Find My iPhone
The next step is to turn off the Find My app.
- Head over again to the Settings page of the iPhone.
- Choose the iCloud tab and select Find My iPhone.
- Toggle off the Find My iPhone feature.
Look for application licenses
If you have had any third-party applications installed on your iPhone, it is important that you take note of associated licenses or serial numbers. This will prevent you from paying again when you reinstall these applications on your new device or even the same device.
Export 2FA settings
Make sure your two-factor authentication (2FA) settings are all exported. Crypto designer Paul Stamatiou underscored the importance of this step on Twitter: “If you’re setting up a new iPhone today, DO NOT RESET THE OLD PHONE UNTIL YOU CONFIRM YOUR TWO FACTOR AUTH APP WORKS! If you use Google Authenticator you need to manually export/scan a series of QR codes for it to transfer.”
If you fail to do this, you will find that you are no longer able to access your old 2FA apps, which could prevent you from getting into websites or apps that used that previous 2FA app. Some 2FA apps like Authy will back up your 2FA settings to the web, so you can recover them that way. Google Authenticator does not!
Finally, factory reset your iPhone
Once you have made the aforementioned checks and saved your valuable data, you can proceed to a reset of your phone, which to be honest is quite a simple process. Let’s have a look at the main stages involved.
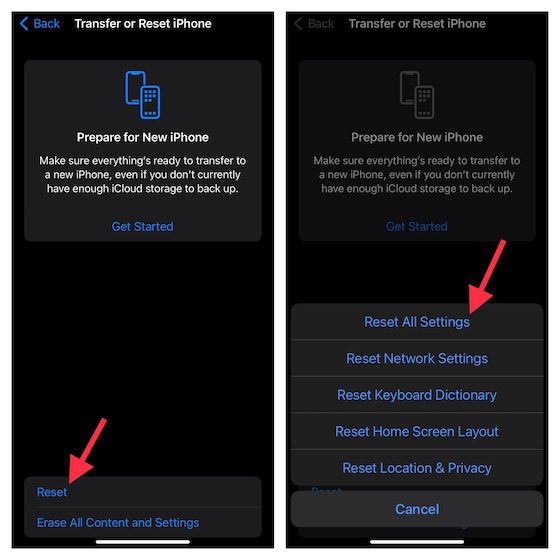
1. To begin, tap Settings and then General. A little scroll-down will show you the Transfer or Reset iPhone option. Unlike the previous models of the iPhone, the new one displays a change. The “Reset All Settings” option has been moved to “Transfer or Reset iPhone.”

2. Next, tap Reset at the bottom of the screen. The Transfer or Reset iPhone menu opens.
3. Choose Reset All Settings.
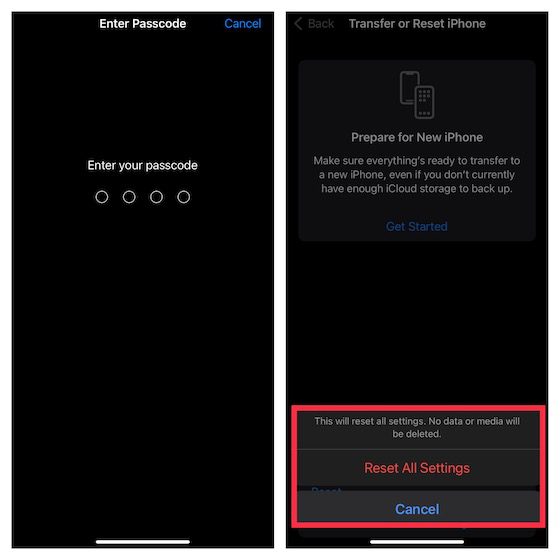
4. The Enter Passcode dialog opens. Enter your device passcode here. After you enter your passcode, you’ll see a message at the bottom saying, “This will reset all settings. No data or media will be deleted.”
5. Tap Reset All Settings again to confirm the reset.
The reset process when kickstarted can span a couple of minutes. After it has been completed, you will see the phone welcome screen. Congratulations! You have successfully managed to factory reset your iPhone!
[Header image by Szabo Viktor on Unsplash]


Why does the message say, “No data or media will be deleted,” when a hard reset is supposed to clear the phone back to original factory setting?
Hi, James –
If I were going to be selling an iPhone or sending it back to Apple as part of the iPhone Upgrade Plan, I wouldn’t “Reset” — instead, I would use Erase All Content and Settings. That ensures that the device is completely erased.
The Reset menu choice really only clears out settings on the device, which is useful in troubleshooting the iPhone if you’re running into issues. All the data is retained, and it helps if you’ve inadvertently made a setting change that is causing problems.
Precisely — the article misstated that a reset removes all data implying it would be sufficient prior to selling.
I think you’re confused. Read it again.