

One of the biggest announcements at WWDC 2022 was the unveiling of macOS Ventura, the nineteenth major release of the series. This version brings with it new features such as a multitasking view dubbed Stage Manager, the ability to use the ultra wide lens on an iPhone with Center Stage, an ambitious way to replace passwords using Touch ID, enhanced search in Mail, and more. Best yet, if you are a registered Apple Developer, you can install Ventura today.
Ventura is currently available in a private beta, meaning that the software contains known bugs and new updates will be seeded often. Primarily this OS should only be used by those that need to check compatibility with their applications, and should not be used for your daily driver. Because of that access to the beta is restricted to those with an Apple developer account.
Before installing Ventura, it is wise to perform a system backup with Time Machine (and, it’s worth reading up on recent changes to Time Machine here). A broadly available public beta will be landing sometime in July. To sign up for the forthcoming public beta, you can enroll in the Apple Beta Software Program here. Once it launches you can follow the installation instructions for the public beta we have listed below.
Pay close attention to system requirements before proceeding with the installation of Ventura. Apple warns that installing the operating system unofficially could leave your system damaged and out of warranty. In general, Macs released in 2017 or later are supported.
While Apple does support the installation of multiple versions of macOS on a single volume, there is no familiar destination prompt to be found within the Ventura installer. To install multiple OSes, Ventura must be installed first, then Monterey on a separate partition second.
Private beta installation (Apple developer account)
To get started, visit the Developer Apple Beta Software portal, and select macOS, and download the beta access utility. Once installed, it will be possible to upgrade to Ventura within System Preferences > Software Update. Click to initialize the Ventura installer. A word of warning before proceeding; the installer will automatically run when the download has completed.
If you’d like to boot the beta from a separate APFS volume, you can create one within Disk Utility and then choose that new volume within the Ventura installer.

Post-Installation
Ventura seems stable enough, but I’d like to have Monterey available on the same system. Since Ventura’s installation didn’t give any options, I’ll have to setup the dual boot after-the-fact. In recovery mode, I have two options for installing an OS. Holding Command R during system startup allows for the reinstallation of Ventura, which is not what I want. Holding Command Option R launches internet recovery mode, which allows for the installation of Monterey onto any APFS partition. I opted to install a new copy of Monterey on an external SSD, and recovered my applications and documents using Migration Assistant and a Time Machine backup.
Public beta installation
1. Register your account through the Apple Beta Software Program:
As we outlined above, if you haven’t made a Time Machine backup of your machine, it is strongly recommended that you do so to avoid potential data loss.
To begin, you’ll go to beta.apple.com on your Mac. If you’ve signed up for a macOS public beta before Ventura, you won’t need to register again. You’ll just click “Sign in” and proceed to the next section.
If you’re new to the Apple Beta Software Program, click “Sign Up” and enter the email address associated with your Apple ID along with your password. Then click Sign in.
2. Enroll your Mac for the latest version of the public beta
Once you’ve signed in at beta.apple.com, click on the macOS tab and then click “Download macOS Public Beta Access Utility.” This will download an installer package that you can open from the Downloads window in Finder. Upon opening, this installer will open up System Preferences to the Software Updates subsection.
Once inside Software Updates, the system will see the public beta installer and allow you to click “Update” to upgrade you from your existing version of macOS to the public beta of Ventura. (If you don’t see the option to update to Ventura, restart your Mac and try again.)
Once the Ventura beta has finished downloading, the installer should start automatically. If it doesn’t or if you want to close the installer and finish the install later, you can reopen it from the Application folder in Finder.
3. Create a separate volume to run both the beta and your current version of macOS on the same Mac
If you’d like to run the Ventura beta but still keep your current install of macOS available, and you’re running macOS High Sierra or later, you can do so by creating a new APFS volume in macOS.
First, open your Applications folder and click on the Utilities folder inside. Then open Disk Utility. In the sidebar, choose your existing APFS volume (typically called Macintosh HD).
Then click Edit in the menubar and select “Add APFS Volume” from the dropdown, or click the add volume button (+) in the Disk utility toolbar. You’ll only see these options if an APFS-formatted volume is selected.
Choose a name for your new volume and click Add. Once the volume has been created, it will essentially act as a partition of the disk that can expand and shrink as necessary. Perfect for running a beta on. You can now quit Disk Utility.
4. Install the macOS Ventura public beta
From the Ventura beta installer click “Continue” at the bottom of the window and then again if you haven’t made a backup and would like to. If you’ve already made a backup, you can click Cancel. Continue again on the next screen, Agree to the beta’s licensing terms and agree once more to confirm.
From here you’ll be able to choose which drive or volume you’d like to download the beta to. If you don’t see the disk or APFS volume you’d like to install the beta to, click Show All Disks. Click the disk or volume and then click Continue.
Now, click Install and then enter your administrator password. Click OK and then click Restart if your Mac doesn’t restart automatically.
5. Enjoy the beta
After the install is complete and the Mac reboots, you’ll be running the macOS Ventura beta. If you installed the beta on a separate drive or volume, you can shut down your Mac and upon hitting the power button, immediately hold down the Option key until you see the Apple logo appear. From here you can choose to boot up either the beta or the version of macOS you were running previously.
Apple releases updates to macOS public betas just as they do official releases. To update to the latest version of the beta, you can open System Preferences>Software Update>Update Now.
New Features in macOS Ventura
Some of the most notable new features found in Ventura include:
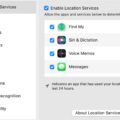
Continuity Camera
Use the professional quality lenses found in many iPhones to improve the visuals of your FaceTime calls and Zoom sessions, complete with lighting effects emulating a key light. An improved Handoff feature allows for the transfer of a FaceTime call from one device to another while in call.
Gaming improvements
WIth the introduction of Metal 3, better graphics rendering is instore for macOS users. SharePlay allows for remote multiplayer games to be hosted through Game Center, and additional game controllers are supported including driving wheels.
Enhanced Search
The fantastically accurate object recognition found on Apple’s Photos app comes to Spotlight. Now, search for words like “car”, “dogs”, or “beach” and get results instantly.
macOS Ventura will receive a proper public release this fall. Be sure to check out Ventura’s features here.


Another option if you just want to install it to have a lookie-loo is to use a visualization software package like Parallels Desktop or VMWare Fusion.
Then you can install it as a “file” on your computer and when you’ve had enough delete the image and still be safe with your original installation that you can be running at the same time.
Hmm, maybe only works with Parallels Desktop, took a guess with VMWare.
Good idea on the virtual machine… I bet that is much easier to manage. I have used Parallels to install Windows but, not in a very long time!
Ventura has been running pretty well, I’ve had a few crashes but no show stopping issues. The iOS 16 beta however…