Sometimes it’s helpful to create a bootable clone of your Mac, such as for testing software or implementing system changes. For example, I often do this to test in-beta versions of macOS.
What is macOS cloning?
When you clone your Mac’s hard drive you create a bit-by-bit, duplicate of it. This includes the data allowing you to boot your system right from that copy. In another word, a cloned hard drive is an exact copy of the original, including the operating system and all the files it needs to boot up and run.
This is great for moving data from one Mac to another. But cloning is also handy for backing up your data.
However, the cloning process has become more difficult because of the “signed system volume” in macOS Big Sur and later, including macOS Ventura.
So what’s a signed system volume? Here’s Apple’s explanation:
macOS includes enhanced protection for your Mac with cryptographic technology (macOS 11 or later) that prevents access to or execution of files that don’t have a valid cryptographic signature from Apple. All system files are protected on the signed system volume (SSV). This advanced system volume technology provides a high level of security against malicious software and tampering with the operating system.
It also allows software updates to complete in the background while you work, which reduces the time it takes for your Mac to restart and complete updates.
How to clone your Mac
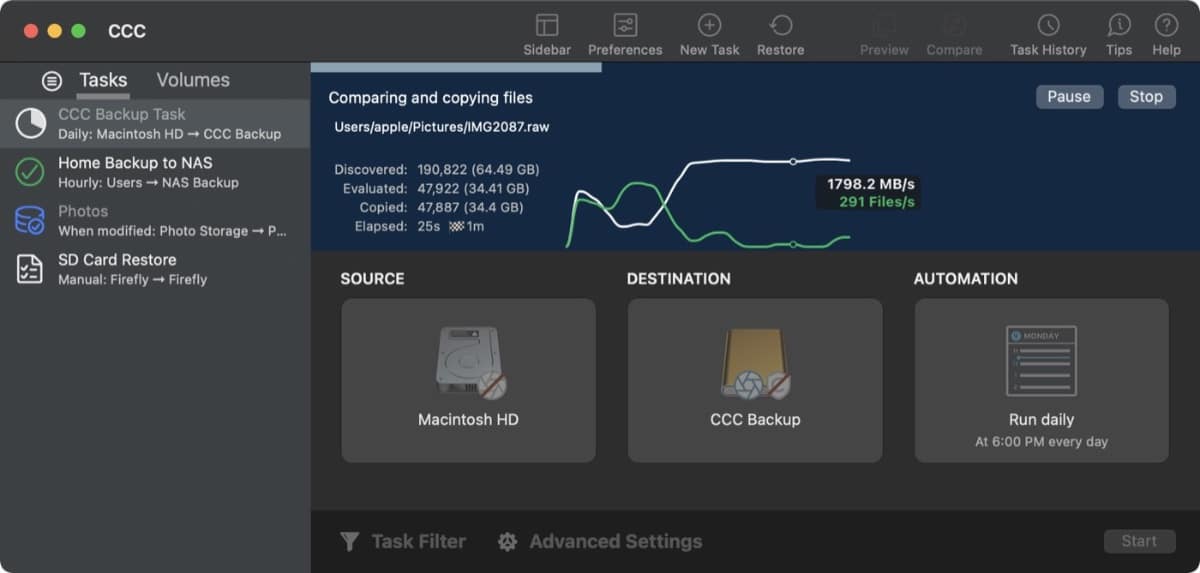
To clone your Mac, the easiest way is to get yourself a spacious external drive and use an app such as Carbon Copy Cloner (my favorite) or SuperDuper!.
Preparing your external hard drive
However, you go about cloning your Mac, you need to make sure you have an external disk with plenty of space. You can use a drive with just about any sort of connectivity. However, I recommend a USB 3.0 drive, as it strikes a nice balance between speed and price.
You’ll need to format the external hard drive before cloning. Here’s how:
- Connect your external drive to your Mac.
- Launch the Disk Utility app.
- Find the hard drive under External and select it.
- Click the Erase tab at the top of the window.
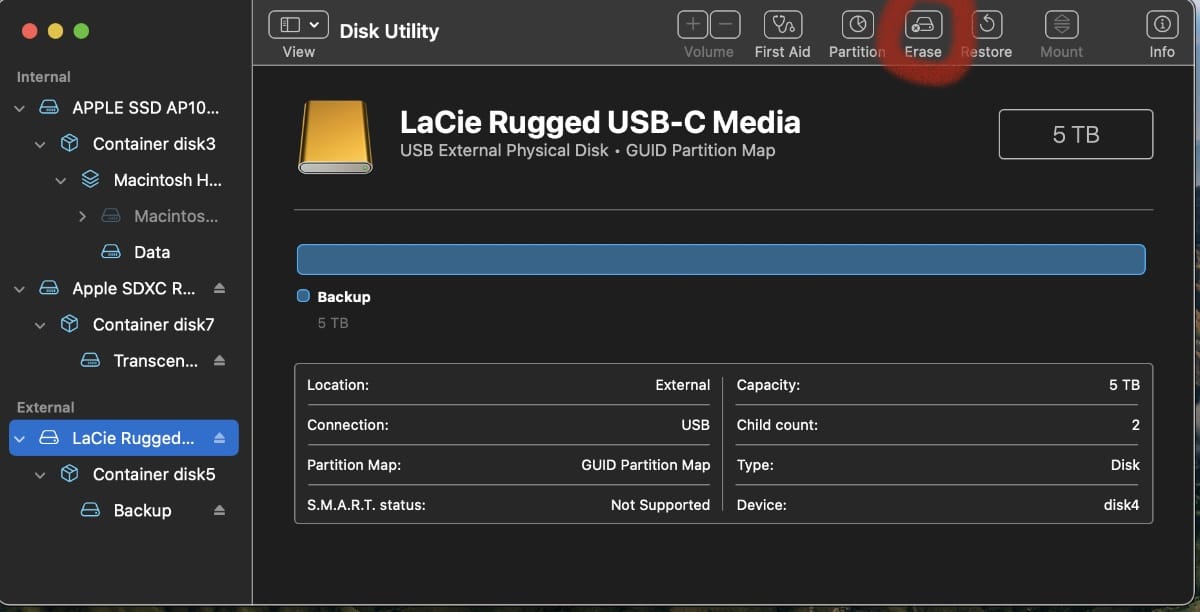
- Name the drive and select macOS Extended (Journaled) from the format list.
- Click Erase.
- Click Done once the process is finished.
- Close Disk Utility.
Your external drive is now properly formatted for cloning your Mac and you can proceed with cloning inside your third party app of choice. For instance, for creating a Mac clone inside Carbon Copy Cloner you would:
- Open the app
- Choose the volume that you want to clone from the Source selector.
- Choose your now properly-formatted volume from the Destination menu.
- Click the Clone button.
Cloning a Mac with Disk Utility
Instead of a third party app, you can also clone your Mac with Disk Utility. Here’s how:
° Launch Disk Utility.
° Choose the backup drive you want to use.
° Click Restore.
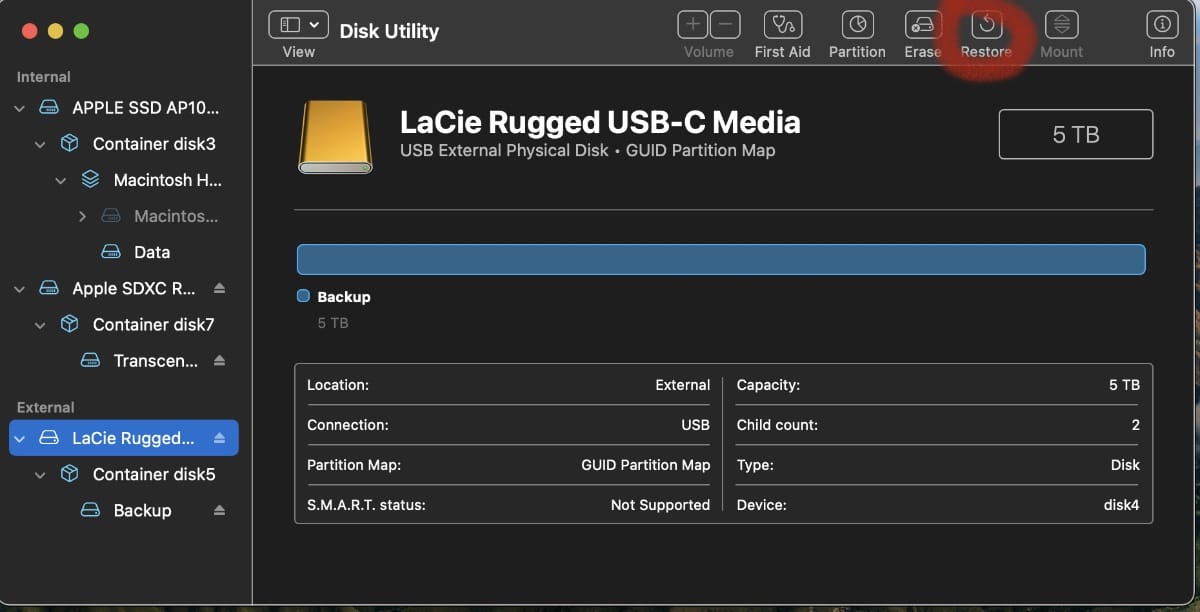
Disk Utility will display a new window with a drop-down menu dubbed Restore from. Select your Mac SSD from the drop-down menu as the source drive. Click Restore to begin the cloning process.
Then, Disk Utility will show you a status bar as the cloning process take place. When it’s done, click Done (d-uh) Done.
Using your clone
If you’ve made a complete, bootable clone (the default option in most cloning apps) then all you have to do is connect your external drive with the clone on it to the Mac you want to copy it to.
In macOS Ventura, go to System Settings > General > Startup Disk.
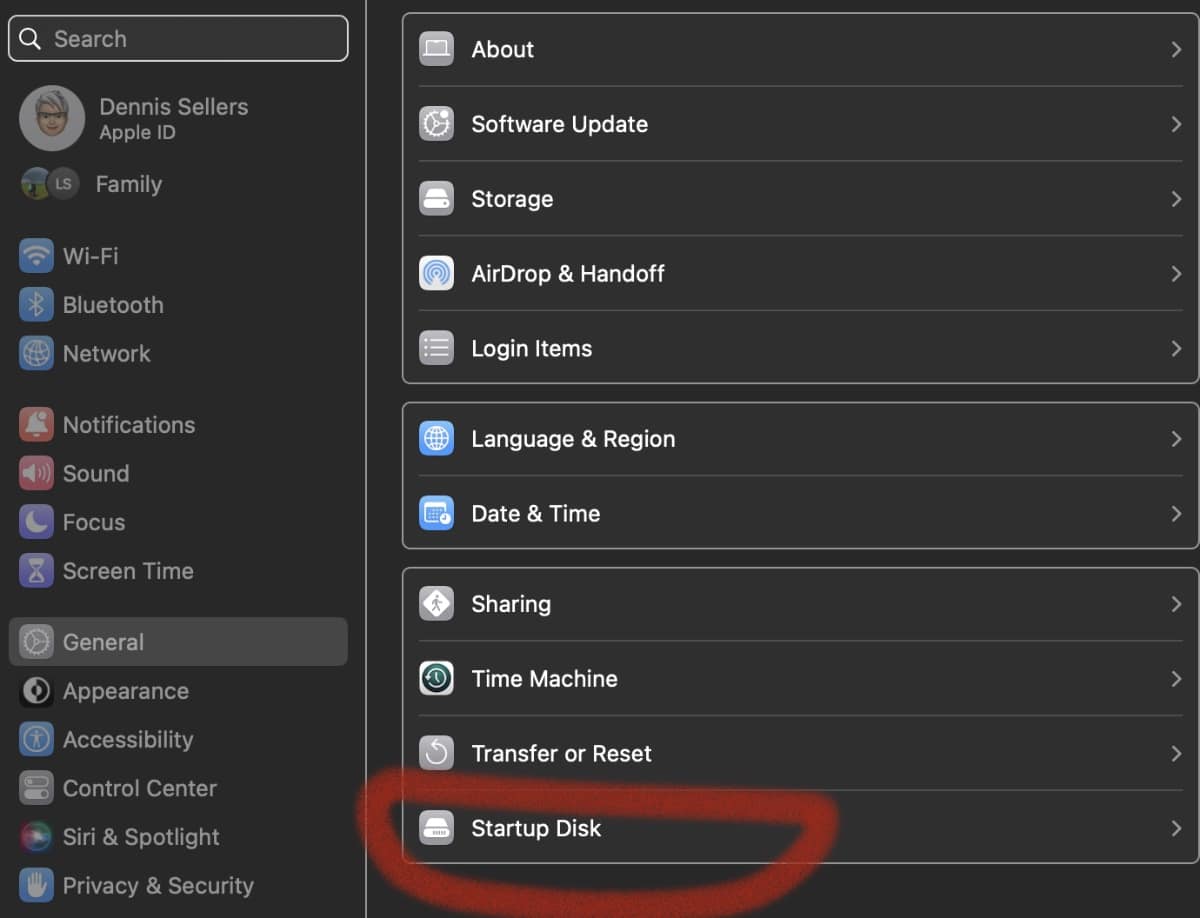
Choose the external drive as your startup disk, then click Restart. Then use the cloning app to copy your clone to the destination disk or SSD.
You can also make a disk image rather than a bootable clone. Disk imaging is the process that compresses the hard drive data, including the operating system, in the form of an image. It also has the information required to boot the operating system.
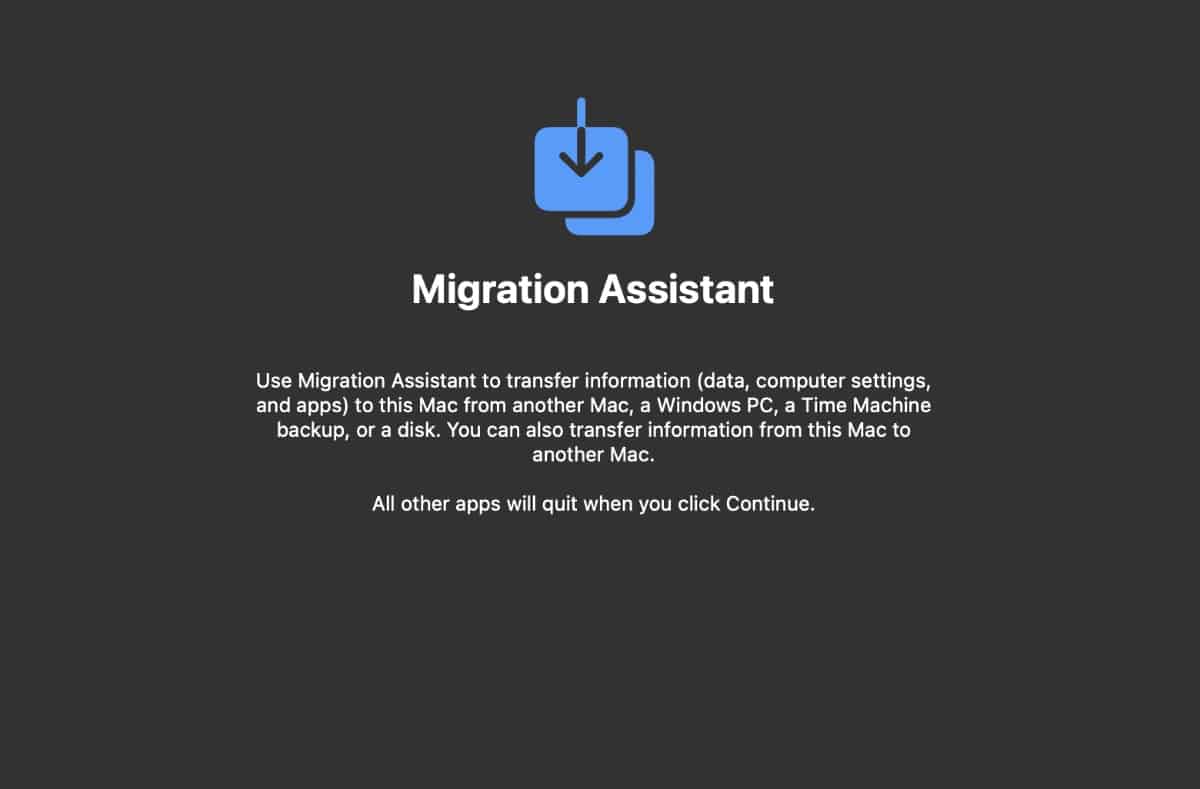
To do so, connect your external drive but don’t change the startup disk. Launch Migration Assistant and choose the option to restore from your disk image.




Just bought a 1TB SSD OWC Ministack STX, told by OWC that I could create a bootable clone of my 2018 Intel Mac mini (128GB / running Monterey 12.6.3). However, unable to get it to be bootable or show up in Startup Disks. Used CCC to clone existing Mac mini but still does not show up. Tried installing a fresh copy of Monterey but comes back with an error message saying there is not enough space to install (even though there is 999 GB of free space available). Any suggestions on how to proceed? I know there are security protocols in the later versions of Mac OS X, but this is crazy.
Dennis, Can a bootable clone be booted if the internal ssd has failed? Also if using an external ssd for the clone should the format be apfs? Third does security need to be downgraded for external booting to be allowed under ventura?
Your instructions don’t work. Have been trying for two days. I’m finding it impossible to make a backup startup copy of Ventura. Why can’t Apple do a decent job of creating a more functional, user friendly product?
Carbon Copy Cloner does not recommend that even if we can do it .
And that is from Catalina, I think .
I did some (to test) with my MacBook Pro 16 M1 Max and it seems to work but starting from now , I will follow the Apple recommendation. What is a shame is that Apple got rid of their own tool to do it on recent MacOsx grrrrrrrrrr.
Carbon Copy Cloner do not recommend cloning anymore even if it works .
I would recommend trying to boot off your cloned drive soon after you’ve made it. It would be a major bummer to discover that, in an emergency situation, you couldn’t boot from your backup!
Dennis, your instructions don’t make any sense. I have been using Carbon Copy Cloner (CCC) to make bootable backups (clones) of my several Mac computers for over 20 years. But since the rollout of Big Sur and later, neither CCC nor SuperDuper will make a clone that is bootable specifically because of the “Signed system volume” technology. The only way I know that make the clone bootable (and this is not 100% successful) is to do an install of macOS on the clone. With these new versions of macOS, Apple has made it very difficult to create a bootable copy of your system.
Also, can you please explain this
“Choose the external drive as your startup disk, then click Restart. Then use the cloning app to copy your clone to the destination disk or SSD.”
The external drive will not show up as a startup disk, and what destination disk.SSD are you talking about?
Thanks,
Peter
Carbon Copy Cloner now very strongly frowns on creating a bootable clone. It’s not as easy as you make it appear. Your SSD has to be in pristine condition with absolutely no irregularities for it to work. And seldom is. I tried it and, indeed, it didn’t work.
CCC suggests you clone the data (which is now CCC’s standard for backup) and then install the operating system on the new computer and use Migration Assistant to copy over the data.