

Apple introduced two-factor authentication for Apple ID in 2015. Today, the tech giant says that more than 95% of active iCloud accounts use this protection. Security Keys enhance this protection with a physical verification method.
What are Security Keys?
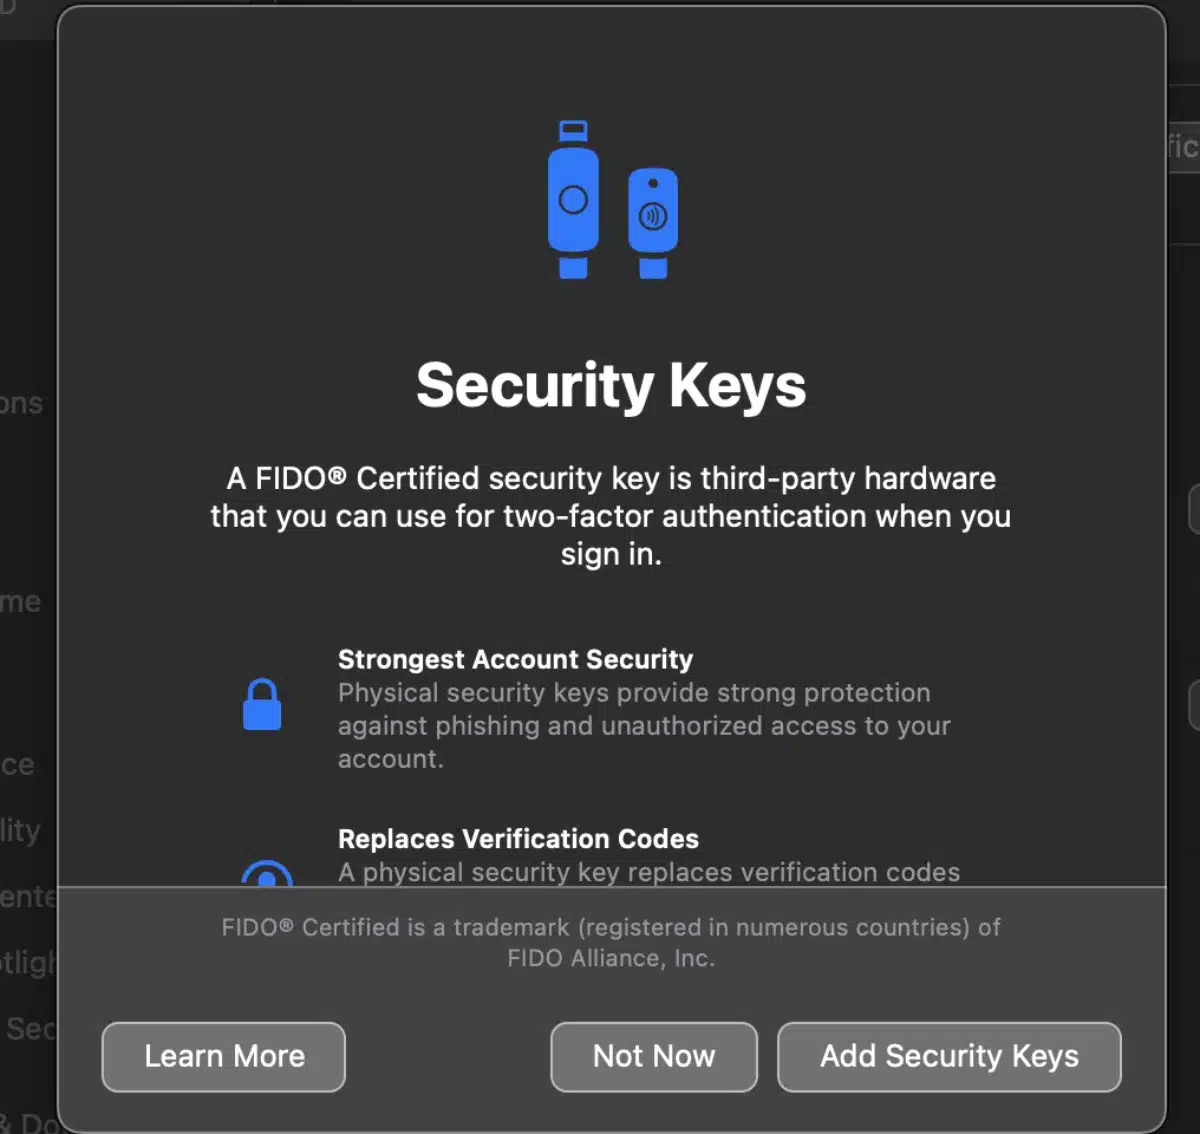
With Security Keys — available in macOS Ventura — users have the choice to make use of third-party hardware security keys to enhance the protection provided by two-factor authentication. Apple says this feature is designed for users who, often due to their public profile, face concerted threats to their online accounts, such as celebrities, journalists, and members of government.
Apple says that for users who opt in, Security Keys strengthens Apple’s two-factor authentication by requiring a hardware security key as one of the two factors. This takes our two-factor authentication even further, preventing even an advanced attacker from obtaining a user’s second factor in a phishing scam.
To set up Security keys with your account, you’ll need to have at least two security keys (you can have up to six). This a bit of an inconvenience, but it does mean that you’ll have a backup should you lose your primary key so won’t be locked out of your account.
How to use Security Keys
When you use Security Keys for Apple ID, you need a trusted device or a security key to:
- Sign in with your Apple ID on a new device or on the web
- Reset your Apple ID password or unlock your Apple ID
- Add additional Security Keys or remove a Security Key
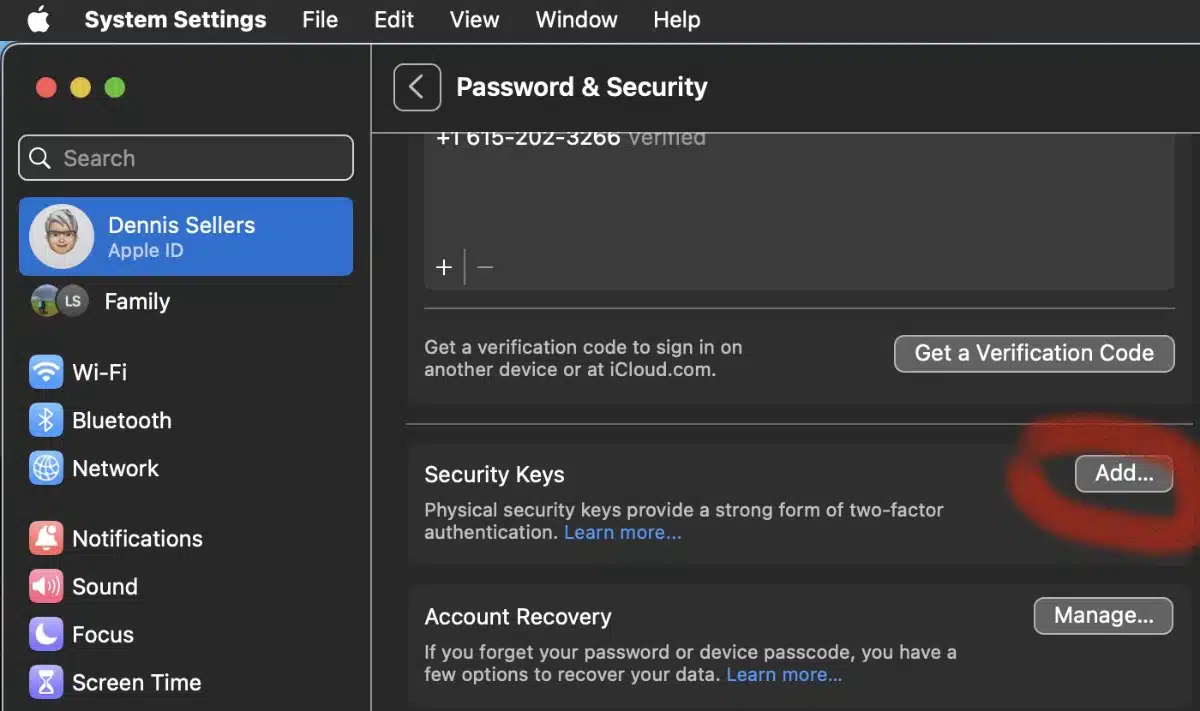
To add Security Keys in macOS Ventura:
- From the Apple menu , choose System Settings, then click your name.
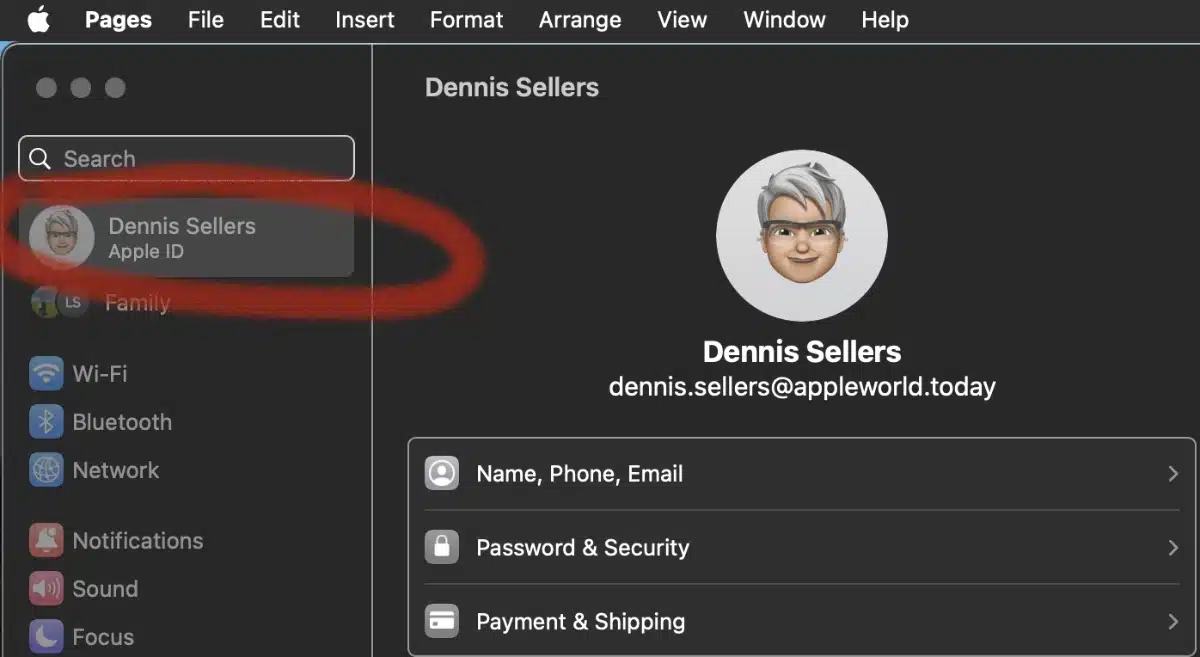
- Click Password & Security.
- Next to Security Keys, click Add, then follow the onscreen instructions to add your keys.
- Review the devices associated with your Apple ID, then choose to:
- Stay signed in to all devices.
- Select devices that you don’t want to continue to have access to your account and sign out of them.
To stop using security keys:
Open System Settings, click your name, then click Password & Security. Click Security Keys, then click Remove All Security Keys. Note that if you remove all security keys, your Apple ID reverts to using the six-digit verification code for two-factor authentication.
You can find the security keys and connectors that Apple recommends in this support document.


The only Security Key I could find on OWC’s web site was https://eshop.macsales.com/item/NewerTech/TOOLTORXT8SL/
Do I have to go to Amazon to get the Security Keys you were talking about?
I always read read your articles, Dennis. They are short, on point and relevant to current tech. Thank you!